Because Steve is well known to our readers, having spent considerable time creating "The Sled" and then tuning a DIANA 56TH, I will not introduce him again.
Those interested in his previous appearance here need to look into the following links:
https://www.ctcustomairguns.com/hectors-airgun-blog/the-saga-of-a-56-th
https://www.ctcustomairguns.com/hectors-airgun-blog/the-saga-of-a-56-th4603110
https://www.ctcustomairguns.com/hectors-airgun-blog/the-saga-of-a-56-th8042880
https://www.ctcustomairguns.com/hectors-airgun-blog/the-saga-of-a-56-th2541108
So, without further ado,
¡Enjoy!
HM
Guest Blog by Steve Herr
was seeking advice on caliber choice for optimum accuracy at longer ranges in the D54/56 platform. My
current rifles at that time were two Diana 56's, both in .177, and I was questioning the performance of the
.22 caliber. Hector mentioned the .20 caliber as an option, and the possibility of testing one of his D54
CCA .20's. After a few more emails back and forth, I agreed to take on this project. Within a couple
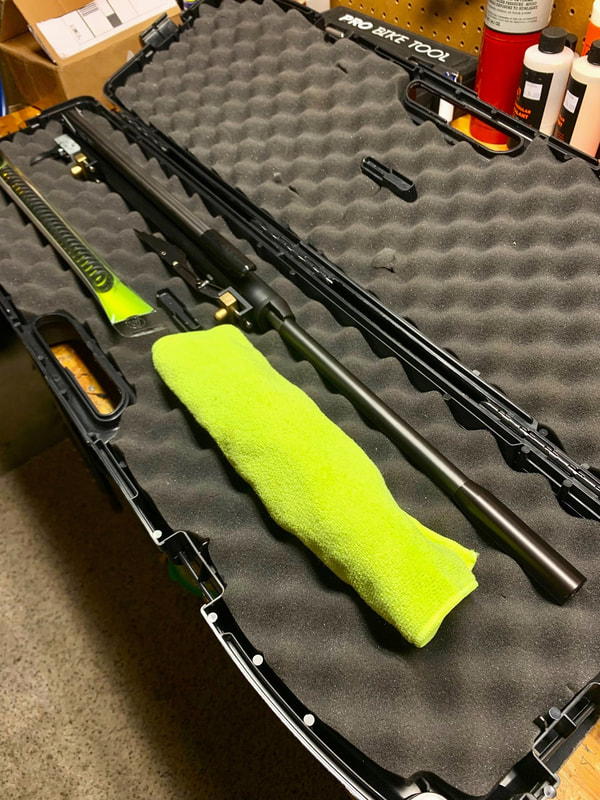
weeks a package from Hector was received containing a D54 CCA .20 (minus the stock), along with a
Titan XS #4 spring, an O-ring Light piston and a couple tins of the JSB 13.73gr Exact .20 pellets. Also
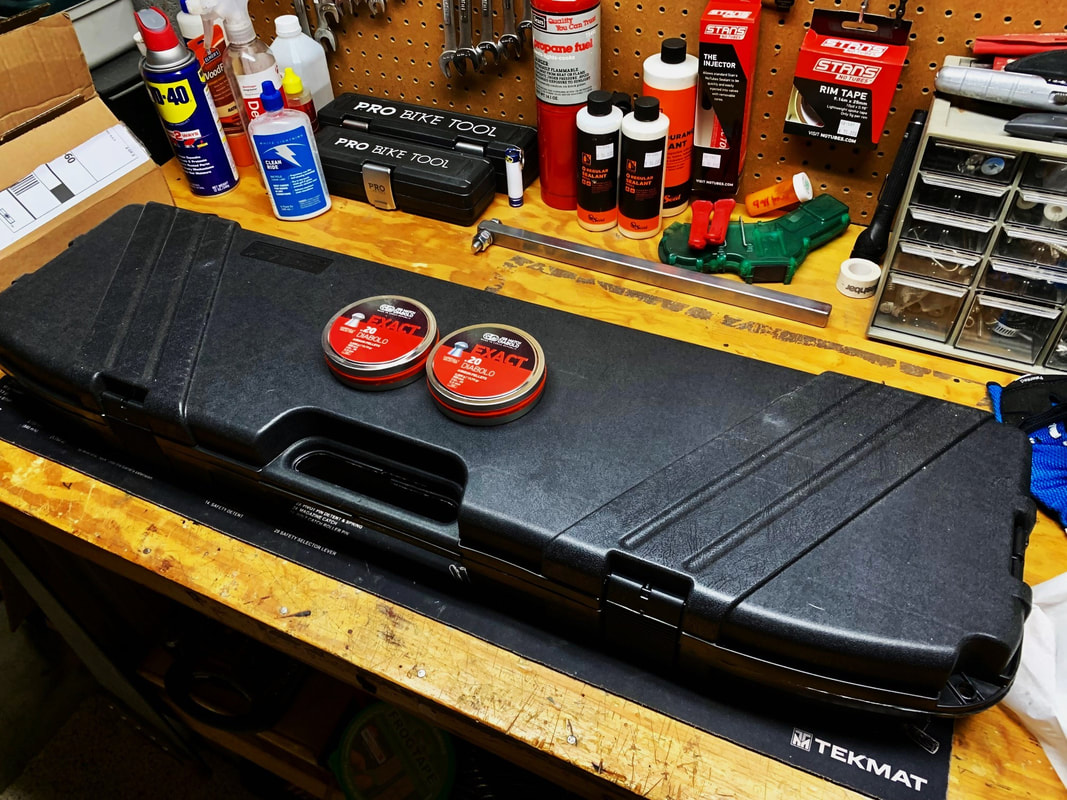
included was a Harmonic Muzzle Tuner. Everything was packaged nicely in a foam lined hard case.
Walther .20 caliber barrel and OEM powerplant just as it had arrived from the factory. The outside of the
action was finished in matte black like the D56’s, and was marked 14 von 30. Since I started off with the
action only, the D54 CCA action was installed in one of my D56 thumbhole stocks to kick things off.
Hector's instructions for this project were quite simple
• Complete the 300-shot barrel break-in as per his guidelines
• Make it what I want after that
That was simple enough and gave me a blank slate to work with. I had read about the D54 CCA .20's in
the past, but never expected to have one in my hands to test, so this was an exciting adventure. With both
OEM and O-ring light pistons, along with the OEM and Titan XS #4 springs available for testing, I was
ready to go!
The outline for testing looked like this;
• Barrel break-in
• Velocity and Consistency
• Accuracy and POI Repeatability
Before moving on, let me explain the difference between accuracy and POI Repeatability. In my opinion,
you can have a very accurate rifle that is able to print nice tight groups, or hit a spinner target on every
shot. But, that does not necessarily mean it will have a repeatable POI. As the rifle is set up at slightly
different angles from shot to shot, things can change. Things like shot cycle, recoil and hold sensitivity
come into play, all of which can make a rifle less tolerable to changes in position when aiming at various
targets. Another critical component is rifle fit, which will be covered later in this article.
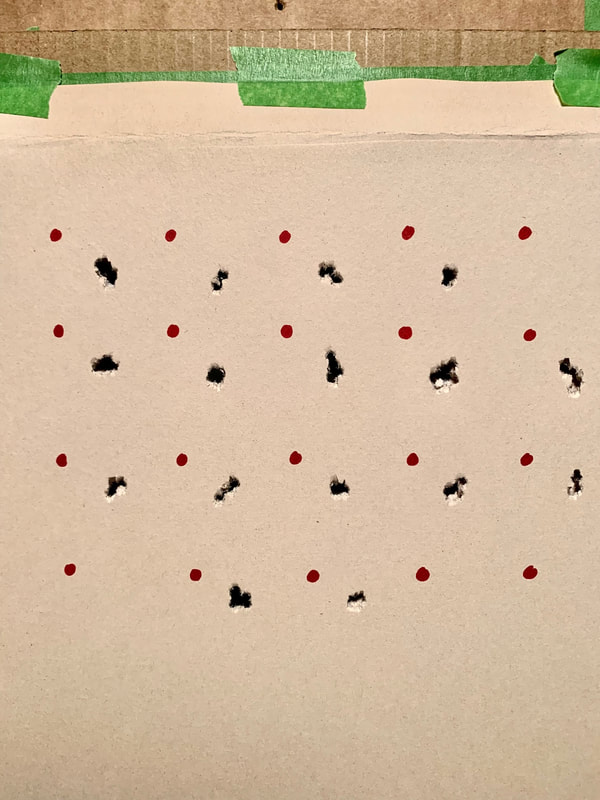
During the POI Repeatability portion of testing, I aim at various spots around the target, from top to
bottom and side to side, with a single shot at each spot. The target is then evaluated for shifts in POI from
one spot to another. I have seen minor changes in preload, and even TP size have an effect on this in my
sub-12 fpe rifles. On the D54/56, the sled tension comes into play as well. If you are too tight (or too
loose) on your sled tension, POI repeatability could suffer.
Ok, lets move on to the first part of this project...the barrel break-in.
Barrel Break In
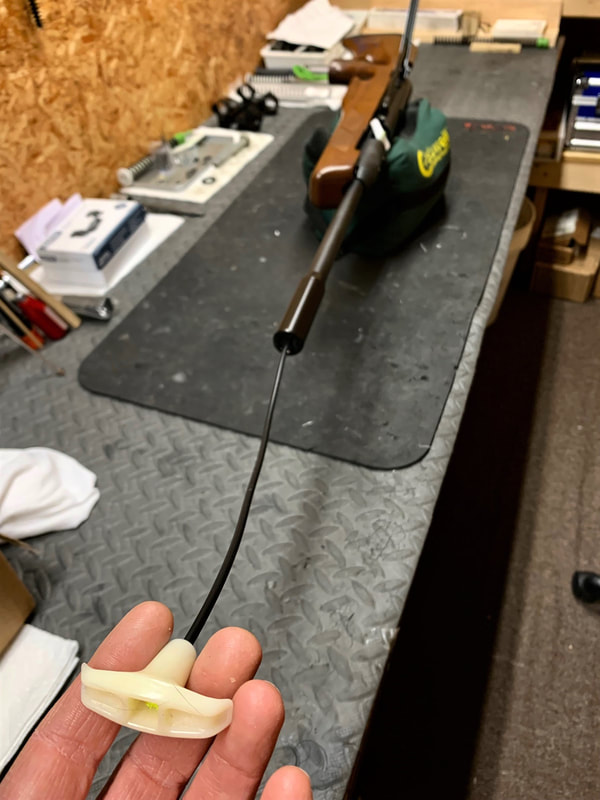
which involved shooting 3-5 pellets, and then pulling several patches through the bore using a Crown
Saver (see below). You then repeat this process for a total of 300 shots.
anxious to move on so that I could machine a delrin guide to fit this spring.
After the 300-shots were complete, the final step in the break-in was to fire lap the barrel with 5 shots
using pellets coated in JB non-embedding bore paste. Velocities dropped even more during this exercise,
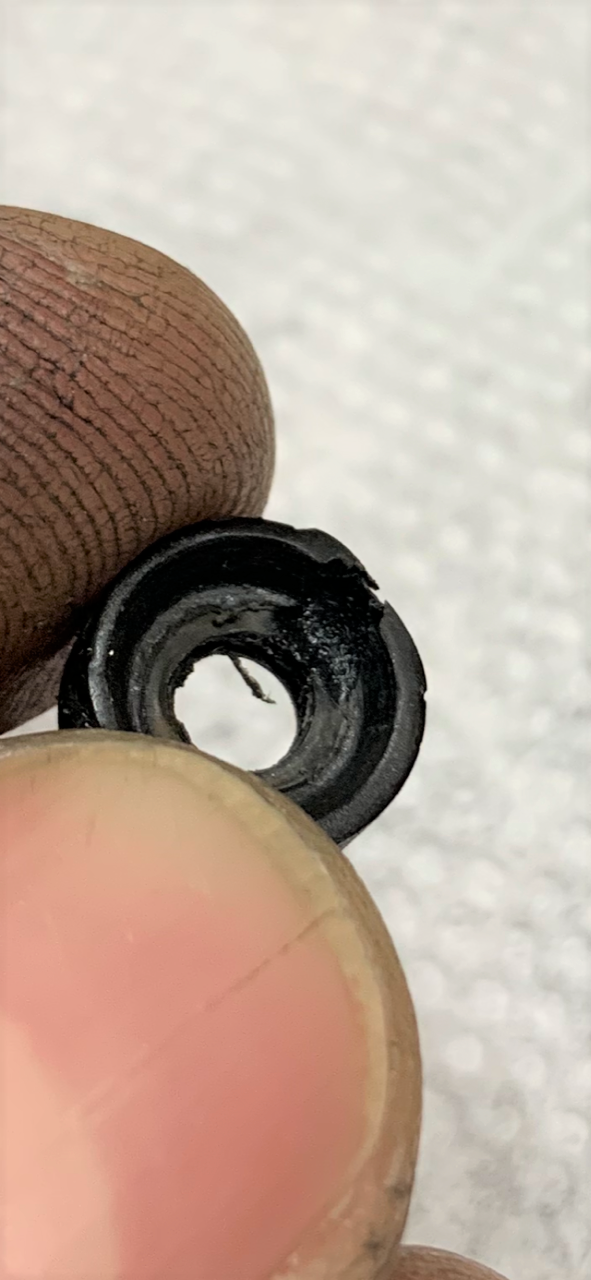
and I could smell something burning. It turned out that the original breech seal had eroded severely.
seal.
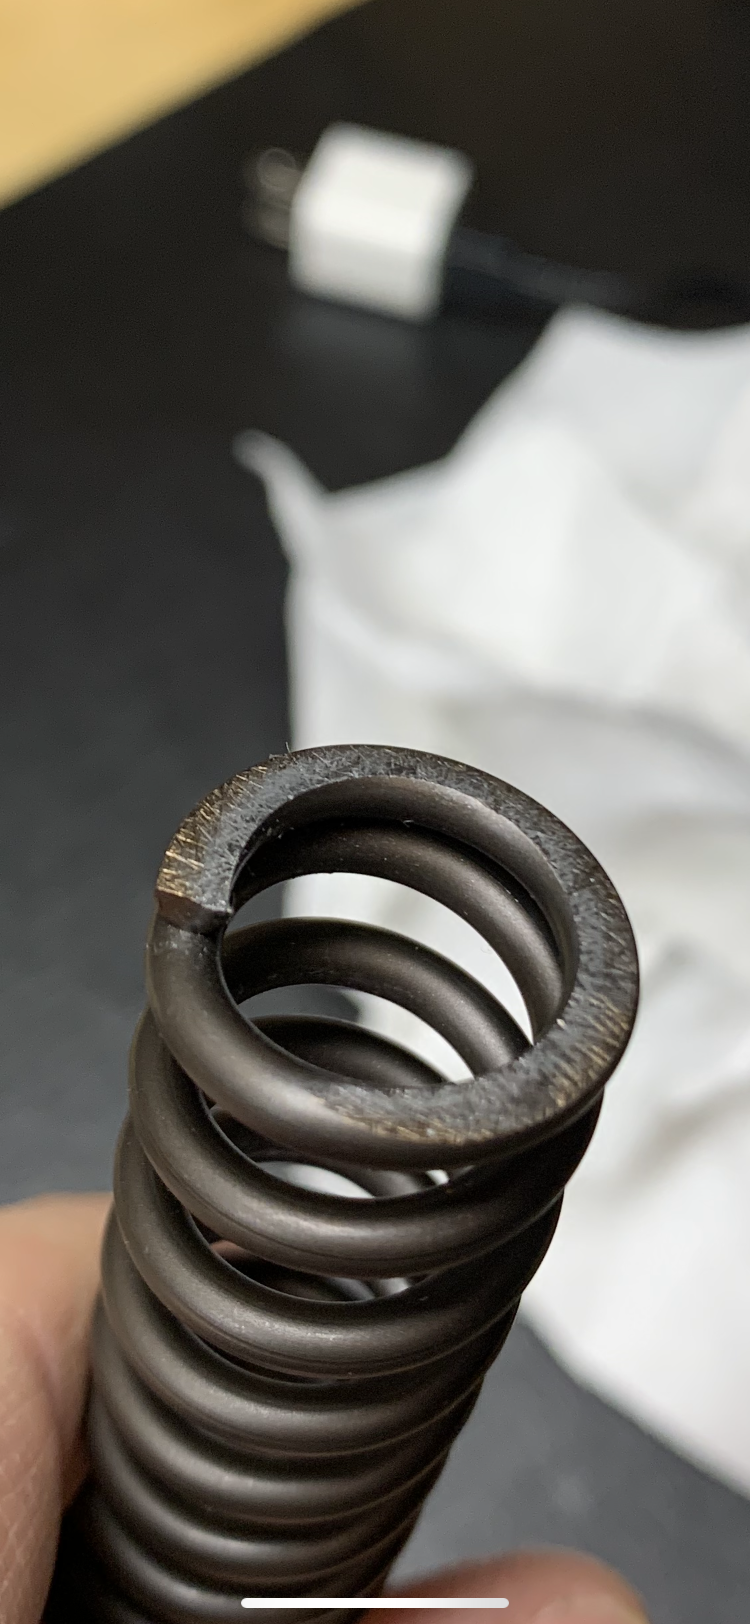
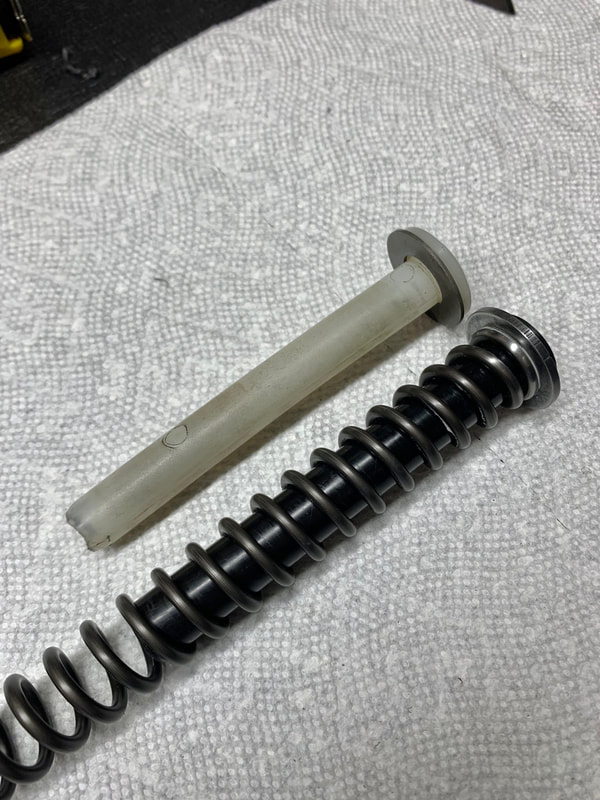
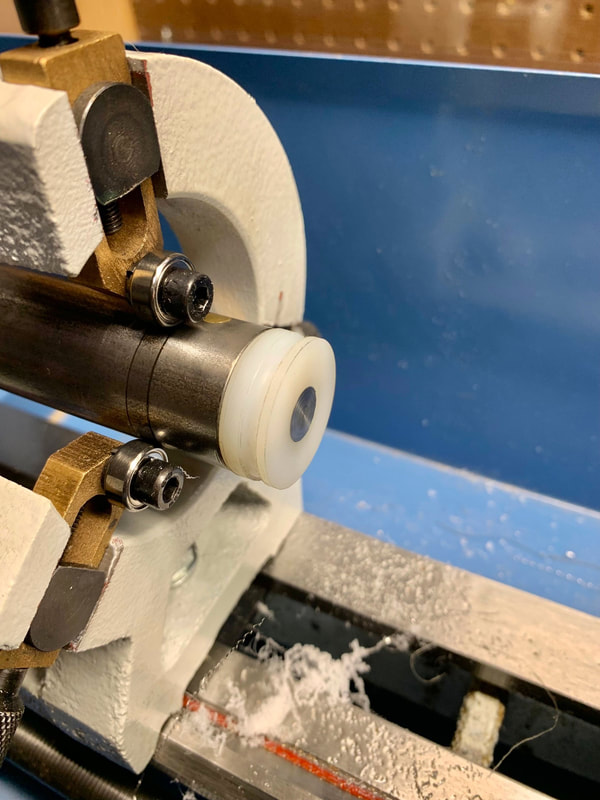
While the rifle was apart, I polished the ends of the main spring and machined a fitted delrin guide to
eliminate the spring buzz. A quick test at 13-yards showed a reasonably uniform group and a much better
feel on the shot.
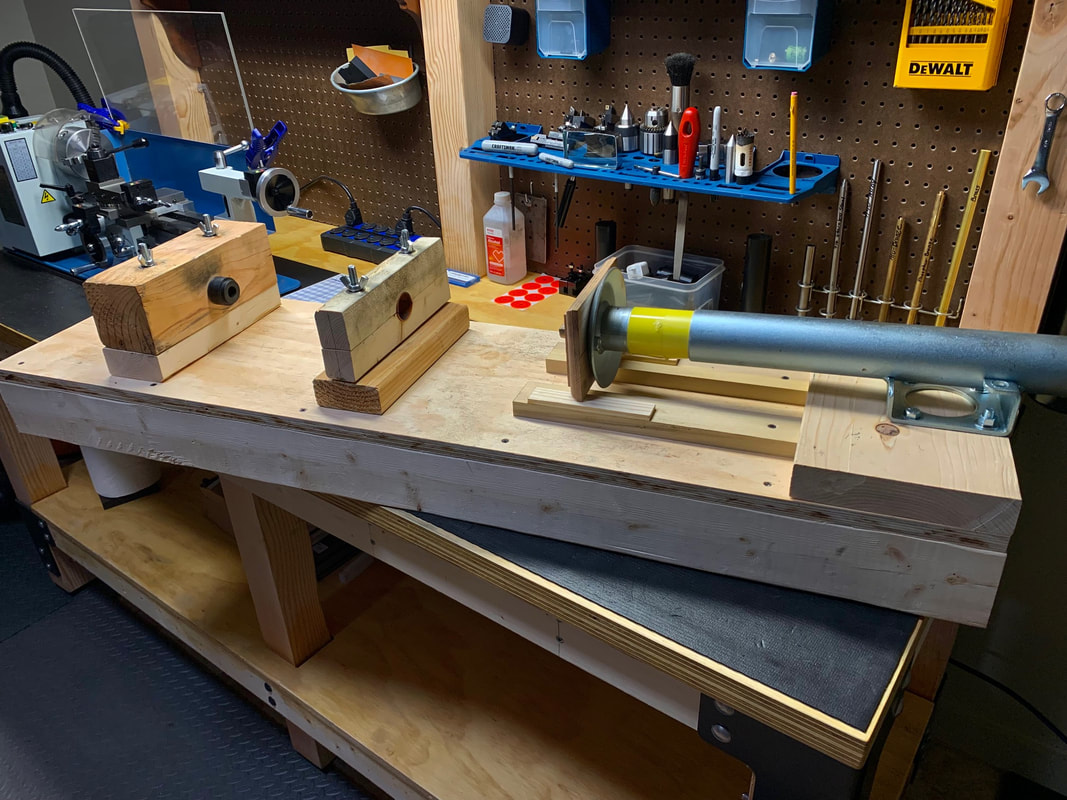
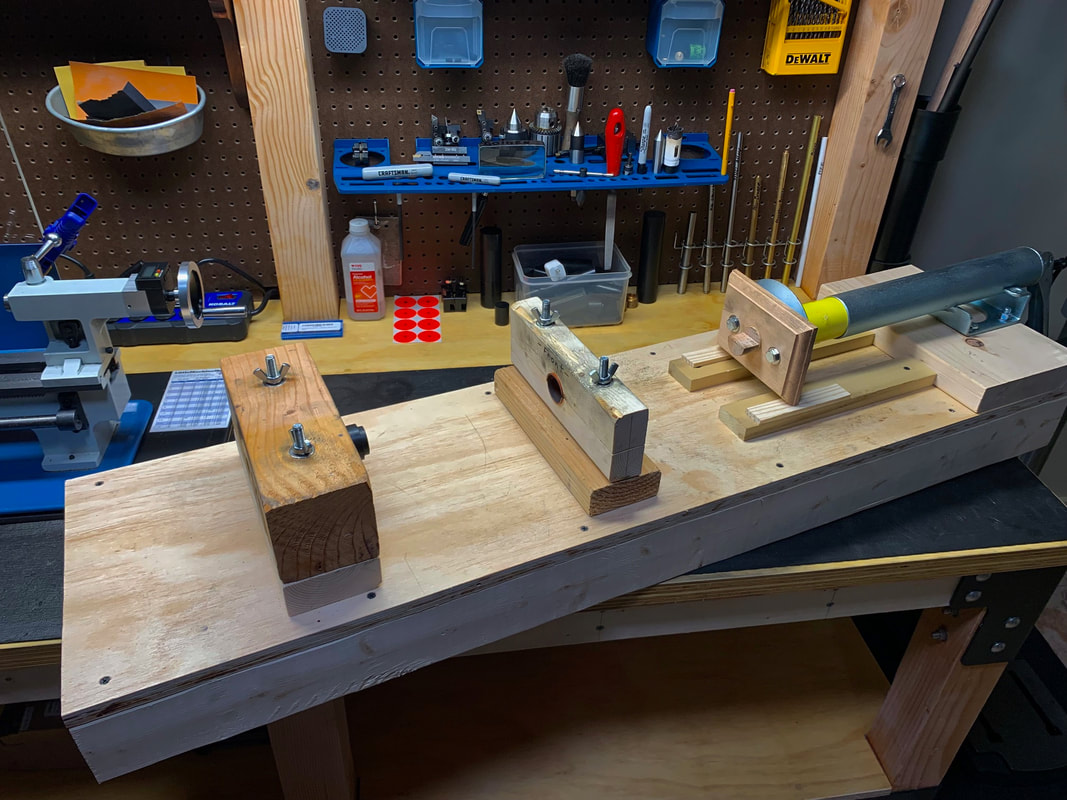
Knowing that there would be numerous combinations tested, I wanted to make something that would not
stress the rifle in any way when pressing. While I have an Air Venturi Rail Lock compressor, I did not
want to use that for the amount of times this rifle would need to be compressed.
My press was based on a couple different designs that I had seen on the internet, with a few changes. The
action is supported in a rubber lined cradle to minimize chances for scuffing, and the barrel is not stressed
in any way when pressed. The barrel slides through a delrin collar, and all of the pressure goes against the
end of the receiver, which presses against the delrin plug that was machined for an exact fit into the
opening in the end of the receiver.
Velocity/Consistency testing
highest possible velocity, while at the same time maintaining target accuracy and repeatable POI.
Going into this project, the targeted velocity was 870-875 fps range. This idea was eventually abandoned
after seeing the rifle was gradually settling in at lower velocities, and any attempts to retain the higher
velocities were unsuccessful.
For the most part, the highest velocities were achieved when there was a certain degree of detonation
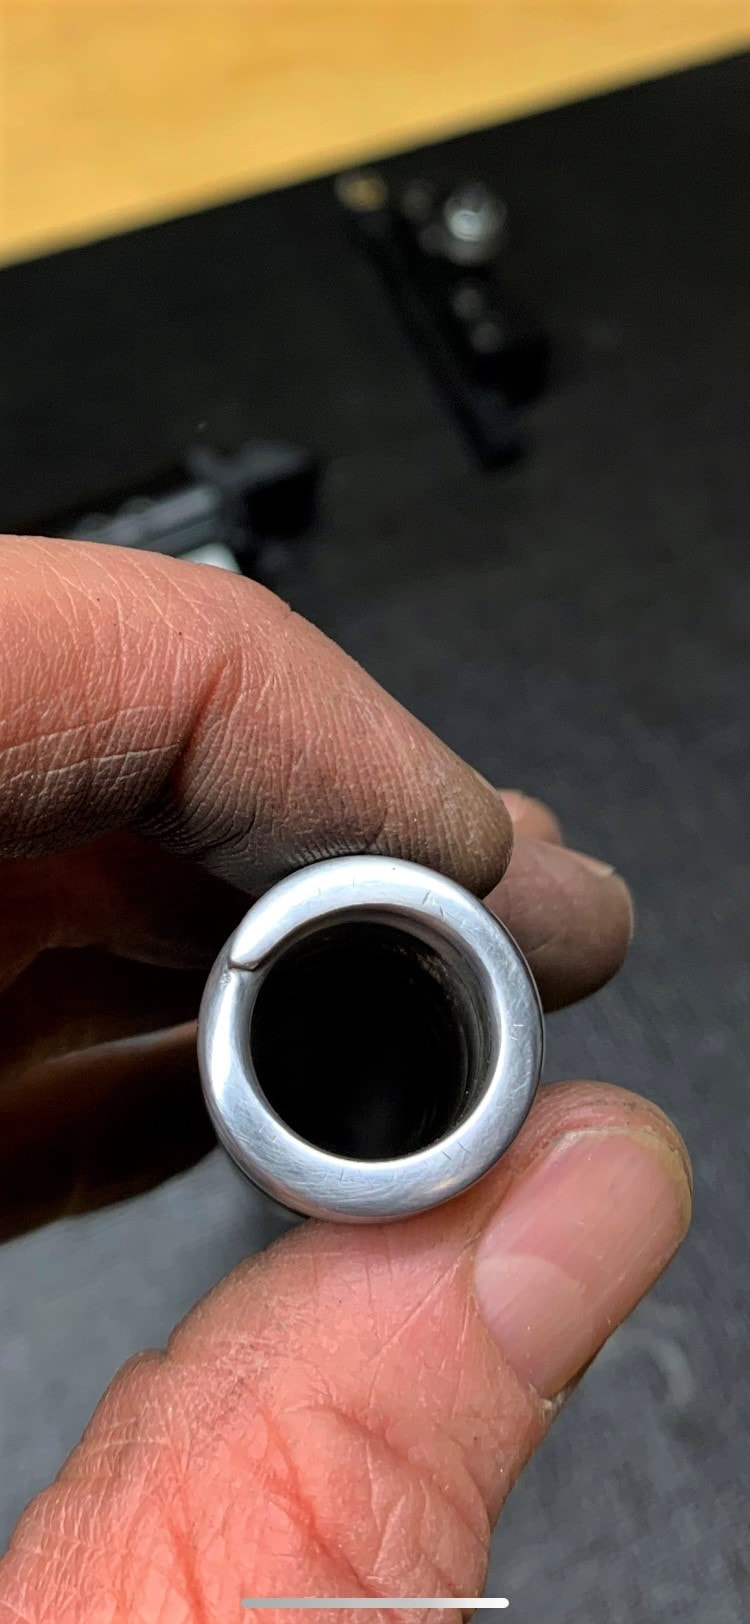
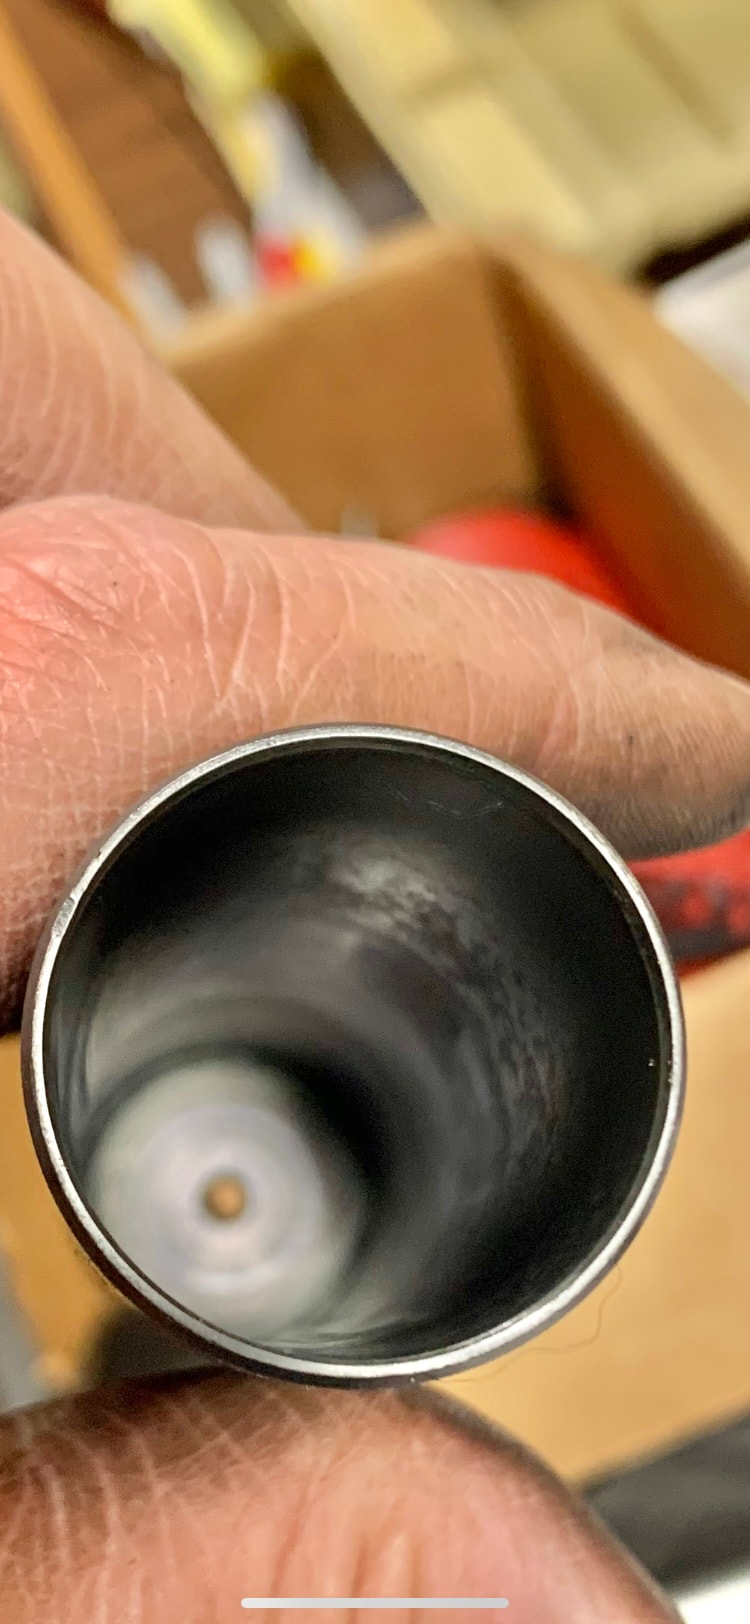
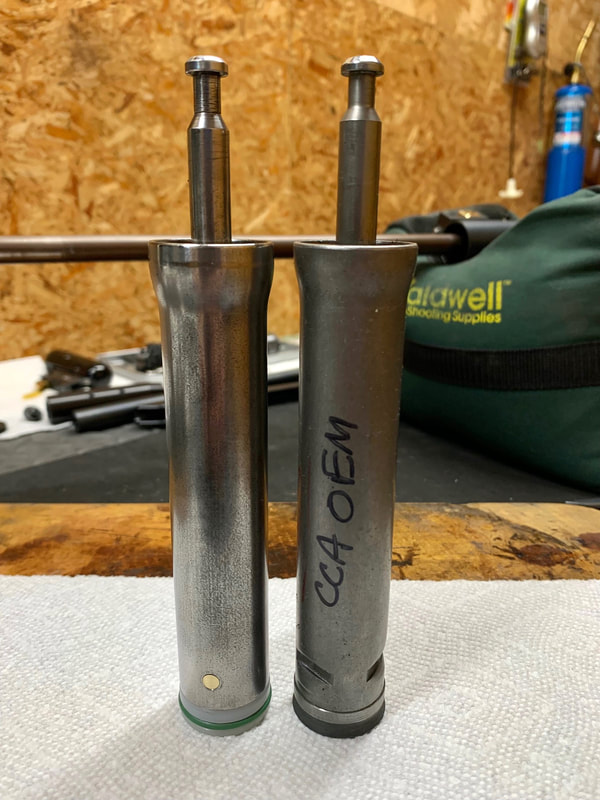
taking place, and this occurred mostly when using the original compression tube. As a side note, I
discovered that the original compression tube had a low spot, which was allowing the piston seal to skip
over it during the piston stroke. This resulted in unstable velocities.
extreme spreads in velocity went away.
I was still seeking velocities of 870-875fps. With about 4 different tests already complete, I continued on
through approximately 14 additional tests of various combinations before accepting the fact that the
spring was settling, and 875 fps was not going to happen. It now looked like the max velocity might be
around 815-820fps. Time to accept that and move on.
Throughout the velocity testing, a number of mechanical variables were evaluated in different
combinations;
Original OEM
Compression Tube
Piston
Main Seal at 28.35mm
Main Spring
New OEM
Compression Tube
Piston
Main Seal at 28.58mm
Main Spring
Other
O-ring Light Piston
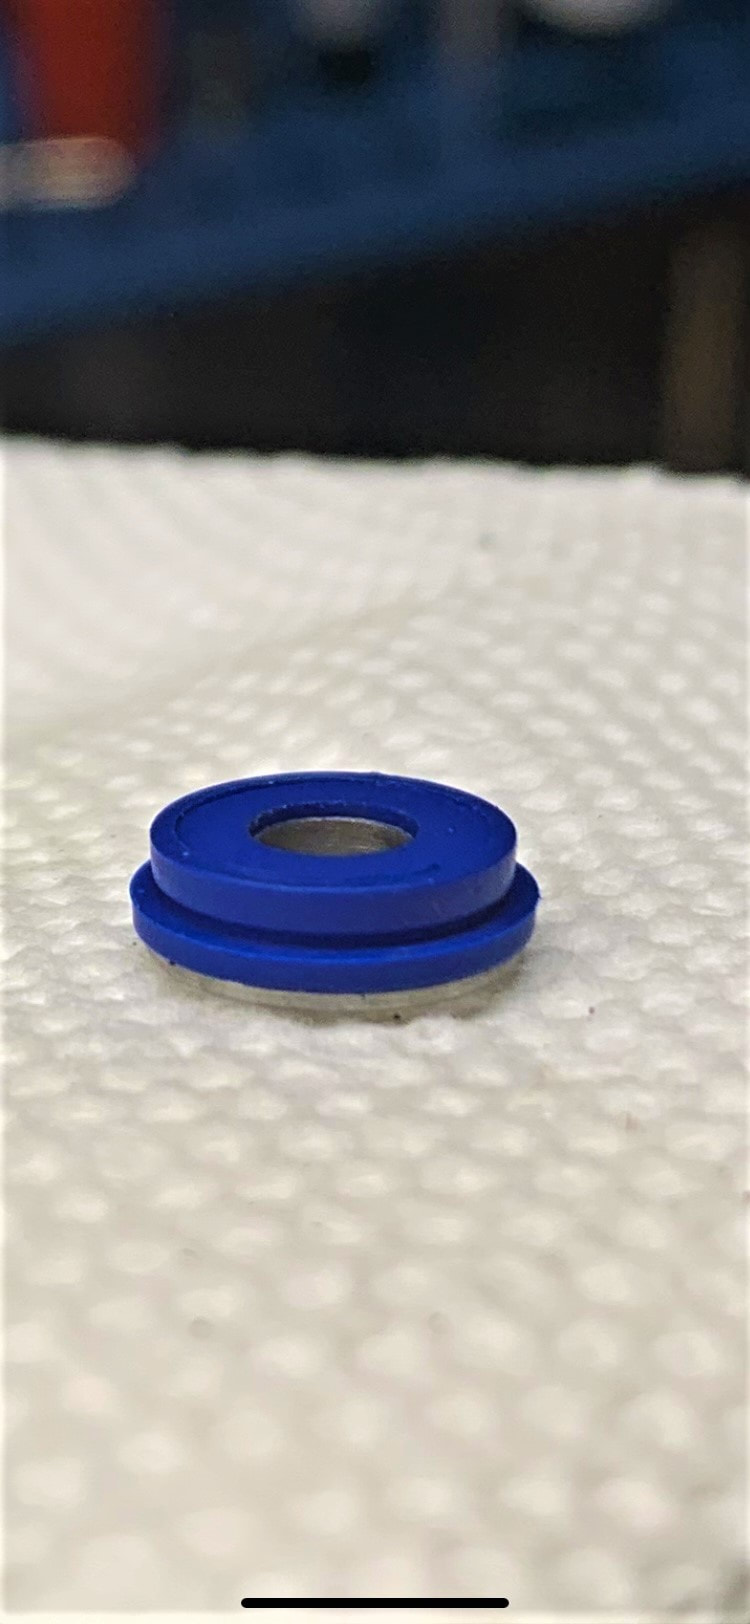
D460 Blue Breech Seal
Maccari OEM style Breech Seal
Maccari Main Seal at 28.42mm
70% Moly Lube
Krytox GPL205
Ultimox 226
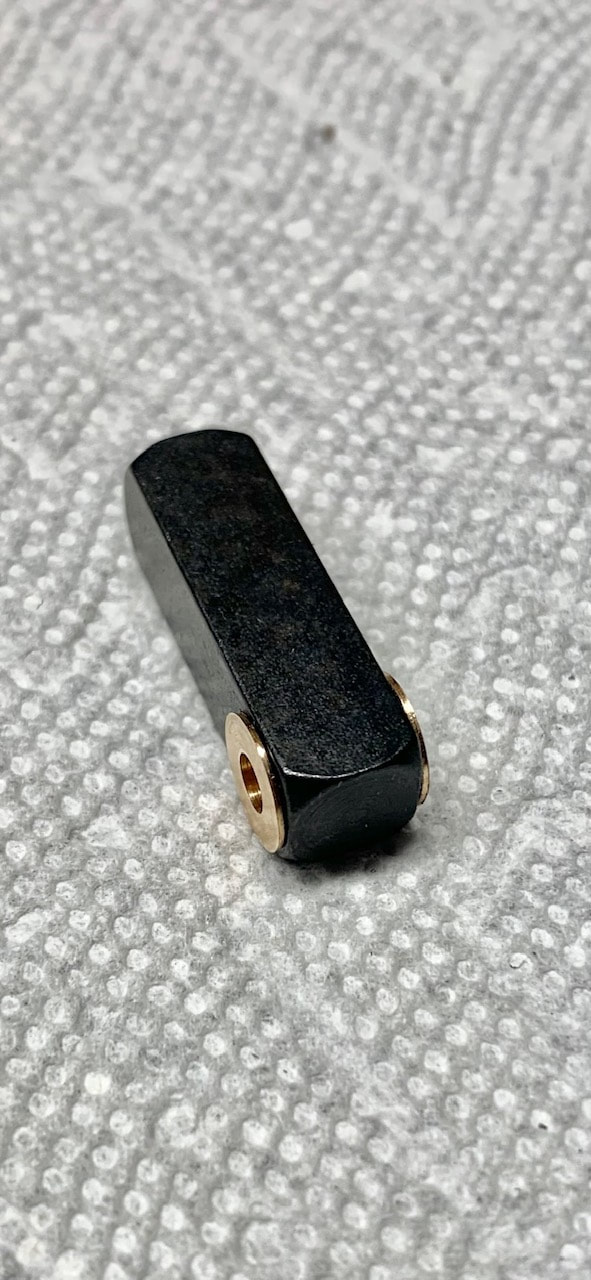
Transfer Port Inserts
Brass
Alu-Bronze
416 Stainless Steel
Various sizes ranging from 4mm down to 3.65mm
Discoveries during the Velocity/Consistency testing
unstable when using smaller sized main seals. This cleared up after a larger main seal was installed,
which measured 28.58mm at the lip. Much smaller than that, and the issues returned.
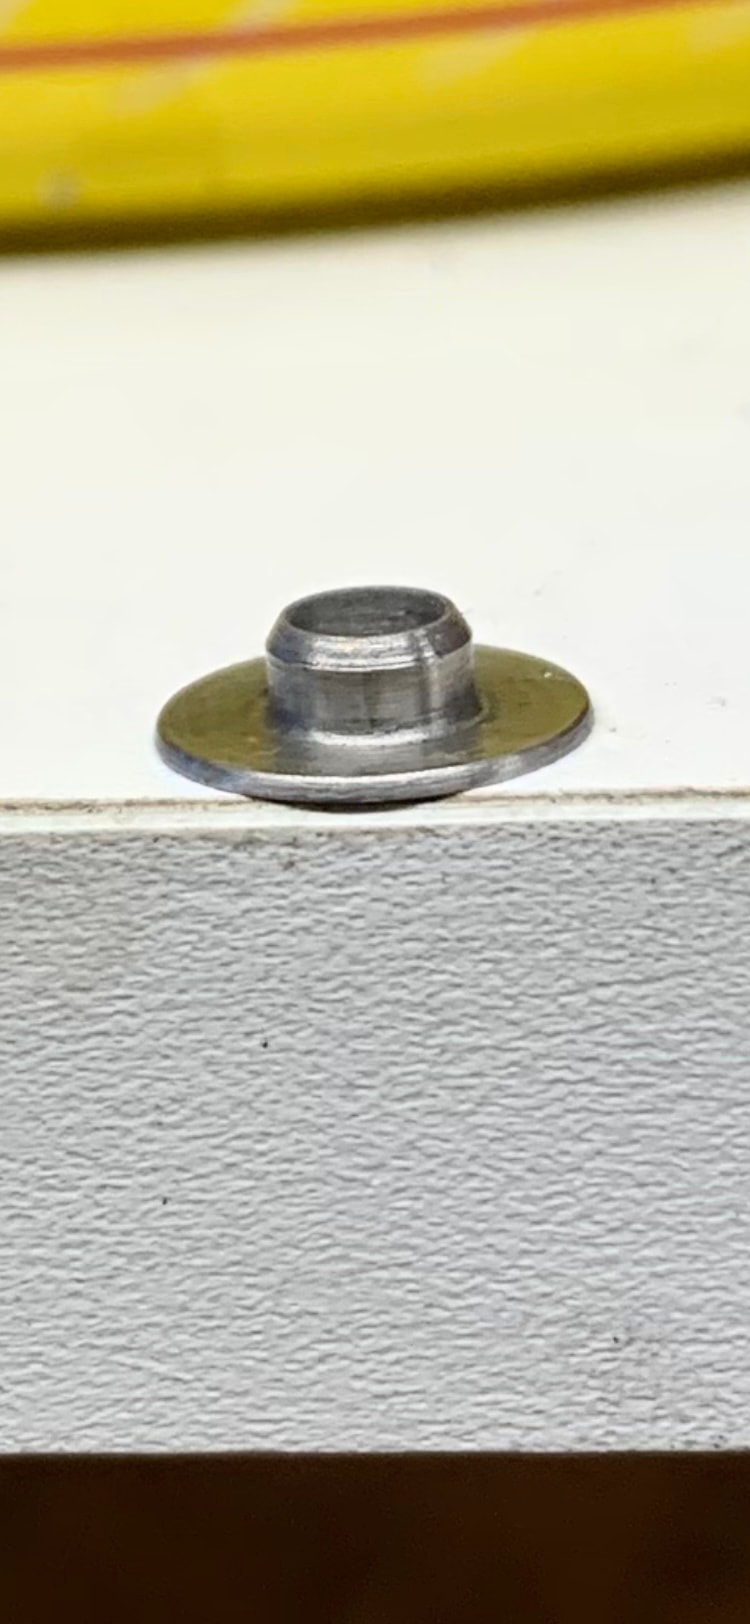
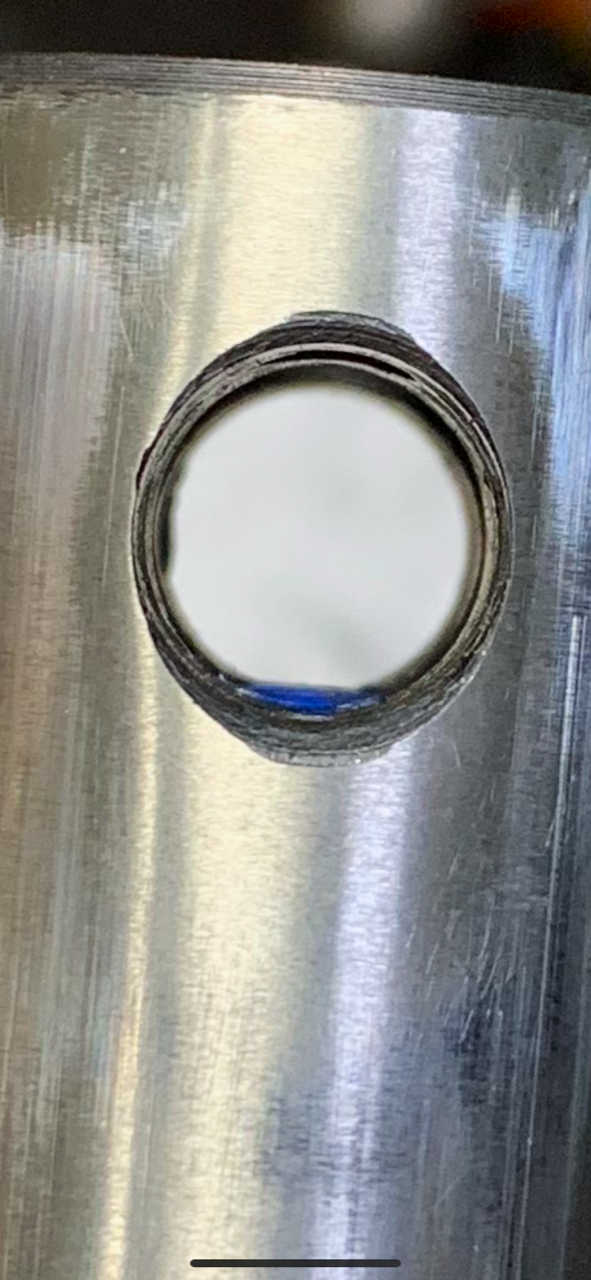
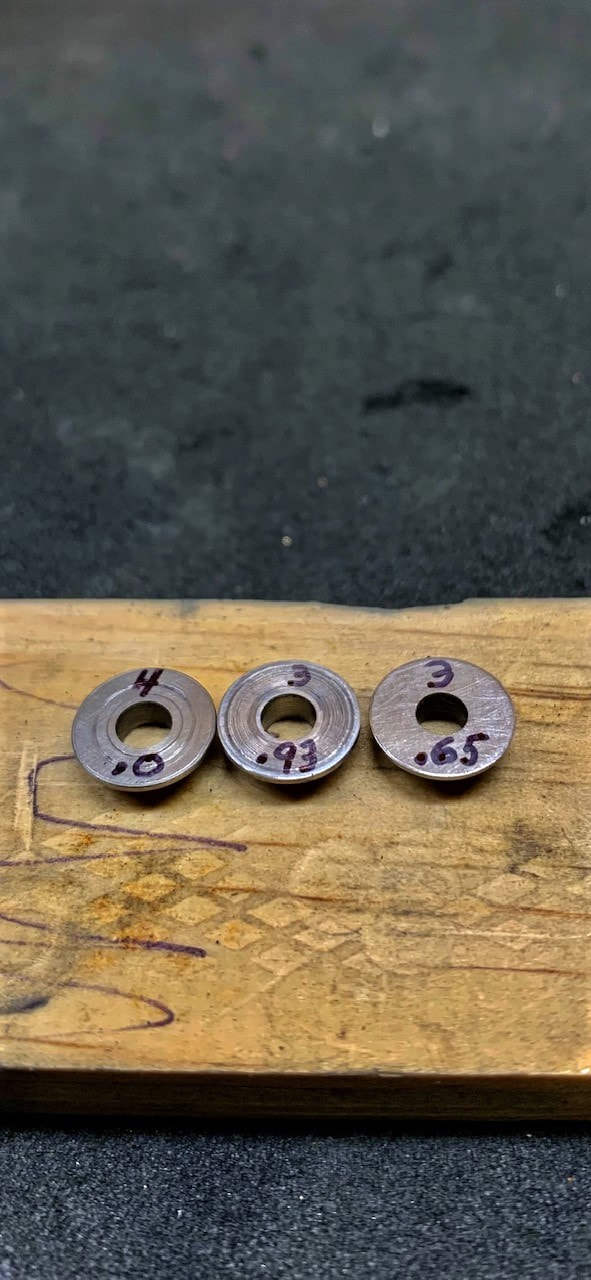
Transfer Port Inserts – A number of Transfer Port sizes were tested using machined inserts that were
based on Hector's design. I found that using softer metals such as Brass or Alu-Bronze would ovalize
under the pressure. When this happened, velocity would gradually start dropping off. Hector
recommended using steel for the TP inserts, so I switched to 416 stainless and have had no problems ever
since.
shot after shot. This contributes to more consistent velocities.
This is a pellet after being inserted by hand
The pellets seat to this same depth shot after shot.
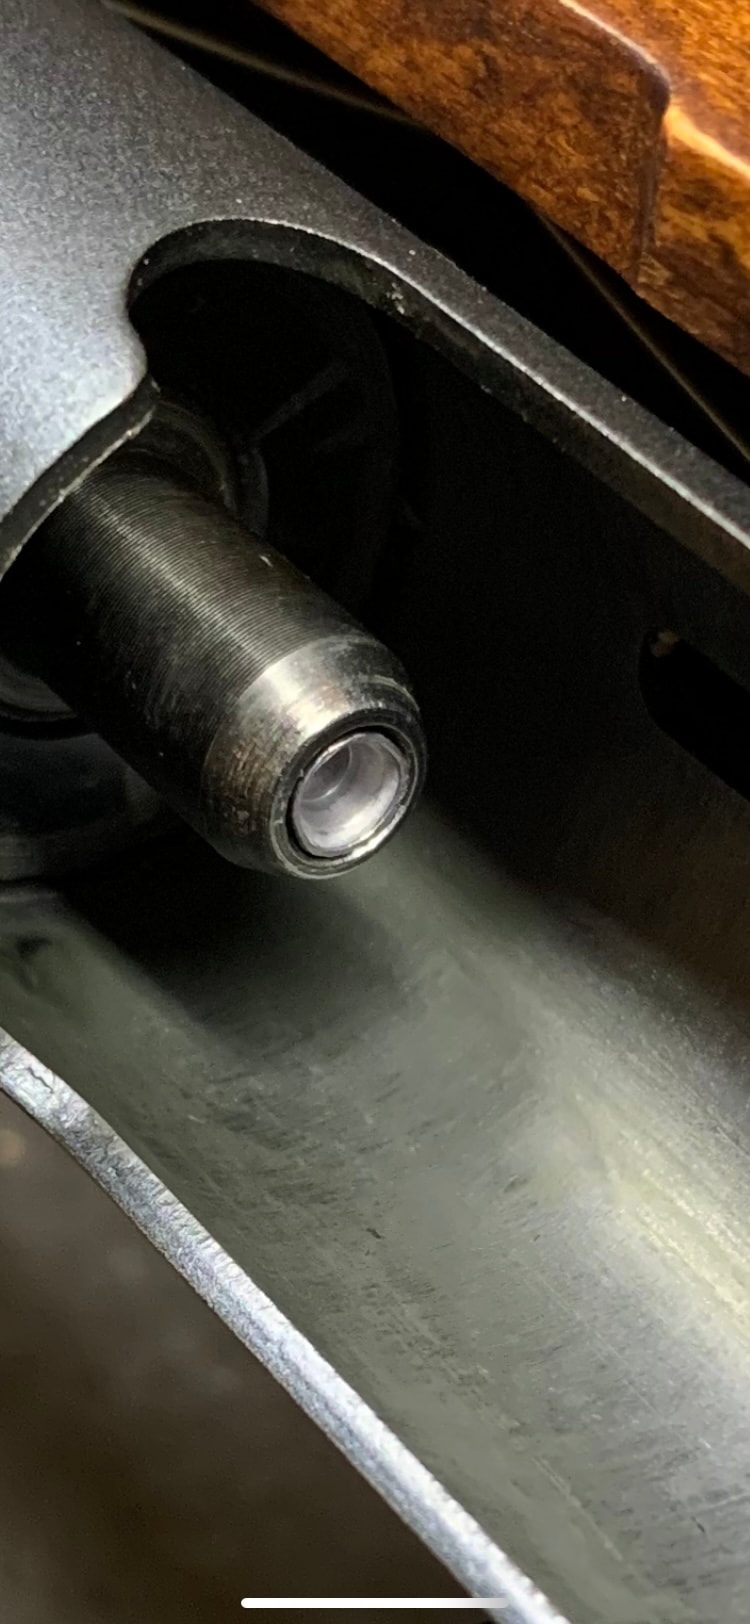
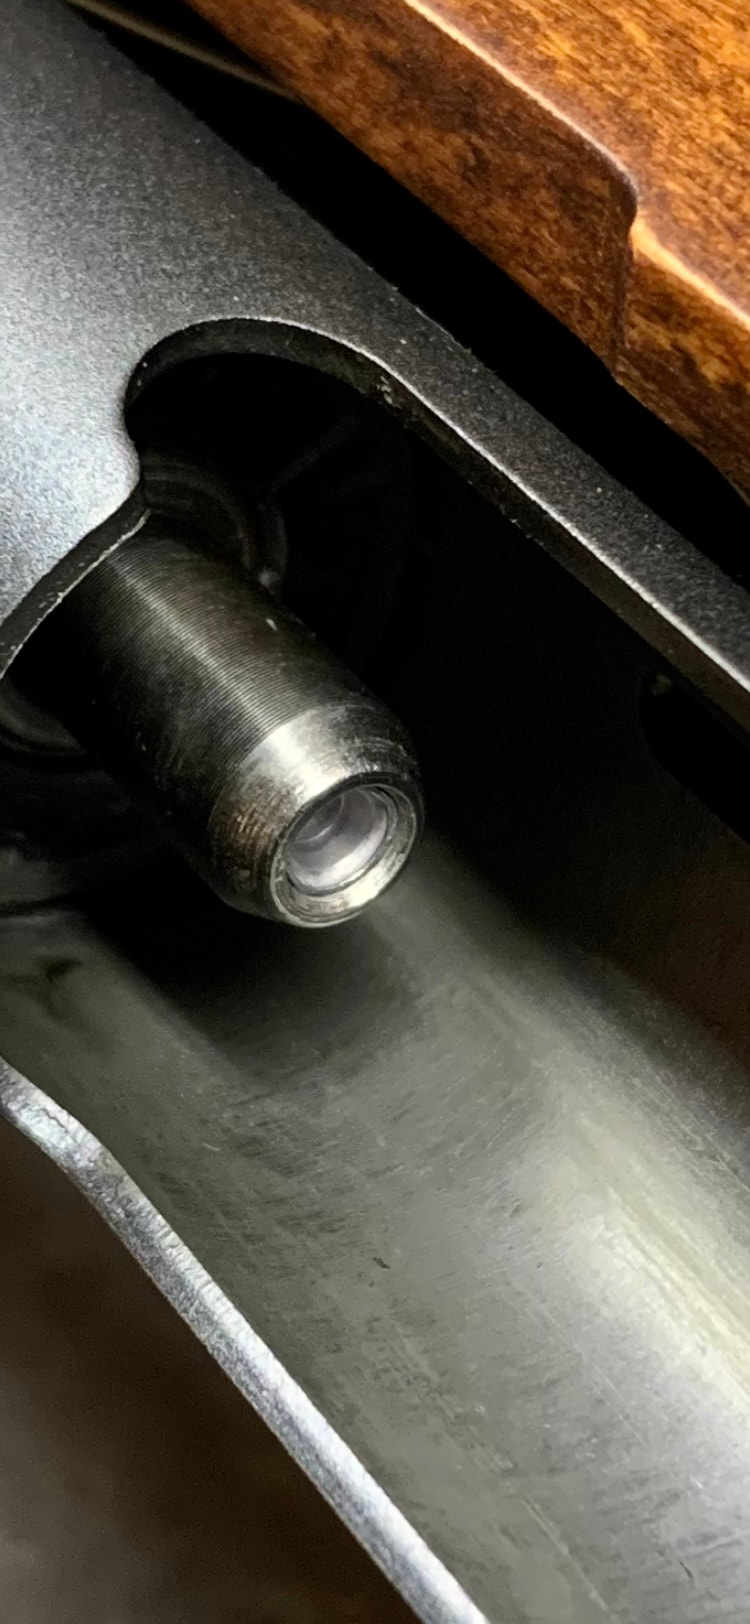
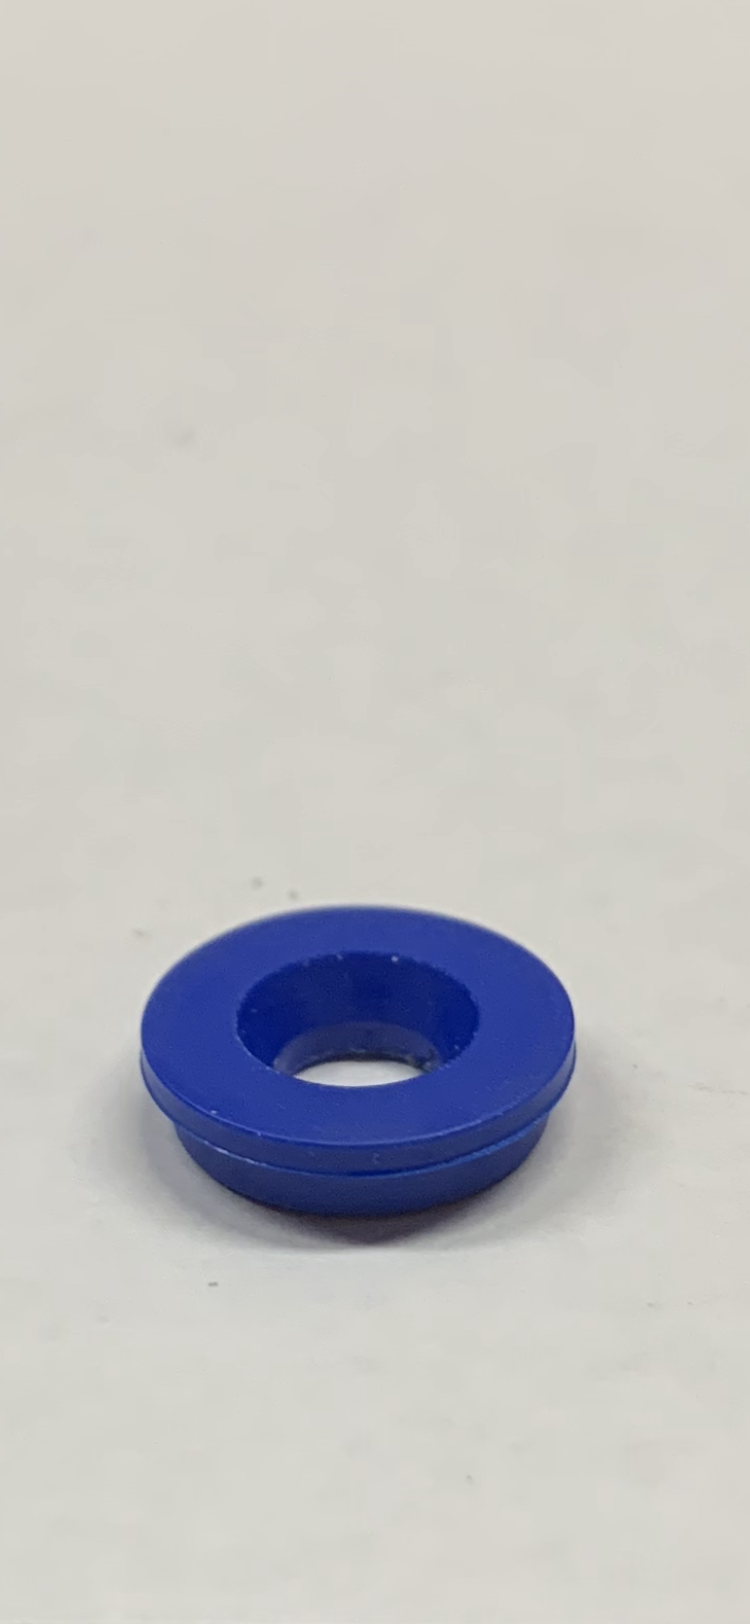
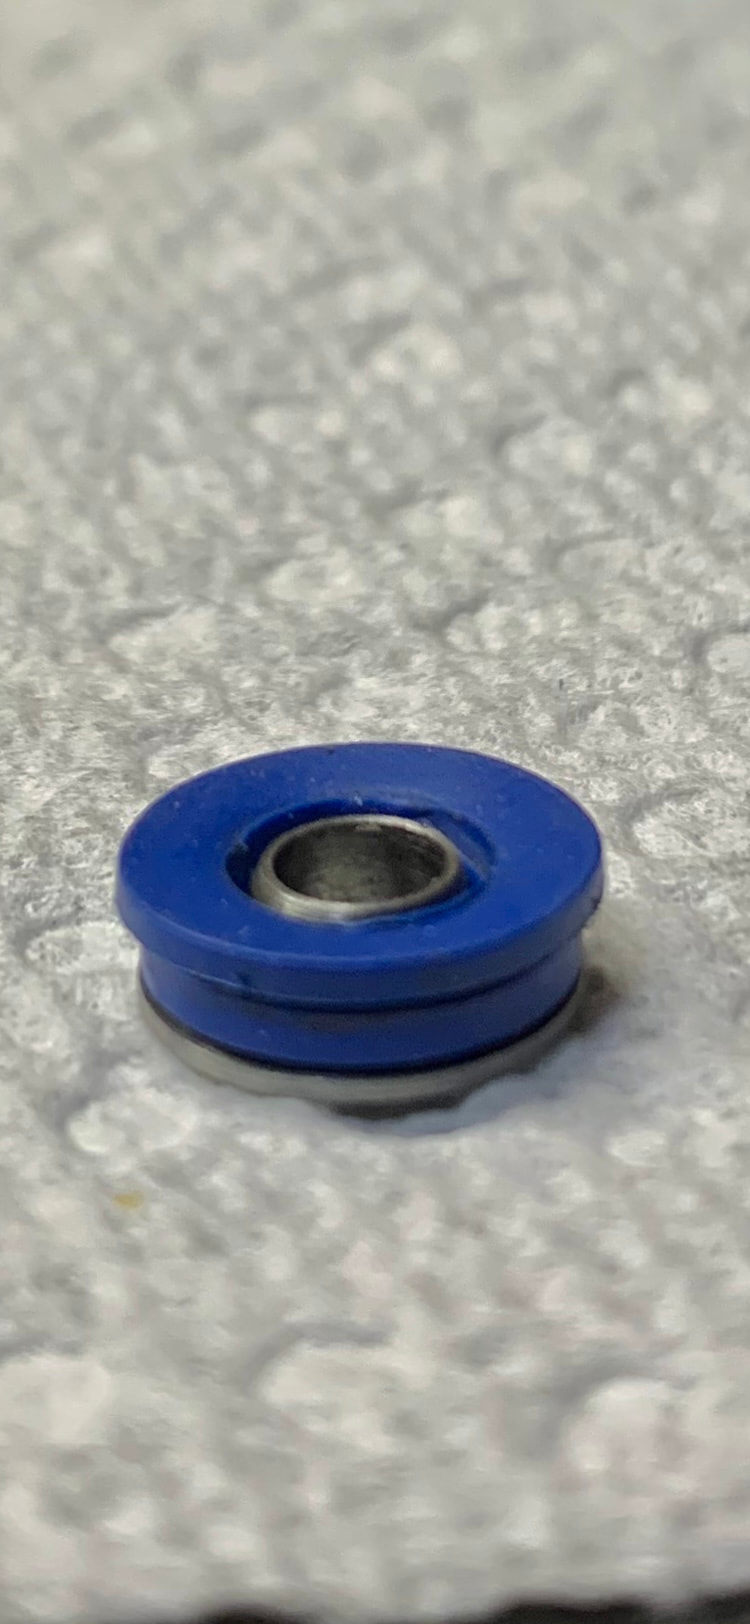
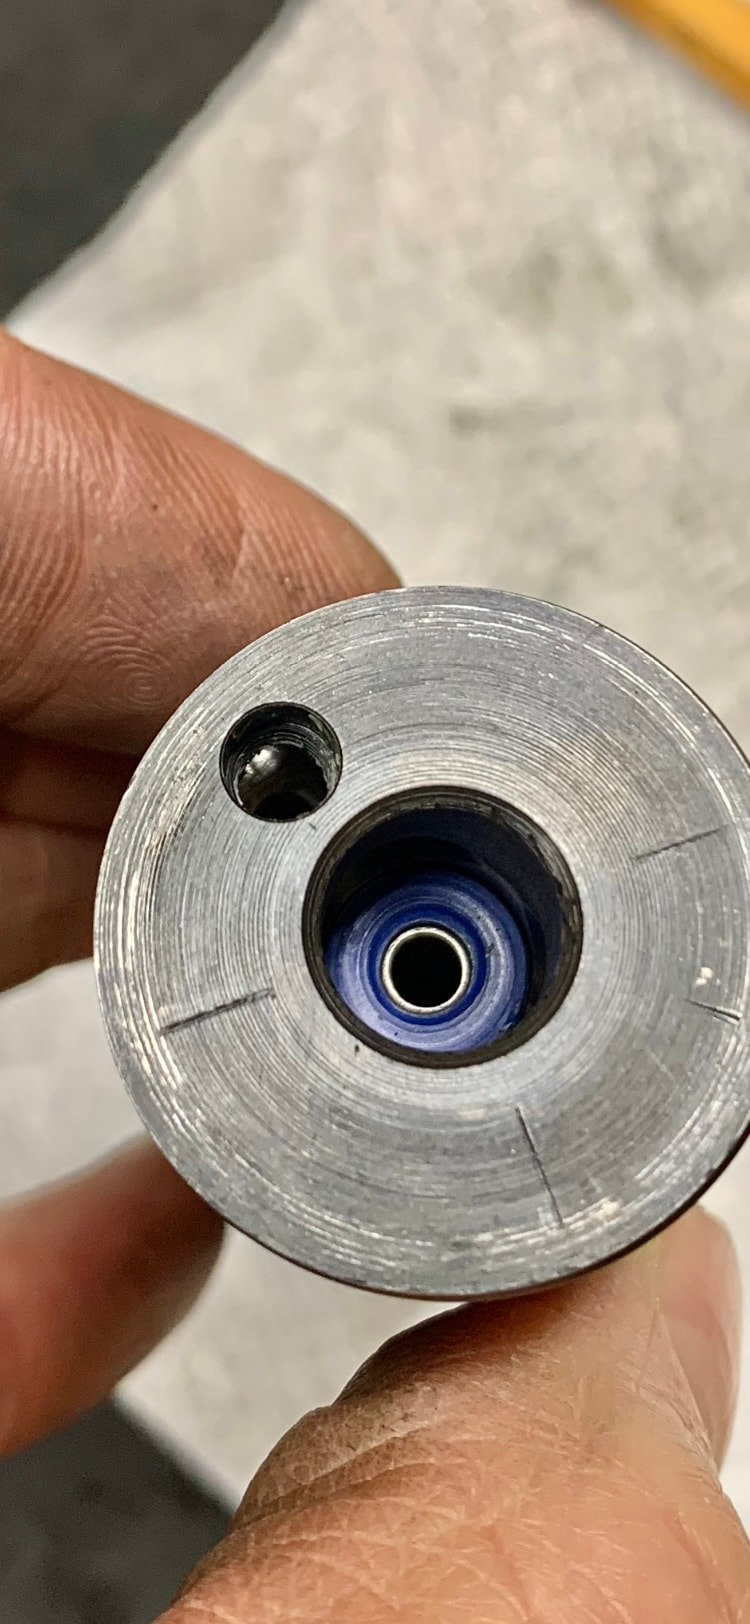
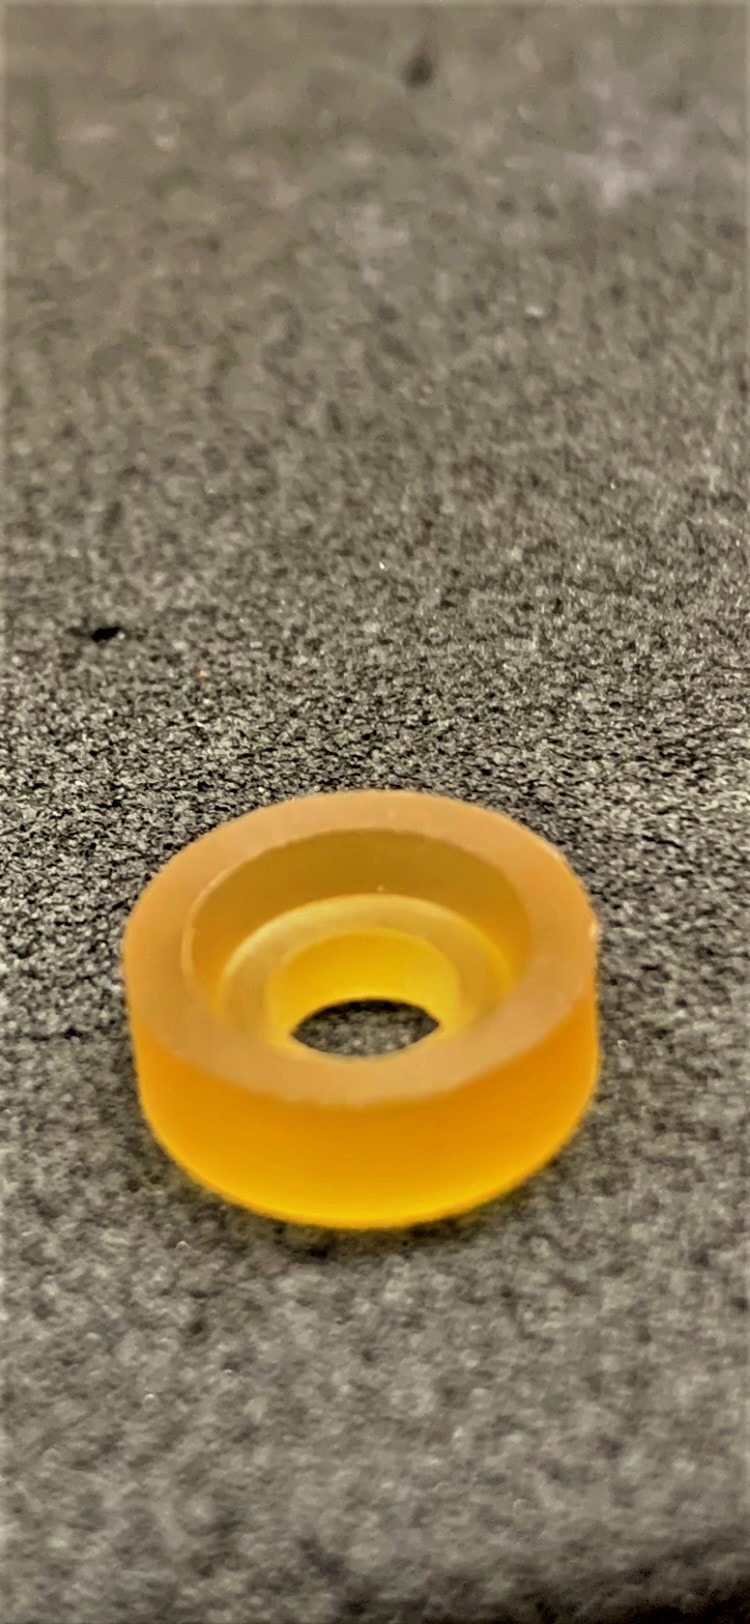
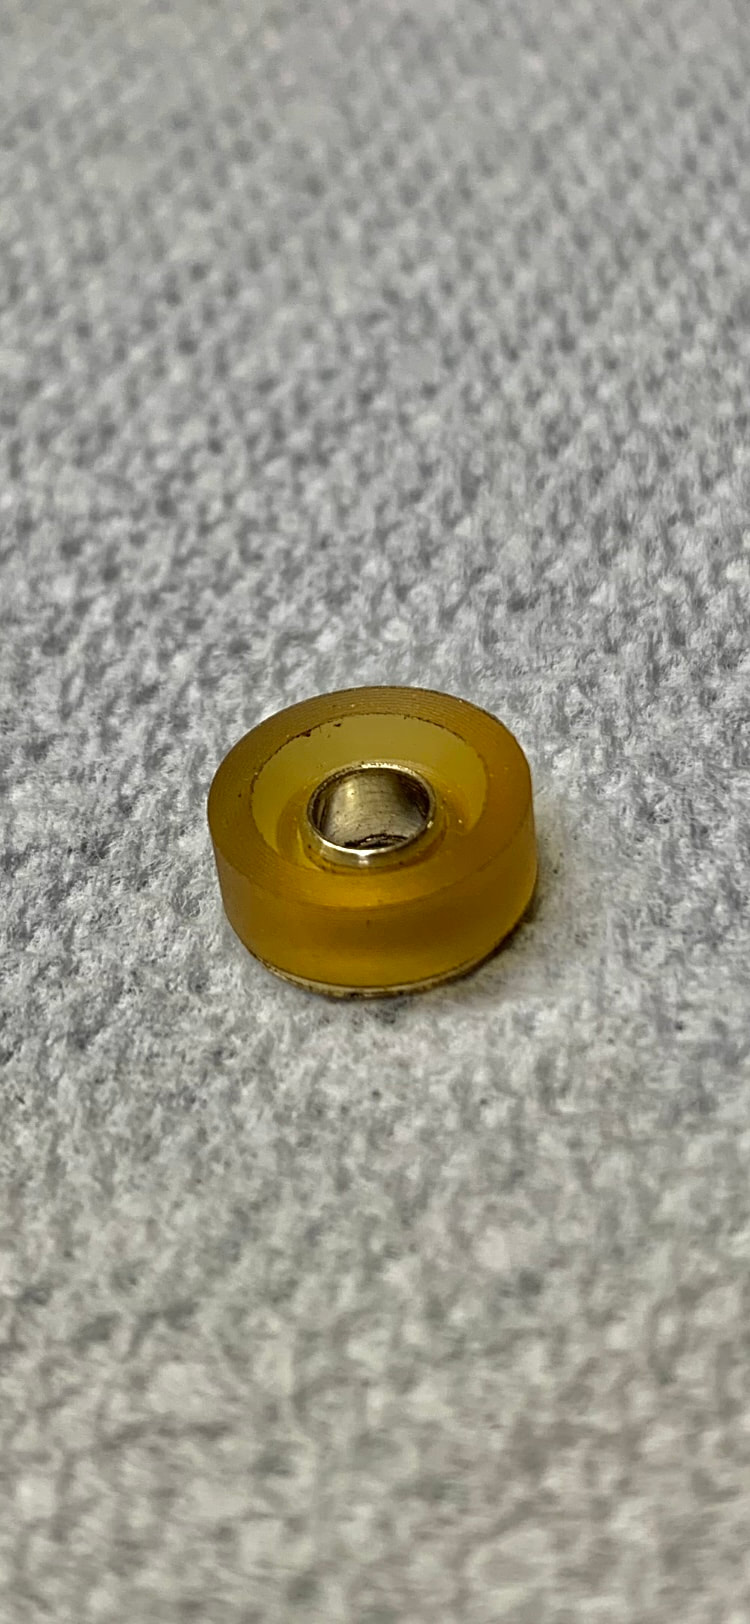
pressure when installed onto the Transfer port insert with the wide side facing out. Even with the thin
base on my Transfer Port inserts, the wider portion of the D460 seal was riding right on the edge of the
opening in the Compression tube. The inconsistent velocity due to pressure bleeding off was most
apparent when adding more preload on the main spring, or using transfer port inserts that were sized
below 4mm ID. Reversing the seal and placing the wide side down against the base of the insert resolved
this issue.
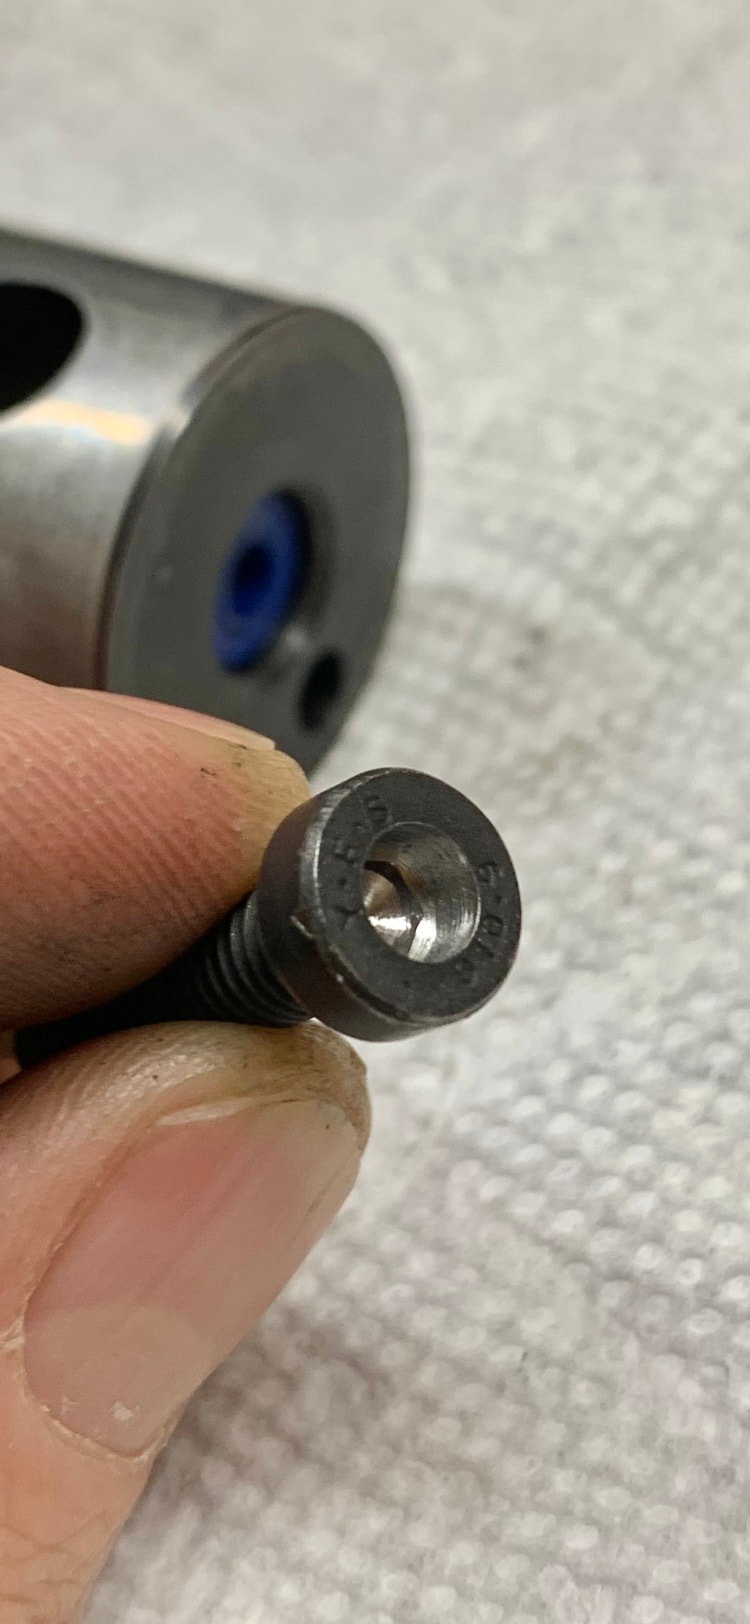
D460 Blue Breech Seal
The inside of the bolt head was machined so that it could press the seal into place without damaging the
metal TP insert. A few taps with a small ball-peen hammer and the seal was solidly in place.
the compression tube. Changing them out is not an easy task. Additionally, they are made of a harder
material and must be drilled out in order to fit the TP inserts. In comparison, the D460 blue seals are a
softer material, require no drilling and are easily removed when changing port sizes.
velocities eventually dropped to around 815fps. Next, the spring developed a very noticeable twist. This
was due to the fact that there was no tophat installed from the factory. For anyone who has used a tool to
compress a main spring, you know that they will twist and buckle in all sorts of directions unless you use
a properly fitted guide and tophat. When compressed on the shot, you should have little to no space
between tophat and guide in order to keep the spring straight. Having too much space between them will
only allow the spring to twist itself out of alignment. I eventually machined a 2.7mm tophat for this
spring to help keep it straight.
OEM powerplant and Transfer Port sizes – After the spring finally settled, the OEM powerplant did
not appear to do well with transfer ports much less than 4mm ID.
Titan XS #4 Main Spring – This was tested with the OEM powerplant several times. Before the original
spring settled in, the Titan spring was usually showing lower velocities. However, after “both” of these
springs settled in, I would say they were relatively equal in power output.
The difference I saw was that, unlike the OEM spring, the Titan #4 seemed to prefer smaller Transfer Port
sizes. In the end I chose this spring. In my opinion it is more consistent and has a better feeling shot
cycle.
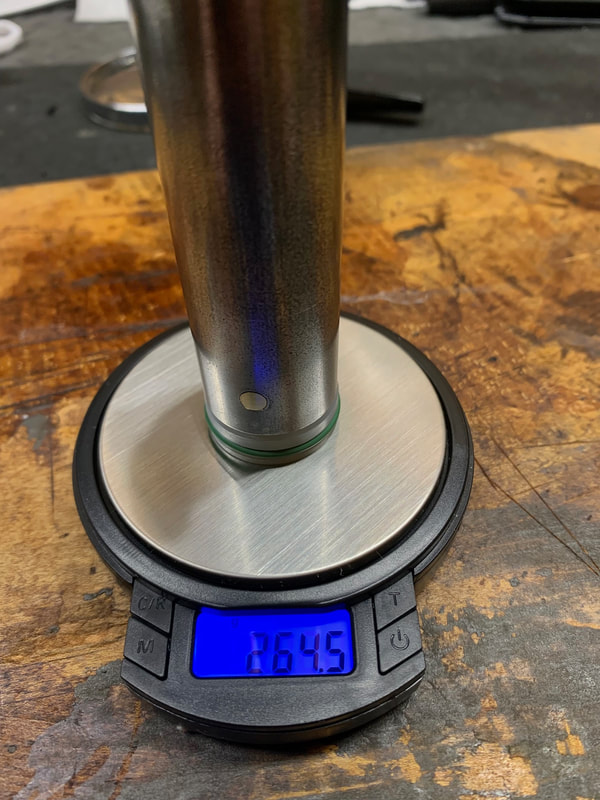
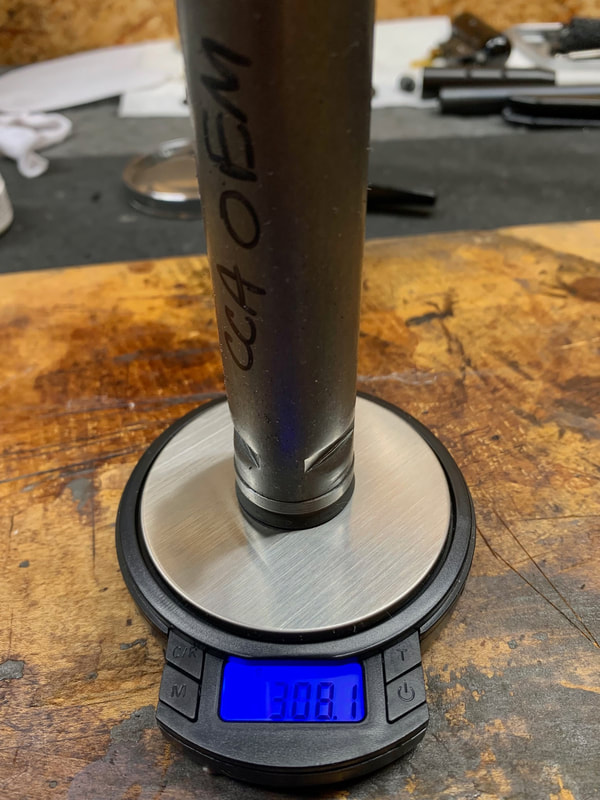
OEM piston vs O-ring Light – In my opinion the O-ring light piston is more consistent, and has a better
feel on the shot. Just smoother all the way around. This piston is about 43.5g lighter than the Diana
OEM pistons, and may provide a slightly quicker shot cycle.
resulted in lower velocities. In order to correct this, I machined 1mm off of the nose. The pistons now
match in overall length and strokes are identical.
ID without reversing the D460 breech seal. After reversing the seal, the problem was resolved.
Krytox GPL205 vs Ultimox 226 – When I first started testing the O-ring light piston, I thoroughly
cleaned the compression tube out with acetone. This lube worked great for about 200-300 shots, but then
began to gum up and velocities dropped and became unstable. After disassembling the rifle I could feel
that the piston movement was sticking and very sluggish. I reached out to Hector and he recommended
using a 3-step process to clean things out to make sure all remaining traces of moly were removed. As
per Hector’s recommendation, the following three products were used in this order;
1) Citrus Cleaner (I used a product called De-Solv-It)
2) Lacquer Thinner
3) Acetone
Products were used in the order listed above, thoroughly soaking and scrubbing during each step. I was
amazed at how much black moly was still coming out of thecomp tube. This process took about 45
minutes until the rags were coming out completely clean. Both piston and compression tube were cleaned
in this manner.
Hector also recommended switching to the Ultimox 226 lube, which I did. At the time of this writing, I
am well over 500 shots into it and have had no further issues.
In the chart below, you will also see that at one point the new OEM piston was used. This was done after
I noticed that the piston rod was quite wobbly on the original piston. I don't think this was causing any
issues, but the new piston was purchased just in case. I never really noticed a difference between the two
other than the fact the new piston rod was nice and tight.
I could outline in detail each of the 26 individual tests that were conducted, but that would be a VERY
boring read for a lot of folks. Instead, I decided to post a chart below showing the specifics of each test in
the order of which they were conducted. On the right hand side of this chart you will see comments
indicating the success or failure of each test. You can also see that I began to overlap the accuracy and
POI testing. I would routinely test for accuracy and POI on calm days as a sense check of how the rifle
was doing on target. Velocity means nothing if you don’t have accuracy so it is important to watch both.
As you will see, the velocity eventually settled to around 812-815fps, at which point all of my attention
moved to Accuracy and POI repeatability.
Accuracy and POI Testing
Listed below are some key items that contributed to the final results on target, some more than others.
Scope at Mechanical Center - With the velocity testing complete, the barrel was tweaked for POI. I like
to run my scopes as close as possible to mechanical zero with POI set at around 30 yards. Prior to
tweaking the barrel, even with the compensated ZR mount, the POI was still a few inches low and left at
30 yards with the scope at mechanical zero. Mechanical zero allows the internal springs to balance out,
and can result in more consistent accuracy and long term durability of the scope.
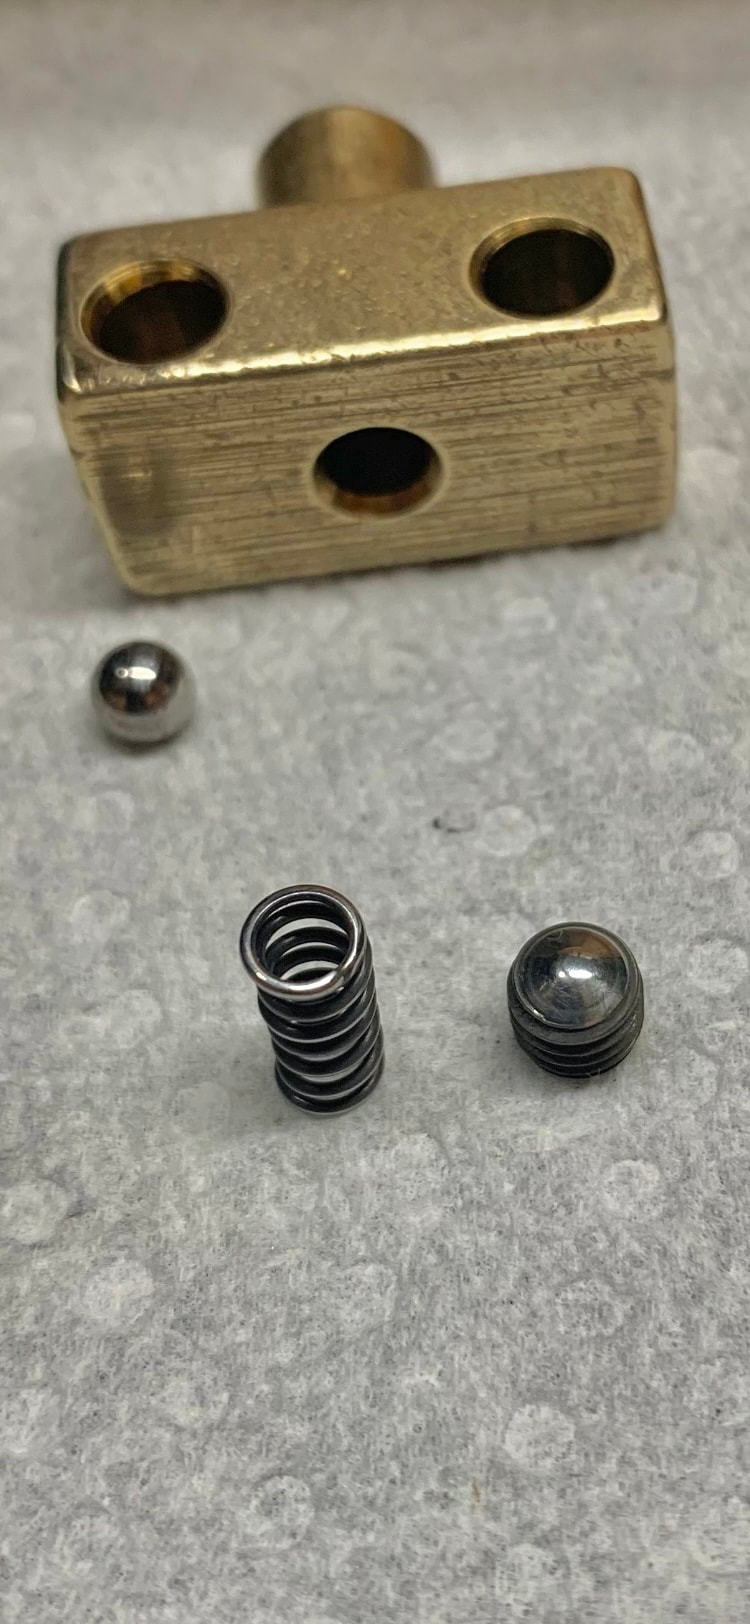
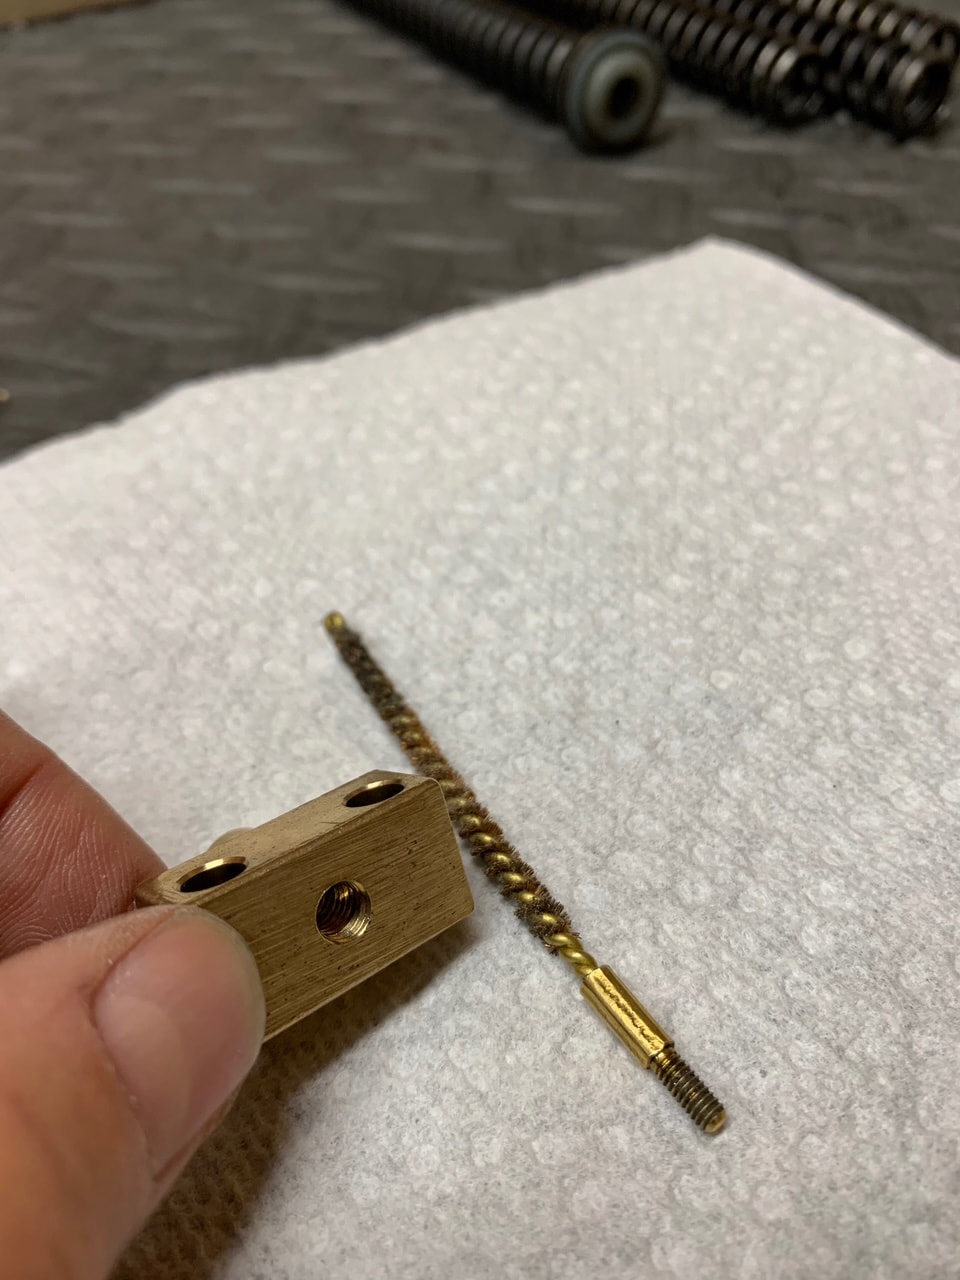
Establish Rear Sled Tension Setting – This step was actually completed much earlier in this project. In
the early stages of tuning a D54/56, I like to pull the rear sled mechanism apart and polish things up. The
main thing that I polish are the base of the adjustment screw, and both ends of the coil spring. I feel that
this allows for smoother adjustments and movement of the ball. I also like to polish the surface on the
base of the sled rail bracket that the ball rolls against.
reassembling.
point, I generally begin somewhere around minus 1 turn from max. With sled in the unlocked position,
turn the adjustment screw in (clockwise) until it bottoms out. You then turn counterclockwise 1 full turn
to begin your testing. From there, make tiny moves in either direction (maybe 1/8th turn at a time) while
observing performance on target. When making changes, always take a few shots after an adjustment was
made before monitoring performance on target. Sometimes the disruption of removing the rear stock
screw in order to make an adjustment will cause a few erratic shots until things settle back in. This really
applies anytime you pull things apart to make changes.
Documentation is key here, so take notes as you go. When you find what you believe is the best setting,
you will then need to verify this setting.
In order to verify your setting, make sure that the sled is in the “unlocked” position. Counting the turns
as you go, turn the sled tension adjustment screw clockwise until it is maxed out. You then turn it
counterclockwise this same amount. You have now returned to your original setting. Document this
setting.
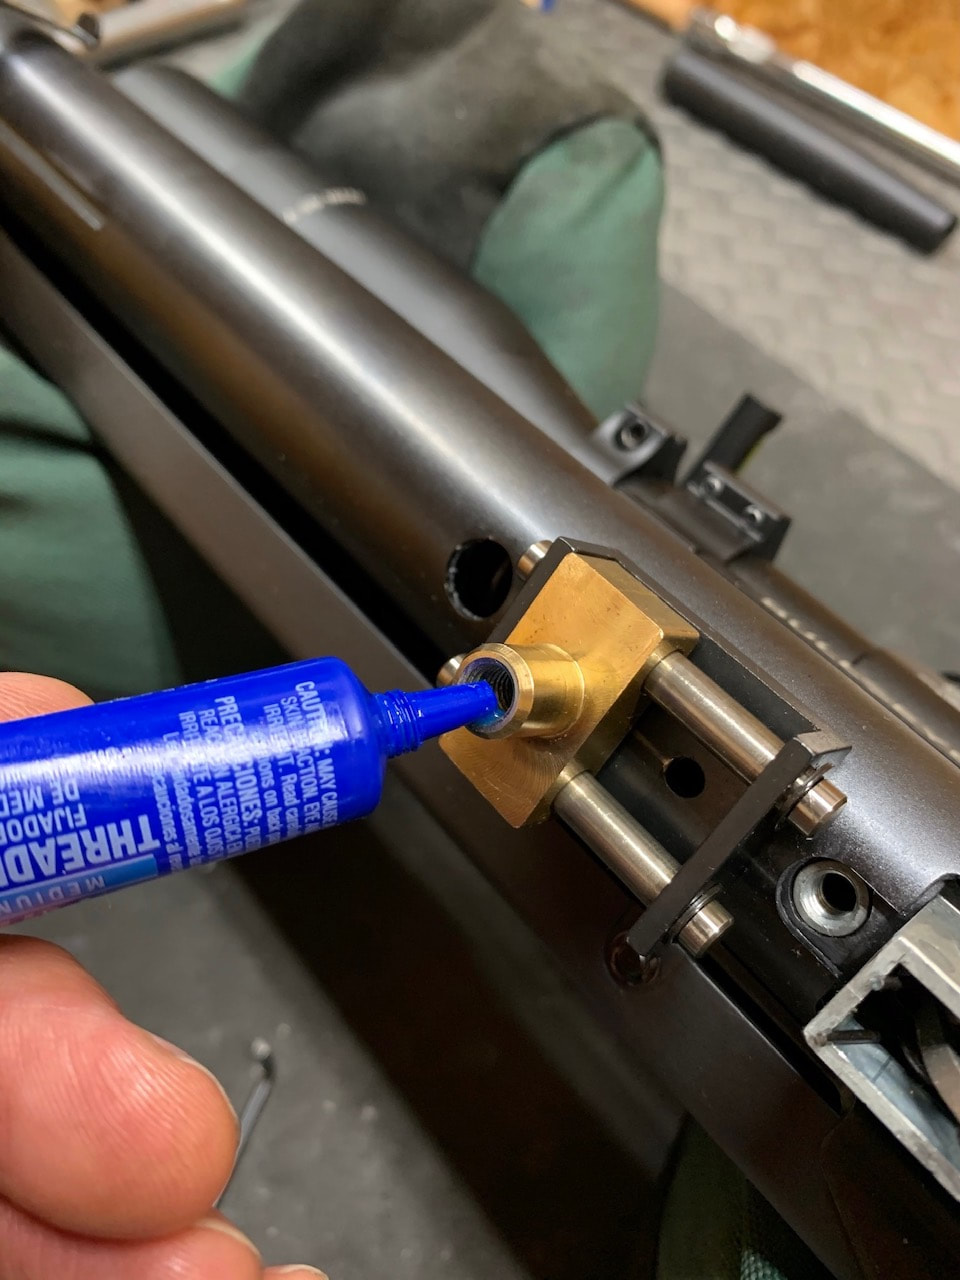
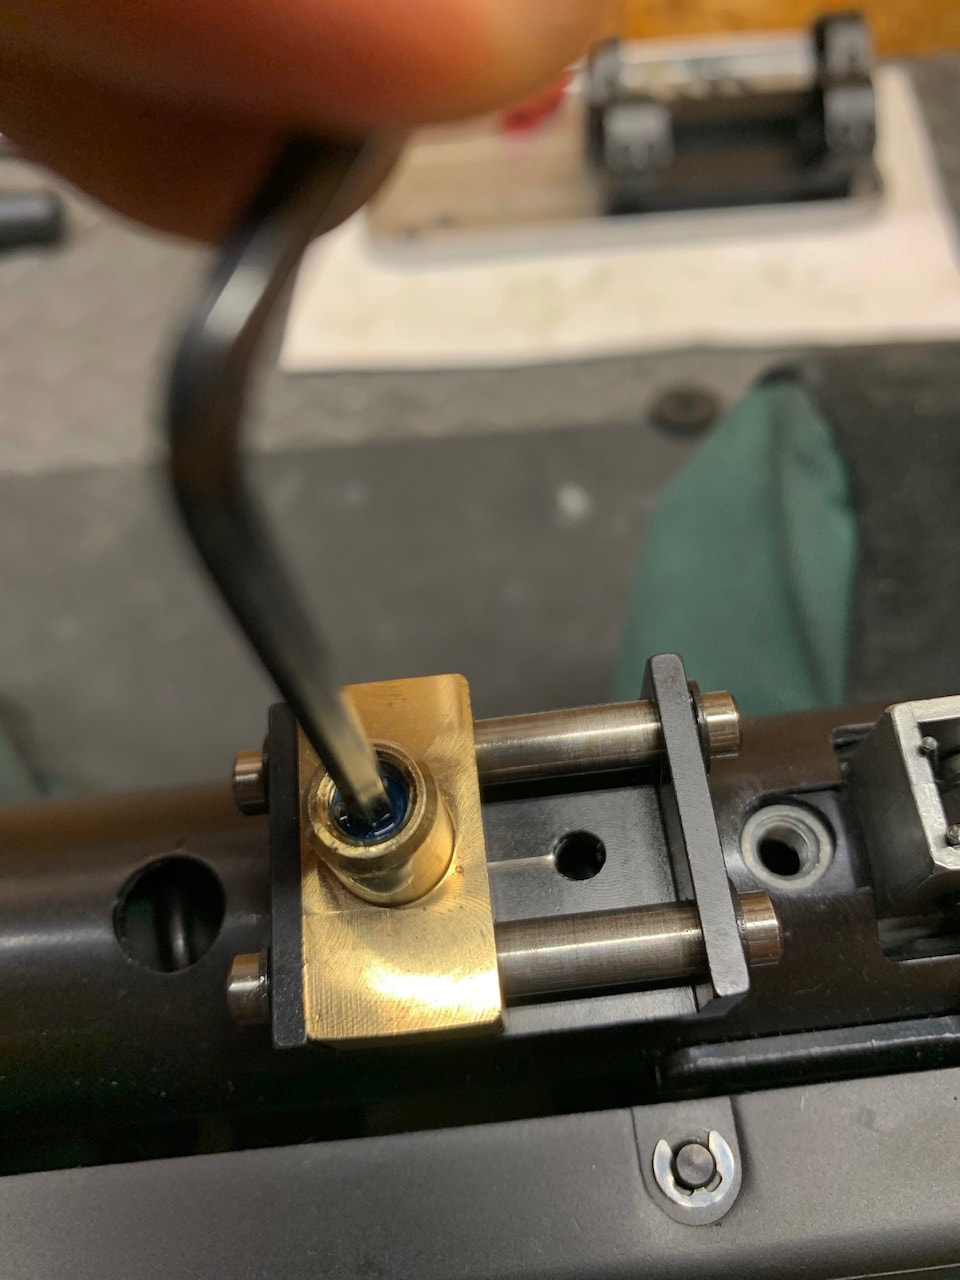
After the setting has been documented, loctite the adjustment screw using blue, medium strength. The
process I follow is outlined below;
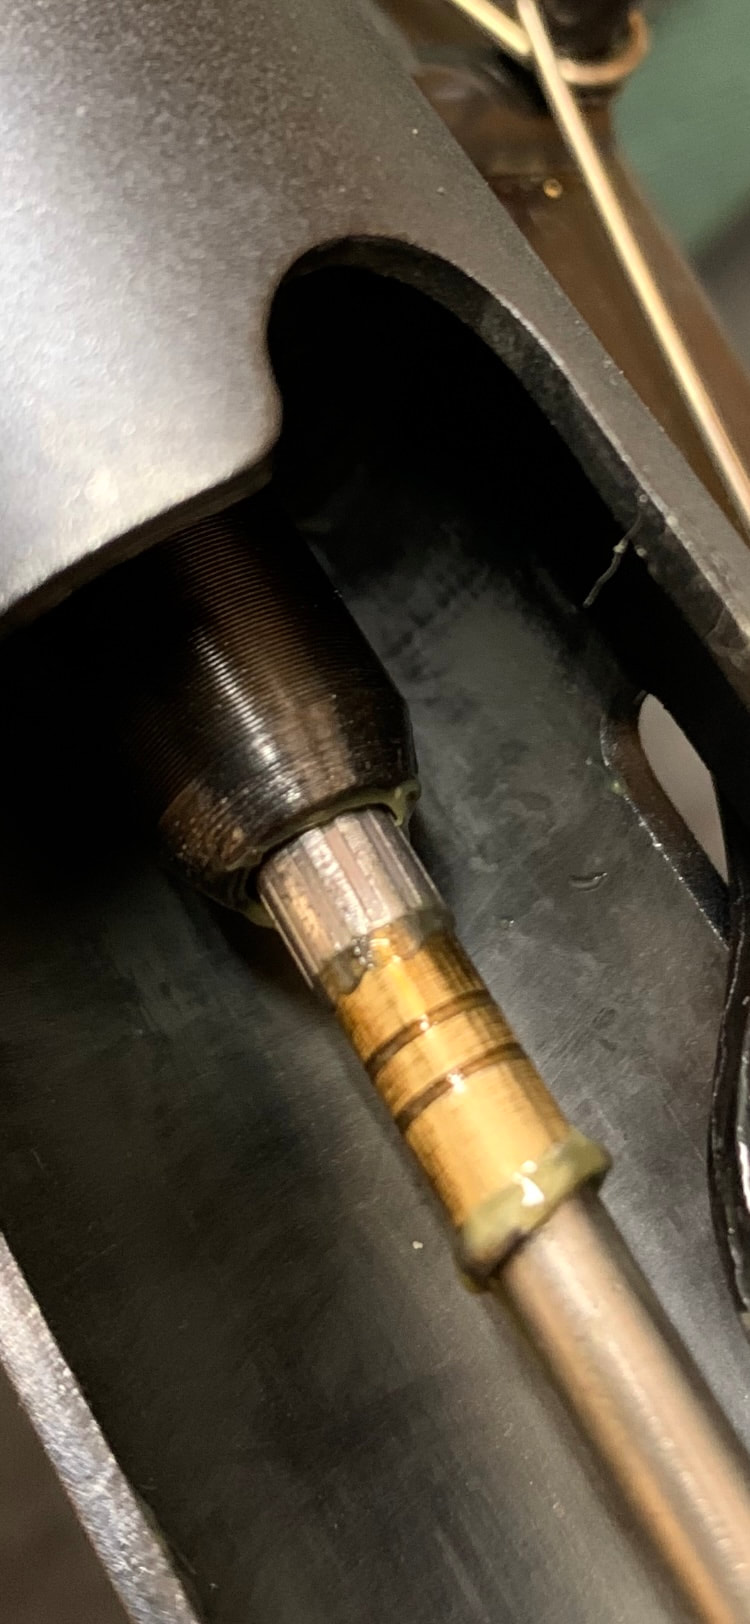
1) Add a drop of blue medium strength Loctite above the screw as shown below
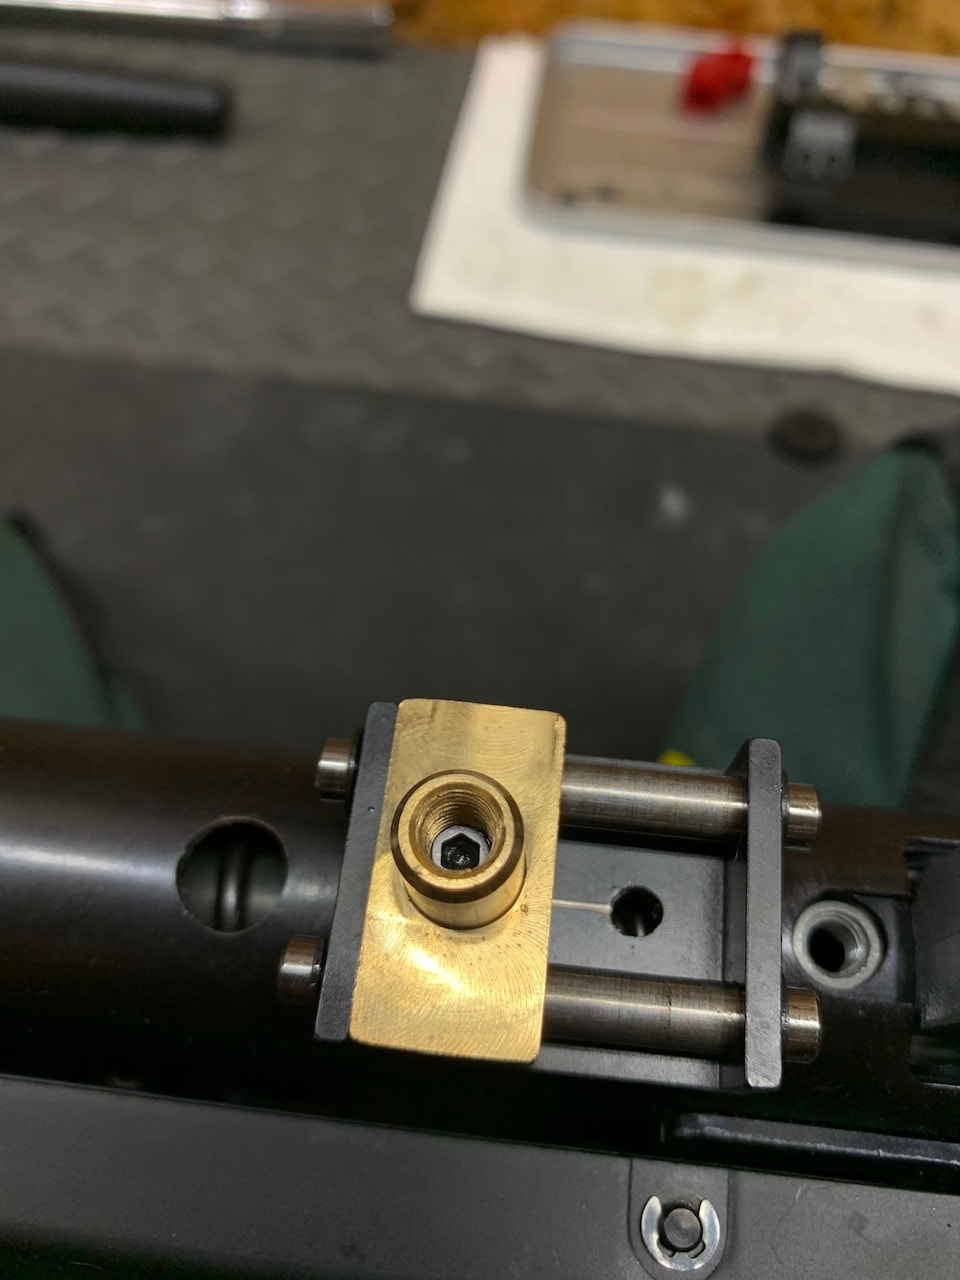
that same amount. The threads will now be coated with Loctite and it will be set to your desired
setting
Loctite gets to the spring and ball, the ability of the sled to unlock and travel smoothly will be greatly
diminished, and accuracy will suffer. So, you must be very careful in not allowing this to happen.
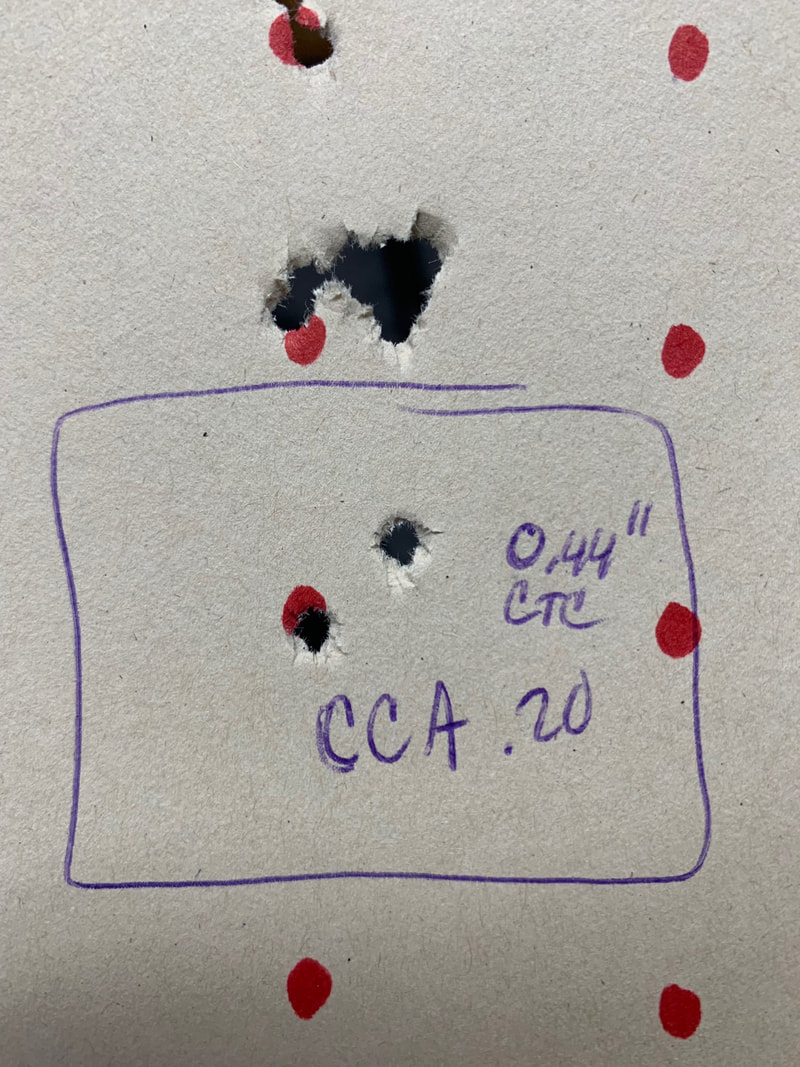
For the majority of this project I was battling with fliers on target, even after setting the rear sled tension.
The rifle would perform well and show some nice tight groups, but would then have a couple random
fliers, some of which were fairly substantial. I began to move away from 5-shot groups in favor of 10-shot
groups as I was working to resolve the issue with fliers.
optimum settings during this project. Even with the unstable groups and fliers, I could still see which
settings resulted in the tightest core groups on target, while ignoring the fliers.
Multiple tests revealed that 4 and 8 o-rings continually came to the surface as the best settings. The fine
tuning of the HT allows you to closely time the exit of the pellet from the barrel to an end point in travel
of the muzzle on the shot. It does not take much to make a change on target.
Let’s shift all focus onto the things that were contributing to the fliers.
It was quite evident that the rifle wanted to shoot. I had many tight core groups, but the random fliers
were ruining things. There were a number of things contributing to the fliers, which I will outline below;
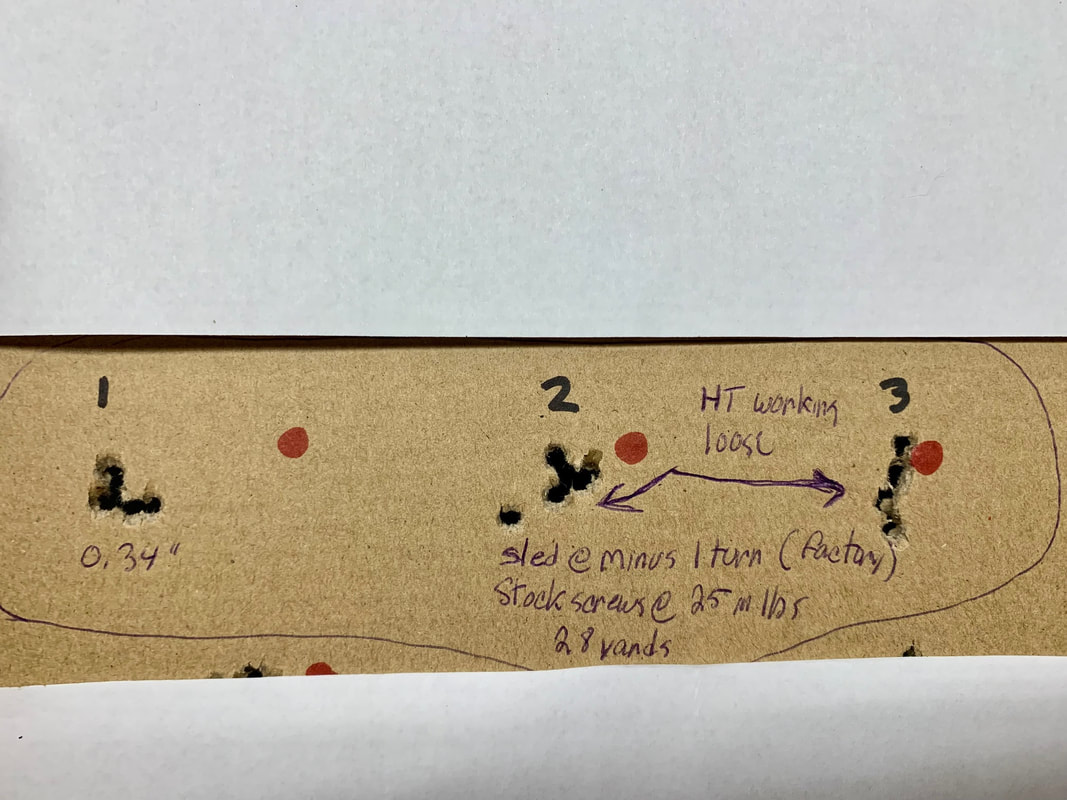
Harmonic Tuner coming loose – Even the slightest movement of this tuner will change POI and allow
the barrel shroud to slide back and forth resulting in accuracy issues. The HT must be pressed snug
against the o-rings and barrel shroud before snugging up the set screws. The supplied screws kept coming
loose, and I did not want to loctite them.
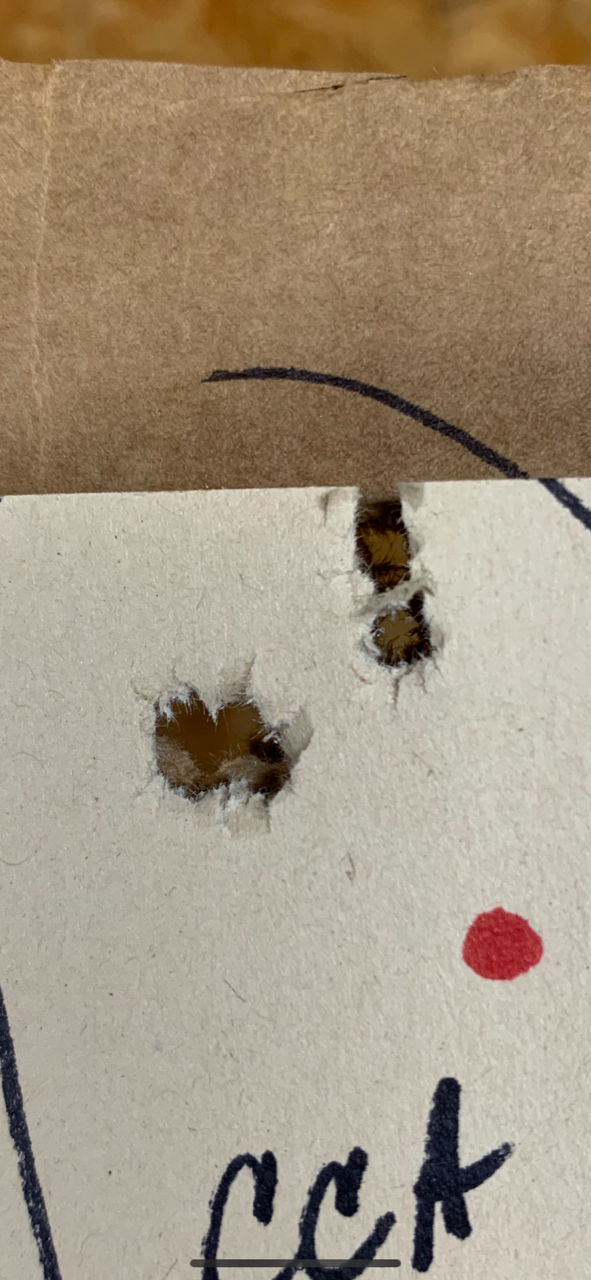
Here you can see the effects of a loose HT on target at 28 yards
of this issue.
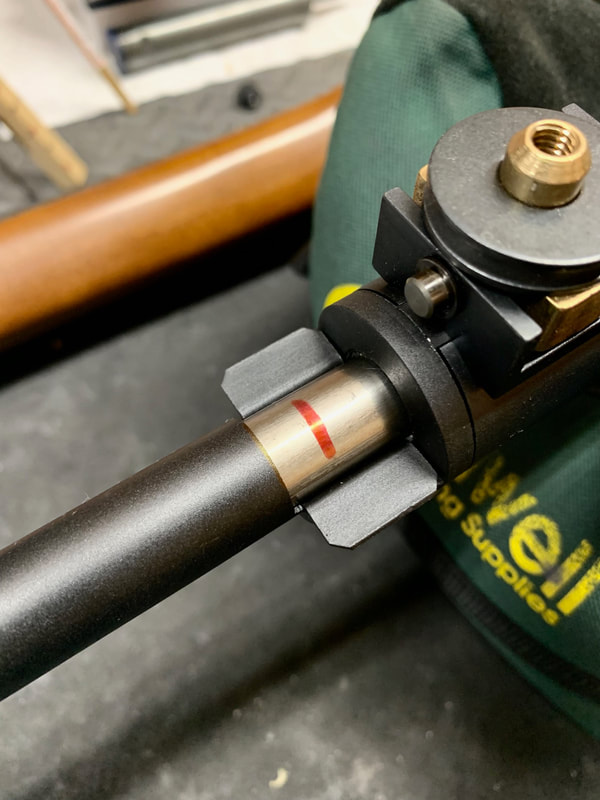
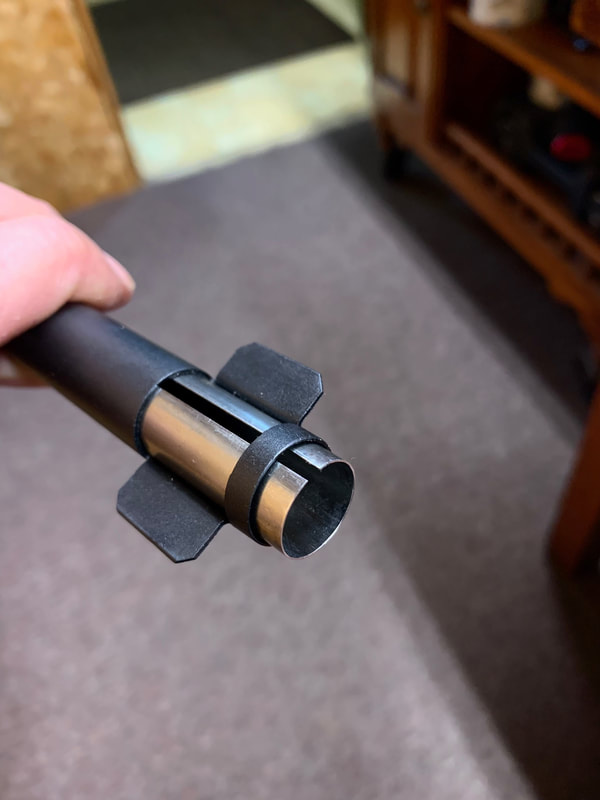
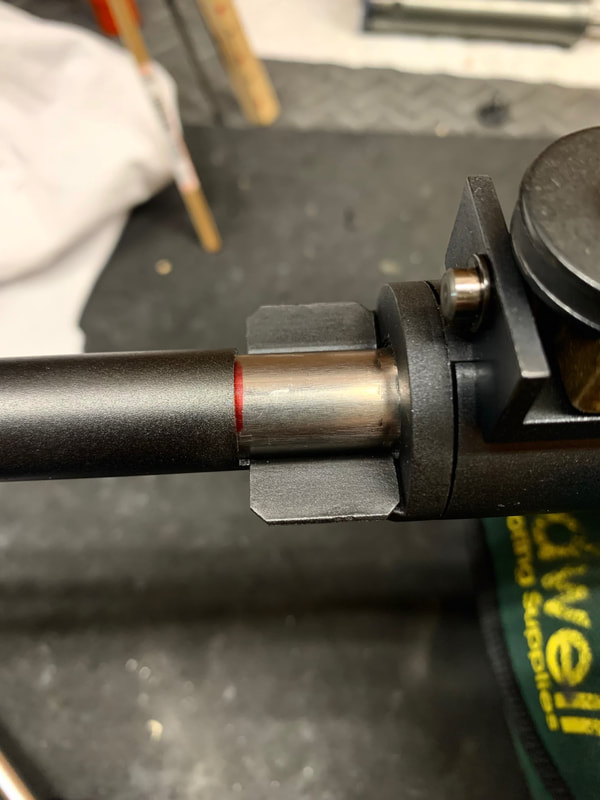
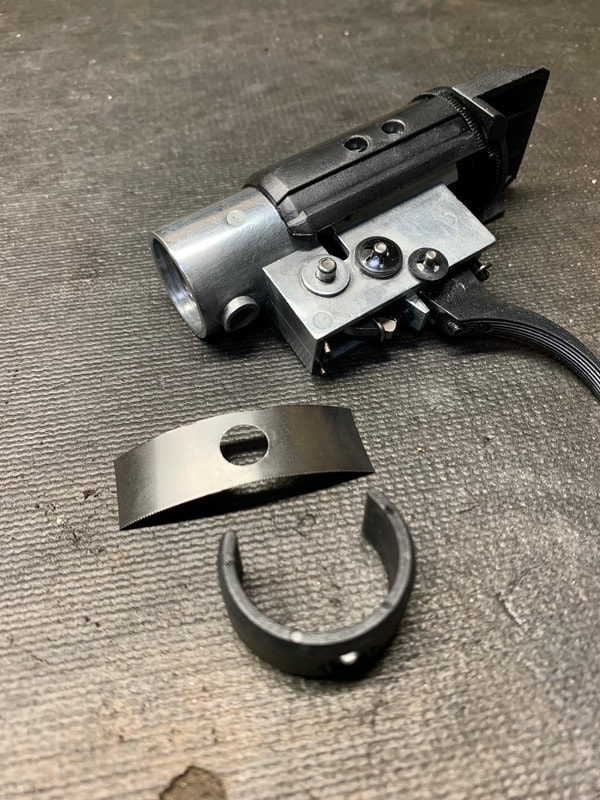
Barrel Shroud (Inner Sleeve) moving – The thin inner sleeve that surrounds the barrel started sliding
backwards within the outer shroud. This happened several times and it did not want to stay in place.
Accuracy was immediately impacted as soon as it began to shift. Hector recommended that I flare the
back end of the inner sleeve to keep it from sliding underneath the outer shroud. After doing this, the
sleeve hasn't budged. I marked it so that I can always see it at a glance that it is staying in place.
In the attached pictures you can see how far it would shift.
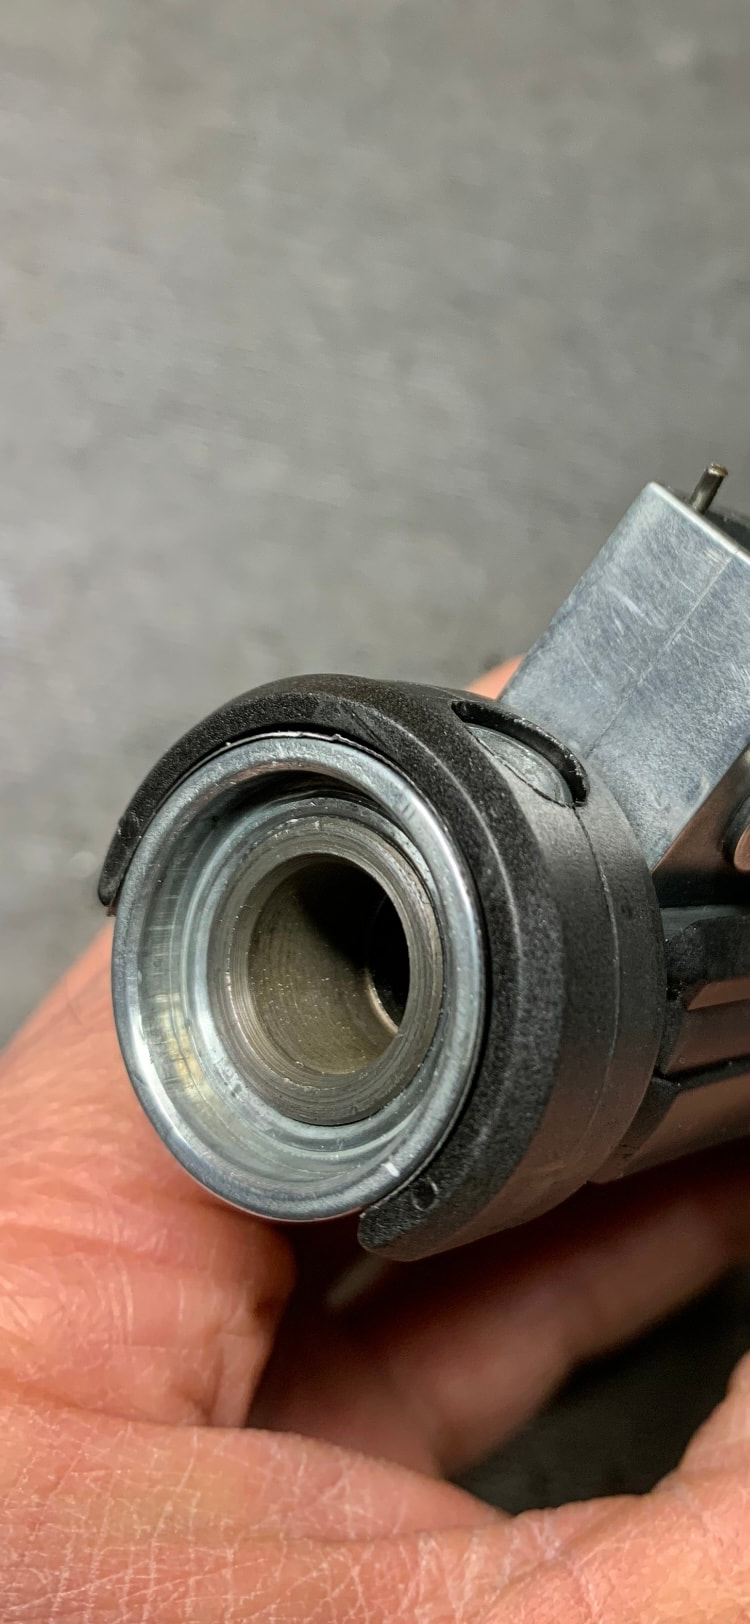
is pressed into the outer breech cylinder at the factory. I would like to mention that many spring piston air
rifles have this issue to one degree or another, so this is not just an issue with the Diana.
As I slowly pressed a pellet through the breech, it would get tight at this one spot, and then free fall with
no resistance until it hit the choke. Because lead is soft and does not spring back, the tight spot essentially
resizes the pellet, allowing it to lose contact after the tight spot until it hits the choke area. This is not
good and can definitely contribute to fliers as pellets are unstable through much of their travel down the
bore until they hit the choke.
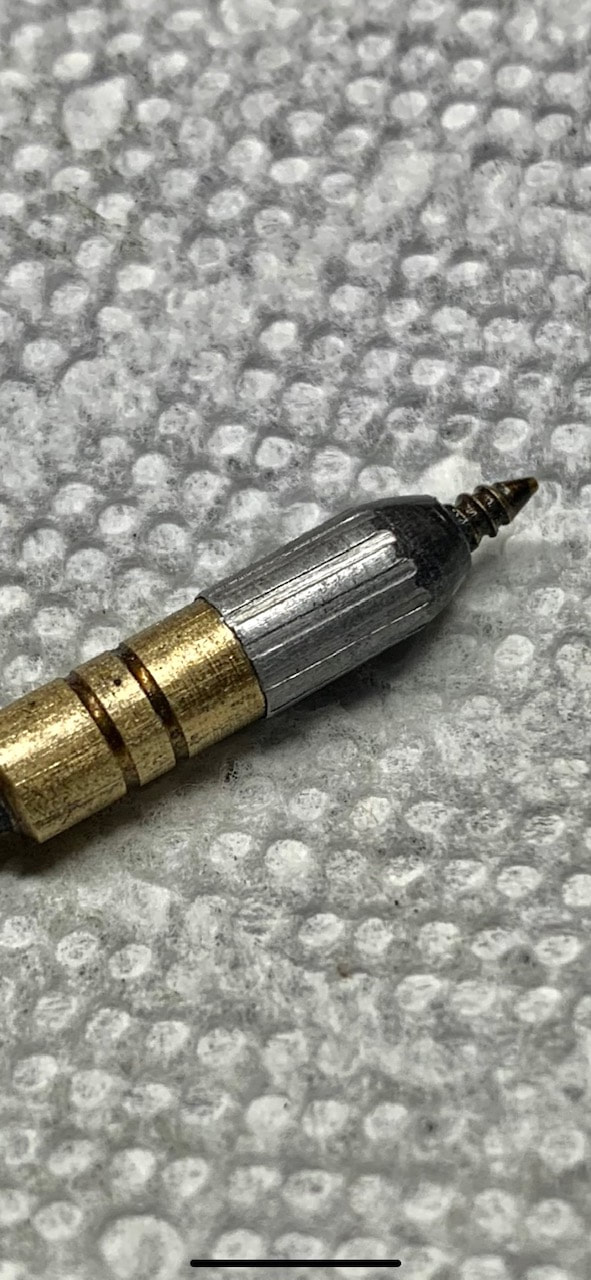
At first I attempted to polish this out using felt pellets on a brass jag, but that did nothing. I then decided
to hand lap the tight spot using form fitting lead slugs screwed onto a brass jag. This was a tedious
process where I used a number of lead slugs and compounds of 120/220 grit, 400 grit and then a final
polishing. The slugs were an exact fit to the rifling and once removed could not be reinserted. After
pulling them from the breech, and new slug had to be made.
A generous coating of grease was applied as a carrier for the compounds, while I worked solely on the
tight spot, testing pellet fit often. When I was satisfied that the tight spot was leveled out, I worked the
entire length of the breech to blend things in, followed by an overall polishing up to the choke with felt
pellet on a jag using JB followed by a mild polish. After this was complete, pellets pressed through the
bore had a nice even pressure from breech to choke with absolutely no free fall.
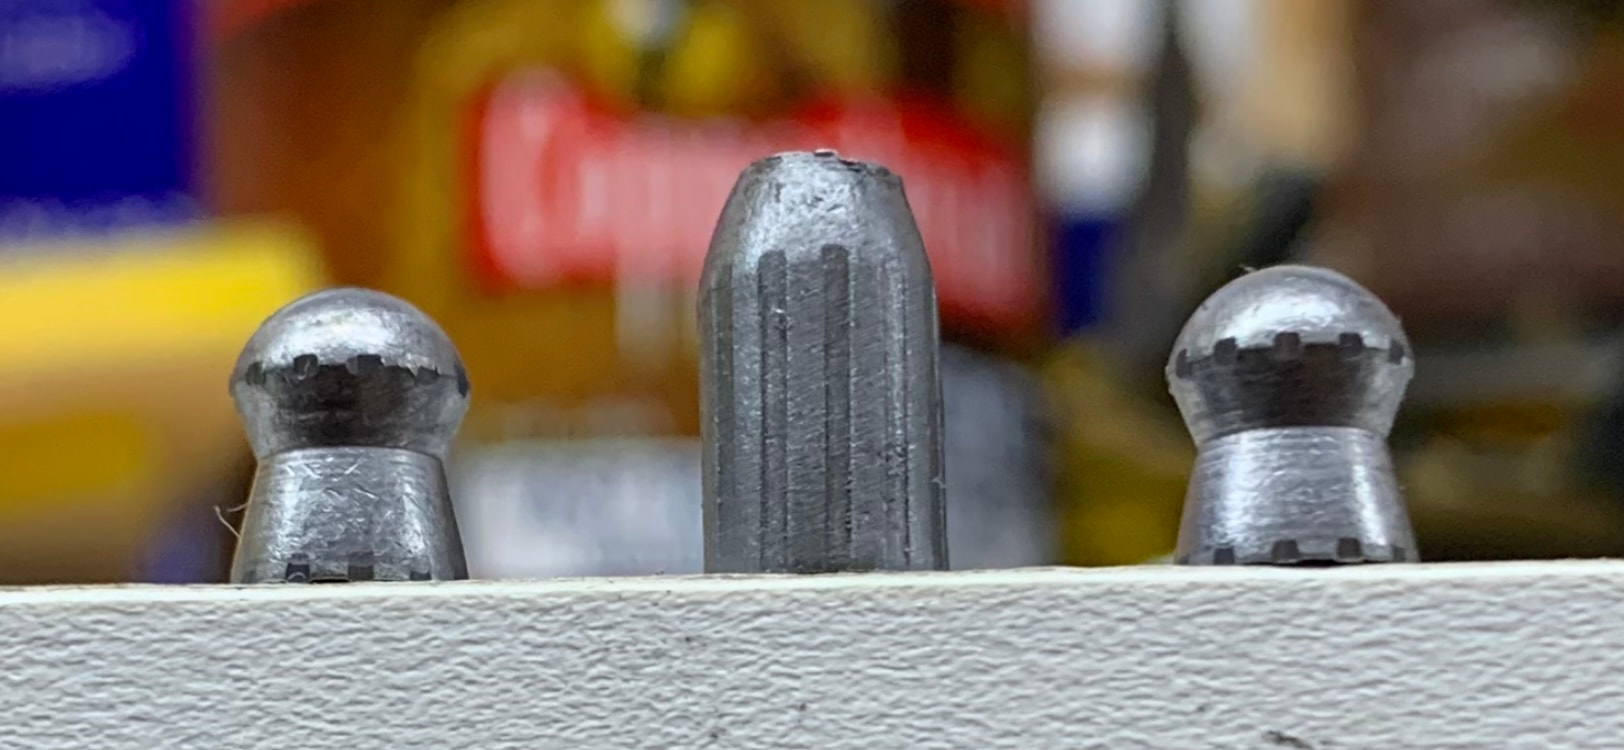
In the photo below you can see the difference in the rifling engagement on the pellet. Pellets were
pressed up into the barrel, but stopped before they reached the choke, and then pressed back out through
the breech. The pellet on the left was “before” the hand lapping, and the pellet on the right was “after”.
Big difference.
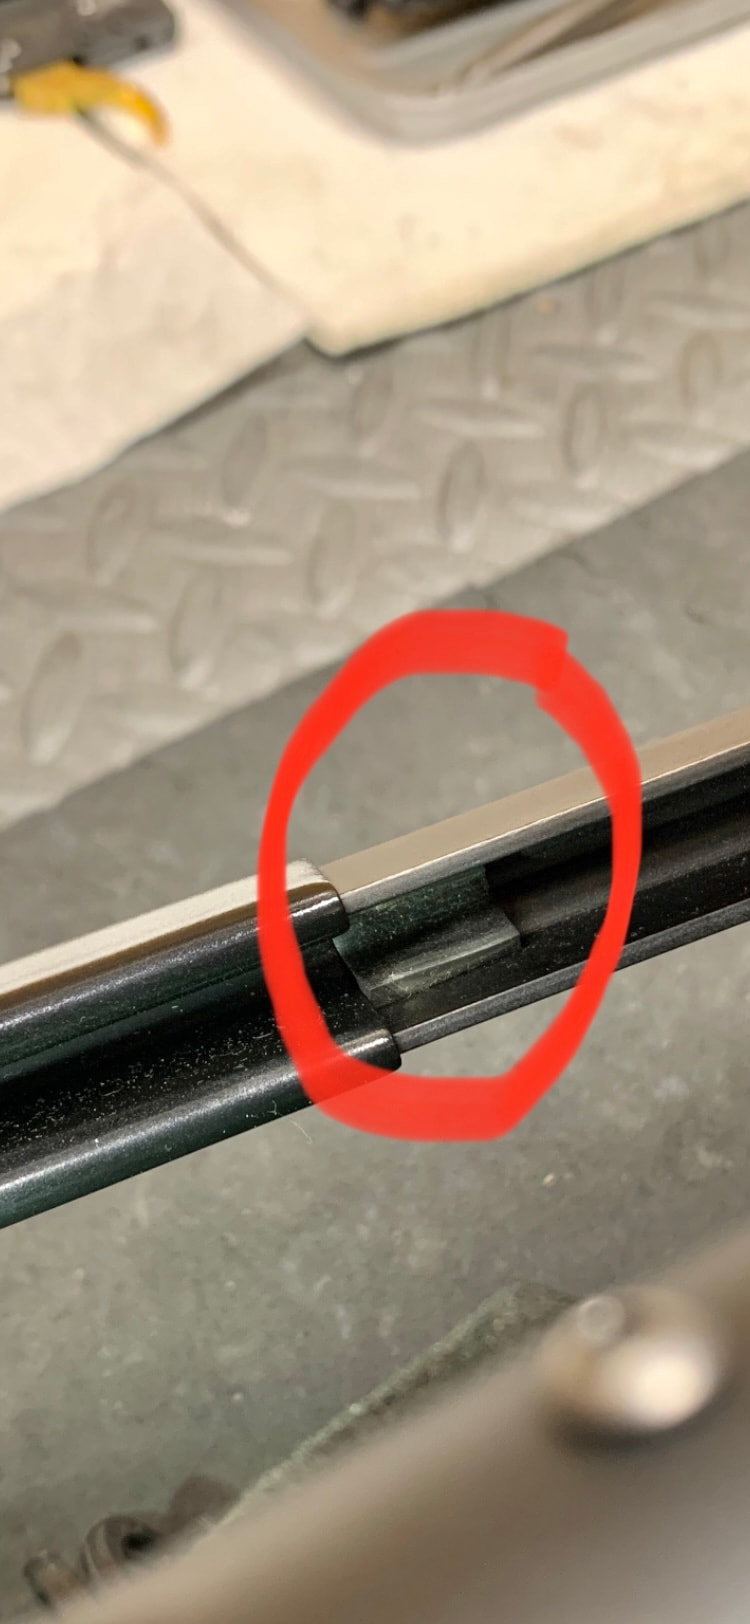
slightly loose fit to the rail.
For most of this testing I had worked solely on the rear sled tension, and although the rear sled tension is
absolutely critical in maximizing accuracy on the D54/56 platforms, it did not get rid of the fliers.
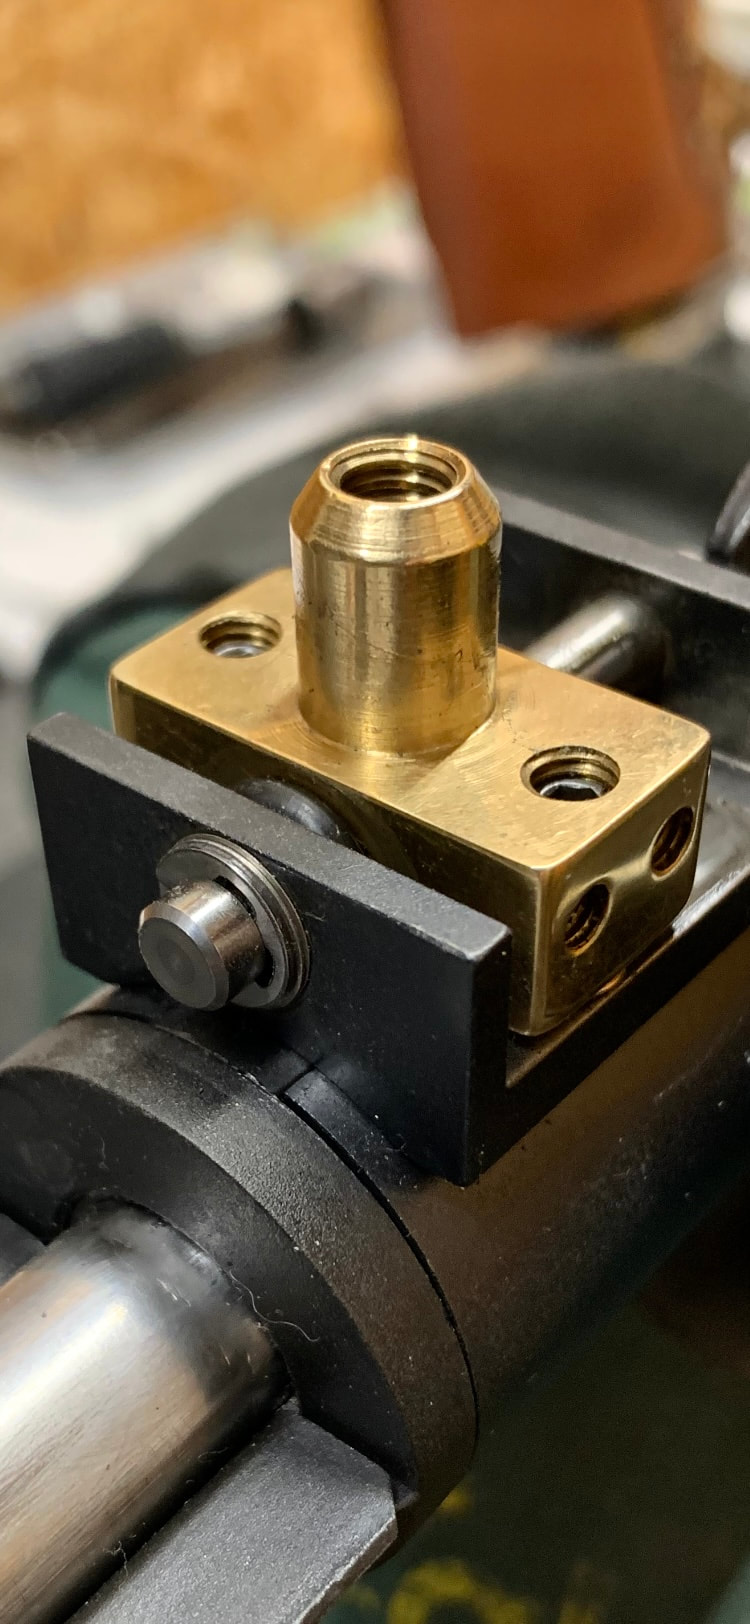
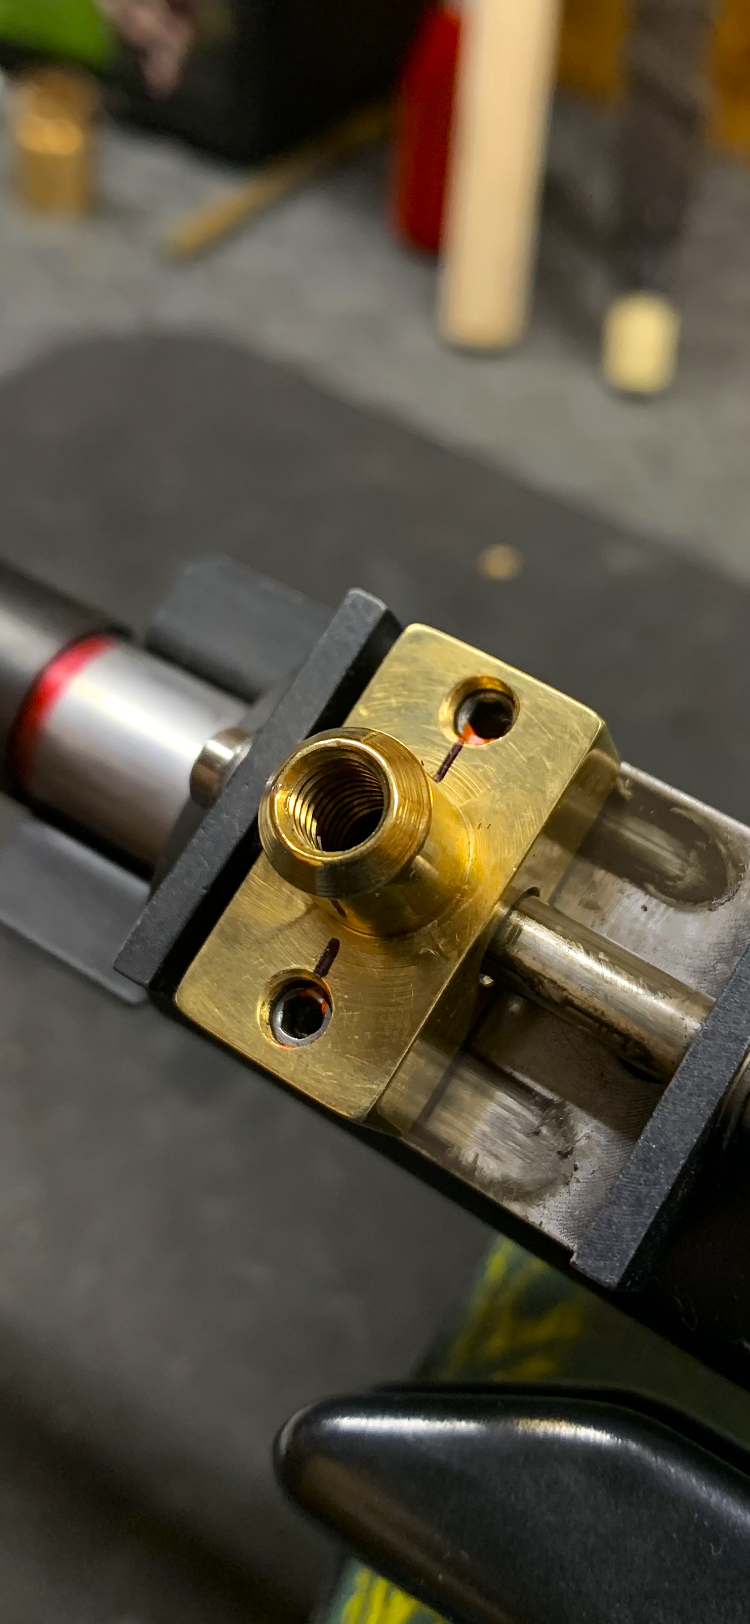
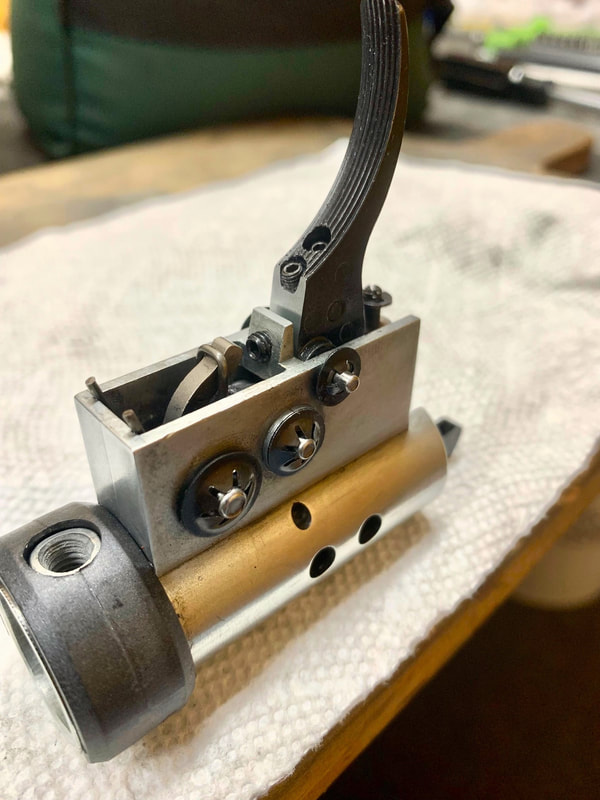
After studying the design of the front sled and its single rail, I decided to modify it in a way that would
tighten things up and remove the looseness, while at the same time allowing tension adjustment similar to
the rear sled, but with smoother movement than the OEM ball bearings.
A summary of what was done:
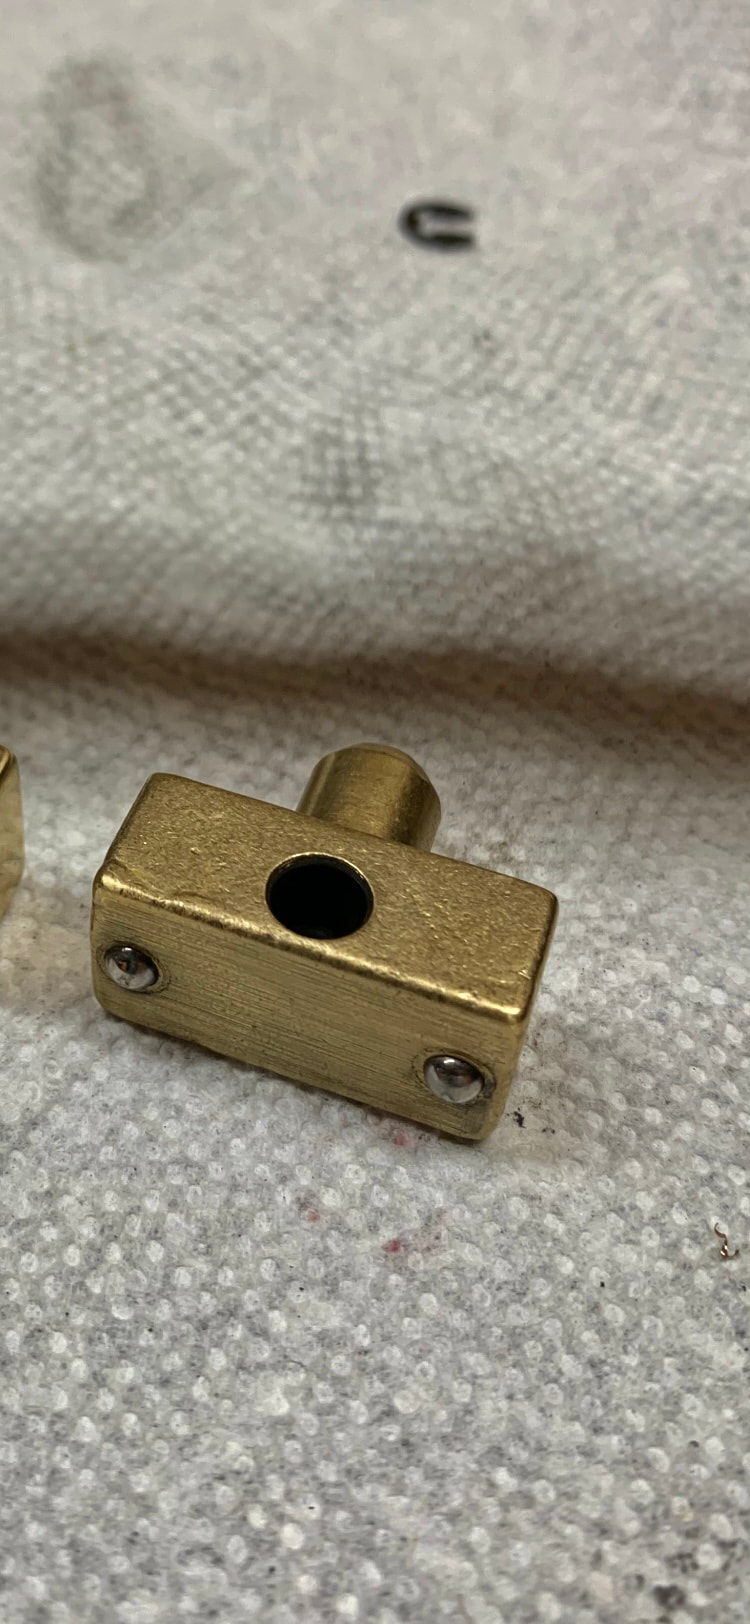
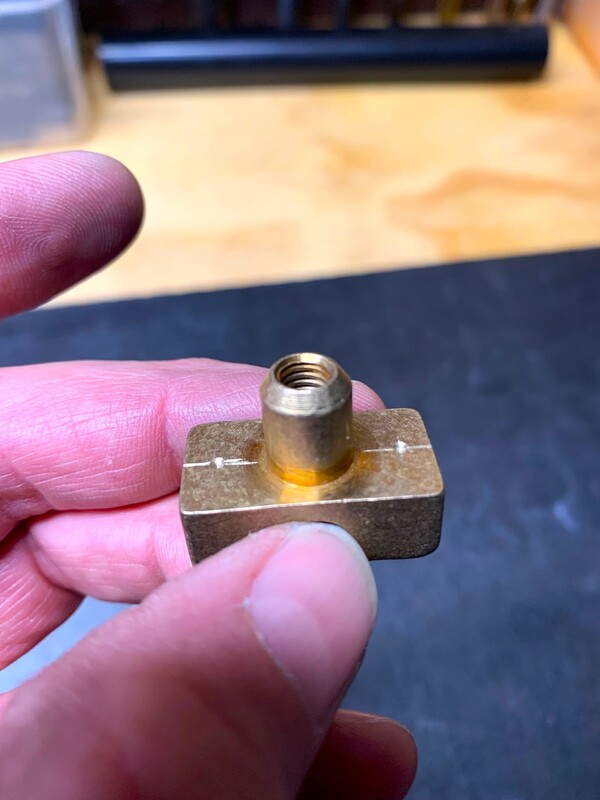
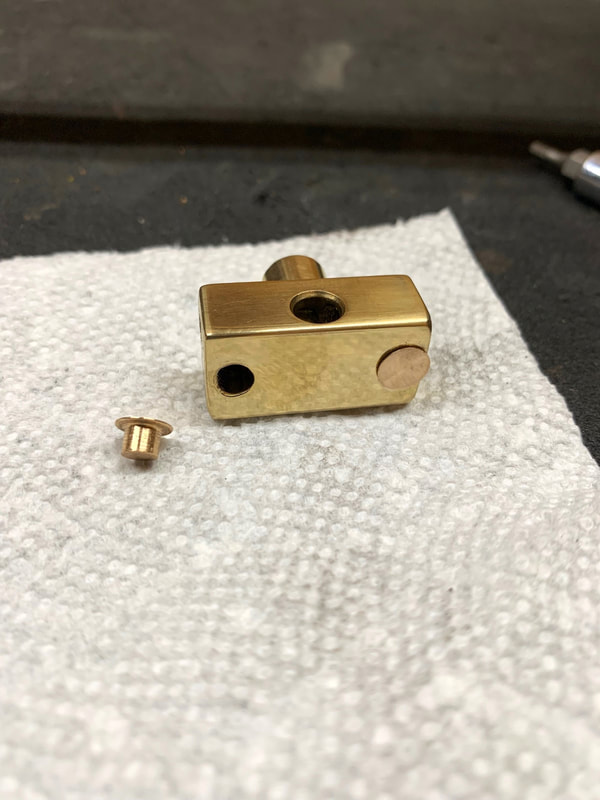
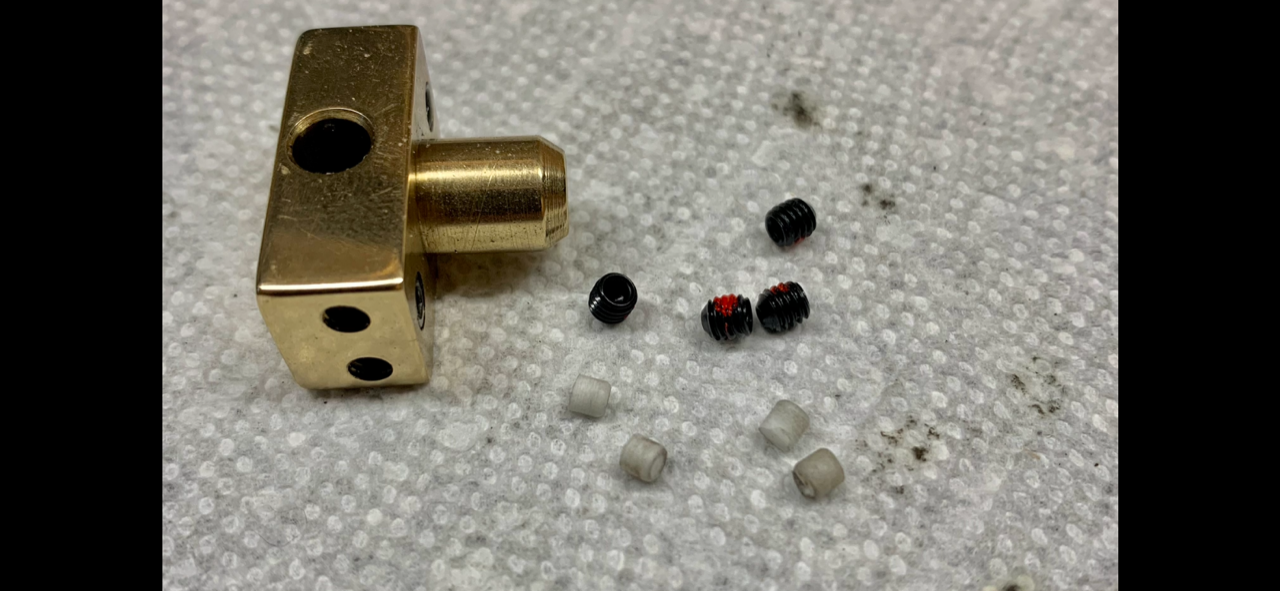
• Existing springs/balls were drilled out and removed.
• Balls were replaced with pads machined from phosphor bronze, using the original springs (minus
1 coil) for tension. Nylon locking set screws were added so that spring tension on the feet could
be adjusted.
• Two holes were drilled on either side of the sled block, and PTFE gibs were added to hold tension
against the rail using nylon locking set screws.This eliminated the slop between the sled block
and rail.
This idea was borrowed from Hector's accurized ZR mounts.
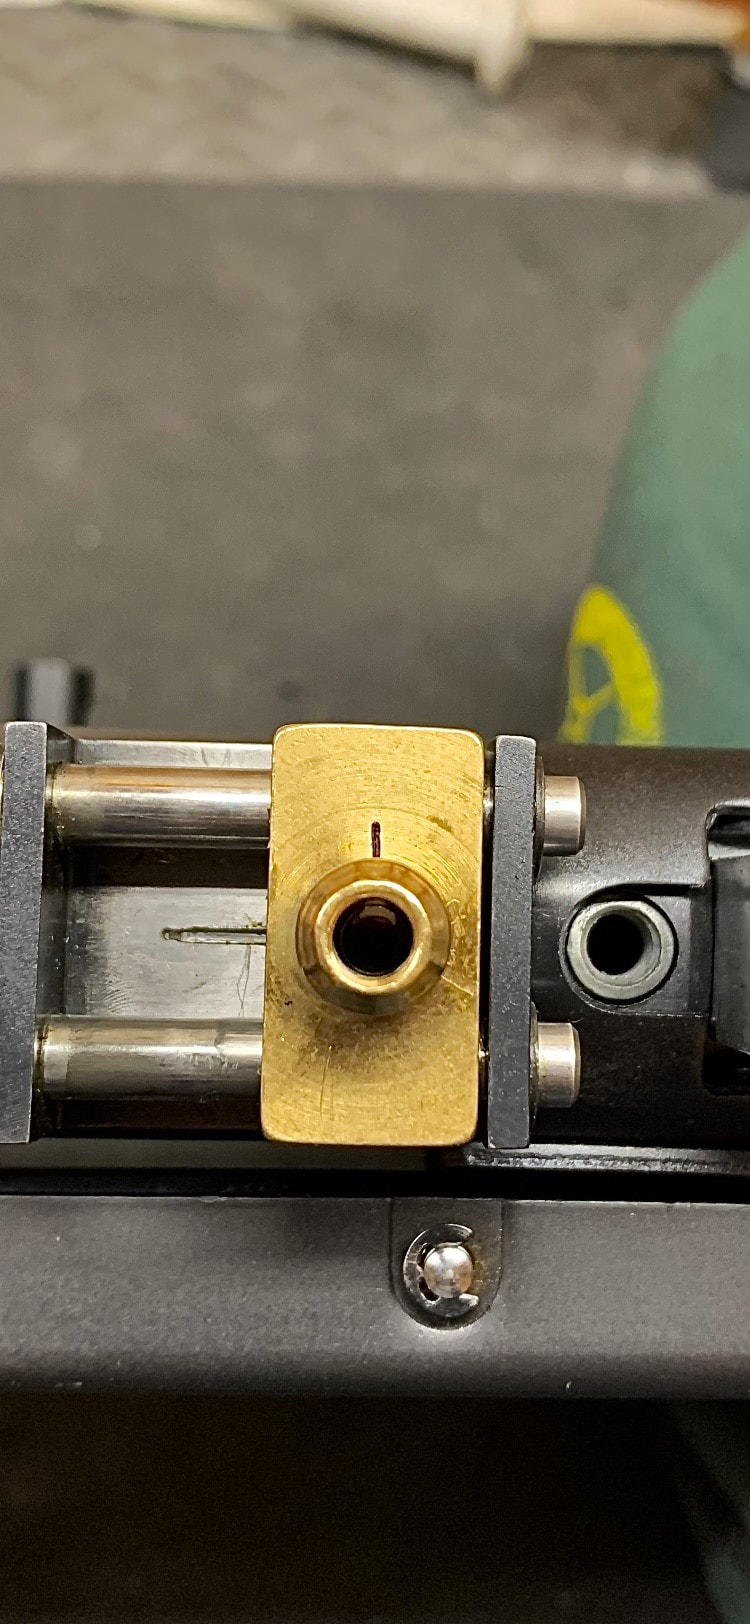
added to the top of the sled blocks to enable a quick check that settings were holding
accuracy on this platform. I initially thought that running the front sled with the least amount of
tension/resistance would give the best accuracy, and when the spring loaded bronze feet were first
installed I had extremely low tension on the front sled. Accuracy was much worse.
The front sled must have tension on it for maximum accuracy and repeatable POI. It kind of acts like a damper for the rear sled, smoothing out the unlocking during the shot, and adding consistency to the
overall sled movement. It is a balancing act and with the added adjustments on the front sled, fine tuning
can now take place for optimized accuracy. Set it too loose and accuracy will suffer. Set it too tight and
you will begin to feel some recoil and the rifle will become more hold sensitive. I found it best to tighten
up until I felt a little recoil and then back off a little bit. Same goes for both front and rear sleds, if you
begin to feel some recoil, you went too tight.
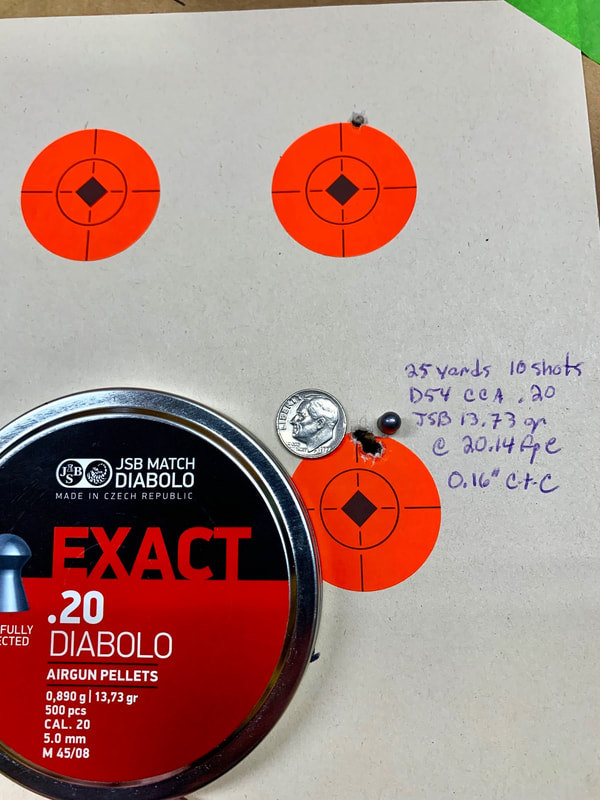
The two things that had the most impact on getting rid of the fliers were the breech lapping and
the front sled modification, with the front sled modification having the most impact overall.
Results on target were clear, fliers were gone. Here is a 10-shot group at 25 yards
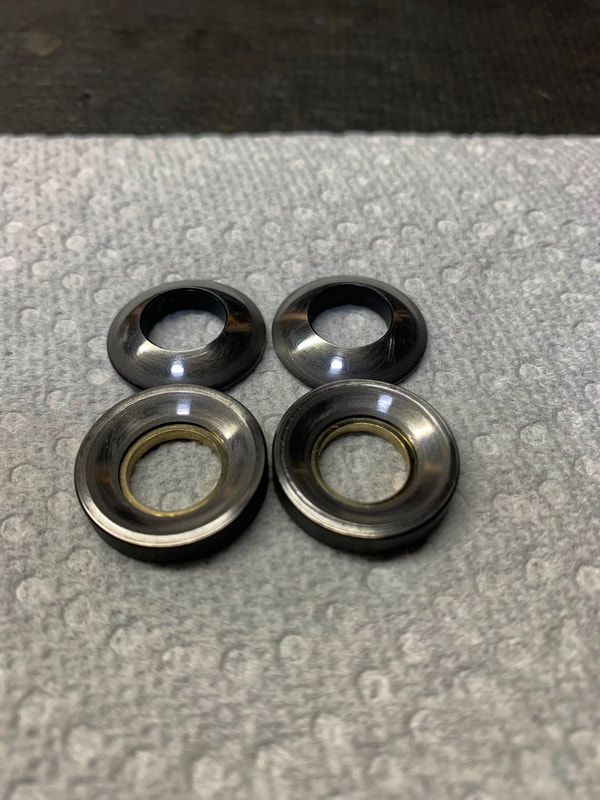
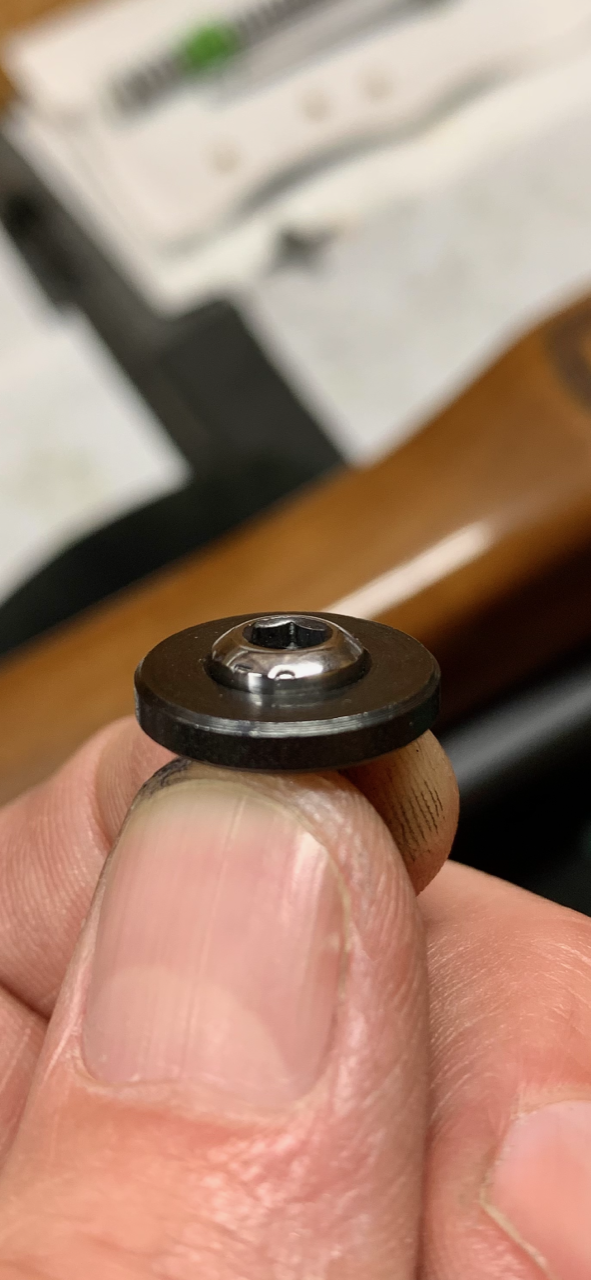
metal self-leveling washers in place of the OEM metal and rubber washer assemblies inside the stock.
With self-leveling washers in place, the rifle would shoot well, and then all of a sudden the POI would
shift. I would then adjust my scope and be fine for a while, but the POI would then shift again and I
would have to adjust once more. The problem was eventually discovered as outlined below.
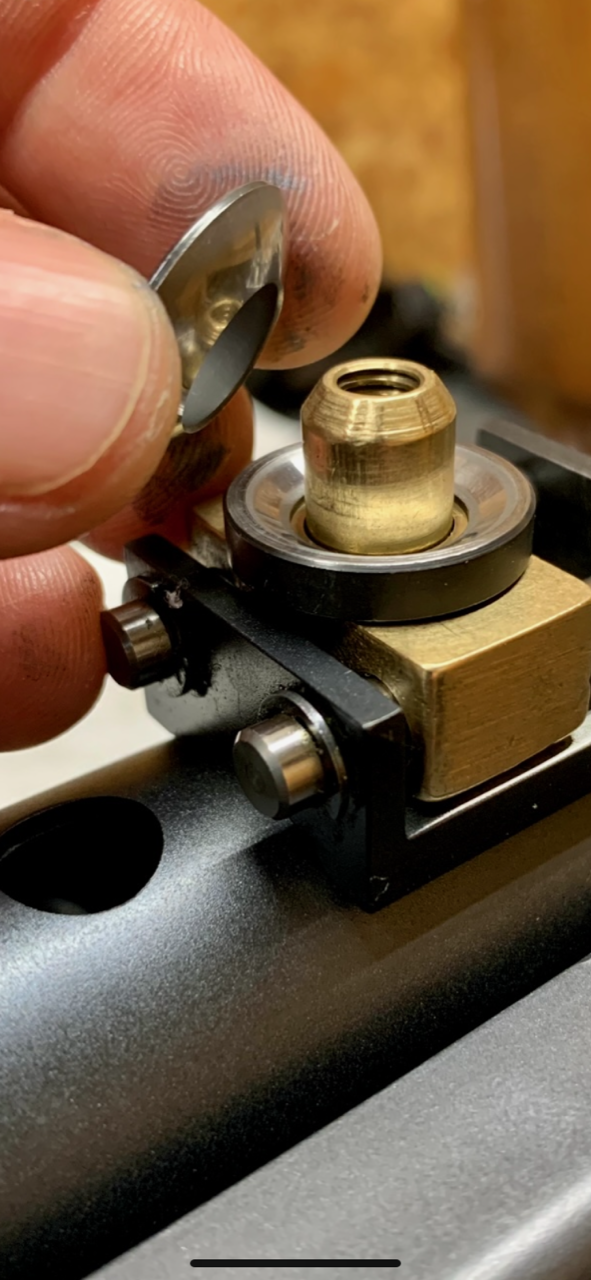
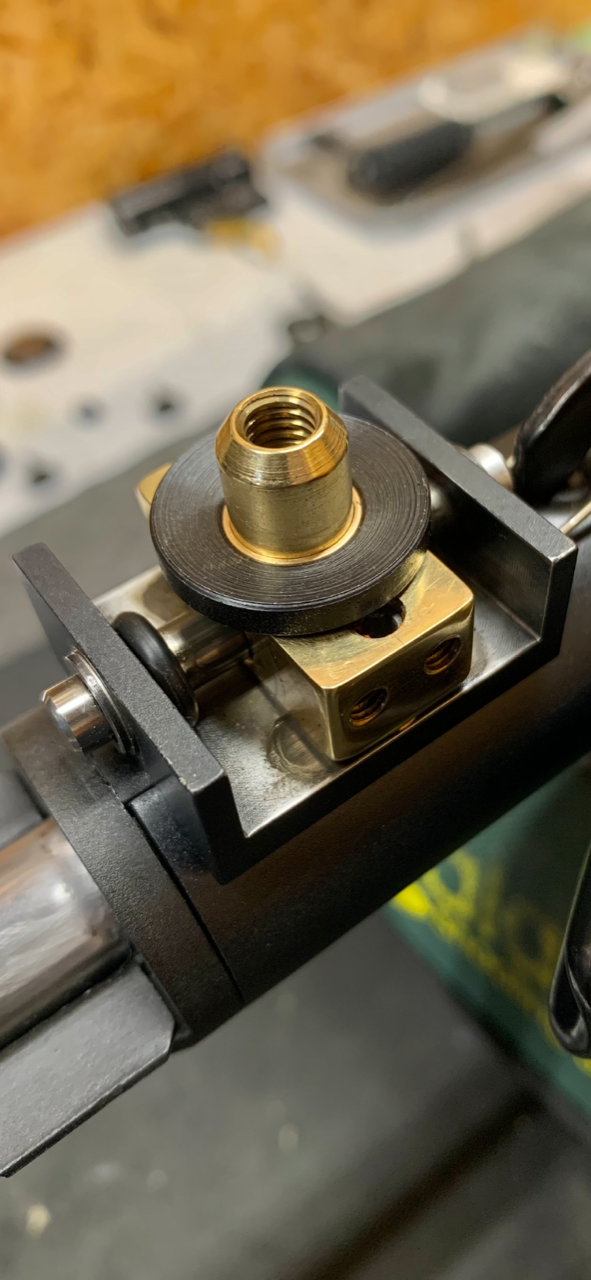
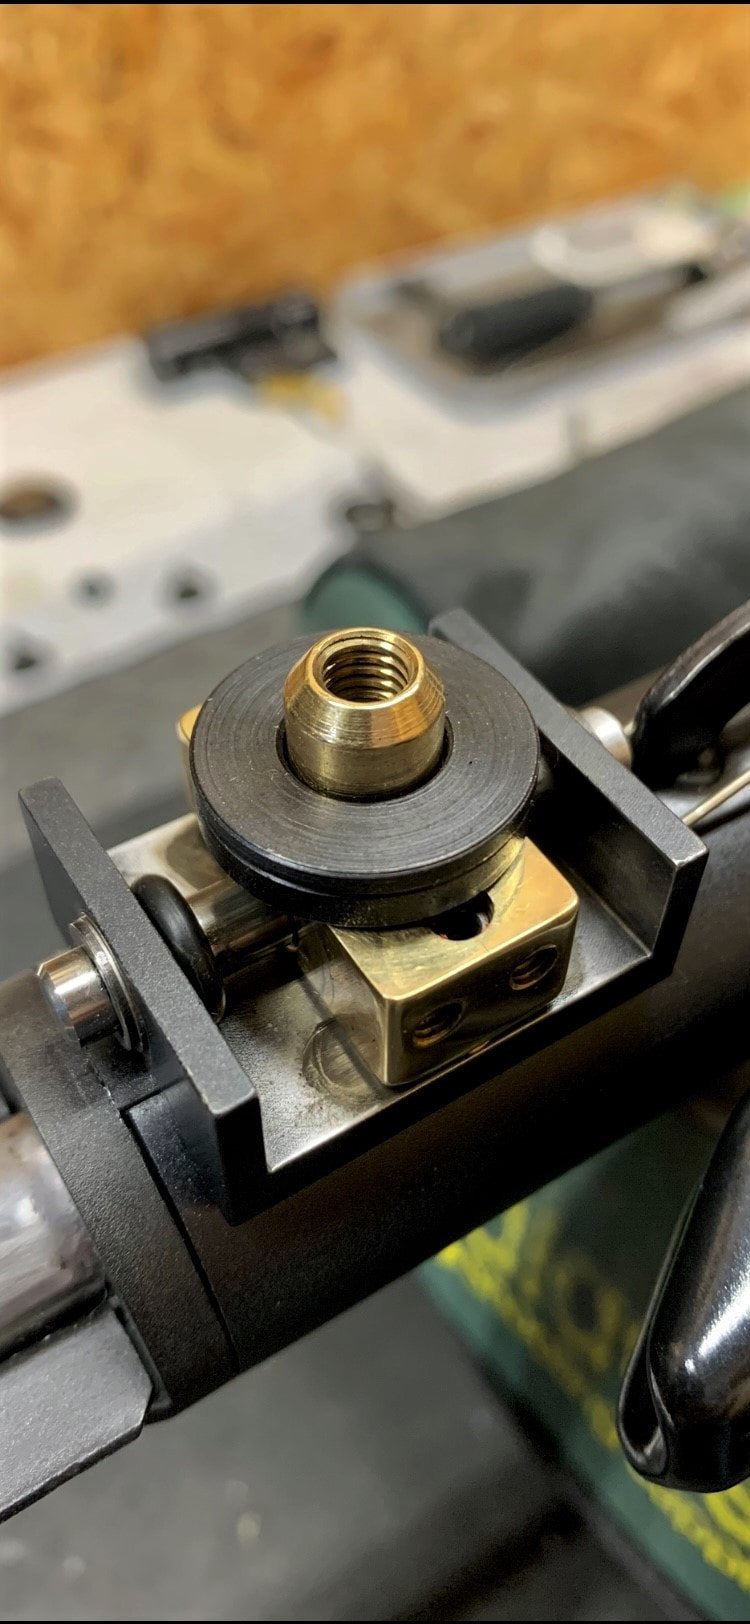
Self-Leveling Washers – When the self-leveling washers were first installed, I polished the mating
surfaces to allow them to level out more smoothly when the stock was in place. I also added bronze
bushings for a tighter fit onto the post of each sled. While the bronze bushings were a nice modification,
the polished surfaces were not. I discovered that they were too smooth and would allow the washers to
shift when shooting, resulting in shifting POI.
Polished
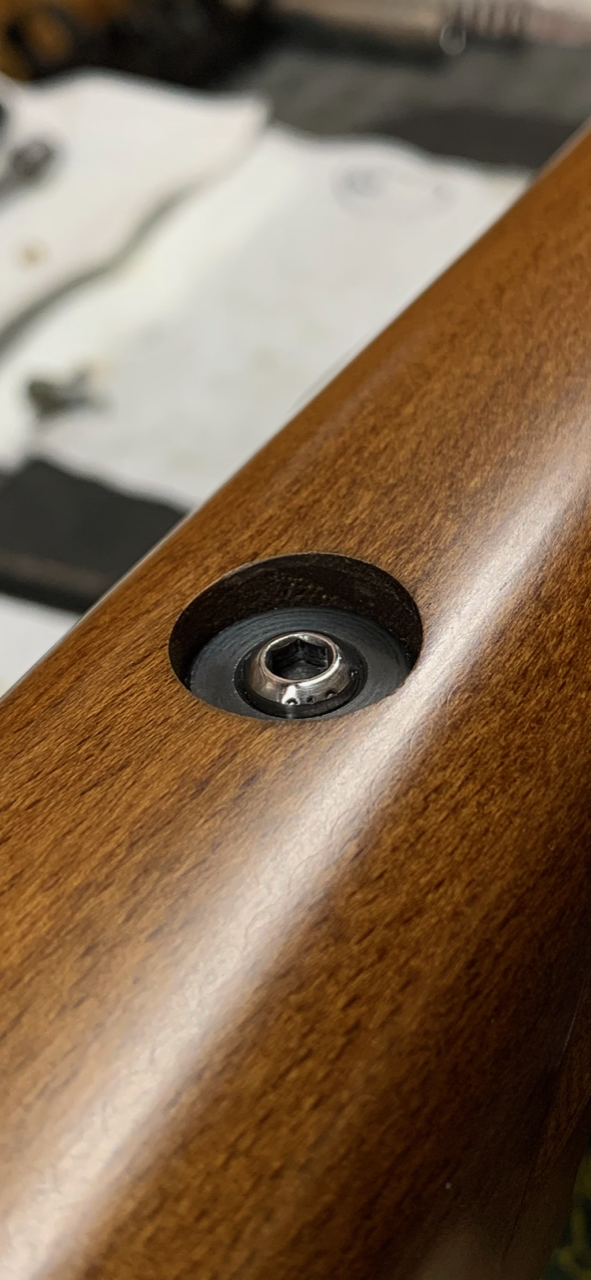
unpolished. I still added the bronze bushings, but did not polish them. I tightened the stock mounting
screws up to 30 inch pounds and have had no problems since. They stay put and offer what I believe to
be a more consistent and rigid sled movement without having the variability of the OEM rubber washers.
Unpolished
additional changes made to enhance accuracy and improve repeatability of POI
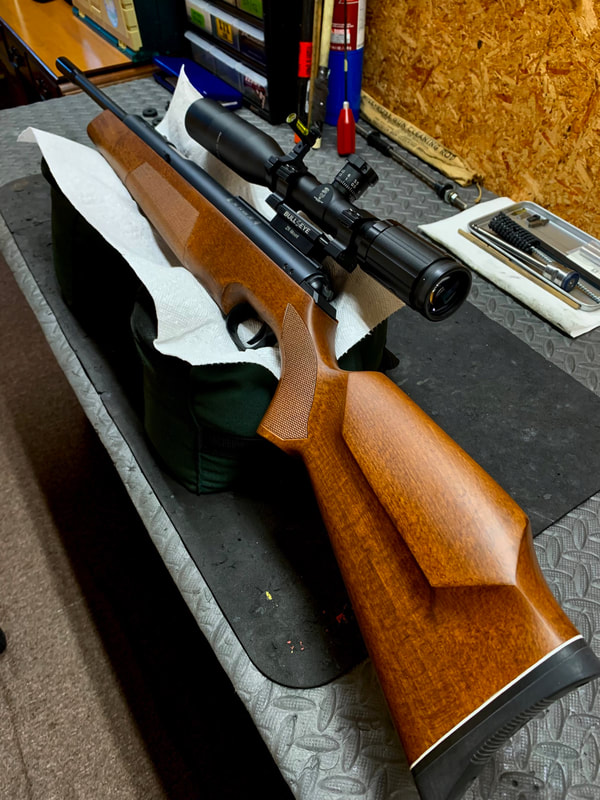
I eventually received the OEM D54 stock from Hector and installed it for the remainder of this testing
.
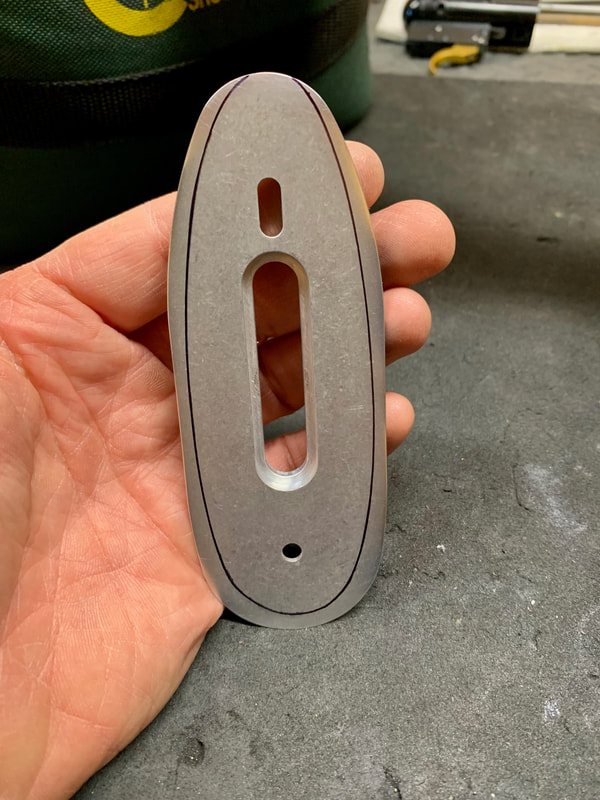
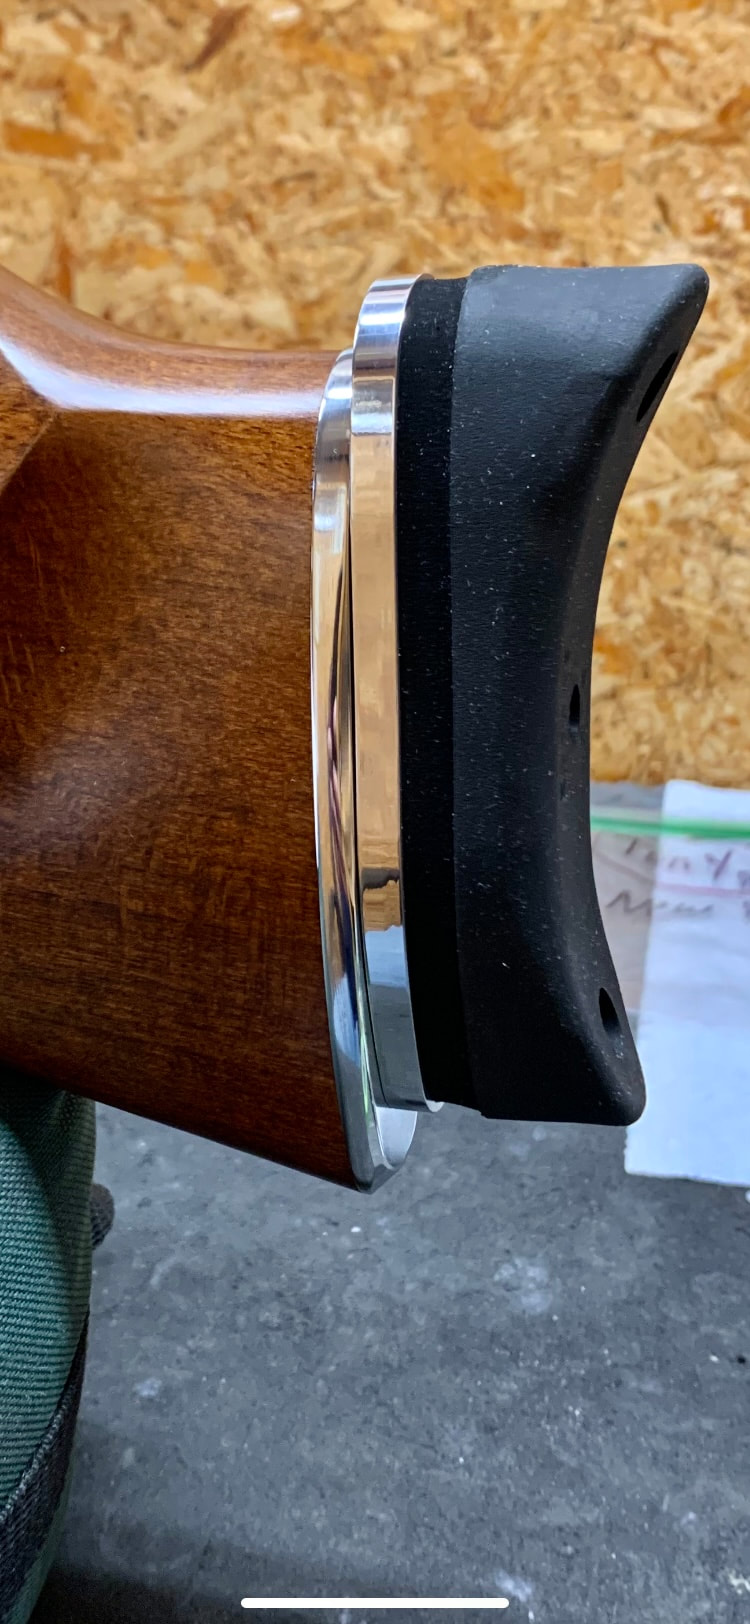
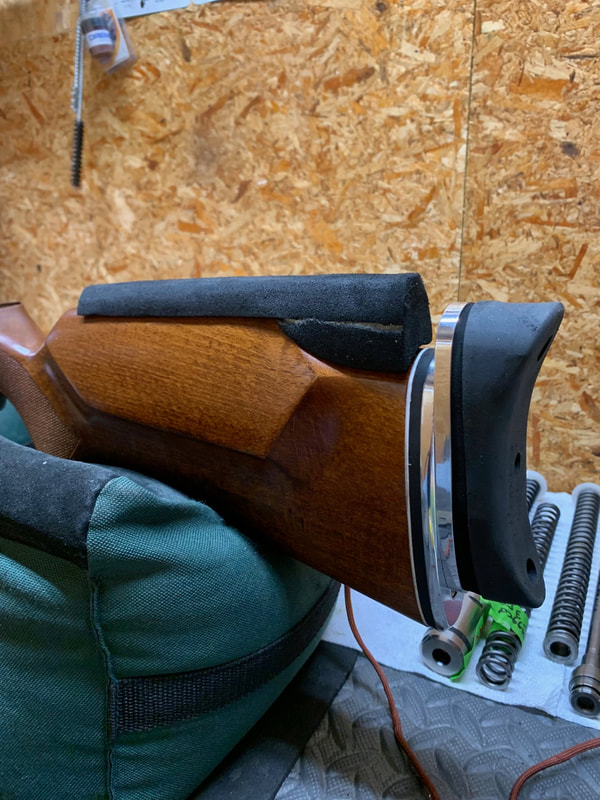
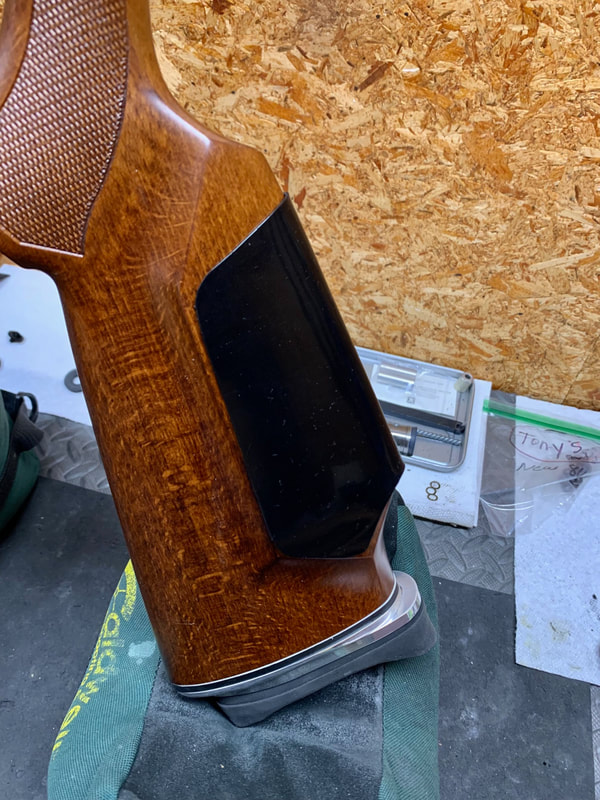
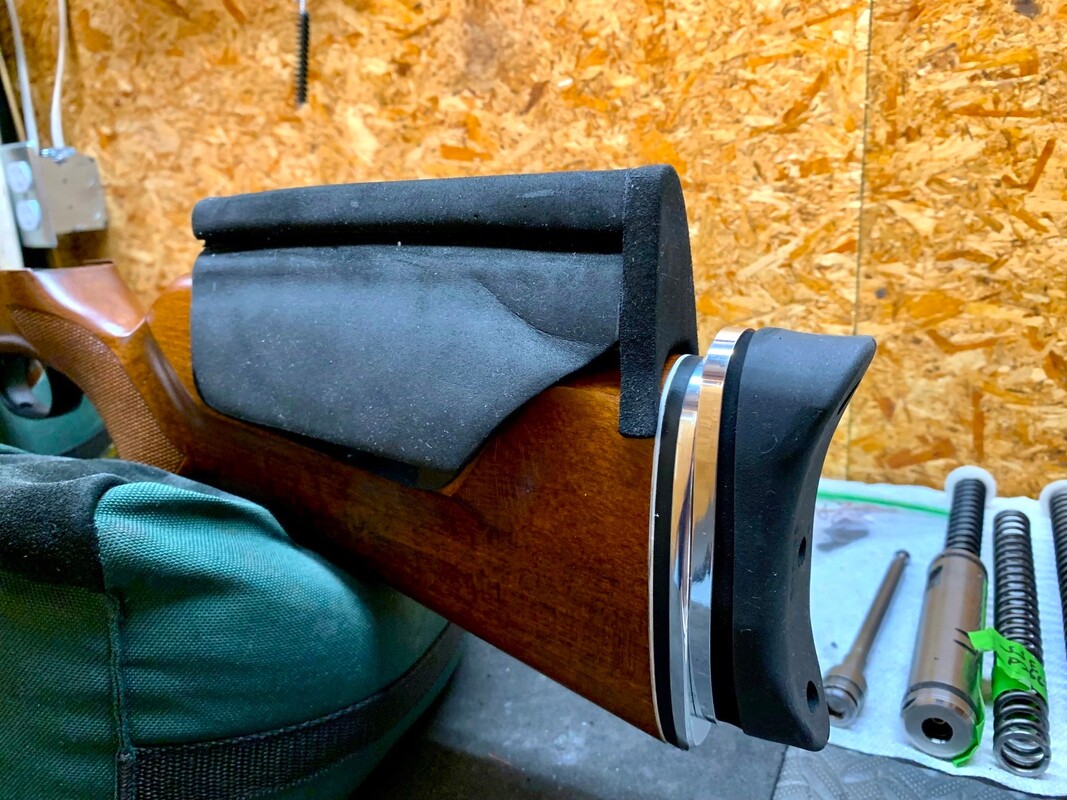
Recoil Pad – After switching over to the Original D54 stock, the length of pull was too short for me, and the cheek rest was way too low. This caused neck pain and issues on target.
The first step taken was to install a Morgan Premium Curved adjustable recoil pad. This has an aluminum
base that requires custom fitment to your rifle, and you must pick a size that is closest to the dimensions
of your butt stock. I ended up letting the OEM plastic spacers in place for some added length, which
worked out perfectly.
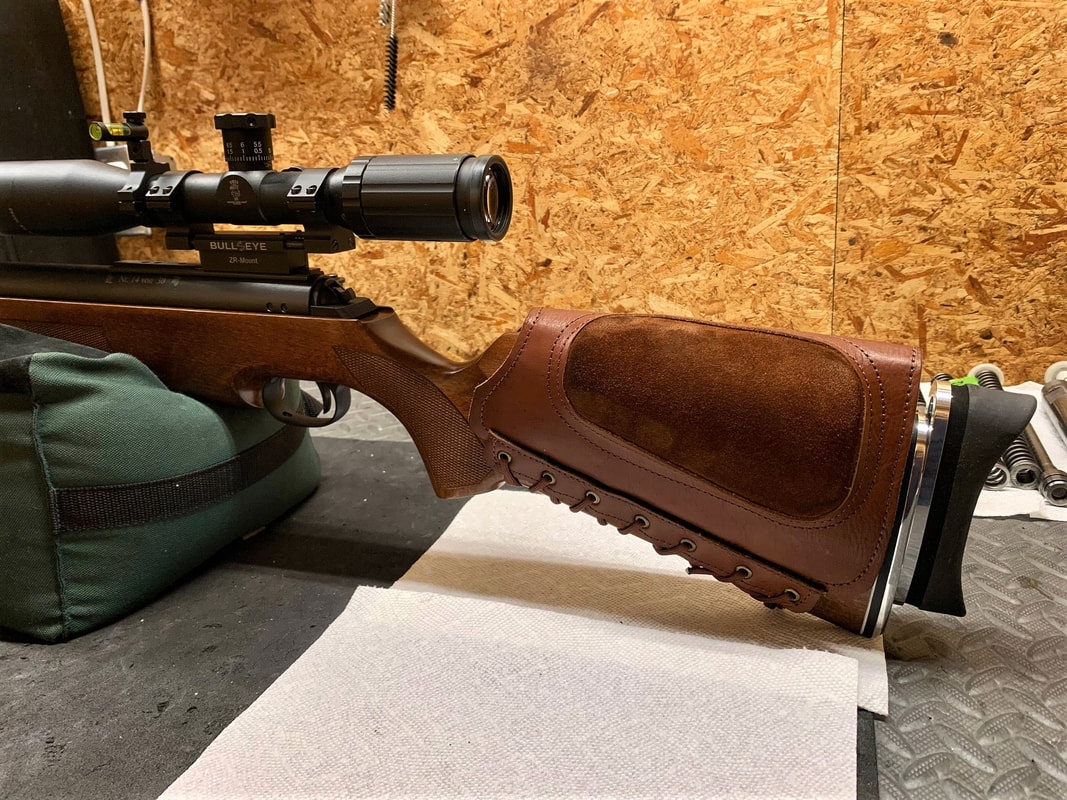
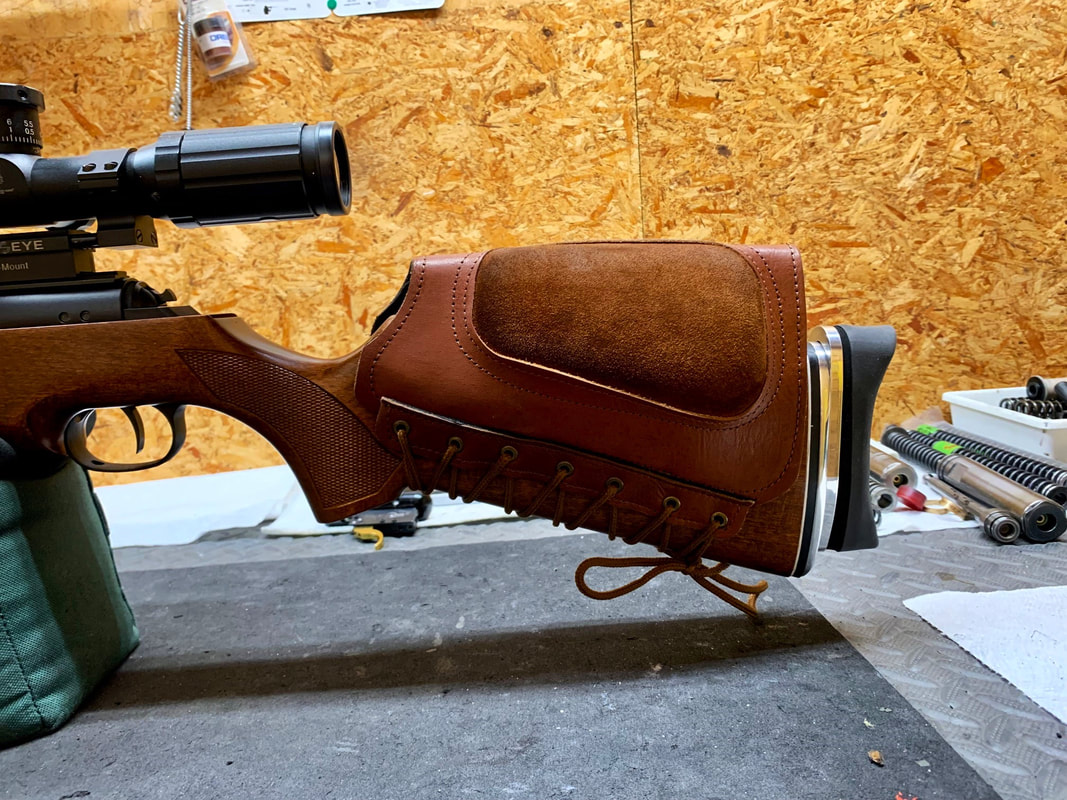
without lifting my head off of the stock. I reached out to Hector for suggestions, and ended up purchasing
one of his leather, padded cheek rests. I had used one of these before on a previous project, and
remembered that they were quite comfortable.
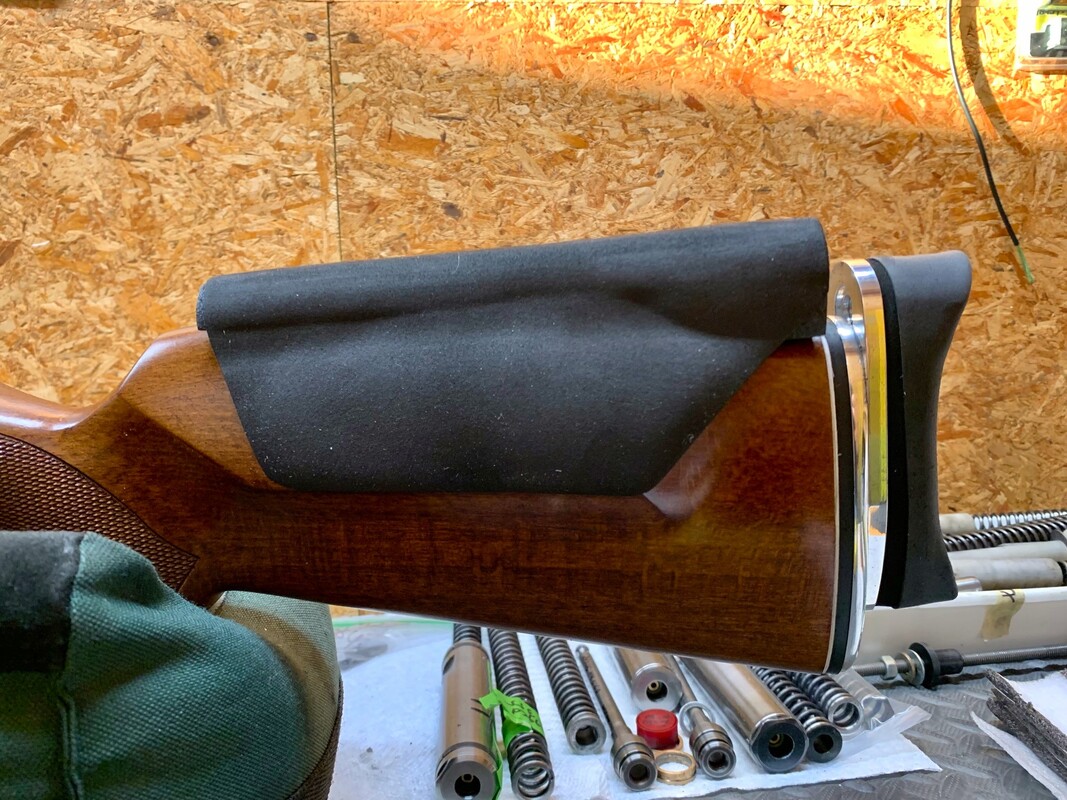
With the leather cheek piece installed, it was still too low. The ZR mount has the scope sitting a little
high, which creates a need for additional height on the cheek rest. After some research I decided to make
a custom fit cheek riser out of EVA Foam. The EVA foam is easily formed and shaped, and could be built
up to the perfect height, while fitting nicely under the leather cheek piece. A total of 25mm of additional
height was added in order to position me properly behind the scope.
In order to hold this EVA foam riser in place beneath the leather cheek piece, a thin piece of silicone
rubber was added between the wooden stock and the EVA foam riser. This held things in place nicely as
if it were glued.
In the pictures below you can see the difference before and after. The time spent making small
adjustments to the recoil pad position and cheek rest height was well worth it. This process reminded me
of my years spent shooting target bows. The fit of my bow was so critical in being able to repeat my
shots on target.
Fine tuning the rifle fit greatly improved the ability to repeat POI around the target. Being able to
position yourself consistently shot after shot is extremely important for both accuracy and POI
repeatability.
above, I had already been through a couple sessions of tuning the HT. However, now that the fliers were
under control, the OEM stock installed and the rifle fine-tuned for fit, I wanted to run one final test to
verify the ideal setting.
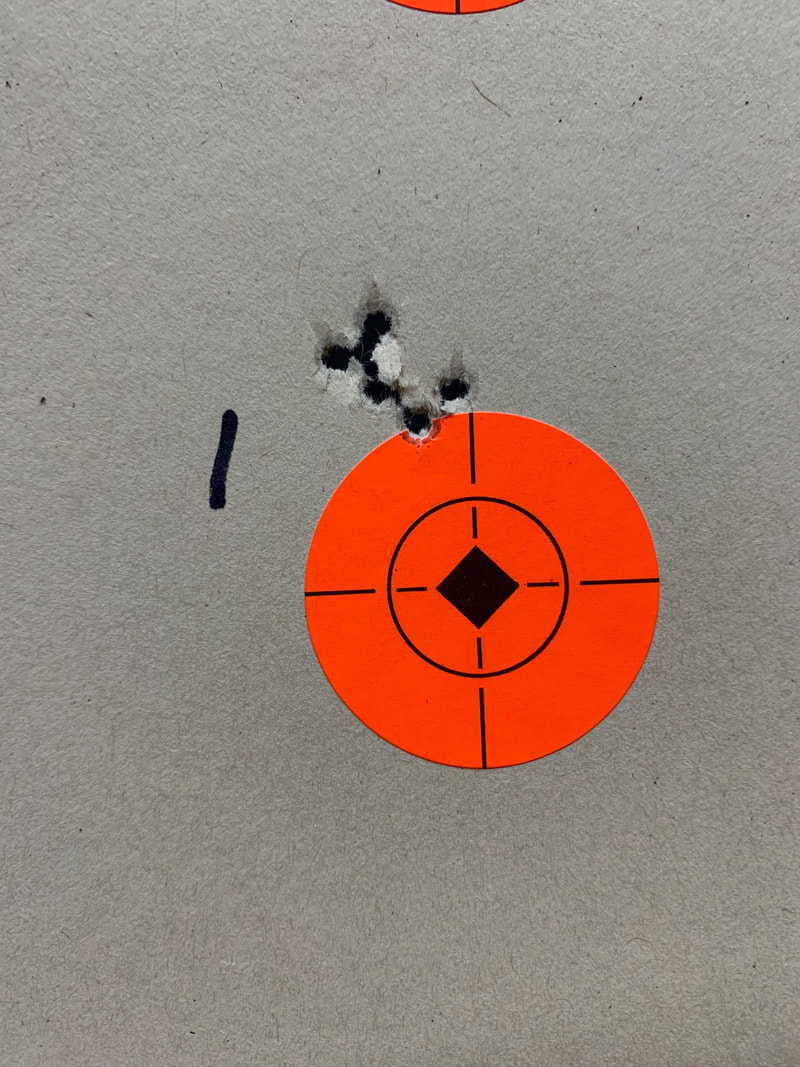
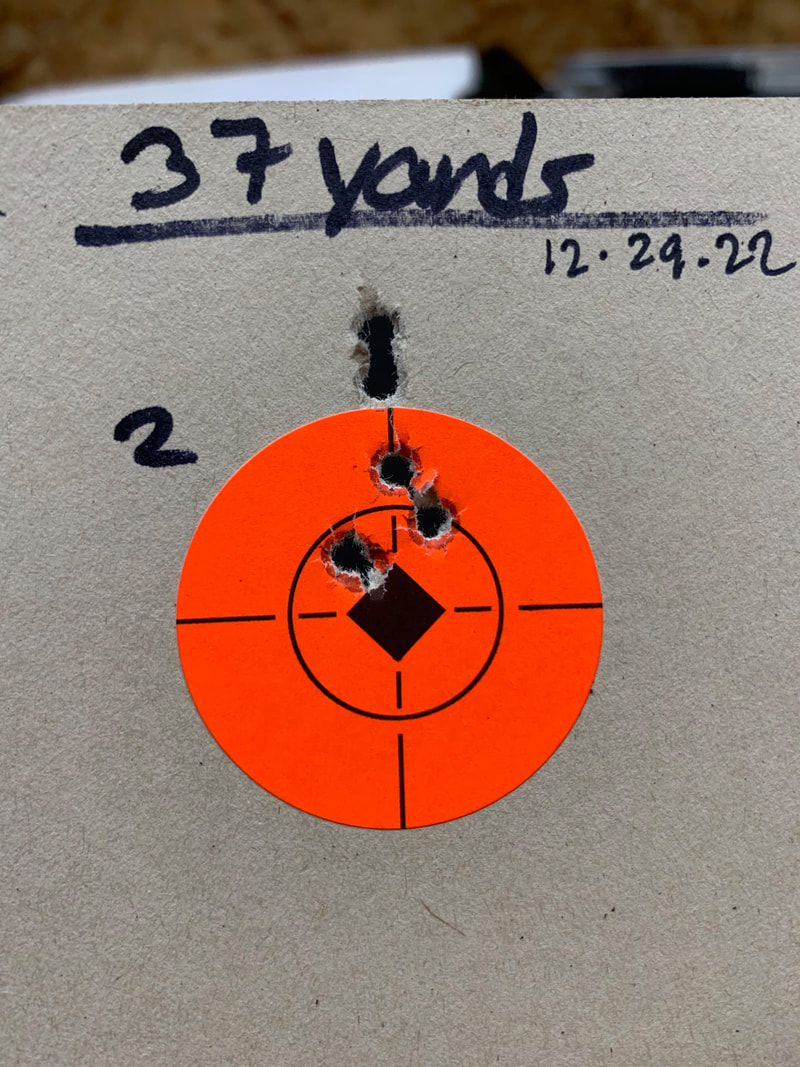
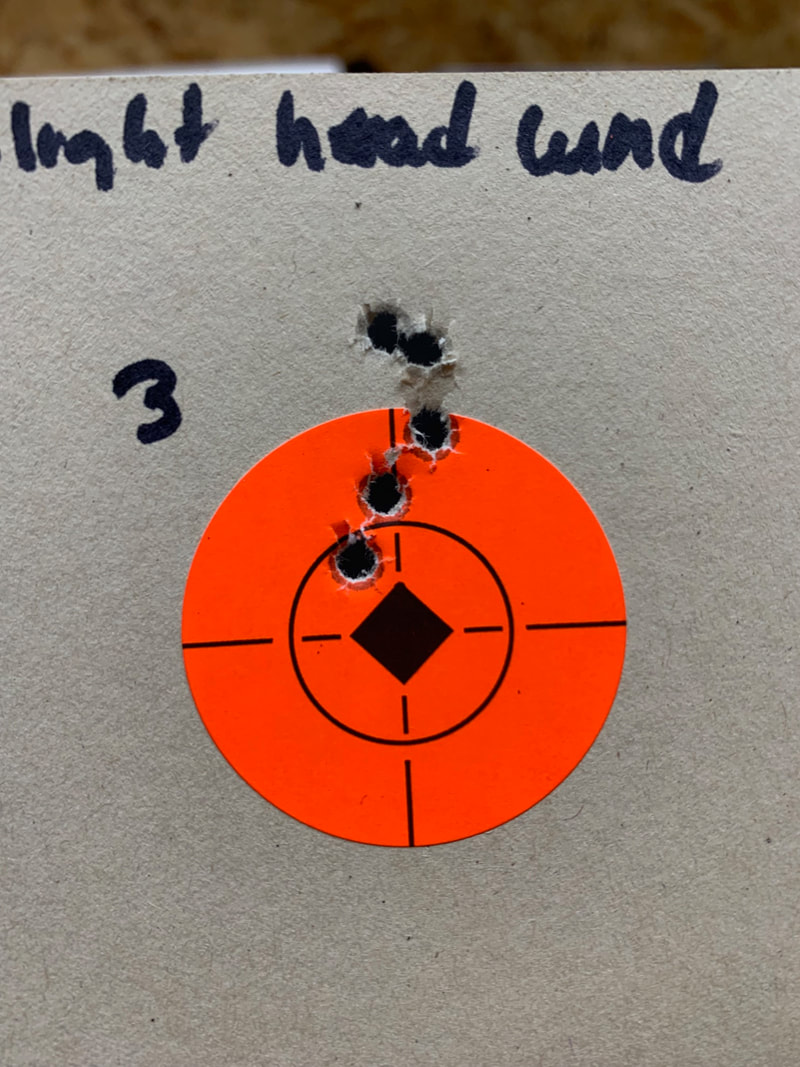
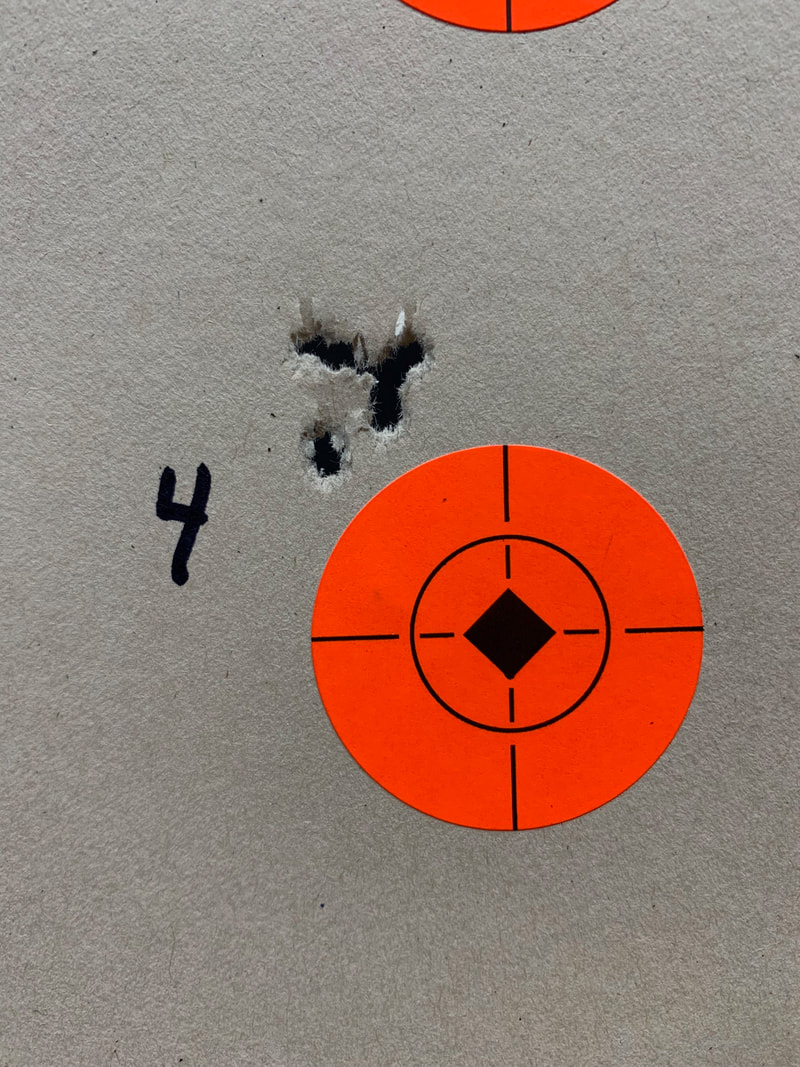
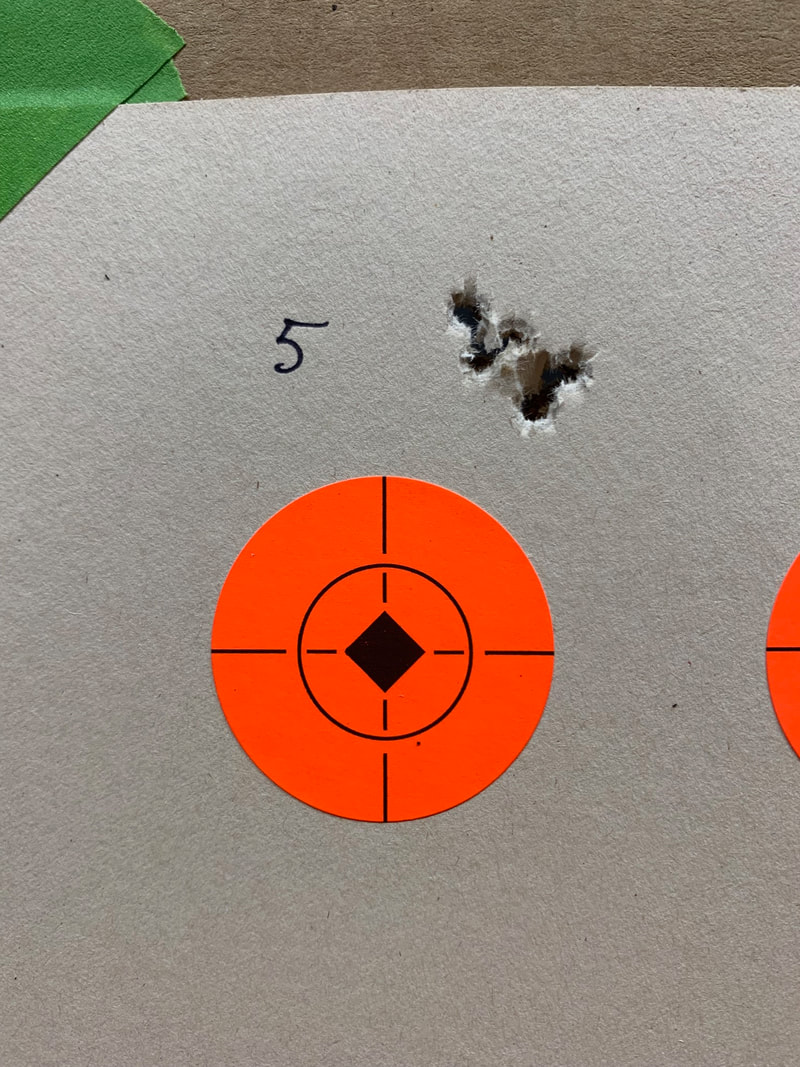
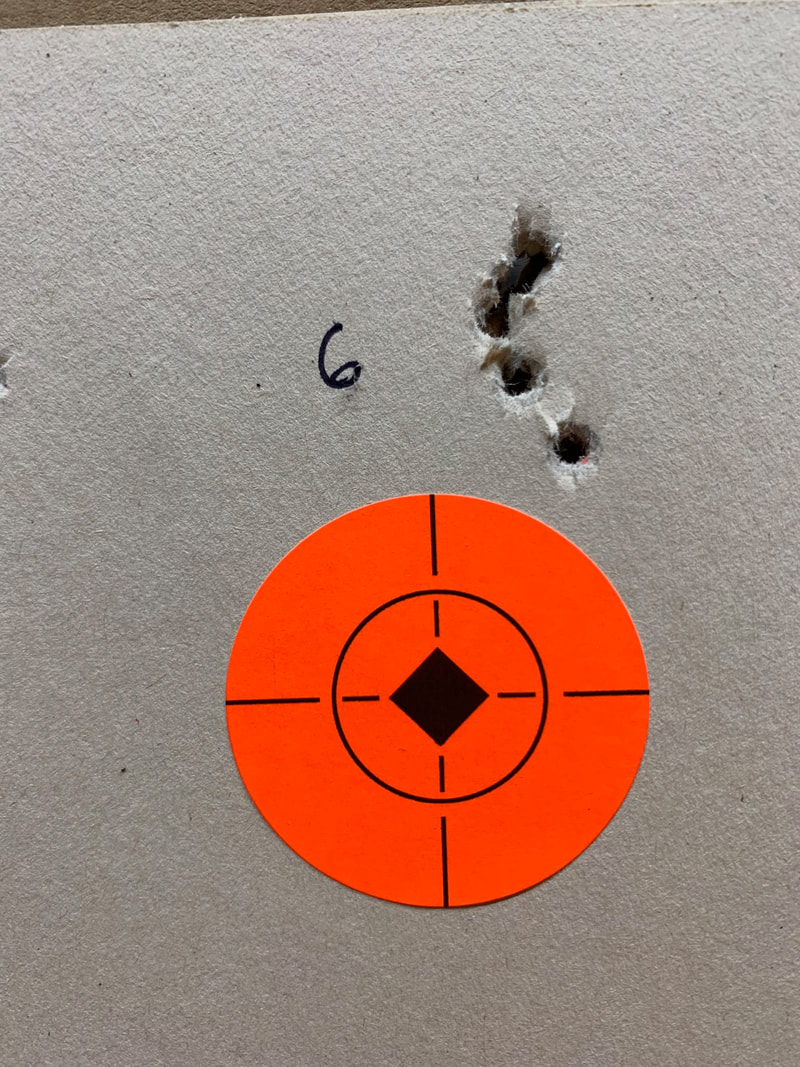
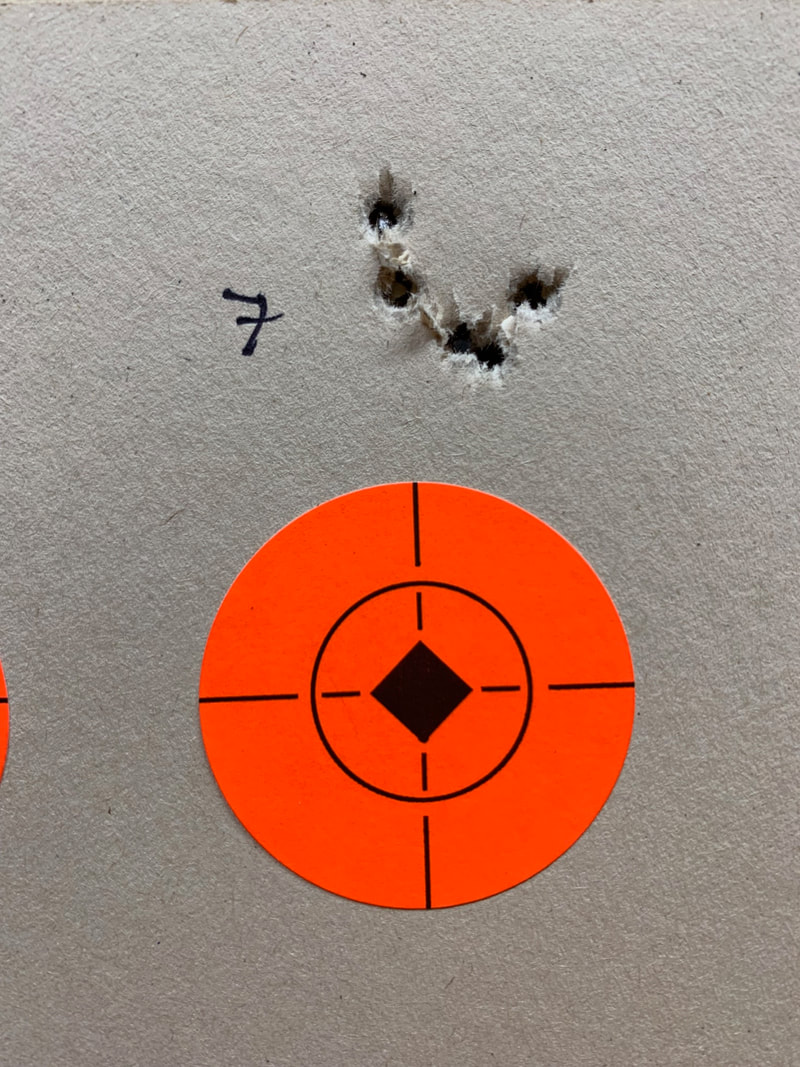
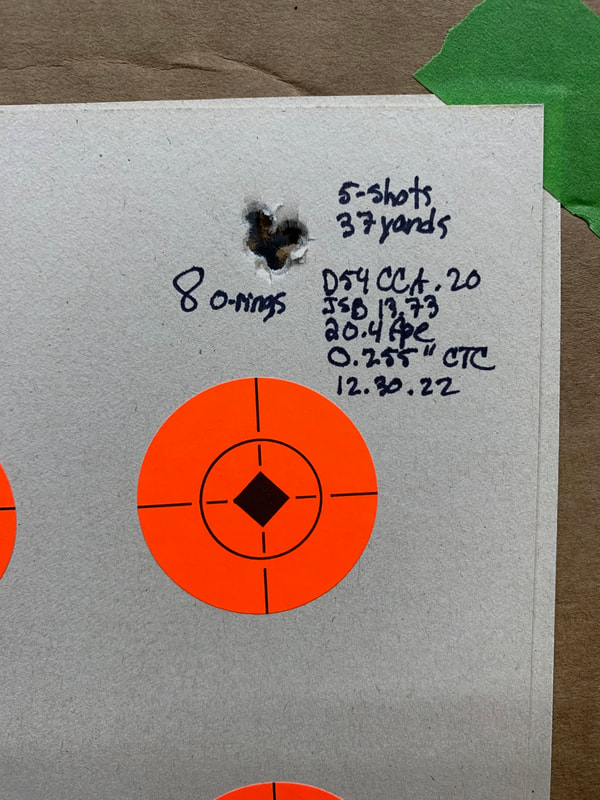
The results were now more clearly defined, and when I reached 8 o-rings it was quite clear that this was
the winner. This was the 3rd test where 8 o-rings had made the list. This test was test conducted at 37
yards. You can see the pattern changes as the muzzle swing transitions from vertical to horizontal, and
then settles close to an end point at 8 o-rings.
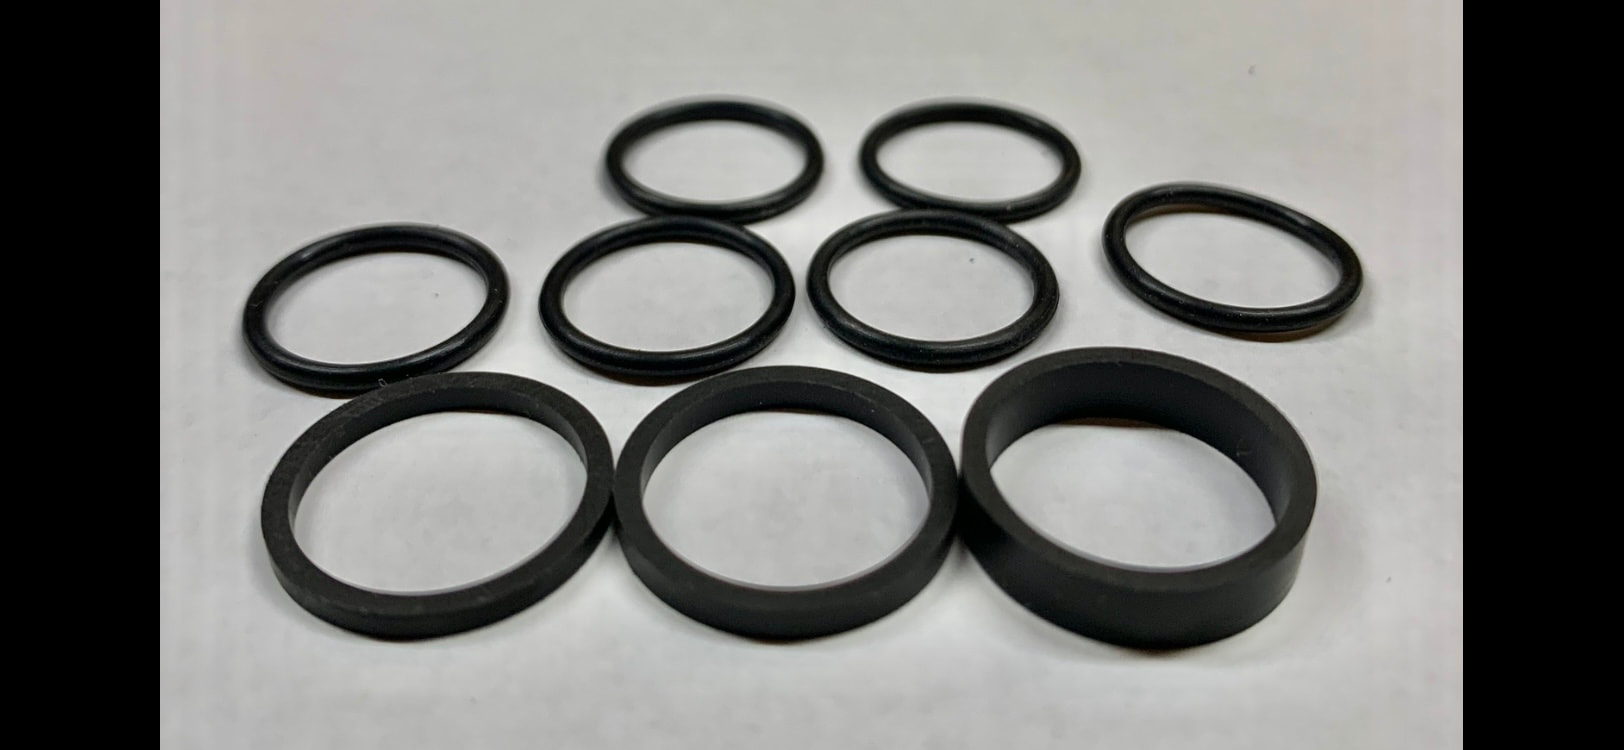
step further. The o-rings are about 1.4mm thick when installed on the barrel, so each additional o-ring
moves the HT that amount. I wanted to fine tune in smaller increments in either direction of the current
setting of 8 o-rings. In order to accomplish this, I made up some delrin spacers of various thickness.
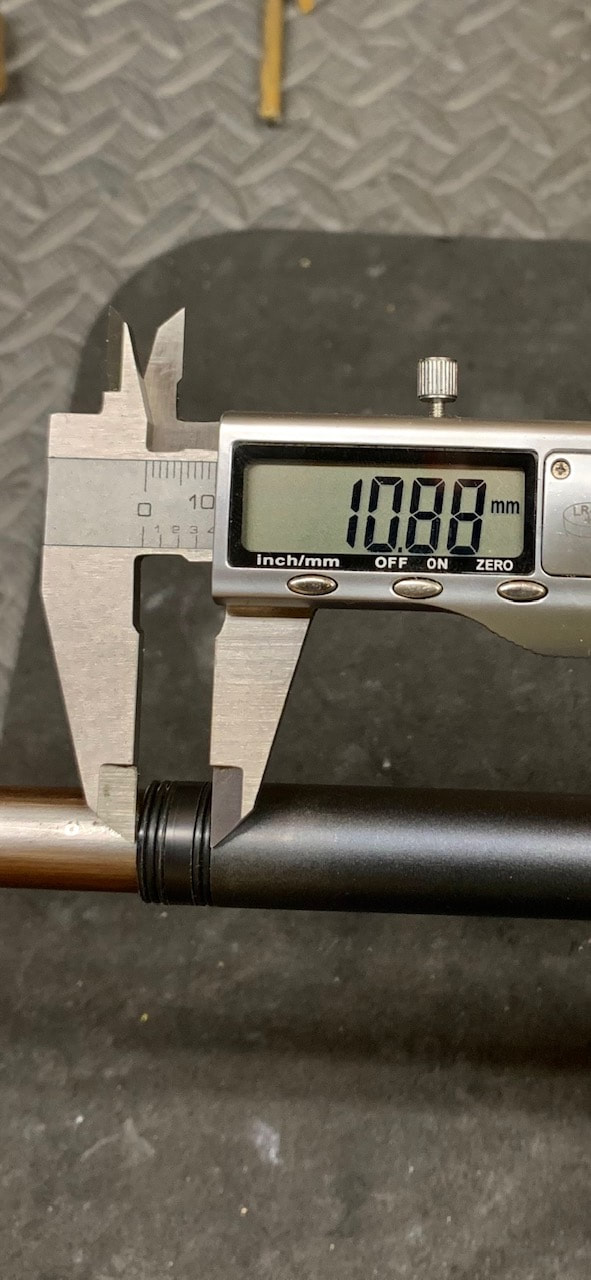
From that point on, my settings were identified in millimeters rather than # of o-rings. My starting point
was 8 o-rings, which was 11.2mm's. After some time on target I found that going over 11.2mm's hurt
accuracy. However, going slightly less than this improved it. Final spacing ended up at 10.88mm's,
which falls somewhere between 7 and 8 o-rings.
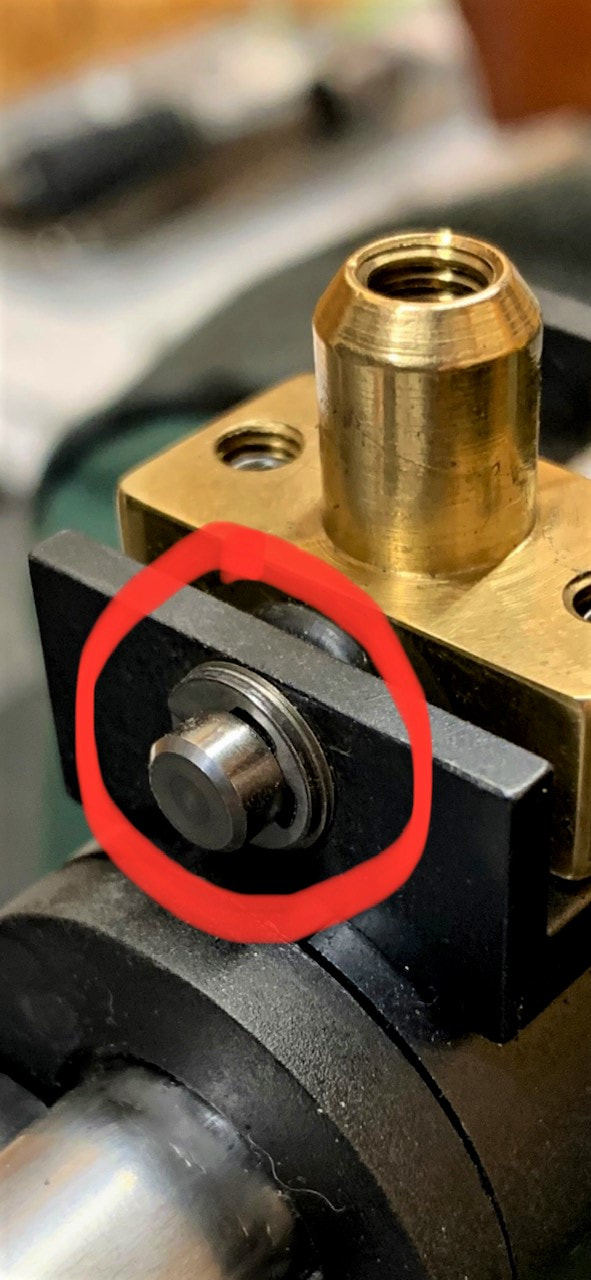
small amount, it can alter sled tension when sled first starts to move on the shot. In my opinion, having
the sled movement as consistent and rigid as possible is best for optimum accuracy. Shims were added
under the e-clips to take up this slop.
also removed 1.5 coils from the trigger tension spring. The OEM trigger adjustment screws were
replaced with TX200 adjustment screws for improved adjustability. I also added a set screw for adjusting
the length of stage one. Press nuts were installed after reassembly to keep the cross pins in place.
Trigger is now set for just under 10oz. I have had it as low as 8oz, but bumped it back up a little.
slightly better fit within the receiver
machined for testing. While the OEM powerplant preferred a larger port, the O-ring light piston along
with the Titan XS #4 spring performed best with smaller ports. The 3.75mm port performed well, but the
3.65mm port seemed to have the edge with more consistent velocities straight off the rack cold and no
apparent loss in velocity over the 3.75mm port.
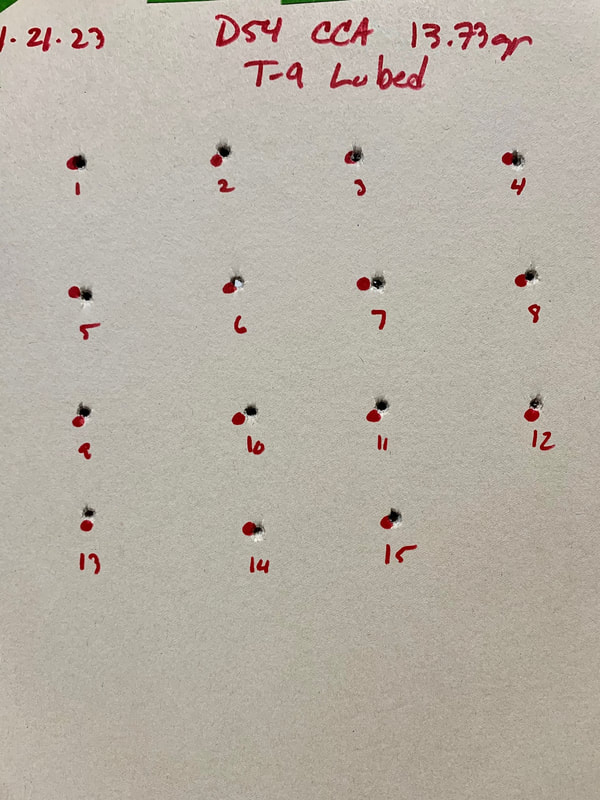
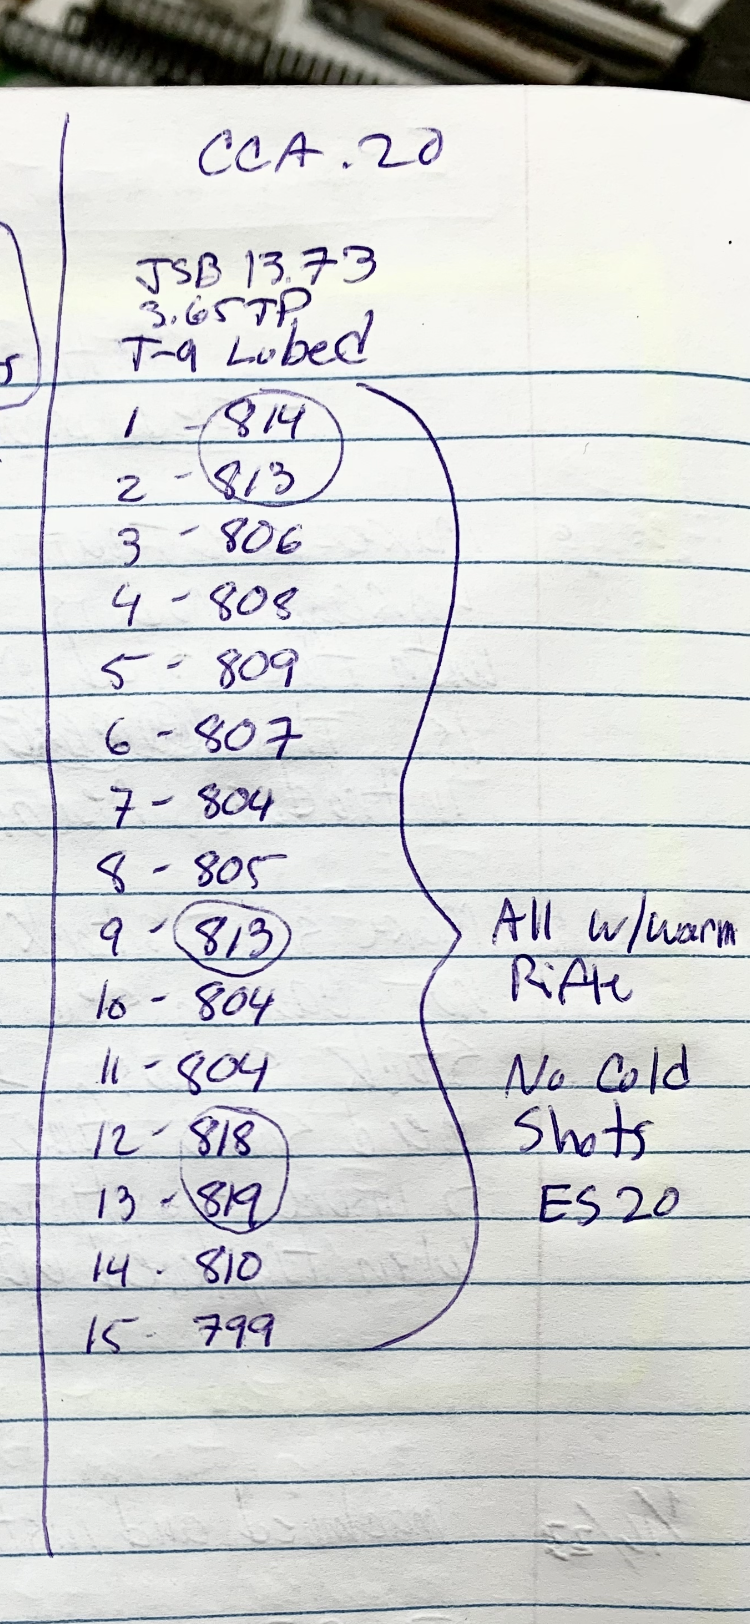
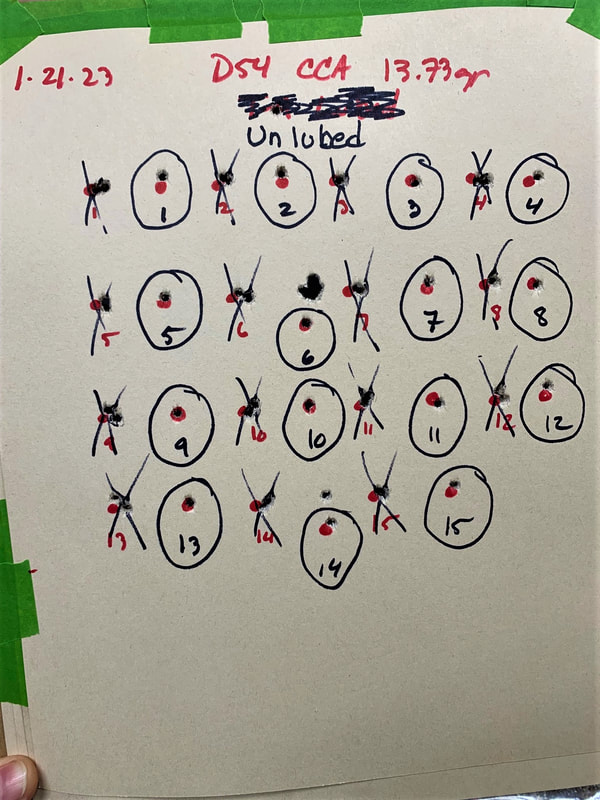
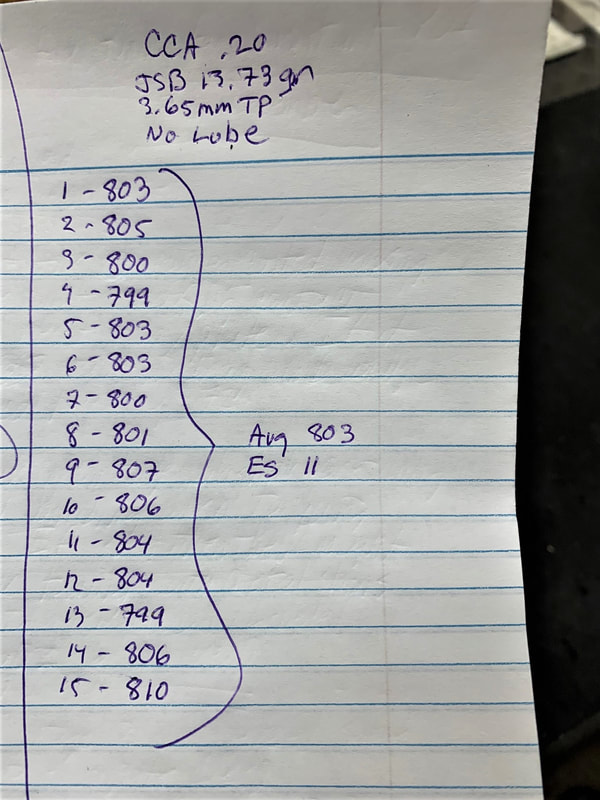
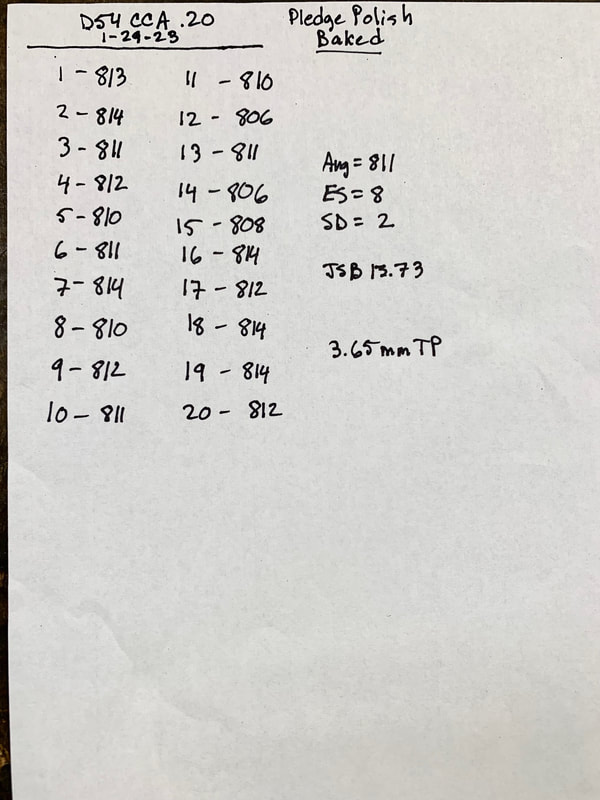
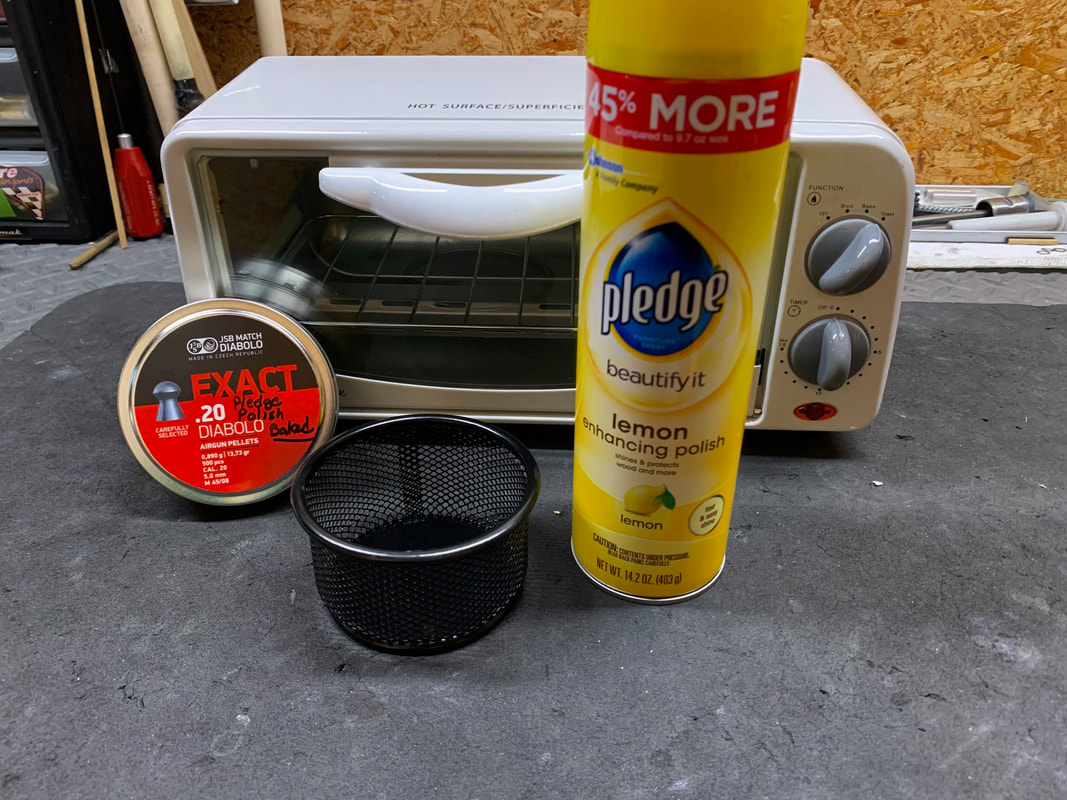
Testing consisted of the following;
• T-9 (Spray) Lubed
• Unlubed
• Pledge Polish (Baked)
In the end, the Pledge baked pellets won for consistency, accuracy and POI repeatability.
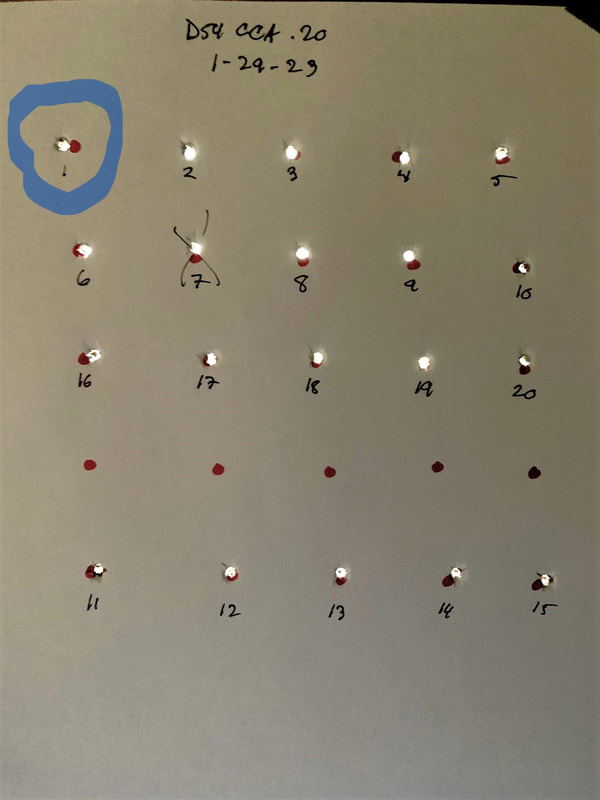
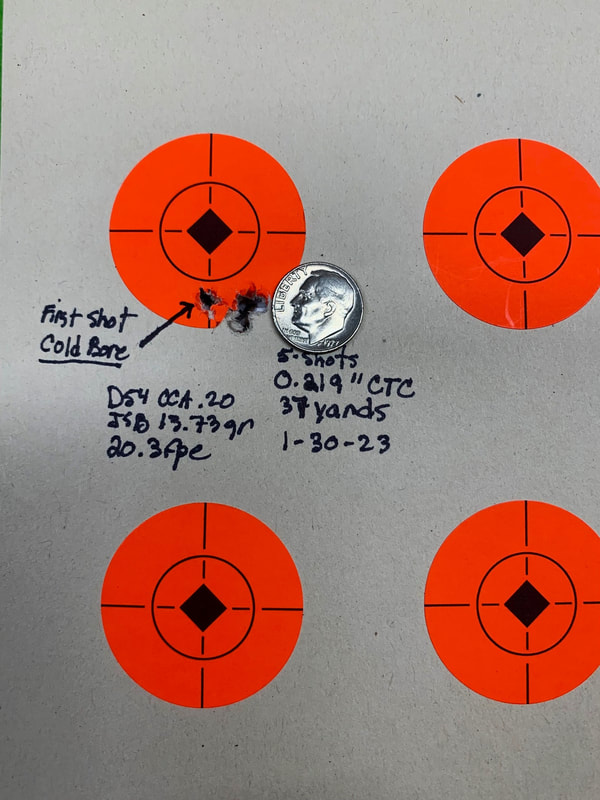
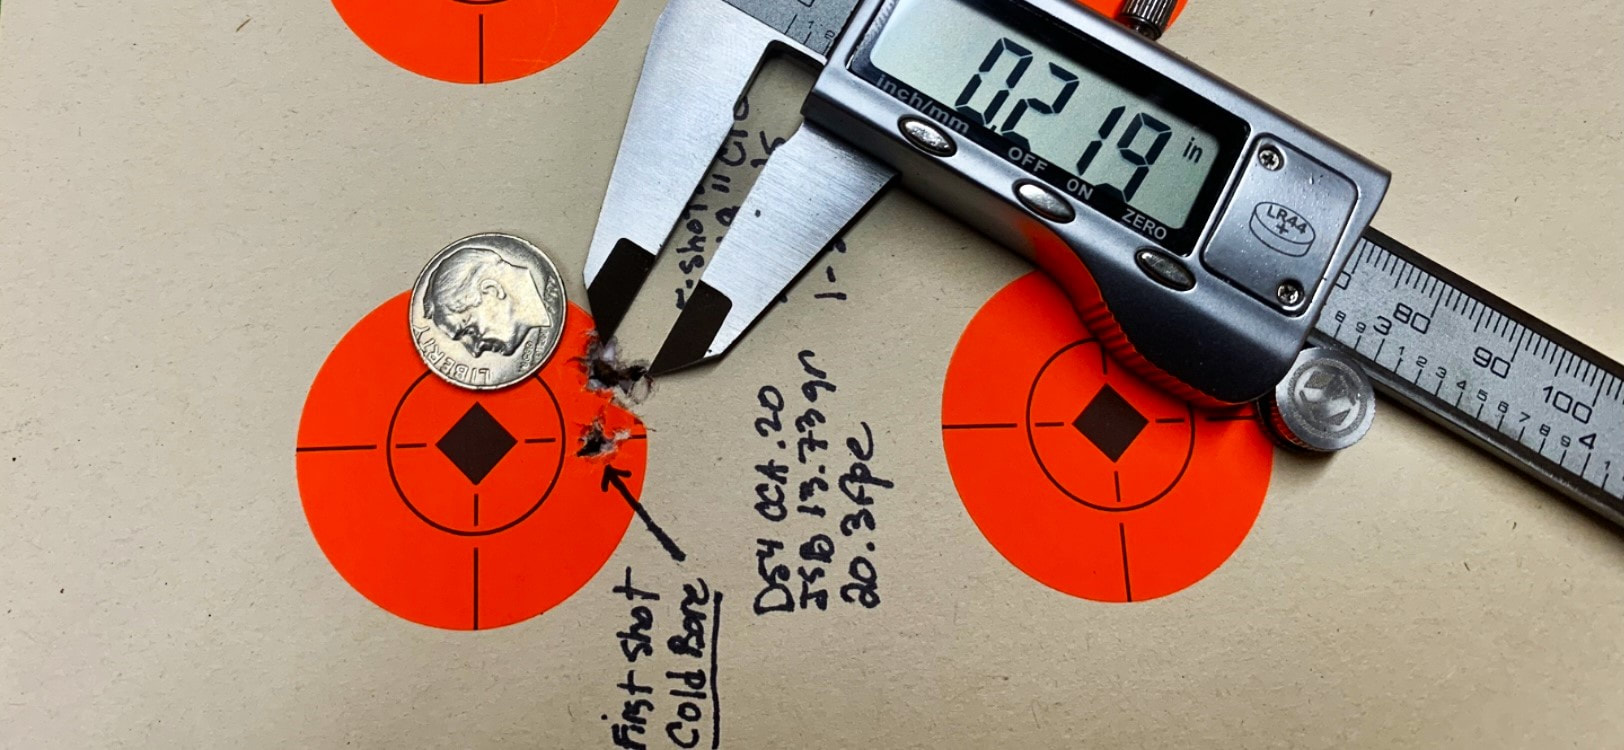
Note: The Pledge baked testing was the only test that started out with a cold bore, and you can see that the
first shot was a touch to the left.
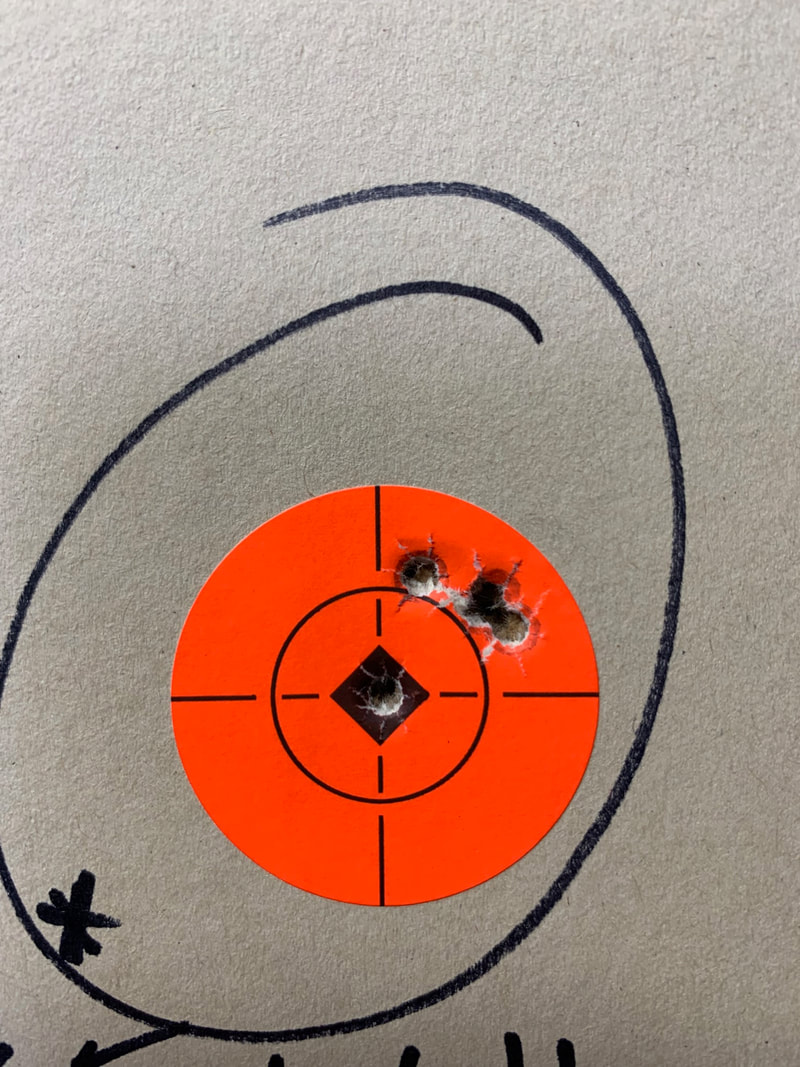
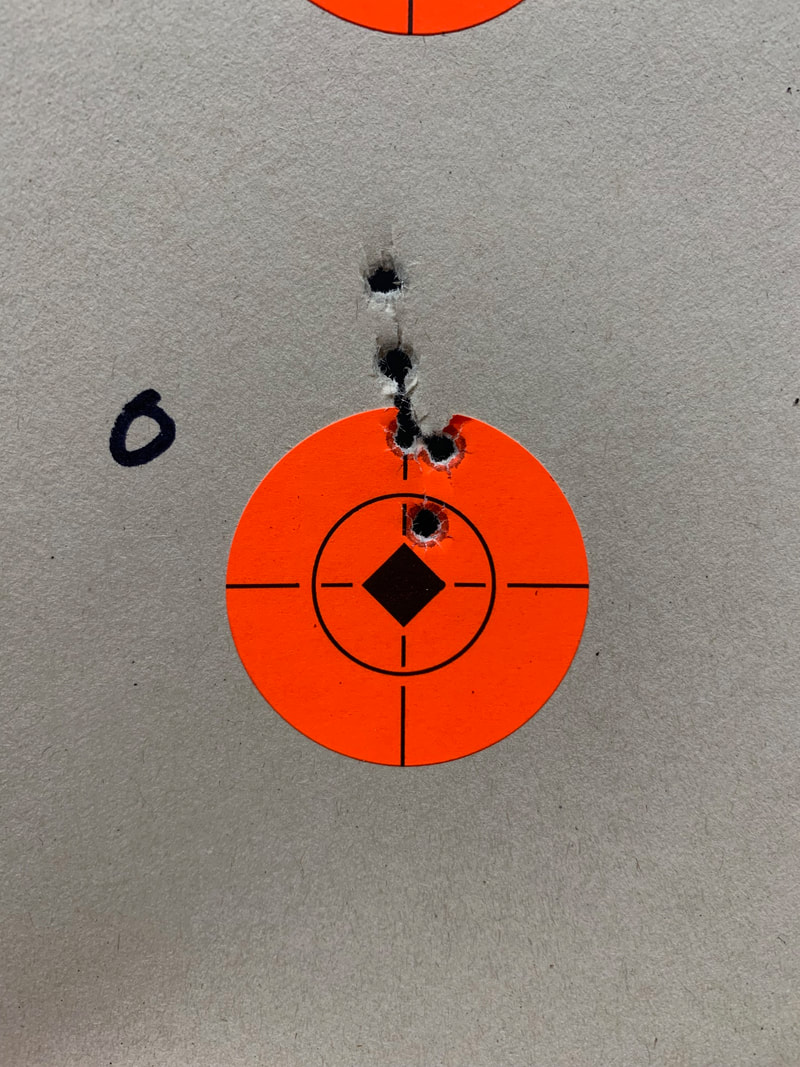
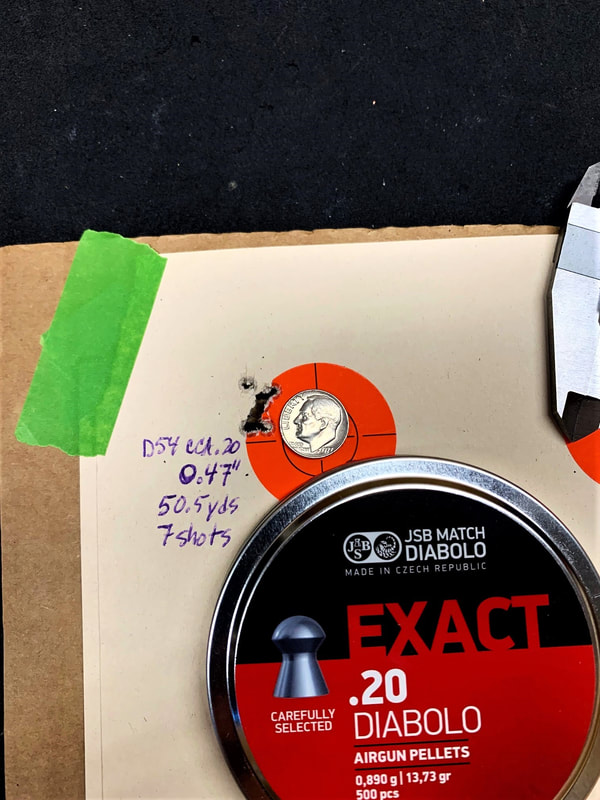
Shots are numbered on the target and coincide with the chronograph numbers
shot first thing in the morning, cold off the rack. I wanted to include the cold bore shot so that you could
see that there is a slight difference in POI on first shot cold off the rack. This mirrors what I saw the
previous day on the cold bore shot (circled on the target above)
Cold bore shot slightly left, then 5 shots under 1⁄4”.
Other Modifications
sealed it inside and out with 3 coats of Maccari's Royal London Oil.
Cocking linkage pin – After breaking several OEM cocking linkage pins at the back of the threaded
adjustment rod, I replaced it with a hardened steel pin from McMaster Carr as per Hector's
recommendation.
machined to fit into the recess of the OEM washers.
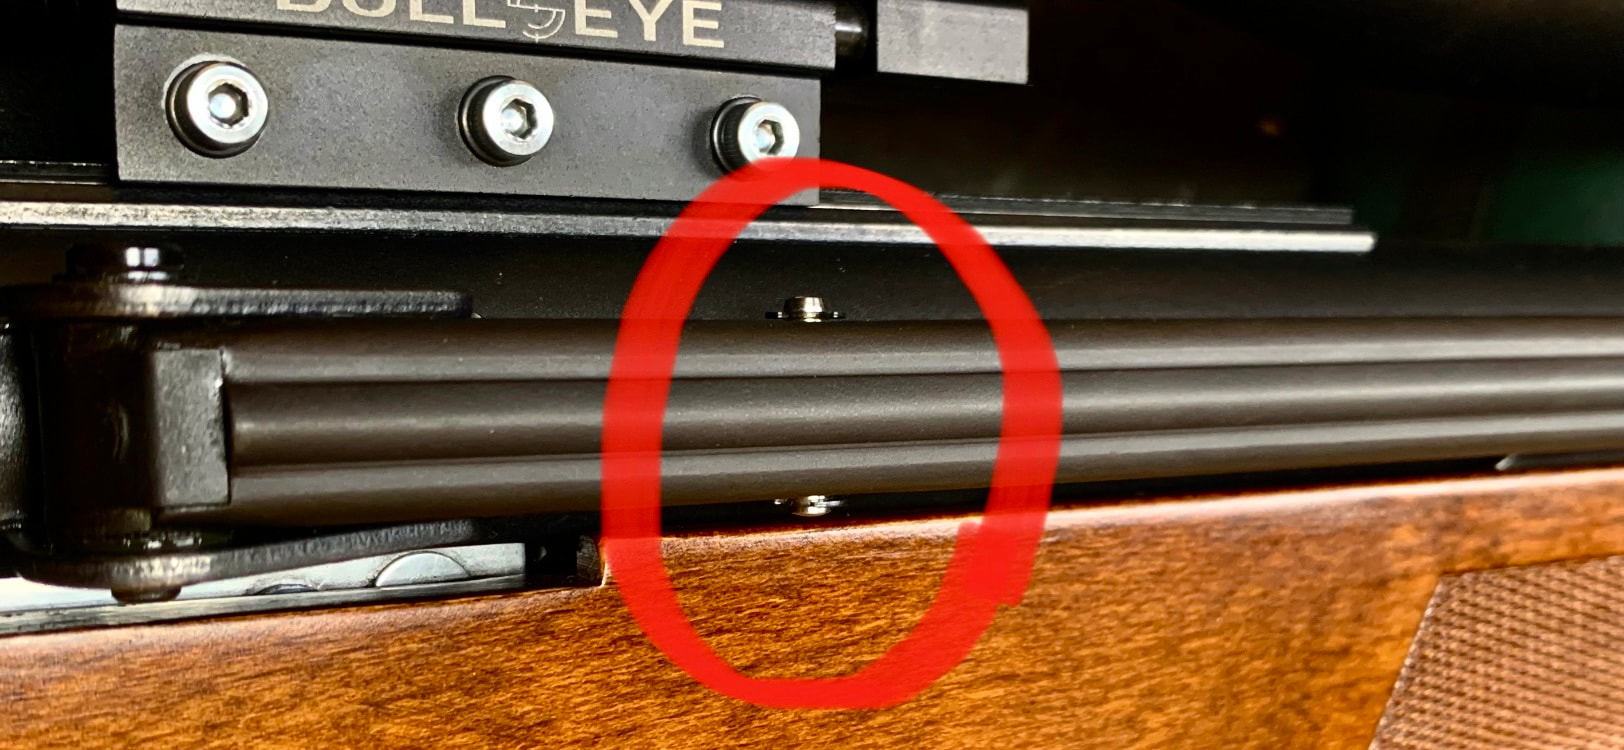
smacking against the pull rod hinge at front of compression tube. This also helps to add a little more
space between the threaded cocking linkage rod and the sled reset bracket. You do not want the threaded
rod to contact this bracket as it will negatively impact sled movement and your results on target. You will
also feel the rifle begin to kick if this rod starts to make contact with that bracket.
pins, which may have been contributing to the broken pins. After several broken pins, I removed this
block, drilled out the hole and machined phosphor bronze bushings. The bushings were installed with
loctite 638 and have an exact fit to the linkage pins. I had no broken OEM pins after this, but opted to
replace them with hardened steel pins anyways per Hector's recommendation.
Piston – O-ring Light
Lube – Ultimox 226
Main Spring – Titan XS #4 with fitted delrin guide, 1.8mm tophat and 3.2mm spacer
Breech Seal – D460 Blue reversed with wide side down
Transfer Port Insert – 416 Stainless Steel at 3.65mm ID
Trigger Pull – 9.9oz
Rear Sled Setting – Minus 9/16 turn from max
Harmonic Tuner Setting measured from end of shroud – 10.88mm
Stock Screws – 30 inch pounds using the spherical washers from McMaster Carr (Not the OEM rubber)
JSB 13.73gr at 20.21fpe
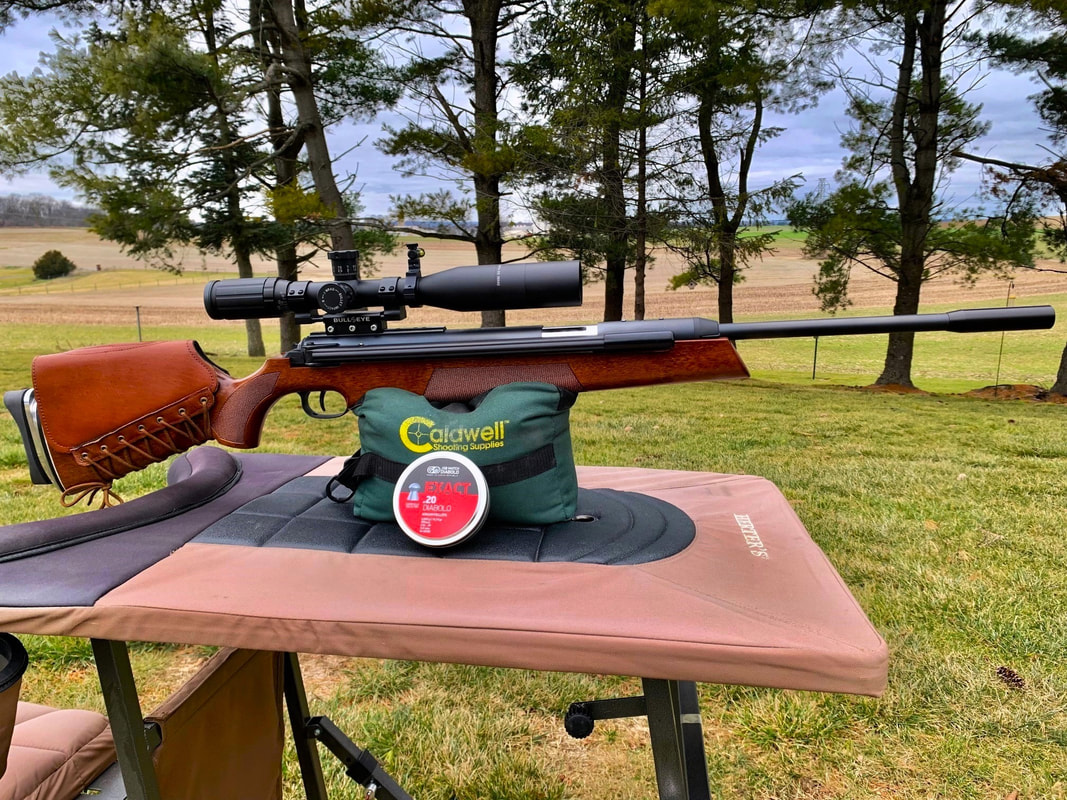
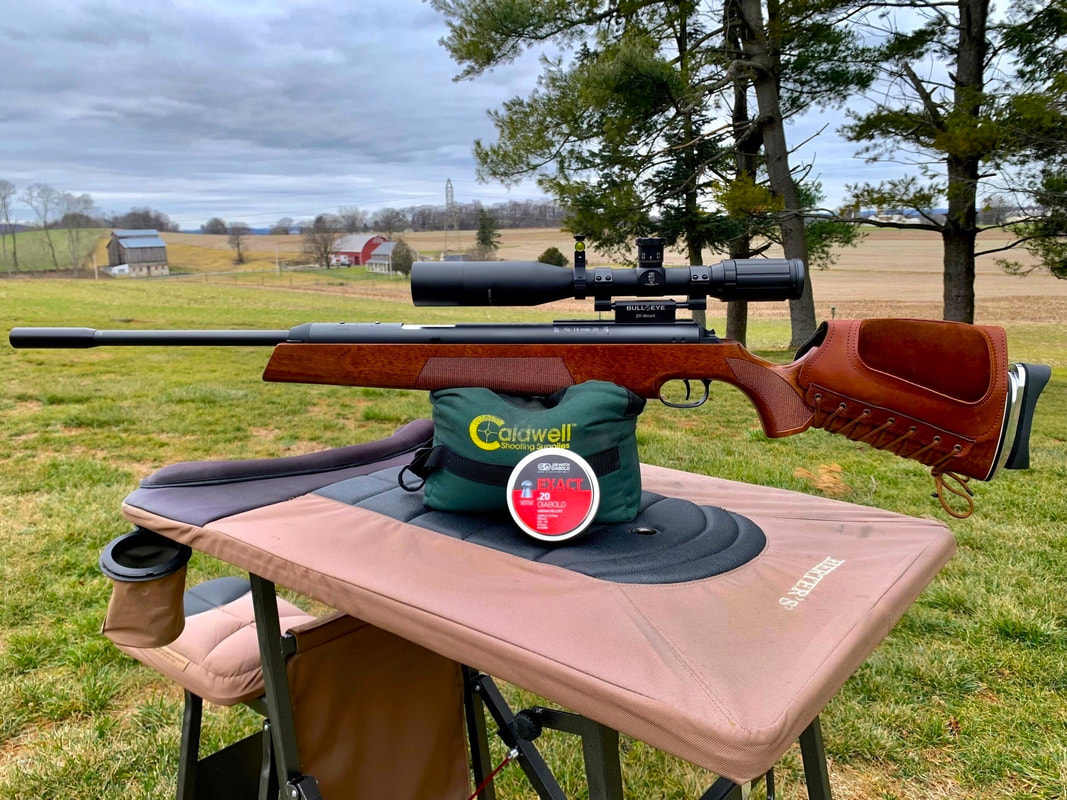
This has been another enjoyable project and in the end, I liked the rifle so much that I ended up
purchasing it from Hector. At 20+ fpe it is extremely accurate with a repeatable POI. With the addition
of the adjustable recoil pad and custom cheek riser, it fits me like a glove. As mentioned at the beginning
of this write-up, until now I had only read about the D54 CCA .20's. I feel honored to now have one in
my collection.
Hector, I cannot thank you enough for offering up this rifle for my testing and eventual purchase. Your
trust in me is much appreciated and it was a pleasure to work with you from start to finish on this project.
Closing Comments by the Editor
The slow and deliberate process of changing one thing at a time is well reflected in Steve's process and work.
His way of leaving no stone unturned, even in the face of difficulties and extensive waits, starts, stops and fits speak volumes about Steve's character.
It was truly a privilege and a pleasure to accompany Steve along this long path of research, enlightenment, discovery, and innovation.
In the old days Apprentices needed to present to the Master a piece that demonstrated that they had learned the skills needed for a trade. And then, fully-fledged tradesmen needed to present a piece to the Heads of the Guild to achieve "Master" status.
This is the origin of the word "masterpiece".
And this is what Steve has presented today to the airgunning community.
I hope it has been enjoyable to read, and I hope Steve's work will motivate others to do a systematic, scientific, exploration of different parts and sections of the "lowly piston airgun". A machine so complicated that we are still in the process of beginning to understand in all its complexities.
Thank you, Master Steve, for your hard work, your dedication, and your unswerving focus.
I hope we can continue to cooperate in the future.
Keep well and shoot straight!
HM


 RSS Feed