Connecticut Custom Airguns
  • Welcome!
  • Hector's Airgun Blog
  • Products and Products Blog
    • One-Off's
    • The "Héctors Special'" scope by Sightron
    • K1050i FT
    • The Hex Louver or "Secret Sunshade"
    • Pellet Path Calculator >
      • Questions, Answers and Comments on P-P Calc
      • Privacy Policy for PP-Calc
    • The Nautilus SideWheel
    • The X-10 TiltMeter
  • Zimmer-Silhouetten
    • Results 2017-2018
    • Results 2016-2017
    • Results 2015-2016
    • Results 2014-2015
    • Results 2013-2014
  • References and Links
  • Contact us
  • Store

Hector's Airgun Blog

Where we discuss, CIVIILY,  anything airgun.

Return Home

DIFTA's first Field Target Clinic and Golf practice Match

5/30/2018

2 Comments

 
Fifteen years ago, as President of the Mexican Pneumatic Shooting Club, I sent an article To Jay Olson-Goude to be published in the AAFTA newsletter.
It dealt with "Clinics and Practice Matches"
Back then, the internet was not as well established as it is now, transmission speeds were mush slower and electronic formats quite more difficult to "transport".
So, it took some effort on both sides of the border, but finally we got everything straight, with pictures and everything.
You can still read that article in the AAFTA's Archives, under the August 2003 issue
Reading back on it, I still think it is a valid article.

Back then, the Clinic and Practice Match was basically our weekend get together, and apart from a few weekends where Holidays took over, we met almost every weekend at different places around Mexico City, mostly up in the surrounding mountains. We had Matches every quarter  or so, but mostly we shot together to train together.

When Paolo announced that he had been thinking about hosting a clinic at DIFTA (my new "Home Range"), I was thrilled. Alas, as usual, airguns are not the priority in many Clubs/Ranges and we had some misconnects that led to a somewhat improvised event.
The good thing is that there is plenty of room for improvement and next time we'll do a better job!

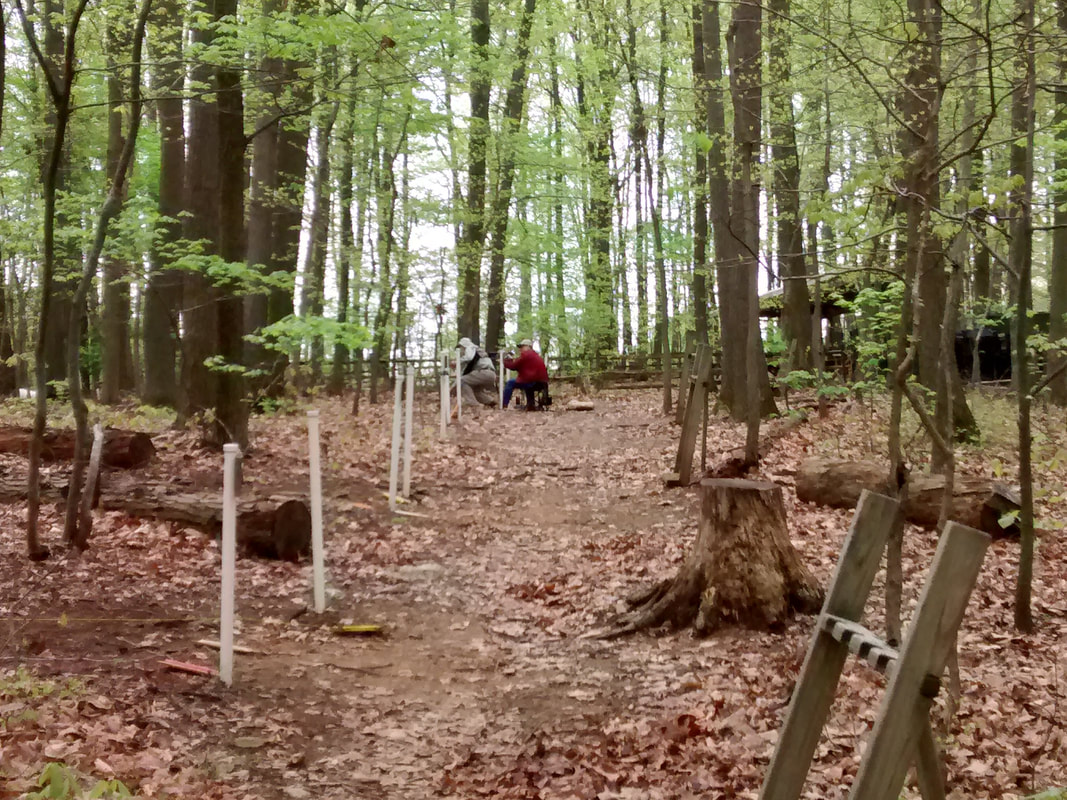
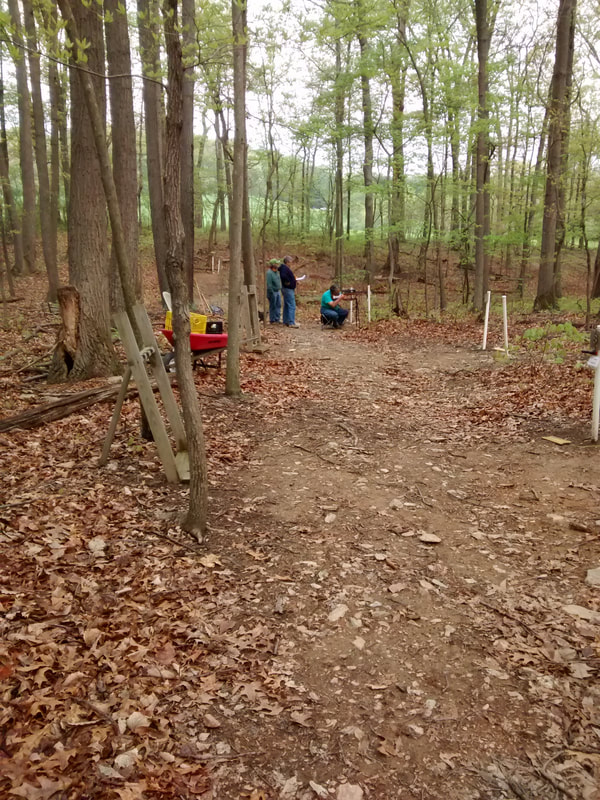
We started the day at 08:30 at the DIFTA outdoor airgun range.
We expected 3 to 4 persons, but two of them got tangled in other things and could not make it, so we were left with two.

Paolo had set up a whiteboard at the range, and it was a good tool because some things are better explained with a drawing
Picture
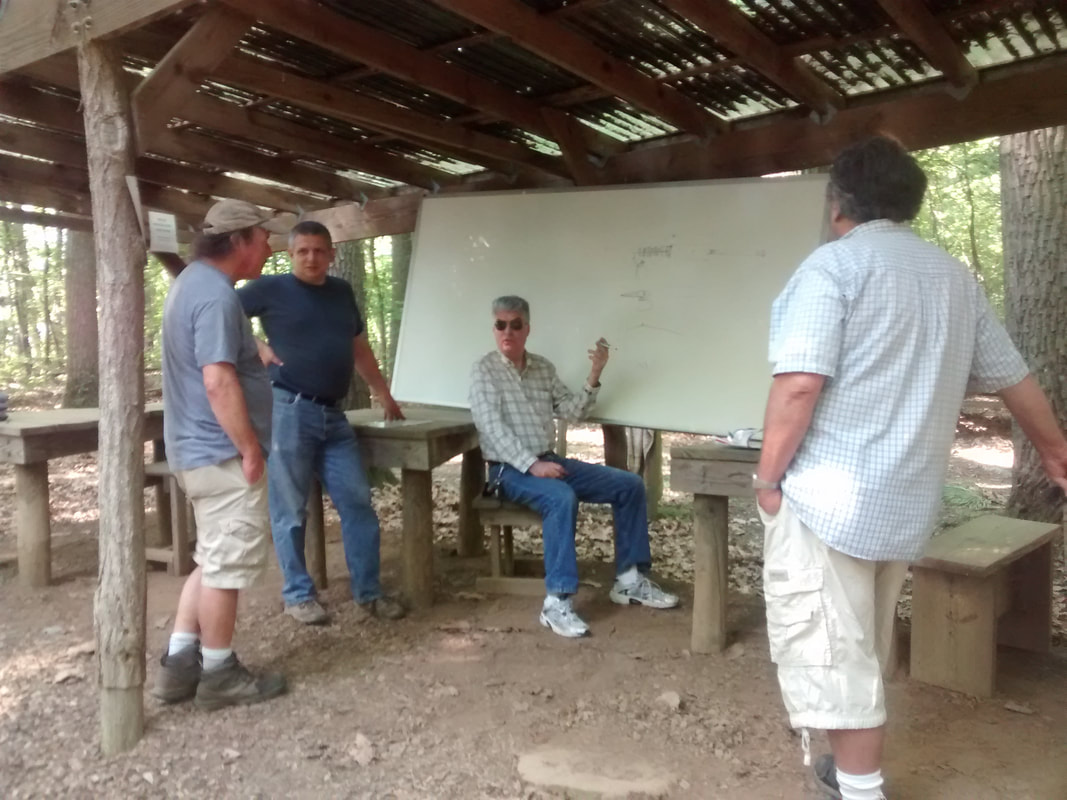
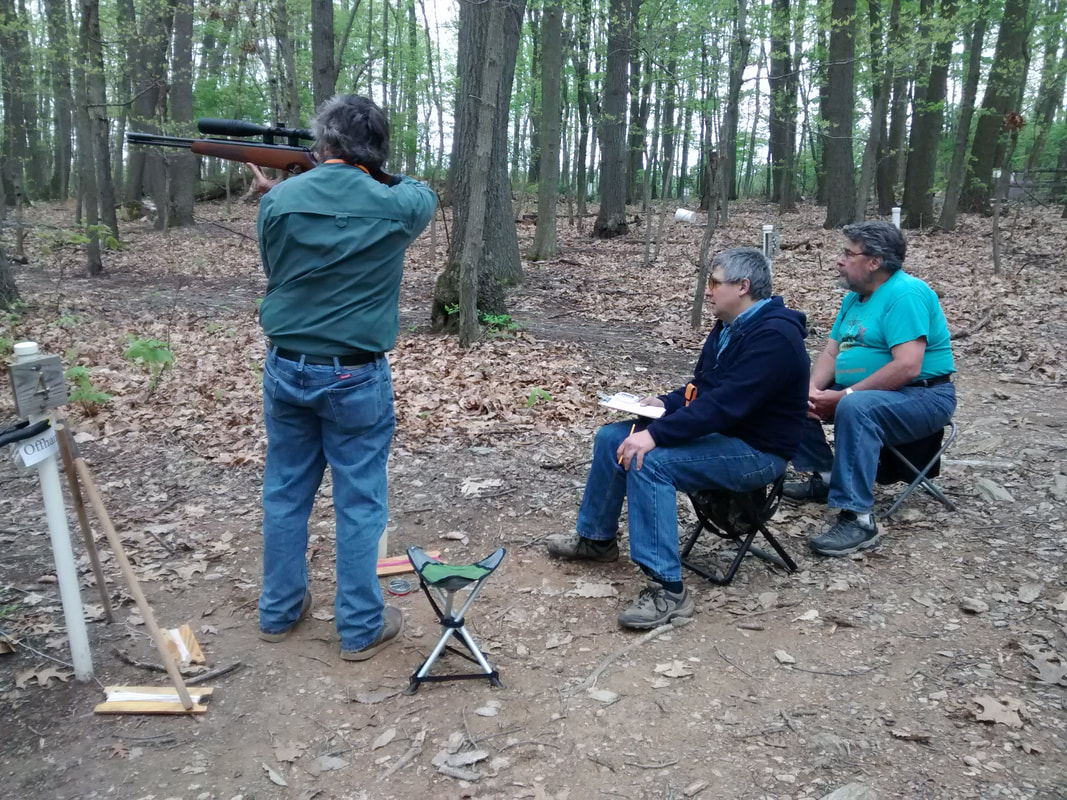
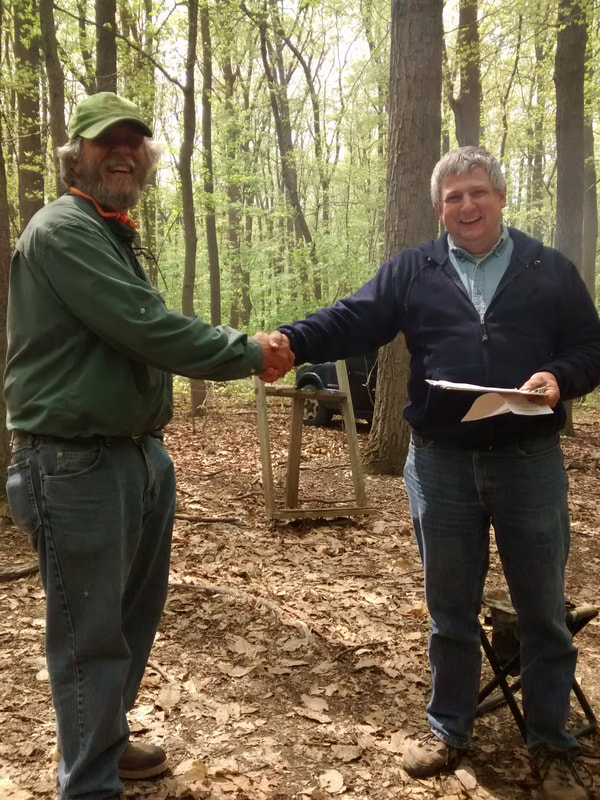
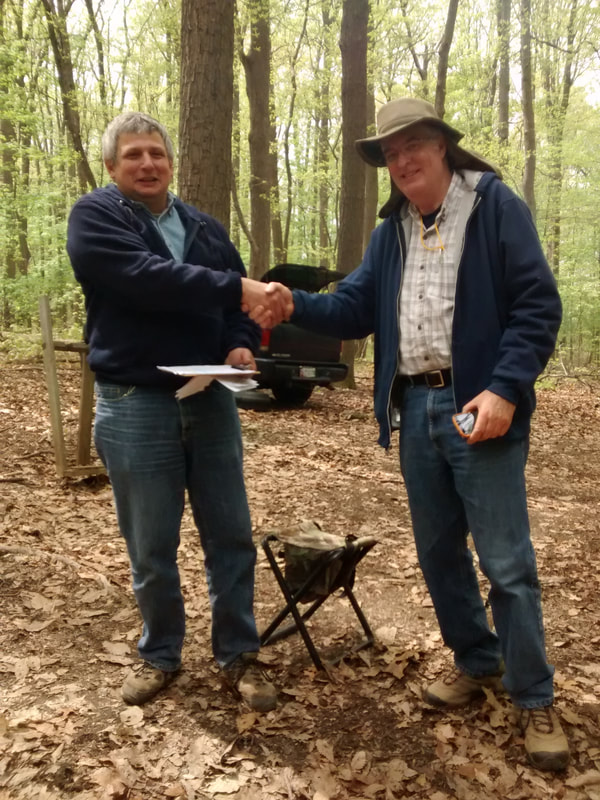
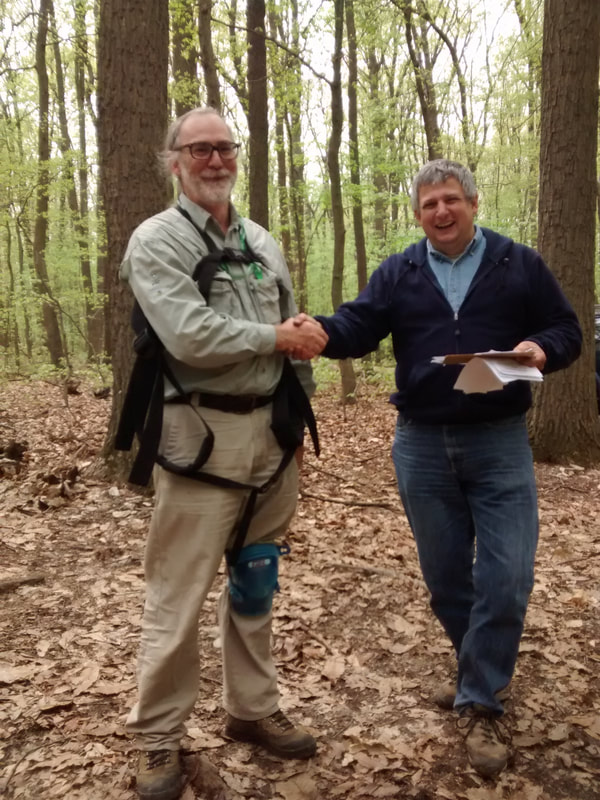
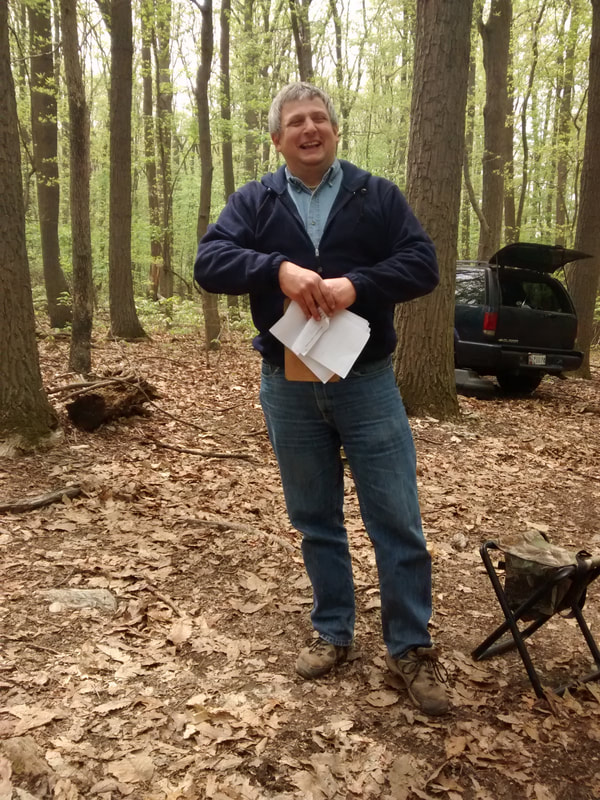
From Left to Right: Chris, Paolo, Vince and Mark Mercer
We devoted about 3 hours to the whole gamut of subjects, from how the targets operate to the finer points of how airguns achieve their accuracy.
At noon, Paolo, and Chris had to leave and so, after some Sighting-in time (and trajectory calculation for me), a very short meeting to establish basic safety practices and etiquette expectations, we started the practical side of the event with a short course (6 lanes, 3 targets per lane for 18 "holes" to be shot like a "Golf" game, 5 shots in less than 3 minutes to get the target down, or your score would be "6".
Picture
Vince, one of the experienced FT shooters, had his son Lucca along, so I was squadded with Mark and we proceeded to commandeer lane 1, it is not often that one can choose which lane to start in! LOL!

Paolo had set an intermediate course, not too hard, and not too difficult, at least one 3/8" kill zone and a few other small ones, but it is all part of getting the "heebie-jibbies" out of novice shooters.

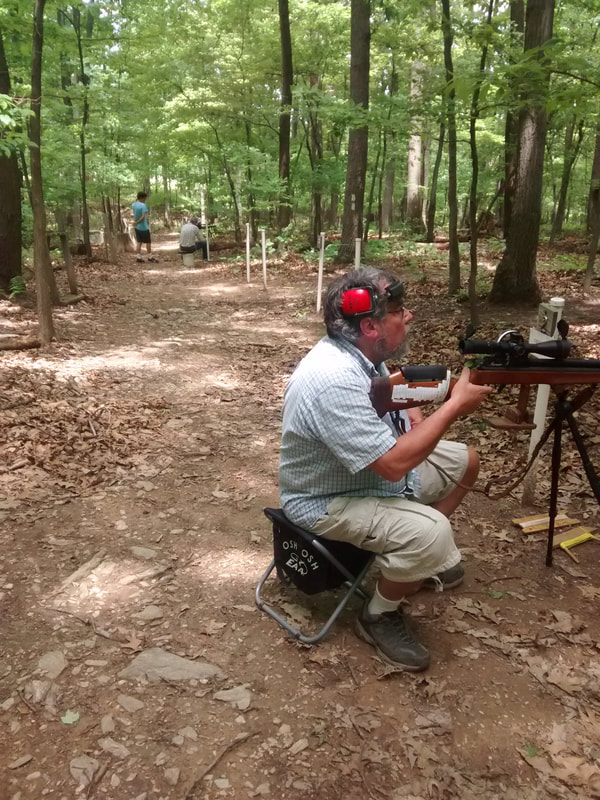
Vince and Lucca were sharing Vince's FX. Mark was shooting a Marauder and I was having fun with a DIANA 54 that I set up for AAFTA Hunter FT. It is short stroked but still yields a little above 14 ft-lbs, shooting the 8.44 JSB's at around 850-870, depending on the pelllet lot.

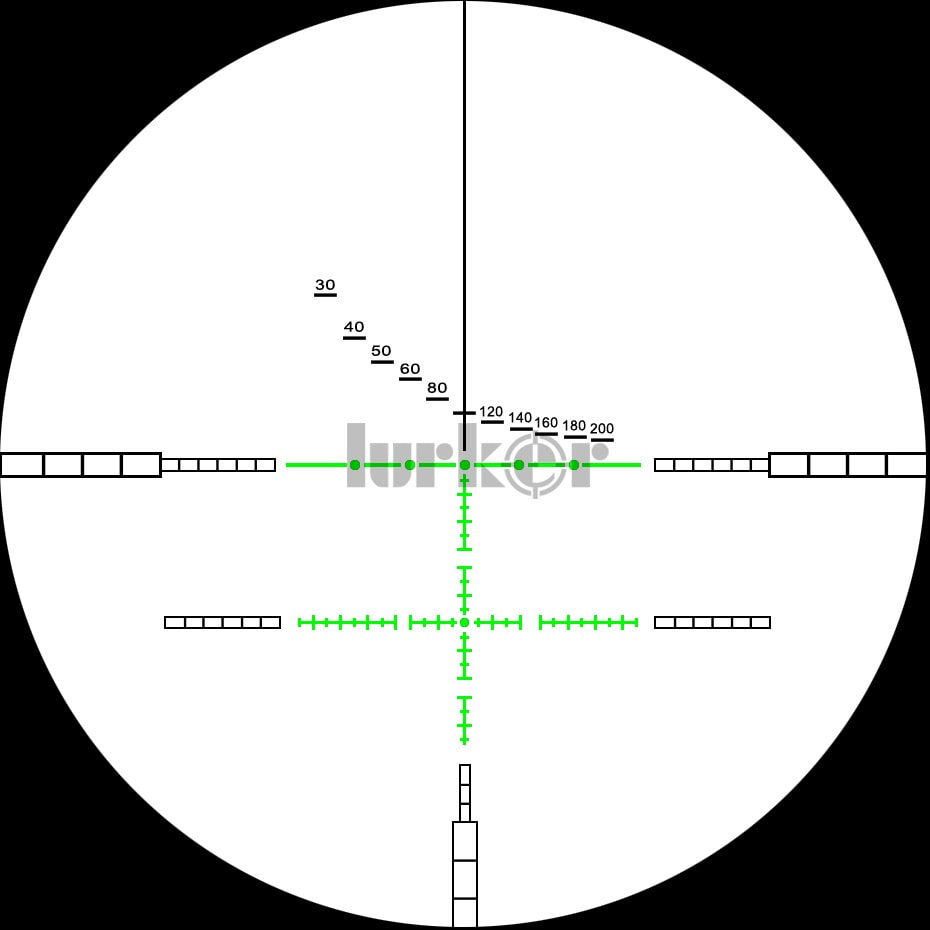
It is a really accurate and flat shooting D54. I was using the gun's scope, which is one of the not so old AEON's with the trajectory reticle, and I have to say that the difference in optics between the original batch of AEON's and this one is dramatic. I always felt that AEON's had dropped the ball in keeping the great scopes that they introduced themselves with, but with so many changes in the chain of distribution, it is hard to keep track of these things.

Perhaps it is time to revisit the AEON line and see if it has come back up in quality and performance now that major wholesalers are carrying their products. We'll see if I have the opportunity to test one of the more recent versions.
​
The lesson here is that unless you are looking to buy one of the used scopes in the first batches, don't. And the key is the amount of spherical aberration present when you move the scope across trees, fences, or other objects that are repeatedly vertical in their pattern. Simple test that you can do anywhere. See through the scope and then move it slowly side to side. If you see the vertical things get distorted, then skip on that purchase.

I had taken to the Clinic two rifles: a DIANA Mauser AM-03 that is currently being prepped for Pyramyd Air Cup, the Gunslynger, and then some Winter testing in the frigid temps of the "far north"; and also this D54, if I had been squadded with someone that was shooting "Open" I would have shot with the Mauser, but since I was squadded with Mark that shoots Hunter, I was also shooting Hunter.
Picture
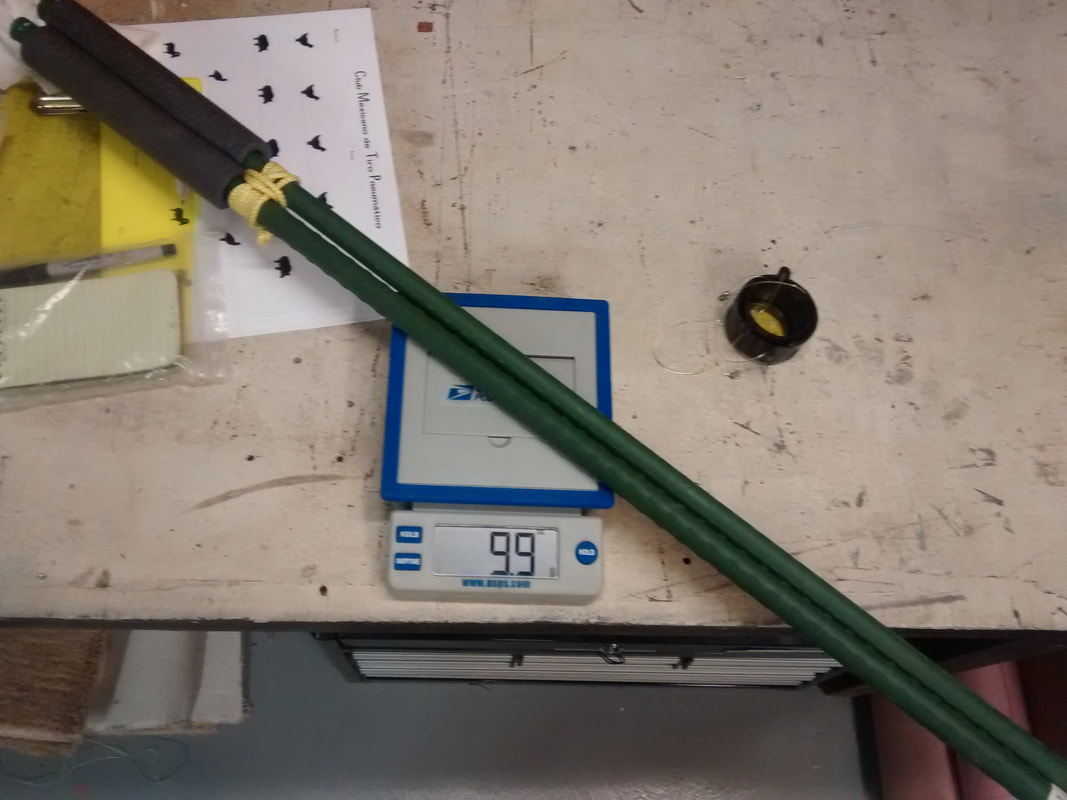
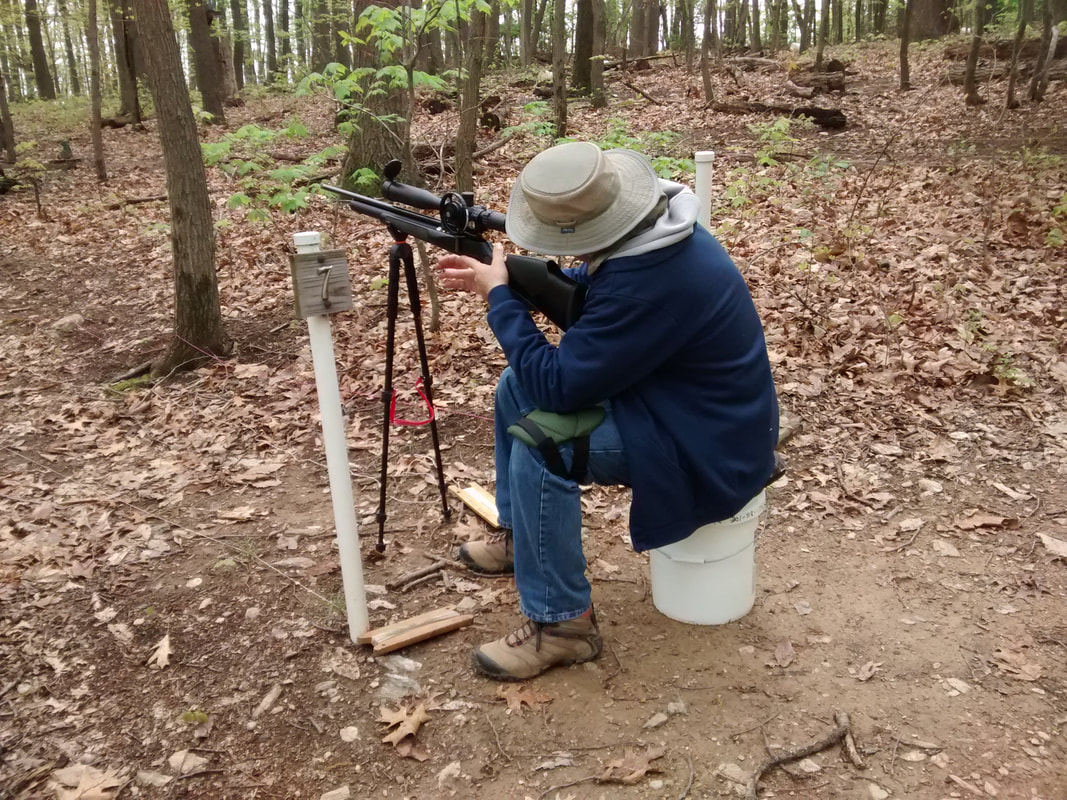
My personal version of "Crossed Sticks" has proven quite good, light (9.9 oz.), and simple. Since I still use a bumbag, I hold them in a very "open" position, and so I avoid all contact between the side-cocking mechanism of the D54 and the upper "V" of the sticks.

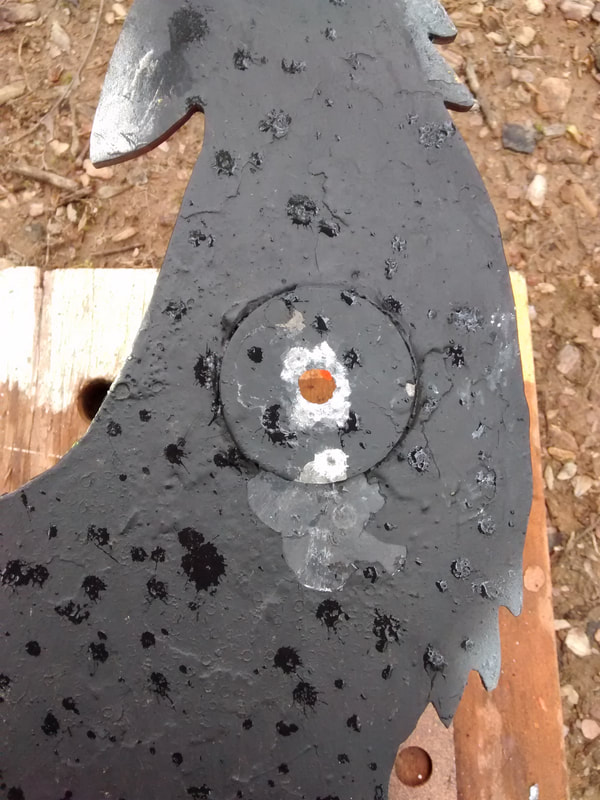
We had a ton of fun! And I was doing reasonably well, even with the challenging scope situation until I hit the EASIEST target in the course. A small, blue, bird that has a HUGE kill zone was the far target on lane 5. It is actually easier to miss the whole target than to hit the faceplate! And yet, I took all my 5 shots at that target and could not get it down!, ROFL! After we picked up the targets, I realized that I had been hitting high, but still on the ¼" of rim that the target has before putting a fly-ball out. And because of the dark blue of the bird, the hits were not visible through the so-so scope.
Still it was a lot of fun to go through the experience of being skunked by a VERY LARGE kill zone, ;-)

This shows that there is NO EASY shot. Each shot has to be taken in stride and judged on its own merits and challenges. Letting down your guard is a sure recipe for a big, fat, miss. We have all been there and done that, so it is good to have "re-learned" something I should have known all along.

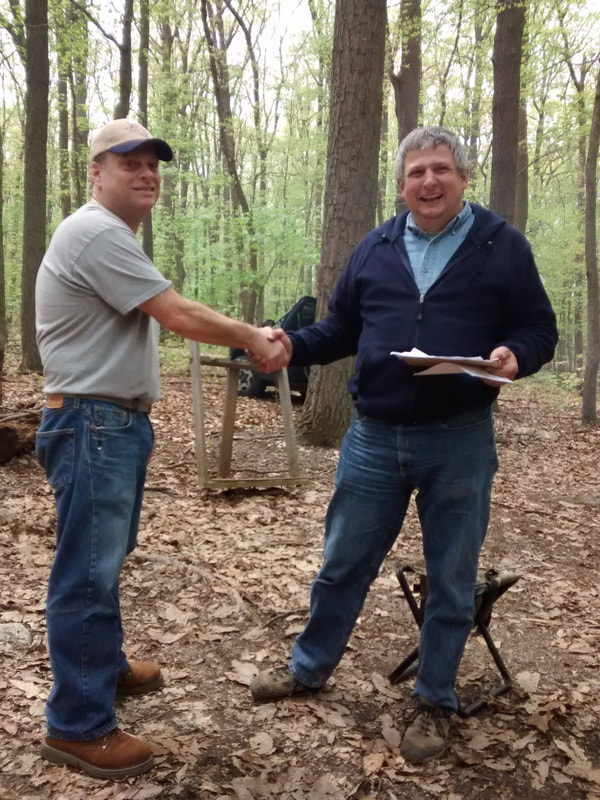
Mark and I were shooting our last lane, when Vince showed up, made the arithmetic and said: 
"You need to shoot 5 or better to not loose"

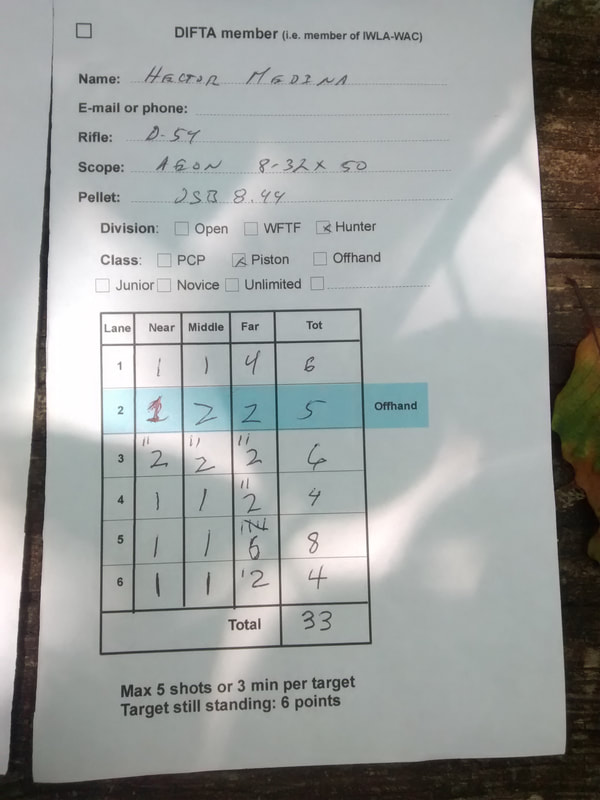
To be honest, I was not paying much attention, as it would be uncommon, under any circumstance, for a piston gun to be Match Best (Low in this case), specially against a seasoned shooter like Vince that is deadly with his FX, and even more so after having missed the big, fat, kz in the blue bird, but I concentrated and took my best shots. Missed only one first shot at the far target on lane 6 and ended the lane with a 4 for a total of 33:
Picture
Could I have done better?

YES!

And that IS the point, we can ALL do BETTER if we try. If we take the time to analyze and learn, and correct those things that are wrong either with ourselves or with our rig, and I have to say that shooting Hunter style has been a learning experience these last months. I will have to get some work done transferring back to WFTF, but it will be a worthwhile learning experience.

I hope Chris, Mark, and Lucca had a good time and learned a little about how the sport is practiced, what they need to do to improve their scores, and what style of FT better suits them.

We'll organize another Clinic, hopefully with better and more enticing wording on the invitation that will get more of the firearms shooters interested. And hopefully, we can get, with more attendance, a little more interest from the Club.

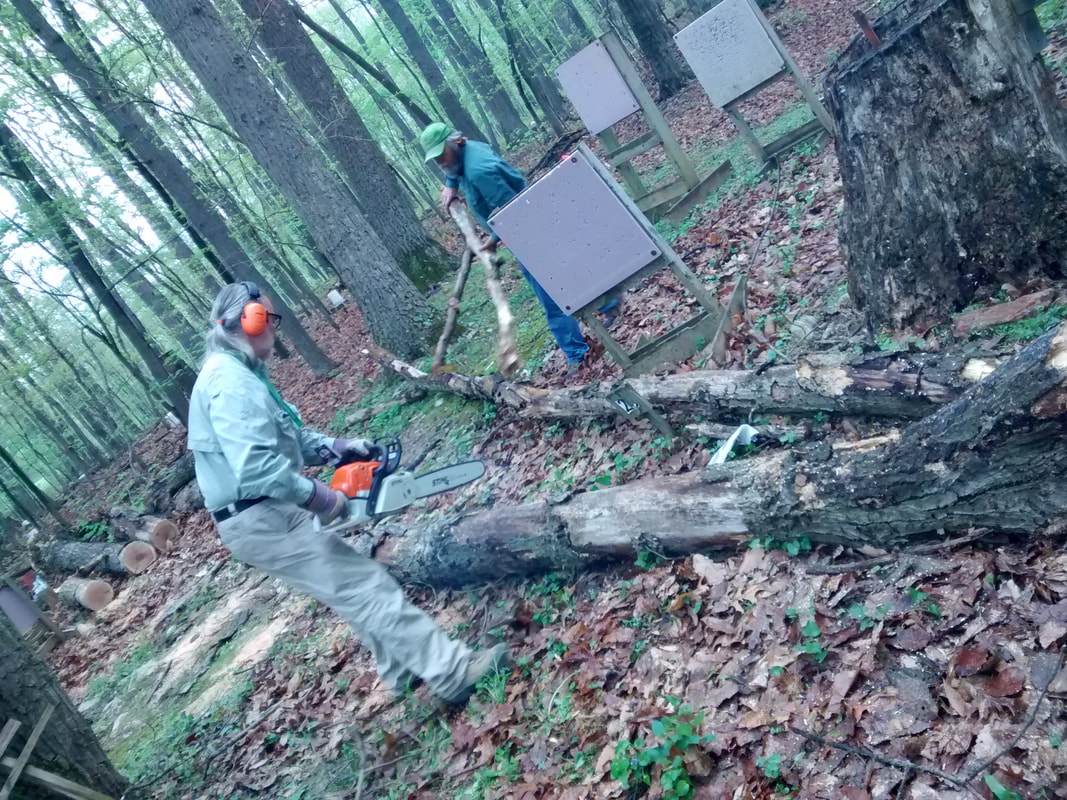
Thanks to Paolo for setting the simple looking but challenging "Golf" course, to Vince for coming over to help and to Chris, Mark and Lucca for attending and helping take down the course.

Hope to see some of you at Crosman's All American Field Target Championship next July.

Keep well and shoot straight!
2 Comments

The "SuperCustom" triggers for the Walther LGU and LGV.

5/24/2018

11 Comments


A short review of the Rowan Engineering's trigger blade, with some comments about the BMS trigger

DISCLAIMER, I will post the same disclaimer as I used in the original post about swapping triggers in the LGU:

1.- Swapping the trigger blades WILL invalidate the warranty of your rifle.
2.- ANY user intervention in the trigger MAY result in an UNSAFE condition. Once you get into the trigger you are on your own.
3.- I have no control of YOUR actions, so I can take NO responsibility for the results YOU get. This process proved safe and sound in THIS gun. I cannot guarantee that it will be the same in YOURS.

Having said that, let's dive into it:


In the past years, I have had the opportunity to tune and shoot a number of LGV's and LGU's, and I still like the guns. They are not the ideal gun for me (though the LGV seems to be a better match), but as we have discussed in the past, we are all different and some guns will shoot very well in some people's hands while shooting horribly in someone else's hands.

Among the most important characteristic of a gun that is to shoot accurately many times in a day, is the trigger. For most shooters, the Walther "Match Abzug", or the "Yankee Tune" trigger solutions will be all they ever need, or want.
I have installed a few of the "super-custom" triggers (like the BMS's and the RE's), but there was always something that didn't really "jive" for me; perhaps I am spoiled by my DIANA T-06's. But, as we just said: we are all different. And so, when a friend asked me to add a Rowan Engineering trigger to his LGU and document the process, I decided to put this blog entry together.
Experiences with Rowan have been somewhat less than stellar.
As an example:
When I ordered this last trigger through the website, everything seemed to be straightforward, when I received an Email from them supposedly enclosing the tracking number, but without any number at all, I suspected that there would be other problems.
So, after writing to them and receiving the proper tracking number, I followed the shipment almost daily.
When suddenly the USPS sent me an alert (I have a USPS account and had registered to receive updates on the package), about the "item being returned to sender because it is undeliverable", I jumped into action and went looking for the package to my local Zip-Code head office, sure enough, after 90 minutes of waiting and repeating the same story several times, someone took pity on me (actually the Germantown, MD, USA, PostMaster), and personally went to look for the parcel.

When I received it, I understood the whole ("Undeliverable")  thing:​
Picture
Tell me in all honesty ¿Would you have been able to deliver such a package? I wouldn't.
An Email to them relaying the same picture included above produced the following response:

"Hello Hector,
 
I have found out what happened with the address.
 
Occasionally the printed address is missing some detail that is hand written afterwards.
To stop this smudging , clear tape is added over which we have been doing for several years.
 
It appears now that the last batch of print consumables is different or the the clear tape has changed in someway and now over a day or so causes the printed ink underneath to erase !!!
Very strange.
 
Anyhow, we will not add the clear tape from now onwards.
 
Best regards,
Derek Rose."


By the end of the day, I only lost 3 hours hunting down the package but now I had it in hand.
​
Anyway, back to gunsmithing:
This is what you get in the envelope:
Picture
And when you unpack it, this is what is inside:
Picture
You will also get a black and white printed version of the instruction booklet:
http://rowanengineering.com/pdf/WalterLGVLGUAdjTriggerInstruct.pdf
One of the things that strikes any observant gunsmith is that the adjustment screws (as the trigger is shipped) are even further apart than the ones in Walther's "Match Abzug"
Picture
If we do the same comparison with the BMS trigger:
Picture
So, how can it accomplish a lower trigger pull with screws that are even farther apart than the OEM triggers?
Reality is, that as it is shipped, it can't FOR THE SAME SET OF CIRCUMSTANCES.
You can read carefully, again, and again, and AGAIN, the instruction sheet included, there is no mention of further adjustability.
Picture
But if you look closely, you can see that there is a third hole in there. And it is tapped for the same screws. So, if what you REALLY want is the lightest trigger pull possible without any further work, then you need to change the rear screw's location from the outside to the center.
But, in a sense, we are getting ahead of ourselves because when I installed the RE's trigger in THIS Walther, then the piston would not make the trigger latch onto the stem.
I looked and looked and looked and could not find what the problem was, until I looked closely at the safety. It would not move to the safe position.

Upon close examination, it was determined that there was not enough space between the housing, the safety pawl and the new trigger blade for the pawl to enter into the cavity of the trigger.

My first reaction was to shim it a little, believing that the problem MUST be a minor one, a question of one or two thousandths of an inch.

I measured the thin washers in the trigger mechanism and made some of copper shim material of the same thickness:
Picture
Yes, I know they are not as elegant, but they fit and didn't snag on anything, so I tried one on the offending side. 
NO luck.
Tried two
NO luck
Tried three
Finally, the pawl could enter the trigger's cavity.
BUT, when I assembled the trigger, it was clearly wrong. Once assembled the housing put enough pressure onto the washers as to lock the parts (sear and blade).
So, what was there to do?

I remembered then that when discussing the trigger with the designer, we had talked about Zinc parts.
Few people really understand why, but those that have worked in precision moulding know that moulds that are made to mould zinc have a relatively short life. It's not that they get clogged, or they break, or they loose their definition, it's that they GROW on the inside. So, parts that are moulded become increasingly thick. A friend once told me that molten zinc dissolved iron/steel; and that is possible, as crucibles for melting zinc are usually ceramic, but I do not know this to be absolutely true, though I think it makes sense.

Not a problem when you know the tolerances and you can plan ahead and leave room for parts that may have up to 0.015" of extra room here and there, but when you design an aftermarket part you run the risk of not being able to use that part if the manufacturer has a little more tolerance built into its designs.
And so, the solution was to thin out the pawl a little, but it is a small part.

Well, part of the reason why early gunsmiths were also clock makers (Girandoni to name just one), was because we develop the tools and the eye to work to very small dimensions by hand.
​
​The small vice was taken out of storage and put to good use:
Picture
Once the offending 0.027" were taken off using needle files, the pawl entered smoothly into the trigger blade cavity when the piston's flat part of the latching button hit the safety extension lever:
Picture
Now, I assume that some of you are asking "why didn't you create some relief in the trigger blade itself?"
Well, the reason  is that RE has a very specific position where the trigger can be at the same time light AND safe. And IMHO there is NOTHING as dangerous as a gun that HAS an INOPERATIVE safety lever; it will lead people to believe it is a safe gun when in reality it is not. So, it was paramount to safeguard the functioning of the safety lever.

You may or may not have the need to do this to your gun, this one in particular was from the latest batch; hopefully, this issue will be corrected and hopefully by now you are ready to start the process of getting the trigger in line with what you want/need.


The booklet tells you to start where the old trigger was adjusted to, but where do you start when you had the OEM 1 screw trigger blade?

Well the answer is in this photo  (that you can find here):
Picture
​What is important here is the DIFFERENCE between the two screws HEIGHTS. Since the "watertables" of both trigger blades are not the same, we cannot ensure that the heights should be the same, but we CAN say that the difference in screw heights should be the same so, we took the height of the front trigger screw and added 0.95 mm's to the second height, and we used that as our starting point.
And, sure enough, the trigger pull changed little.
I then adjusted to the lowest possible weight and measured an average of 5 shots.
It was interesting to note that compared to the "Yankee Tune​", the difference was almost non measureable.
To take the experiment further, I moved the screw to the closer position (more forward), and re-tuned the trigger to the lowest possible weight that I still felt was "safe". It was then that we could observe some appreciable differences.
Picture
Here we need to add that adjusting the RE's trigger is not as easy as it should be, every time the screws need to be adjusted, the blade itself needs to be moved/removed. 
By the end of the day, the RE trigger was set to 17 oz. (close enough to 1# even) and the job was considered finished.

One important aspect is that if you need to work on your gun, remember to remove the trigger blade, as the trigger guard will not release the trigger with the blade on. 
You can modify your trigger guard to create room, but in general I do not advocate modifying structural parts and the trigger guard is an important part in the bedding of the LGU and LGV. They are not as "tunable" as DIANA mod. 34's using the rear stock to action screws, but a properly set and consistent trigger guard torque is important to achieve utmost accuracy in any gun.

Since I already had the trigger pull scale out and I had the rifle vise pointed at the pellet trap and everything was set, I decided to measure the trigger pull in my personal LGV (shooting at 16 ft-lbs in 0.177"), the average of 5 trigger pulls was 15.6 oz.
Sure enough, my LGV has stoned trigger parts and uses the "Walther Match Abzug".
Further, the trigger on the LGV feels "crisper" because once the force of the opposing sear spring has been overcome, the trigger pull is finished in a VERY SHORT DISTANCE. Whereas the BMS and the RE triggers need a longer distance to actually release the shot.
Nothing new or out of the ordinary here, it's a simple result of levers and fulcrum points. Longer lever, more force, but shorter distance. Shorter lever, less force needed, but a longer travel is required.

In here I would like to insert RE's response to the question of when the third screw hole had been added:

Hello Hector,
 
The additional tapped hole was added in the last few months, we’ve been producing the trigger for several years.
We often make incremental changes to our products and this was a result of one or two comments I have read on various forums that people have done themselves.
Like almost all manufactures, we don’t offer “upgrades” to the latest version during the product life cycle.
I’m not entirely convinced that the extra hole it is necessary or even gives an overall improvement, but was added so that customers who wished could experiment.
I find that although the new grub screw position will reduce the pull weight, it also increases the trigger creep which is very undesirable.
 
Our recommendation is to position the grub screws in the original intended position.
 
Best regards,
Derek Rose.


Couldn't have said it better myself! LOL!
Picture
​Which trigger is the best?  All of them, or none, it all depends. Remember we are all different, and depending on your habits and customs as related to shooting, one trigger may be better for you than the others.
An undisputable advantage of these "supercustom" triggers is that you can move the blade itself back and forth, and twist it a little, if that works better for you, the Match Abzug, or the OEM triggers do not have this facility.
A good gunsmith can set the release point to a reasonably wide latitude of positions forward and back, but moving the trigger blade itself makes more sense for the home tinkerer.

The BMS trigger does have more adjustability in the LENGTH of the first stage because the safety pawl to trigger relation is less demanding than in the RE's trigger.

That is part of the beauty of gunsmithing, there is so much variety!

Anyway, hope this short note helps you identify which trigger is better for you and why, and also may or may not save you some money because at around US$80 for the RE and US$140 for the BMS, getting some polishing stones and a longer M3 screw; or asking a friend to do it may make more sense.

Keep well and shoot straight!
11 Comments

Second Round with the DIANA Mauser AM-03 shooting at DIFTA on "Cinco de Mayo"

5/9/2018

0 Comments

 
As I have written before, there is no harder shooting discipline than shooting a high powered spring-piston airgun.

They are the physical embodiment of Murphy's Law.

But, they are so much fun!
​
Last time we talked about loose screws, this time it was a scope the one that caused a less than good performance. Even in a recoil-absorbing mount.

But let's start with the shoot.
DIFTA is a great FT Club, it has been running FT shoots for over 30 years. It has hosted Nationals and other important matches of International reach, like the "Mason-Dixon Shootout".
​This shoot was interesting because it was planned and setup remotely.
Paolo was travelling and it was only through the good offices of Mark Mayer that we could have a shoot, as he set-up the field.
It was sparsely attended, but it was not surprising because the weatherpersons of several websites had been warning of a day of continuous rain.
Reminding myself of what my Norwegian friends say: "There is no bad weather, just bad choice of clothing", I got out the Ridgeline (New Zealand) rain suit and prepared to be wet. And what better gun to take to a wet competition than one that is set in a synthetic stock and is gas-spring powered? LOL!

I had previously received a scope for testing (part of the BSA Familly of scopes) and it had an interesting and, what proved to be a useful, reticle for low magnification ranging. It is a version of the Dragunov reticle that is marked 30-40-50 etc.
Picture
Dragunov reticles work under the stadia-ranging (bracketing)  principle of measuring the height of a known object against a graduated pattern and then using trigonometry to establish the distance to the object.
There is a lot more to read about this here.
SOME of these reticles are based on objects of 2,000 mm's height, SOME are based on objects of 1,800 mm's height, the latter ones are specially useful for airgunners.
I was not expecting spectacular results, after all it is a $100 scope, but the scope did provide some useful information and we'll be looking into these reticles a little more in the future.
So, having scoped the AM-03 with this little scope, off I went to DIFTA.
When I arrived, I met Dean Gumby who was shooting his first match, and shortly afterwards, Mark arrived with a chainsaw.
​Why?
Picture
A huge tree had fallen across the sight-in range!
Picture
I am sure Dean was not expecting to work so hard just to have an airgun Match! LOL!
In relatively short time, the sighting-in range was clear and after setting it up, while the rest of the shooters were rolling out the strings, we had a good sight-in and after the customary shooters meeting, where Paolo made special emphasis on the safety aspects because of the new shooters present, we got the shoot underway.

I was, again, squadded with Vince S
Picture
While Paolo squadded himself with Dean G and Mark Mercer, while Mark Mayer was squadded with Mike G
Picture
Picture
DIFTA is always a nice venue
Picture
And, apart from the FIVE 3/8" targets we had, most were reasonable shots.
Picture
I was hitting left and right, even at extended ranges, so ranging was not the problem. Nor was there too much wind.
Shooting the JSB's GTO's allowed me to distinguish my hits from the rest (they are the shiny ones), so I was getting good feedback, but scope simply could not take the 20 ft-lbs (yes, 11.5 grs at 875 fps)  was a little much and it was going from one side to the other.

I have tested the scope since then in a 12 ft-lb D54 and it has fared well, much better, but still, it is a $100 scope.
We'll have some conversations with the makers and if they decide to bring out a really serious offering, I will let you all know.

So, when all  was said and done, the scores were tallied and handshakes were awarded to the winners:
Picture
Mike Greco, Unlimited
Picture
Dean Gumby, Hunter Piston
Picture
Vince Sempronio Hunter PCP
Picture
Mark Mayer, Open PCP
Picture
Paolo shaking hands with himself, WFTF PCP
All in all an excellent day at DIFTA with old and new friends.
First time I have shot a whole match in AAFTA Hunter style with cross-sticks and I have learned a few things. I'll make some changes to my cross sticks and test some other time.
A successful test of the raingear (not because there was any doubt as to its "waterproofness", but it is the first time that I have worn something like that all day to test how comfortable it can be. Important in a real hunt, or in an international match.
The rifle, with a much better scope now, is shooting as it should:
Picture
Result of some Nord-Loc washers and some Loc-Tite, again, the black bullseye is a little over ½".
Which is a remarkable result for a $300, basically OoB rifle, with modifications that can be made by anyone with a modicum of handtools and some knowledge.

And the GTO's gave a BC of 0.0214, which is not bad at all. I would not hesitate to take this rig hunting, especially, harder targets like Chucks, O'Possums, Raccoons, and Badgers; at 41 yards it is still hitting the target with more than 12 ft-lbs and at 54 yards it carries 10½ ft-lbs. and the hardness of the tin pellets would ensure a deep penetration.

I will keep on using sporadically this gun, whose ultimate purpose is to undergo some cold weather tests next winter, it is a lot of fun and a lot of gun for the price!

We may also start working on a 0.177" version setup for sub-12 ft-lbs, but as that will be an all-out FT rifle, we'll go a lot deeper into the modifications.

Hope you have enjoyed the writeups.

Keep well and shoot straight!


​HM
0 Comments

    Hector Medina

    2012 US National WFTF Spring Piston Champion
    2012 WFTF Spring Piston Grand Prix Winner
    2013 World's WFTF Spring Piston 7th place
    2014 Texas State WFTF Piston Champion
    2014 World's WFTF Spring Piston 5th place.
    2015 Maine State Champion WFTF Piston
    2015 Massachusetts State Champion WFTF Piston
    2015 New York State Champion WFTF Piston
    2015 US National WFTF Piston 2nd Place
    2016 Canadian WFTF Piston Champion
    2016 Pyramyd Air Cup WFTF Piston 1st Place
    2017 US Nationals Open Piston 3rd Place
    2018 WFTC's Member of Team USA Champion Springers
    2018 WFTC's 4th place Veteran Springer
    2020 Puerto Rico GP Piston First Place
    2020 NC State Championships 1st Place Piston
    2022 Maryland State Champion WFTF 
    2022 WFTC's Italy Member of TEAM USA 2nd place Springers
    2022 WFTC's Italy
    2nd Place Veteran Springers

    Archives

    August 2022
    May 2022
    April 2022
    February 2022
    August 2021
    July 2021
    June 2021
    May 2021
    April 2021
    March 2021
    February 2021
    October 2020
    September 2020
    August 2020
    July 2020
    June 2020
    May 2020
    April 2020
    March 2020
    February 2020
    January 2020
    December 2019
    November 2019
    September 2019
    August 2019
    July 2019
    May 2019
    April 2019
    January 2019
    December 2018
    November 2018
    October 2018
    September 2018
    August 2018
    June 2018
    May 2018
    April 2018
    March 2018
    February 2018
    January 2018
    December 2017
    November 2017
    October 2017
    September 2017
    March 2017
    December 2016
    October 2016
    September 2016
    July 2016
    June 2016
    March 2016
    January 2016
    December 2015
    November 2015
    October 2015
    September 2015
    August 2015
    June 2015
    May 2015
    April 2015
    March 2015
    February 2015
    January 2015
    December 2014
    November 2014
    October 2014
    August 2014
    July 2014
    June 2014
    May 2014
    March 2014
    February 2014
    December 2013
    November 2013
    October 2013
    September 2013

    Categories

    All
    Events
    Gear
    Hunting
    Tests

    RSS Feed

Proudly powered by Weebly