We're going to give a rest to the critters and their anatomies for a while.
On one hand, it is Christmas; on the other, variety is the spice of life.
At the request of one of the foremost pellet manufacturers (European, naturally), I will post this time, what it takes to make a semi-custom gun. Mostly to European tastes.
In many instances, the discussion of why the Europeans have better airguns than the rest of the world always puzzles people, some arguments advanced have been:
a) their restrictive firearms laws (true in SOME cases, but not all)
b) the "smallness" of their spaces and their complete lack of truly wild areas (again, true but only up to a point).
c) the long history of indoors and short range shooting (Zimmerstutzen and the likes; again true, but also, again, only up to a point)
Most probably the truth lies in a combination of all these factors plus some others:
1) In Europe, ANYONE adding or removing metal from a gun, requires a license, a register, and some real, decent education or apprenticeship. He is, therefore, a professional, and charges accordingly.
2) It is much more important to have a FEW GOOD things than having tons of so-so.
All the above mentioned reasons point to the fact that in Europe, Airguns are much more expensive. And their quality reflects the investment needed to possess them; investment not only in monetary terms, but also time-wise.
Quality things take time to make, and custom (truly custom things) take even more time. Just how much time and money can be understood by looking into the prices of some Holland and Holland shotguns and rifles, or at some of the truly custom airguns still built in modern times.
The modern world, however, with its globalization and its furious break-neck speed does allow for something like a "happy medium", and that is the Semi-Custom product. Where a basic -whatever- is taken from a manufacturer, or a combination of manufacturers working together in concert and harmony, and then individual touches are added so that the end product conforms to a niche market.
Examples of these are relatively common but, to some extent, my favorite is the Ruf Porsches.
With this mechanism in mind, we at Connecticut Custom Airguns, are able to provide a few discerning shooters per year with airguns that are not crazy expensive (like the Hollands and Hollands), but still provide distinctive, individual, and classic touches that make any airgun a pleasure to own, carry, shoot and hunt with.
Having explained all that, let's dive head-first into the process of making a "Berg-Stutzen"
A "Berg-Stutzen" is, by definition a "Mountain Rifle". It is a sleek, light, small caliber gun suitable for hunting medium and small game in the mountains.
The Airgun equivalent of a "Berg Stutzen" is the short, medium powered, carbine, capable of taking birds and squirrels at woods ranges; and ¿what can be more European than the Mannlicher stocked carbines?
So, this post is about the making of a 1st generation Diana Mod. 430 Stutzen into a Berg-Stutzen.
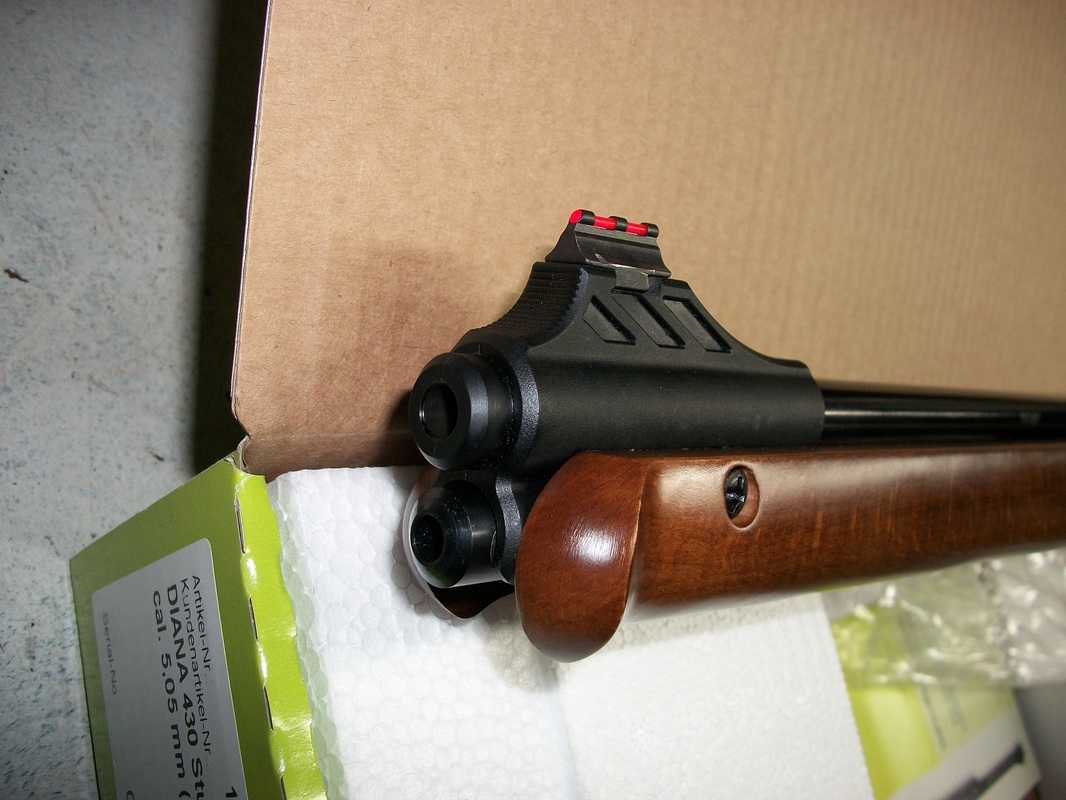
Let's start from the beginning, this is how we get the rifle from Diana:
On one hand, it is Christmas; on the other, variety is the spice of life.
At the request of one of the foremost pellet manufacturers (European, naturally), I will post this time, what it takes to make a semi-custom gun. Mostly to European tastes.
In many instances, the discussion of why the Europeans have better airguns than the rest of the world always puzzles people, some arguments advanced have been:
a) their restrictive firearms laws (true in SOME cases, but not all)
b) the "smallness" of their spaces and their complete lack of truly wild areas (again, true but only up to a point).
c) the long history of indoors and short range shooting (Zimmerstutzen and the likes; again true, but also, again, only up to a point)
Most probably the truth lies in a combination of all these factors plus some others:
1) In Europe, ANYONE adding or removing metal from a gun, requires a license, a register, and some real, decent education or apprenticeship. He is, therefore, a professional, and charges accordingly.
2) It is much more important to have a FEW GOOD things than having tons of so-so.
All the above mentioned reasons point to the fact that in Europe, Airguns are much more expensive. And their quality reflects the investment needed to possess them; investment not only in monetary terms, but also time-wise.
Quality things take time to make, and custom (truly custom things) take even more time. Just how much time and money can be understood by looking into the prices of some Holland and Holland shotguns and rifles, or at some of the truly custom airguns still built in modern times.
The modern world, however, with its globalization and its furious break-neck speed does allow for something like a "happy medium", and that is the Semi-Custom product. Where a basic -whatever- is taken from a manufacturer, or a combination of manufacturers working together in concert and harmony, and then individual touches are added so that the end product conforms to a niche market.
Examples of these are relatively common but, to some extent, my favorite is the Ruf Porsches.
With this mechanism in mind, we at Connecticut Custom Airguns, are able to provide a few discerning shooters per year with airguns that are not crazy expensive (like the Hollands and Hollands), but still provide distinctive, individual, and classic touches that make any airgun a pleasure to own, carry, shoot and hunt with.
Having explained all that, let's dive head-first into the process of making a "Berg-Stutzen"
A "Berg-Stutzen" is, by definition a "Mountain Rifle". It is a sleek, light, small caliber gun suitable for hunting medium and small game in the mountains.
The Airgun equivalent of a "Berg Stutzen" is the short, medium powered, carbine, capable of taking birds and squirrels at woods ranges; and ¿what can be more European than the Mannlicher stocked carbines?
So, this post is about the making of a 1st generation Diana Mod. 430 Stutzen into a Berg-Stutzen.
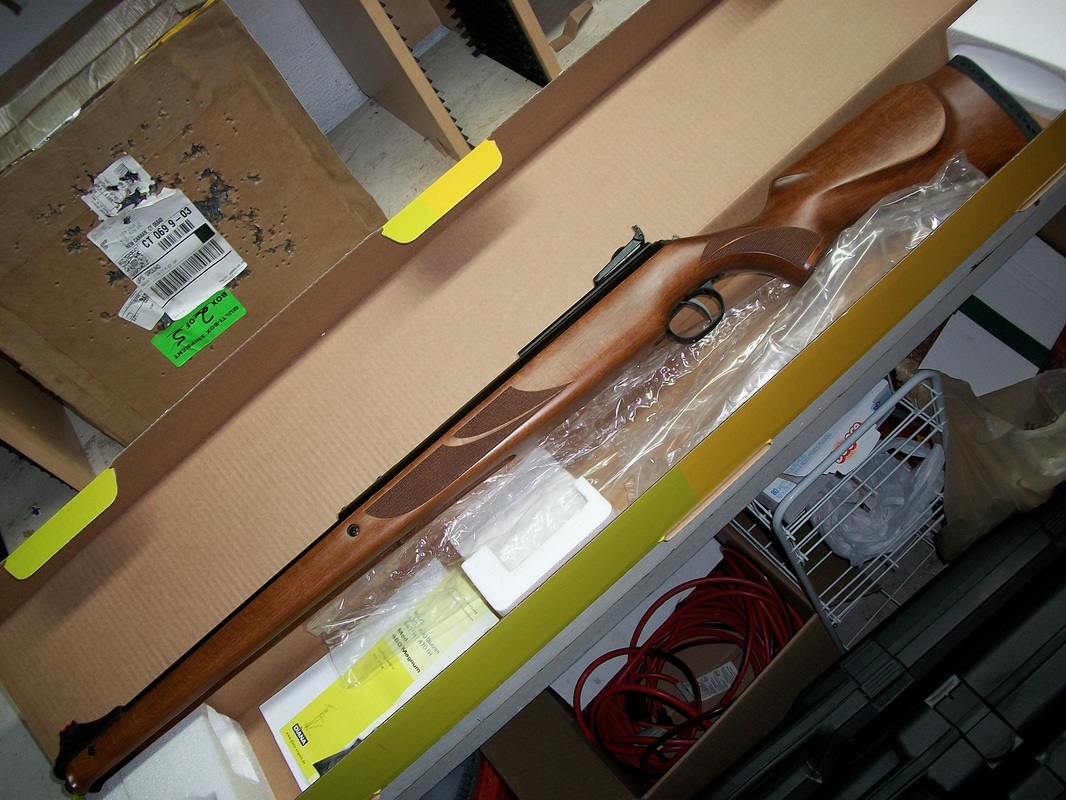
Let's start from the beginning, this is how we get the rifle from Diana:
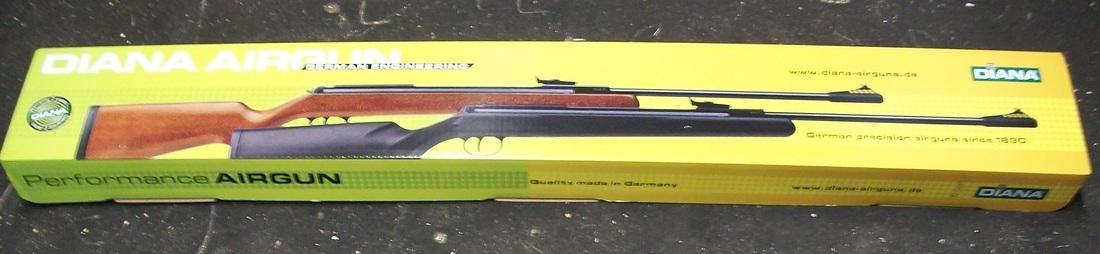
And what is inside the box?
This:
This:
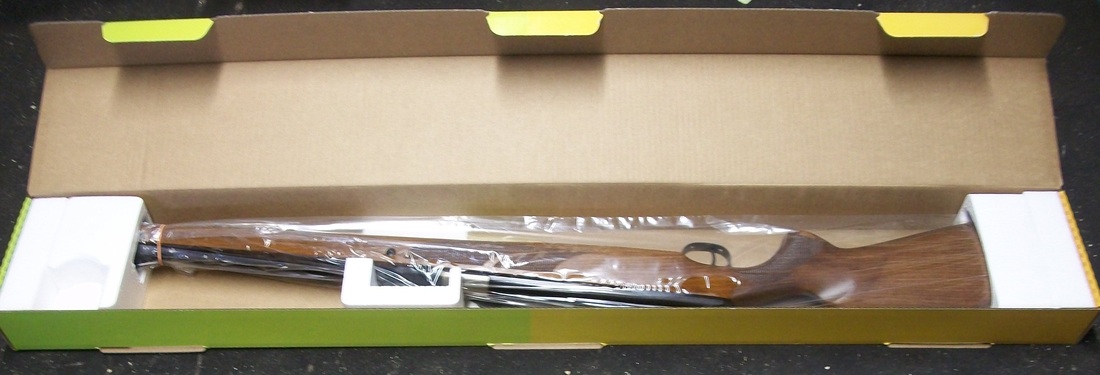
Once out of the bag, cleaned and stripped of all shipping oils, this is what we have:

First generation 430 Stutzens had an atttractive checkering in the pistol grip as well as in the forend.
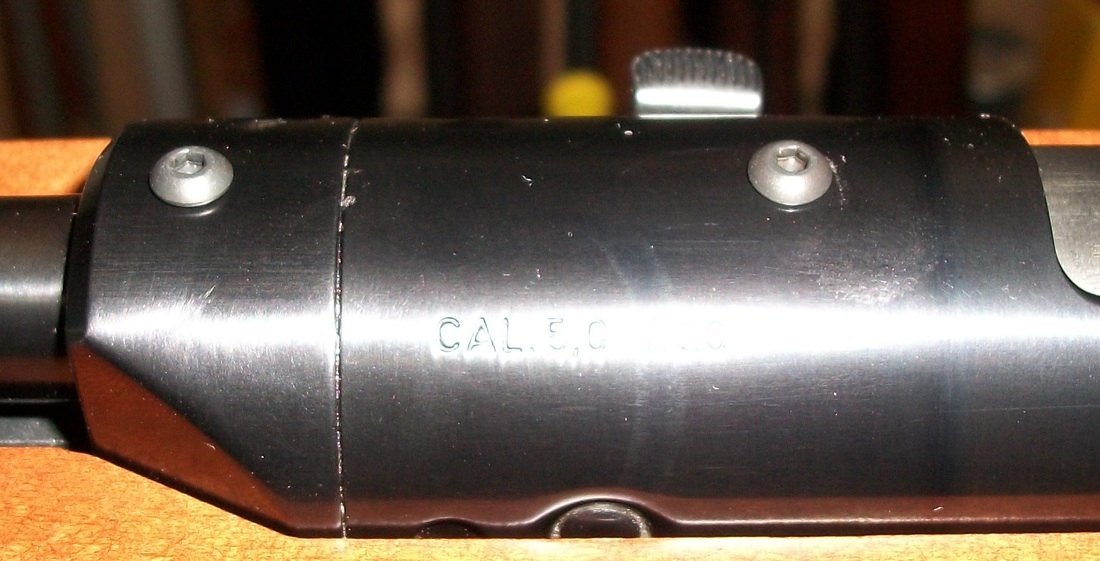
Open sights need to come off, but before going on to the next picture, do note the caliber:
Open sights need to come off, but before going on to the next picture, do note the caliber:
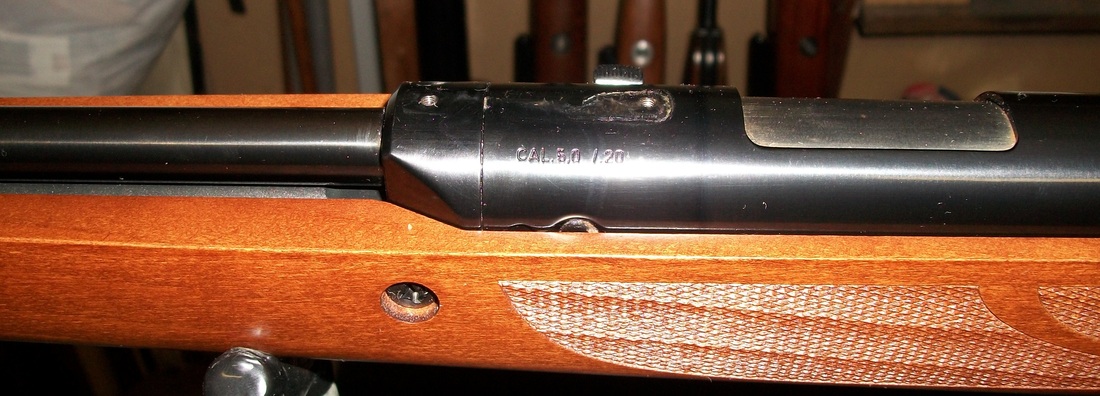
Yes, it is a 0.20" cal. barrel made by Lothar Walther to our specs.
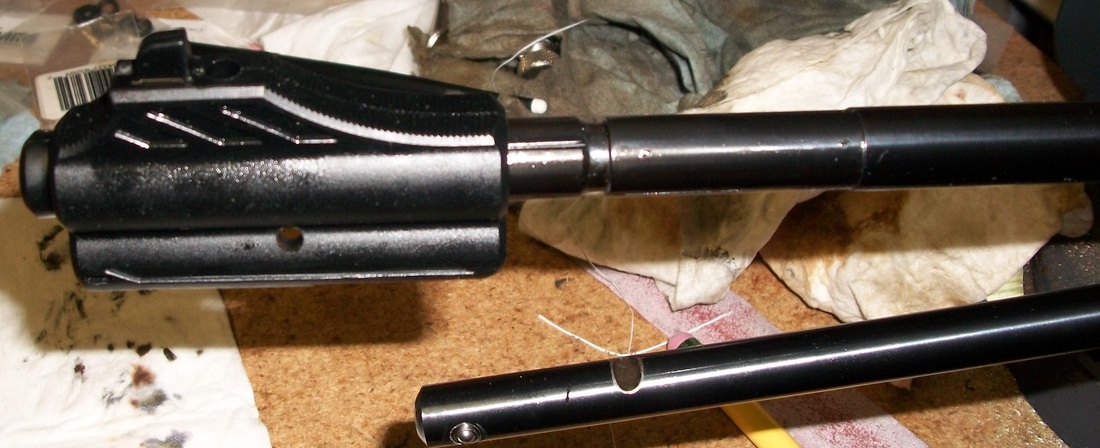
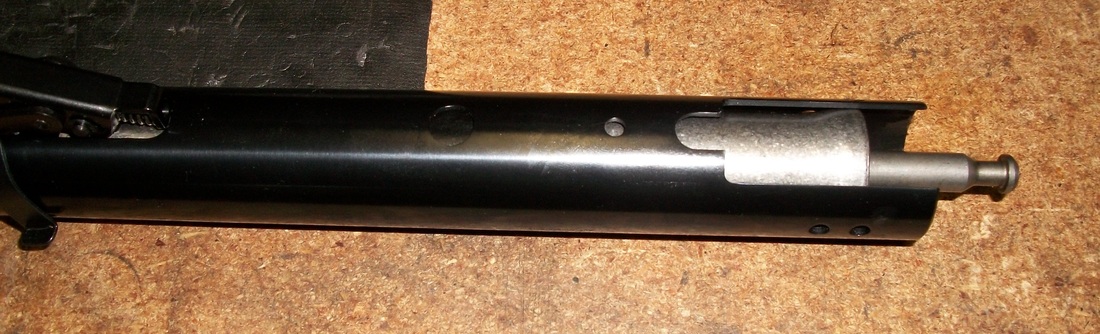
The stock needs to come off and the action underlever looks like this:
The stock needs to come off and the action underlever looks like this:

To those that are familiar with other Stuzens like the GAMO, BSA, and even the Diana 46, it will be clear that this is a completely different action. One based on a shortened 460, with a short transfer port, direct pellet loading into the barrel's breech and concentrical piston/travelling compression chamber arrangement.
There is no "lever extending handle", and the front end that acts as a muzzle piece / front sight / lever retention device has been completely redesigned from the old 46's.
Do note that the barrel is shorter than the cocking lever, that the cocking lever is slotted for a pass-through screw with a slotted nut that adjusts the retaining force for the cocking lever, as well as the barrel being slotted for the grub screw that retains the muzzle piece where it should be.
One of the differences between a factory gun and a custom or semi-custom gun is that the sights are there mostly as decoration, as opposed to truly functioning sights. But we will go into that later. After getting the front sight off, we need to put the gun into the spring compressor:

And we need to remove the trigger unit/closing block to get to the inside of the gun. Once that is done, what do we find inside the gun?
Basically the same arrangement of spring/guide and piston that is common in all spring-piston airguns, but let's take it by stages.
This is the trigger block removed, the guide and the spring visible in the action still:
Basically the same arrangement of spring/guide and piston that is common in all spring-piston airguns, but let's take it by stages.
This is the trigger block removed, the guide and the spring visible in the action still:
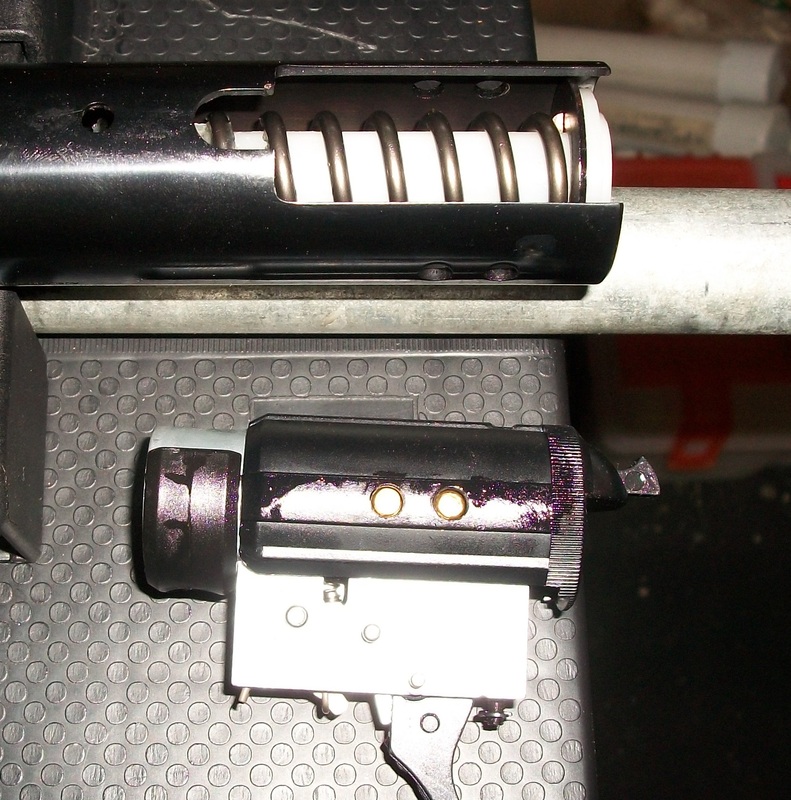
This is a closeup of the T-06 trigger unit. One of the finest triggers in the spring-piston world. And, yes, it is a metal blade, hook release, adjustable pull trigger.

Now, let's remove the spring and guide and slide the piston back:
What are we going to do with the piston?
Change it for an HMO Piston:
Change it for an HMO Piston:
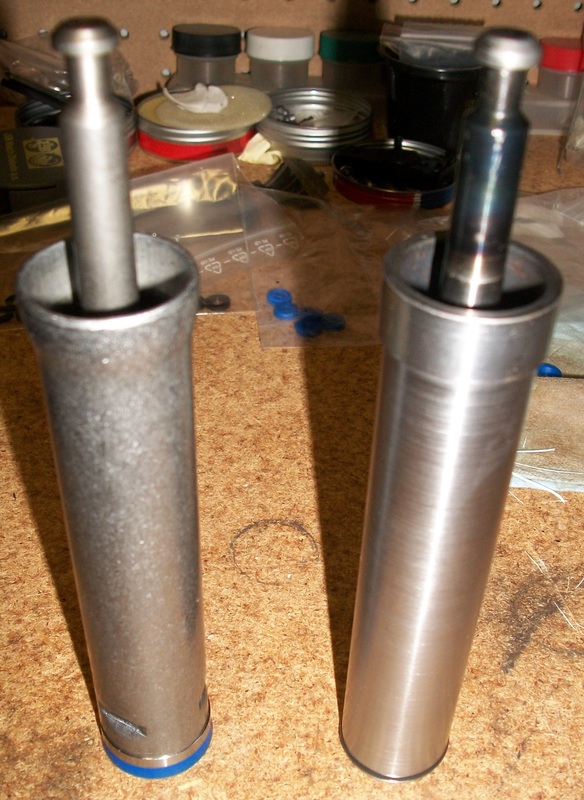
On the left the OEM piston. On the right, the HMO Piston. Machined from schedule 60 DOM steel tubing, tool steel and equipped with an ORing, it performs at a much faster linear speed, producing excellent power at very consistent levels.
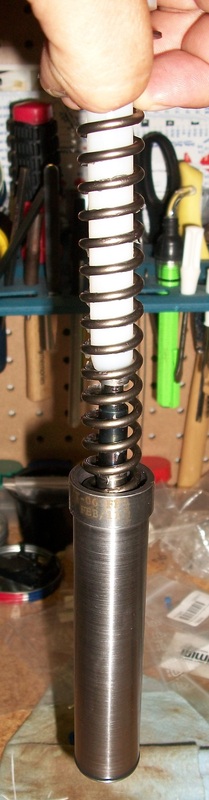
Another interesting aspect of the HMO piston is that it "grips" the spring. Thereby reducing the piston-bounce-back and the spring's buzz/vibrations after the shot is released.
How tight is the "grip"? quite tight, you can hold the piston aloft by the spring and guide:
Another interesting aspect of the HMO piston is that it "grips" the spring. Thereby reducing the piston-bounce-back and the spring's buzz/vibrations after the shot is released.
How tight is the "grip"? quite tight, you can hold the piston aloft by the spring and guide:
Now, let's come back to that front sight/muzzle piece.
The thick post is quite useless in a dark forest environment, so we mill that off:
The thick post is quite useless in a dark forest environment, so we mill that off:
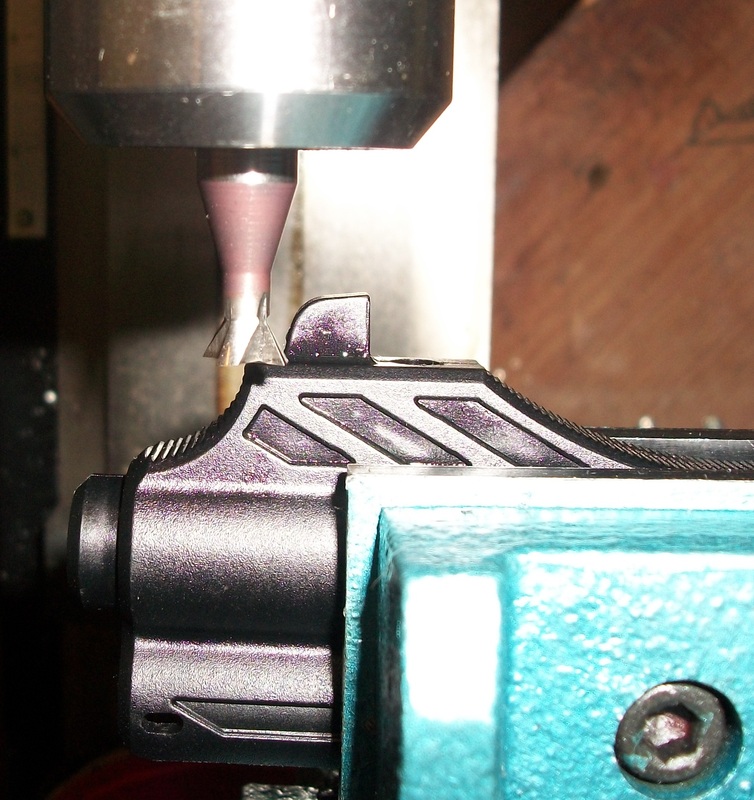
And we mill a cross-dovetail:
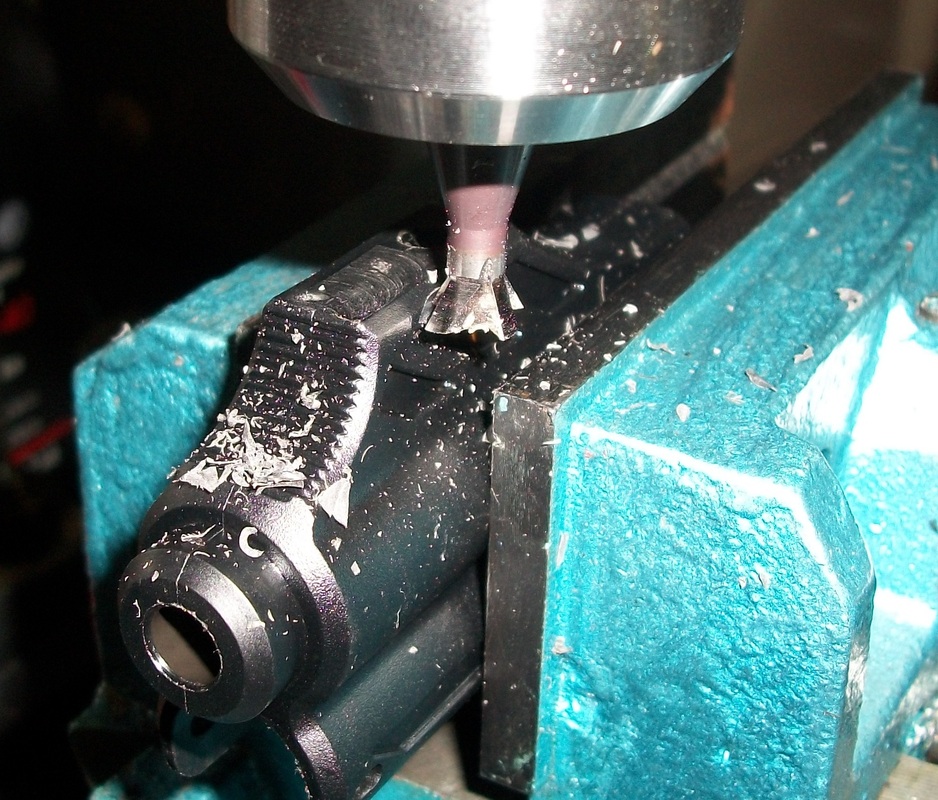
The piece is made of glass micro-beads re-inforced plastic, so care needs to be taken with the cutting tools.
Halfway finished, this is the dovetail that was cut:
Halfway finished, this is the dovetail that was cut:

Fuly finished, the 60° dovetail for the Firesight front sight to be installed:
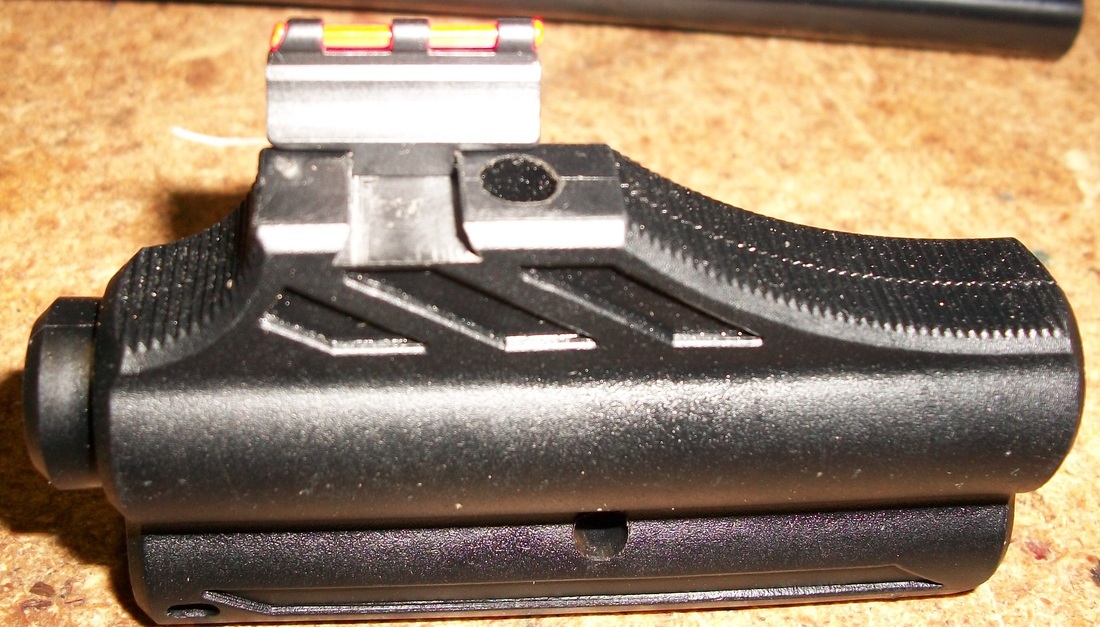
Once the front sight is drifted into place, the whole "iron sights" concept becomes useful and enjoyable to use once again.
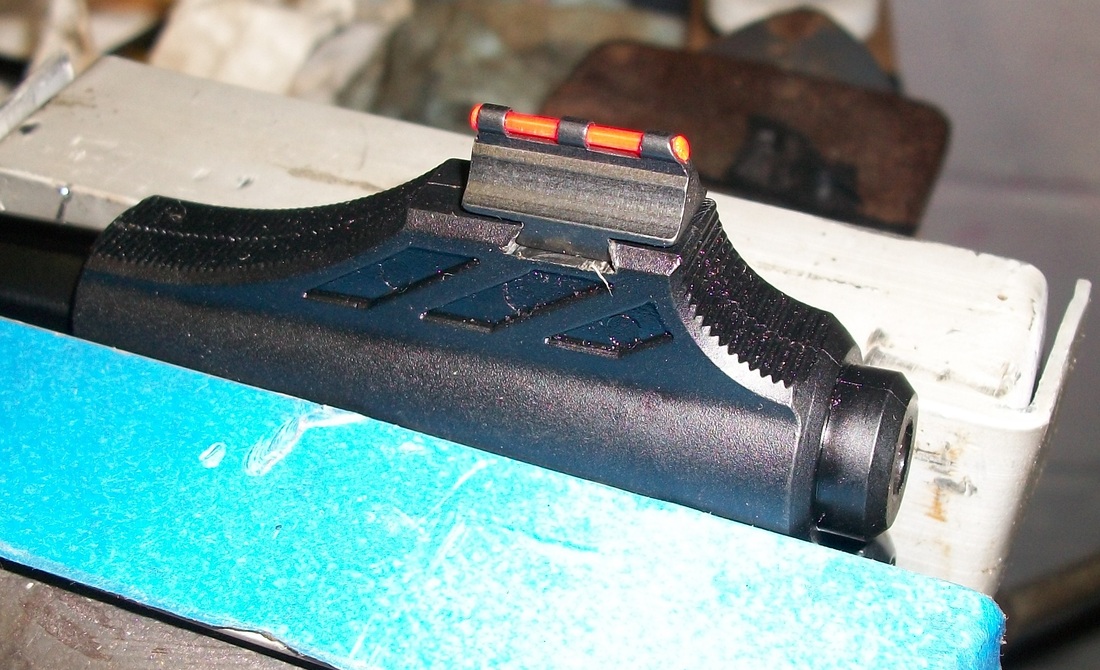
The Firesight provides a very noticeable, luminous, VERY SMALL point of aim (unlike the terrible "Optic Fiber" front sights common in some cheap airguns nowadays. We will analyze the finished mounted front muzzle-piece later.
Now, let's turn our attention to the stock.
Swivels need to be installed. Any gun that is designed to be carried more than it is shot needs sling swivels. And the best way to install sling swivels in a gun that is supposed to be carried into the mountains or the woods, is the "Tyrolean way", where the swivels are installed into the sides of the gun, not to the bottom.
Because it was desired to have completely flush mounting, Pachmayr flush swivels are installed at the rear. On the right hand of the stock for right handed shooters, left hand for left handed shooters, but the process starts with mounting the stock onto our workbench:

Now, we register and affix the drill-guides to the stock at the right place:
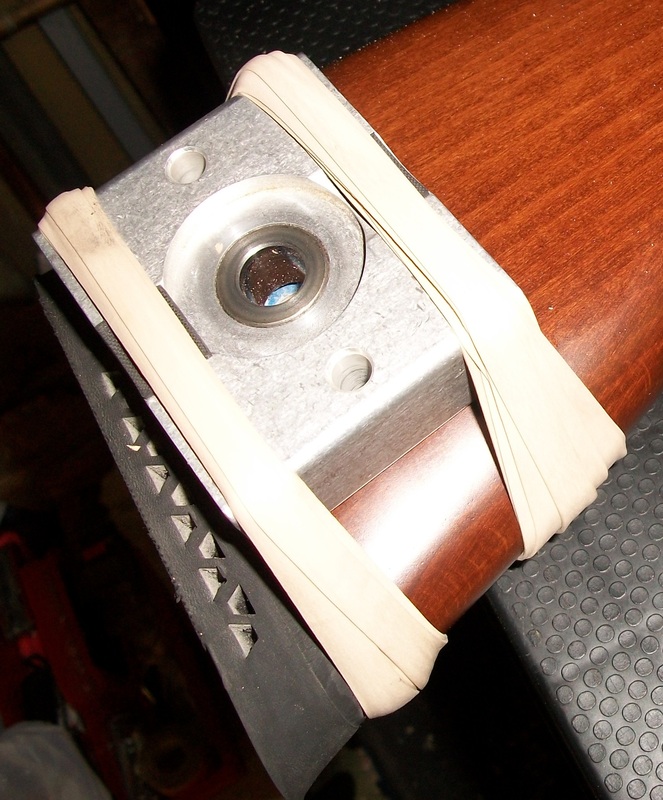
Using rubber bands allows to "tailor" the right holding force to the finish and the odd shape of the stock to be drilled.
After we drill, this is the result:
After we drill, this is the result:
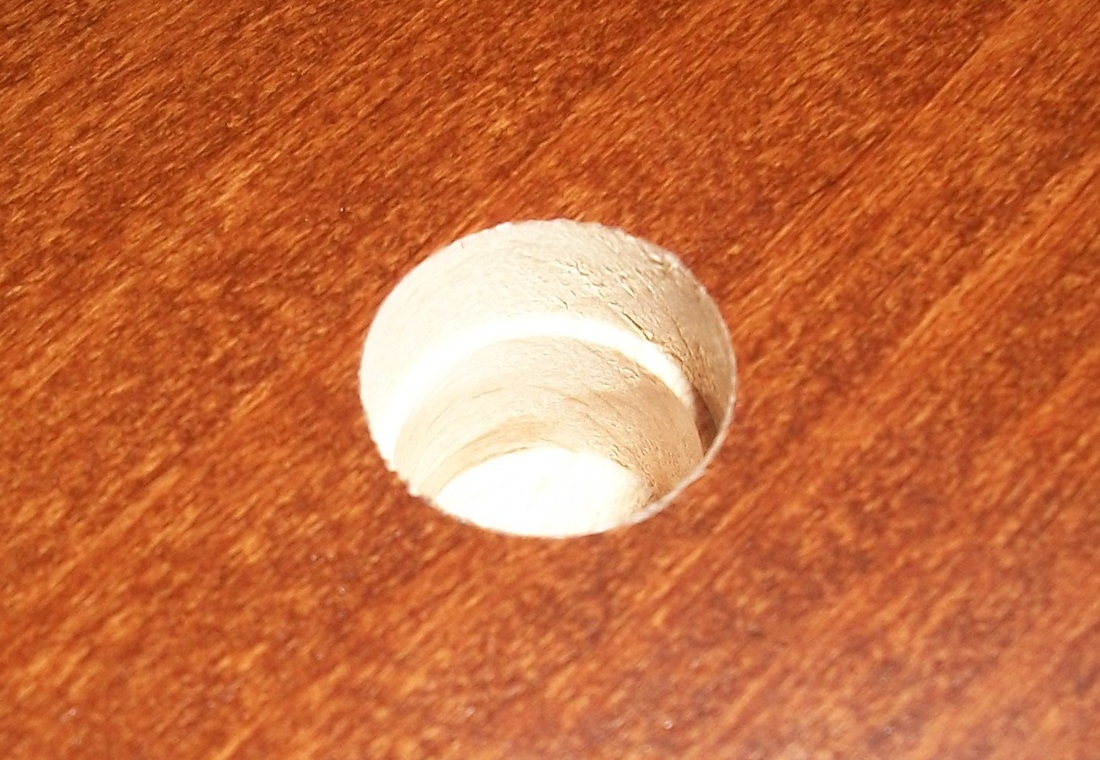
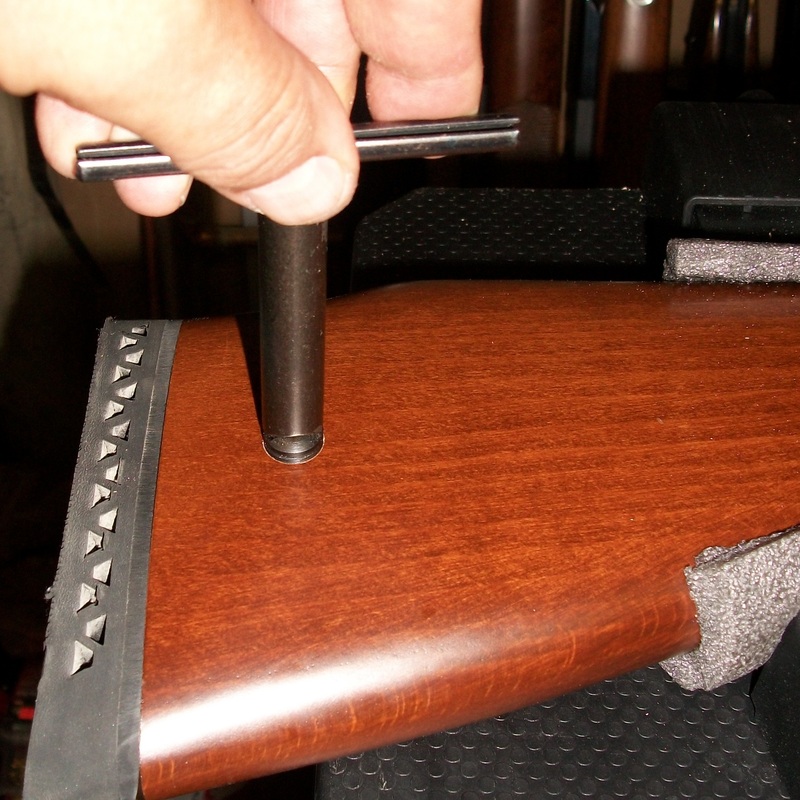
Note the stepped drill that was used. And now the swivel base gets installed with the proper tool:
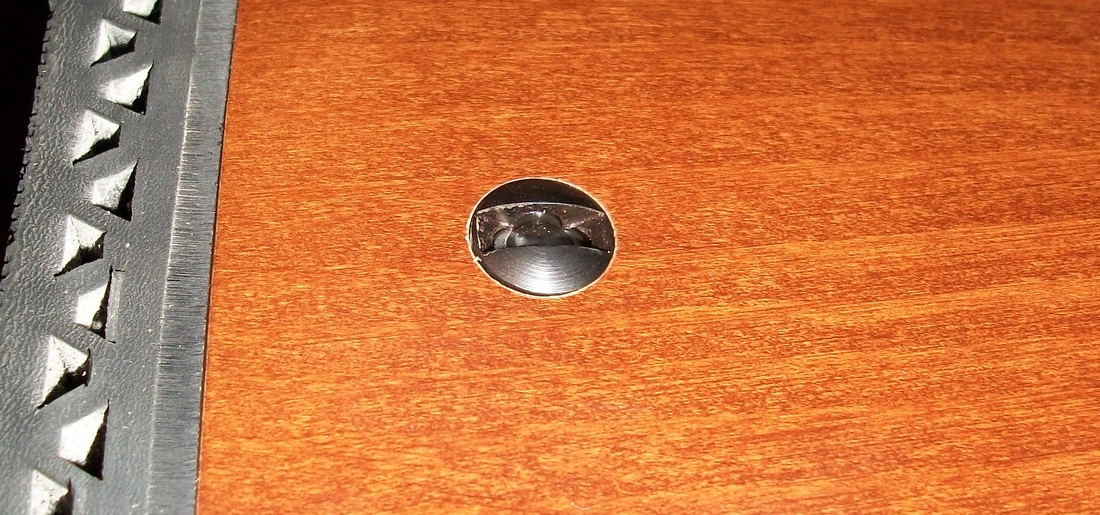
And this is how it looks once finished:
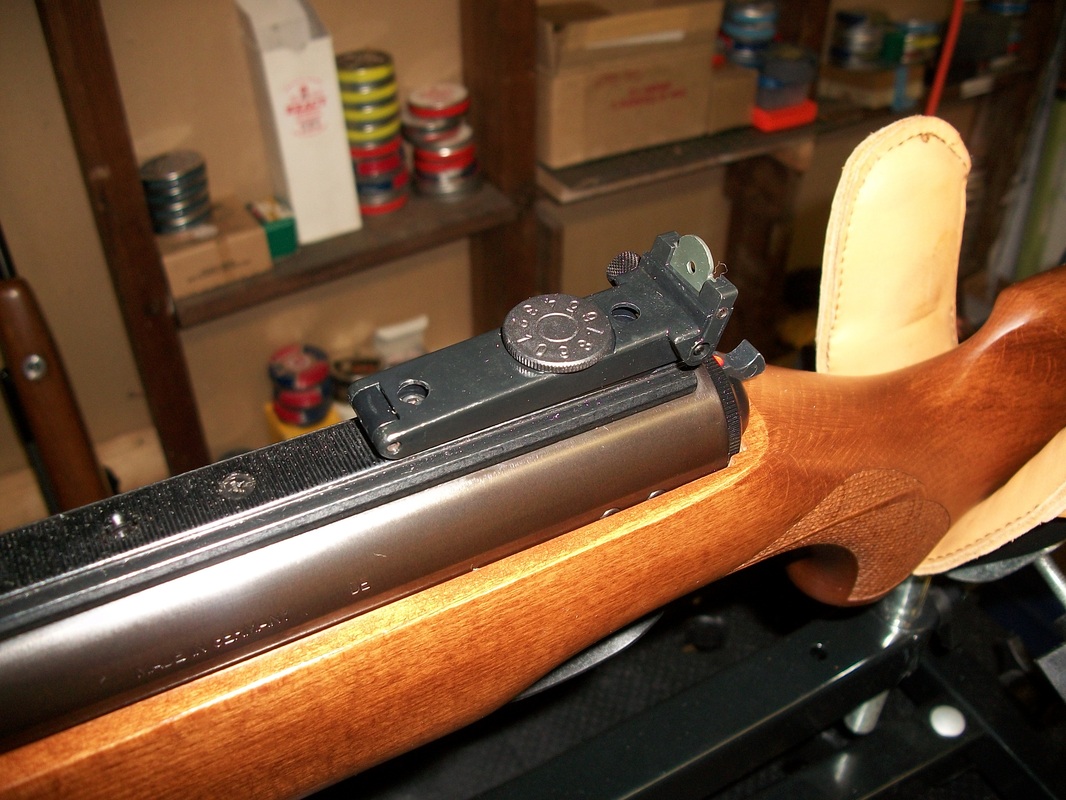
Now that the stock is done, we mount the rear sight that is most appropriate to the front sight used. Note the Merit Iris in the peep sight. It is a valuable addition as it allows for different light conditions to be accounted for. From the darkest parts of the forest, to the most luminous alpine clearings.
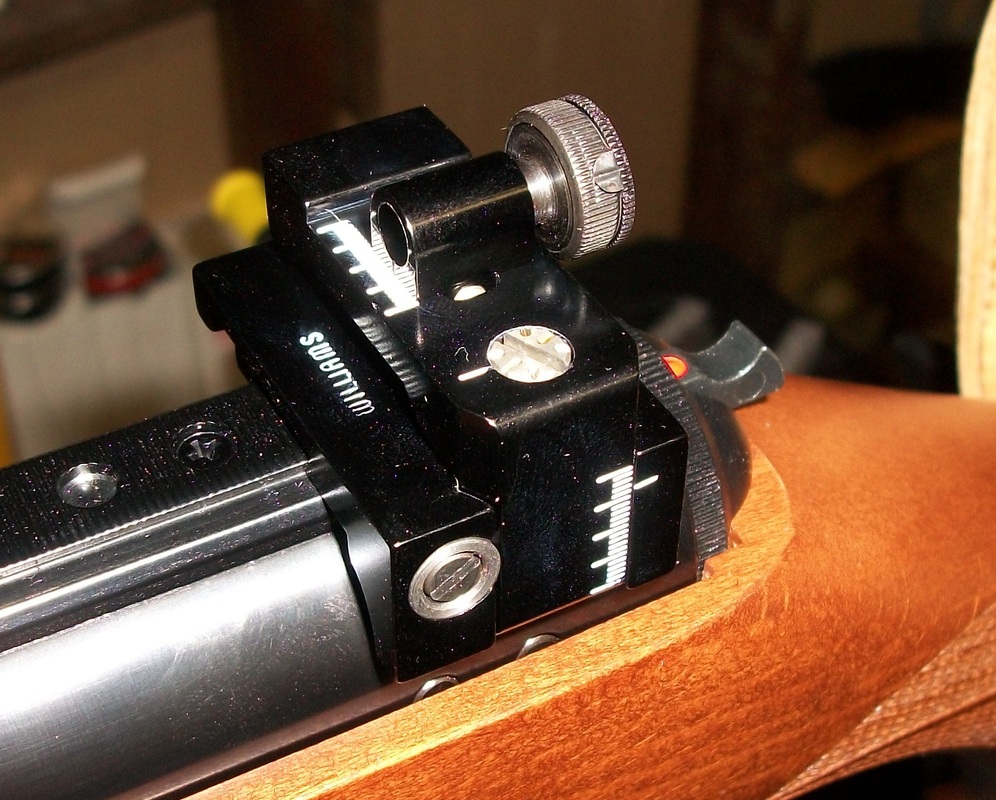
But this is a custom airgun, so you may have opted for the ultralite rear peep (and also less expensive):
The OEM rear iron sight's holes are closed with the appropriate hardware:
And we now look in detail at the front muzzle-piece:
You can see how the pass-through screw holds the two stock "prongs" and the muzzle-piece in the right place. The lever is held by two spring-loaded ball detentes that lock into holes in the sides of the muzzle-piece.
Of course, the gun can also be scoped, and this is how it looks with the sling installed:
Of course, the gun can also be scoped, and this is how it looks with the sling installed:
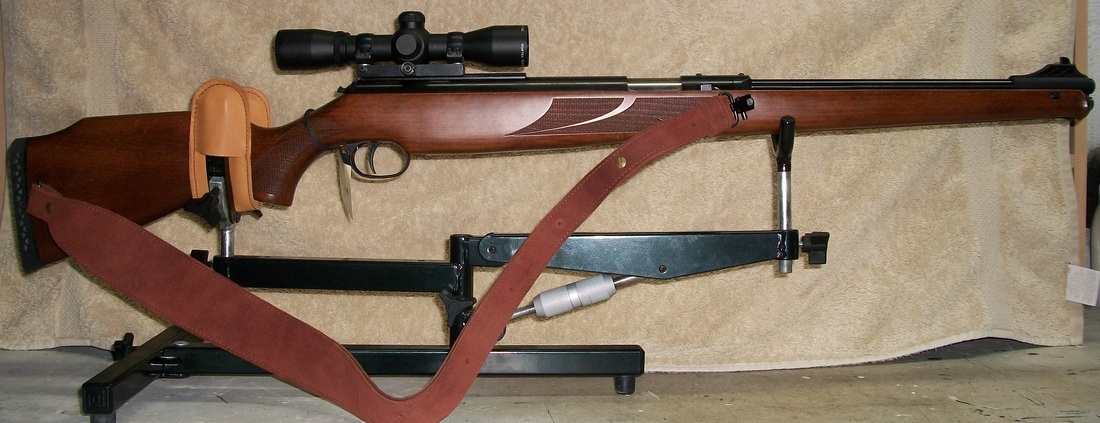
In usage the gun is very comfortably slinged muzzle down over the back, across the whole body. A very stable and comfortable mode of carry. Not too fast, but very safe and practical.
How does the gun performs?, ALL of them yielded between 11½ and 13½ ft-lbs in 0.20" cal. The 0.177" cal. yielded 12 ft-lbs and slightly under. It is a short stroke piston and a short cylinder, no surprises there. But more than enough power to get the type of game that the gun was designed for with a proper placement of the pellet. And here we come to the best part of the Stutzen architecture and of this project: All airguns in this project (35 were made) were truly accurate. These groups are truly typical:
How does the gun performs?, ALL of them yielded between 11½ and 13½ ft-lbs in 0.20" cal. The 0.177" cal. yielded 12 ft-lbs and slightly under. It is a short stroke piston and a short cylinder, no surprises there. But more than enough power to get the type of game that the gun was designed for with a proper placement of the pellet. And here we come to the best part of the Stutzen architecture and of this project: All airguns in this project (35 were made) were truly accurate. These groups are truly typical:
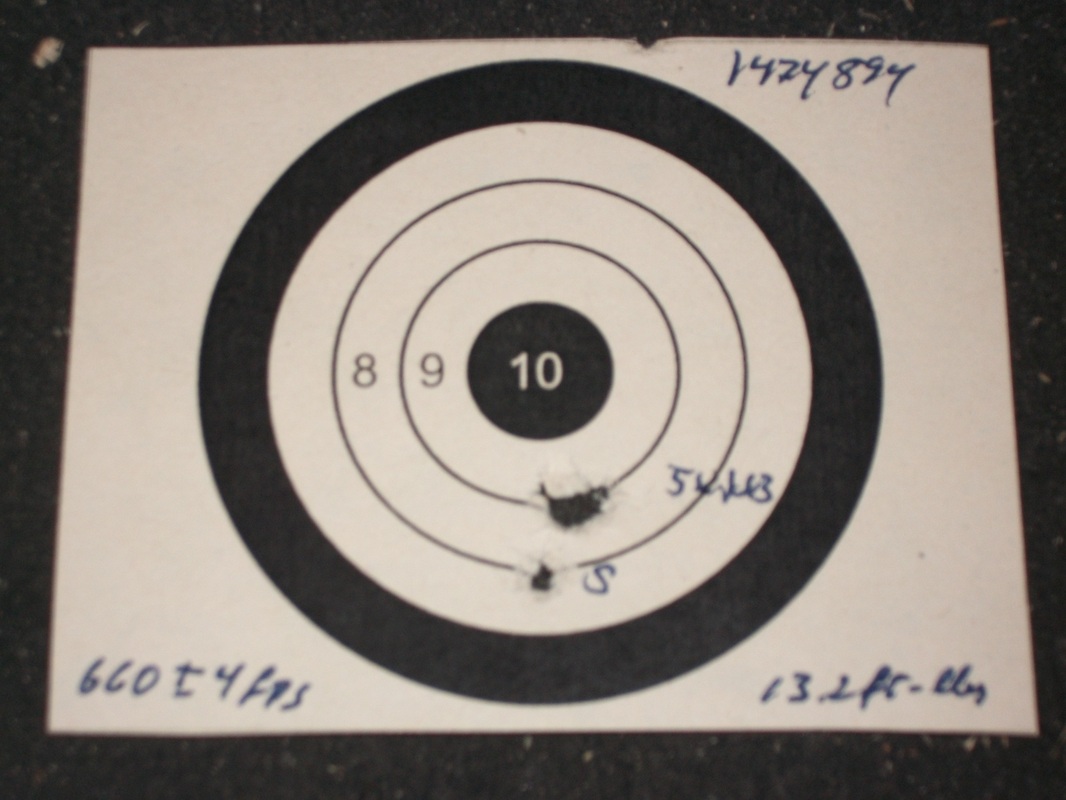
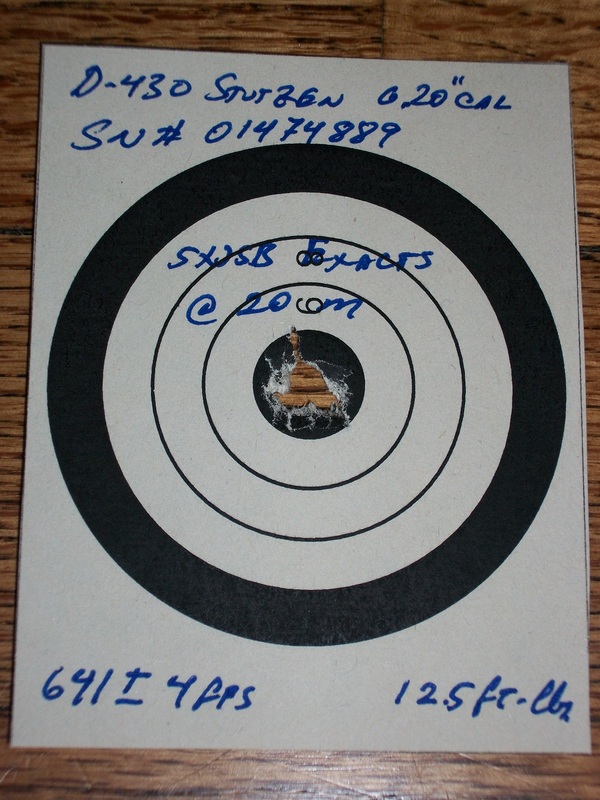
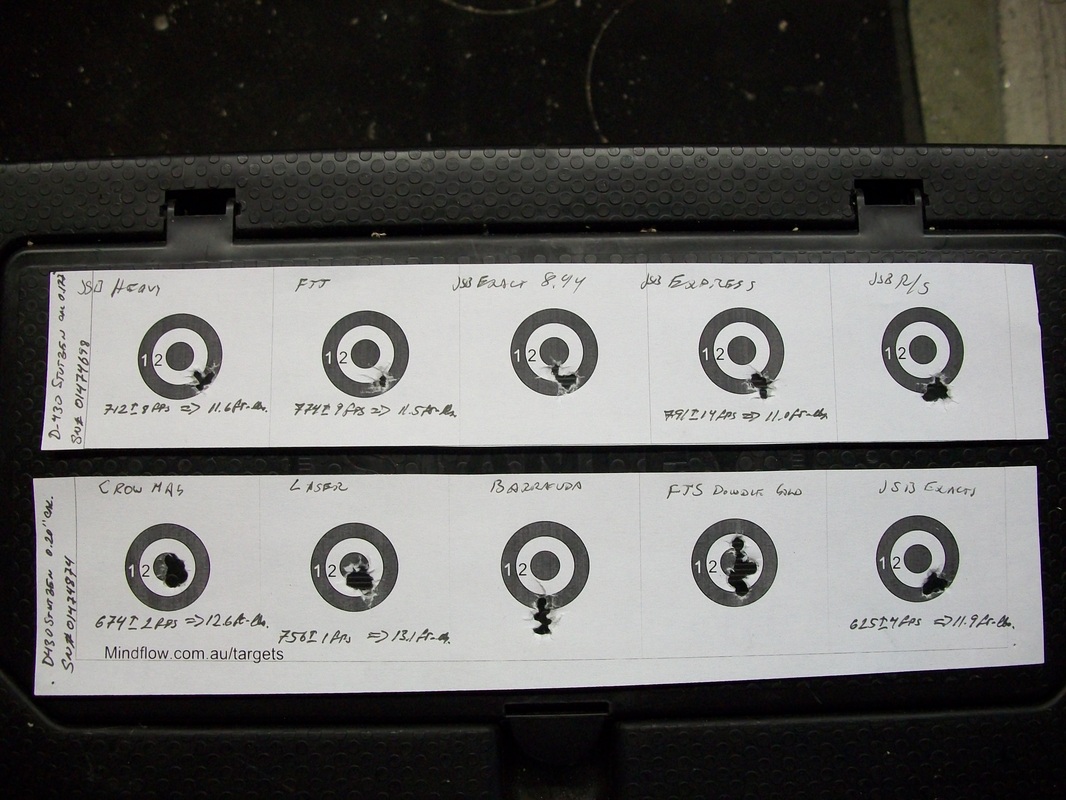
This is what you ensure when you get a semi-custom airgun. You are not wondering about the accuracy of the barrel or the consistency of the compression cycle.You get a test target shot by your gun with your sighting equipment specifications, at some reasonable distance (20 meters in all these cases) using normal, hunting pellets.
You get choices of what to put, mount or remove. In the end, the gun is uniquely yours.
The other aspect you get when you buy a custom gun is that, sometimes, the factories make mistakes, or they are not prepared for "over-enthusiastic" shooters. The 430 has a breech seal problem that we corrected. Breech seals were chewed up by extensive and intensive firing.
On our custom guns, all customers were offered an upgrade. Some took it, some didn't. Not everyone shoots 100 pellets a day for weeks on end. So a Custom gun also affords some peace of mind.
Lastly, a custom gun is a scarce resource, not too many out there.
And this value carries on into the future.
Hope you enjoyed this small trip through my world.
Héctor Medina
Hope you enjoyed this small trip through my world.
Héctor Medina
 RSS Feed