Connecticut Custom Airguns
  • Welcome!
  • Hector's Airgun Blog
  • Products and Products Blog
    • One-Off's
    • The "Héctors Special'" scope by Sightron
    • K1050i FT
    • The Hex Louver or "Secret Sunshade"
    • Pellet Path Calculator >
      • Questions, Answers and Comments on P-P Calc
      • Privacy Policy for PP-Calc
    • The Nautilus SideWheel
    • The X-10 TiltMeter
  • Zimmer-Silhouetten
    • Results 2017-2018
    • Results 2016-2017
    • Results 2015-2016
    • Results 2014-2015
    • Results 2013-2014
  • References and Links
  • Contact us
  • Store

Hector's Airgun Blog

Where we discuss, CIVIILY,  anything airgun.

Return Home

Nur für Jäger / Only for hunters.-  Take TWO

7/29/2021

1 Comment

 
Some things come out of the blue.
Unexpectedly.
Suddenly
And challenge your "mettle".
Such is this case.
Some months ago, I was contacted by a person that had not shot before (this is important!). But had decided to get rid of invasive pests using an airgun.

So far so good, right? NOTHING out of the ordinary!

Well, because of the disruption of the supply trains of EVERYTHING due to the Pandemic, the ONLY gun he had found was a Hatsan FlashPup QE.
As far as I was concerned, he could have been talking in Martian! Hatsan? yes, check! I know they make guns, but have never taken them too seriously after venturing into one of their power-monster-springers.

And this guy was telling me he was happy with a PCP!

That he had been shooting squirrels and pesky birds.

But that now he needed a "scope or something".

Hmmmmmm, quickly look into the Hatsan lineup and yes, there are the PCP's; and there are the Flash'es; and there are the bullpup versions, ergo: FlashPups;  BUUUUTTTTT, they have NO SIGHTS!

"Ehem, ehem, ehem, sorry, sir, but have you been shooting an airgun without ANY sighting equipment?"

"Yes, and I am hitting rather well, but by now the critters are learning that the "pfft" precedes the decease of a mate, and they have started to fly as soon as the window opens".

WOW! I must have been silent for more than a few seconds because the voice on the other side of the phone asked: "HELLLOOOO! You there still?"

"Yes, yes, yes, of course I am here it's just that you are the first person that I have met that has chosen to shoot a bullpup gun in 0.25" cal yielding well in excess of 28 ft-lbs without sights!"

and without skipping a beat he goes: "Yes, that is why I need some sort of sighting equipment, what do you have?, I live in Connecticut and I thought I would swing by and see what we can put on the gun"

Ooops!

"Sorry sir, we used to live in Connecticut, but we now live in Maryland. We moved about 4 years ago".

"Ahhhh, I really wanted to chat with you and see if you can teach me how to shoot properly"

Properly?  this guy is hitting stuff without sights! What can anyone possibly teach him?

Anyway, to cut the story short, he mentioned that he had some issues with the gun, that, at first it had been shooting very well, but that a few weeks before something had gone wrong and he was not able to hit anything.
He suspected the gun needed cleaning, but he just could not find a way to do it.
Lots of questions with no answers till I could get my paws on the gun.

So . . . The gun was shipped and put in the queue. And as time passed, its turn came.

So we started talking again about the gun itself, the purpose and the future.

After a good conversation we agreed that I would test the gun and see if it was in any way "not 100%", and that after that we would agree on course of action.

Initial tests were somewhat disconcerting, the gun would yield 100 shots with more than reasonable consistency, but at too low power (under 10 ft-lbs). Yet, nothing seemed to be wrong with the gun.

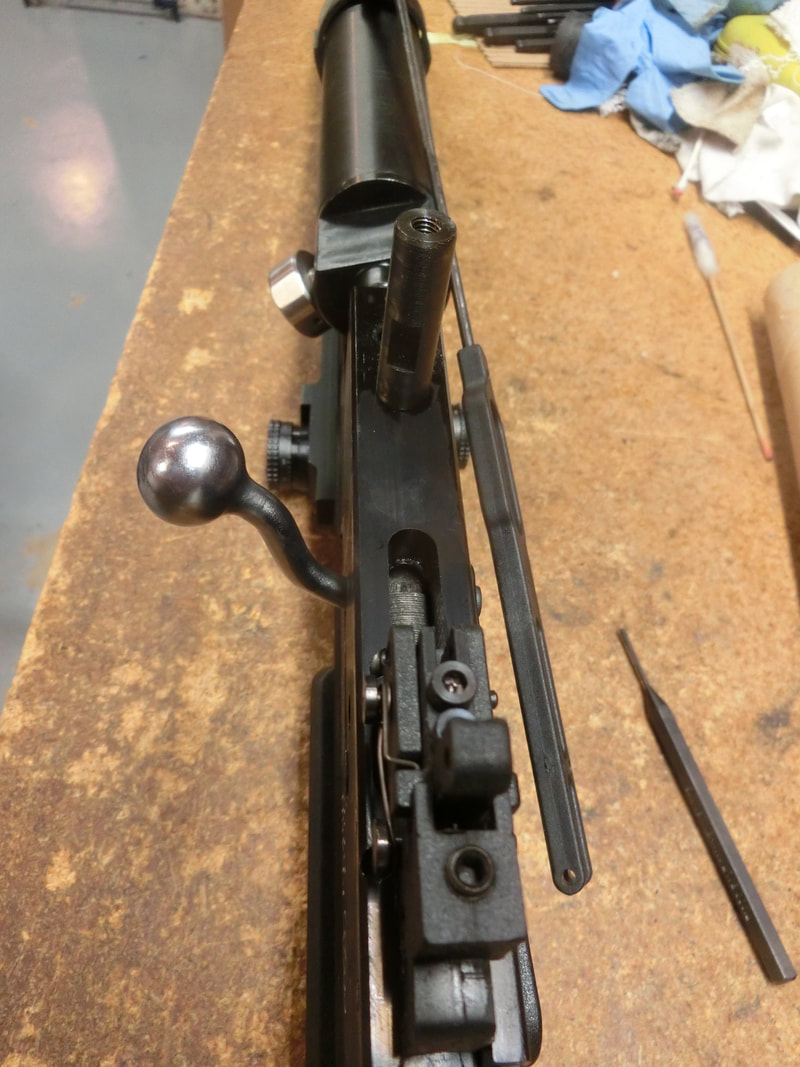
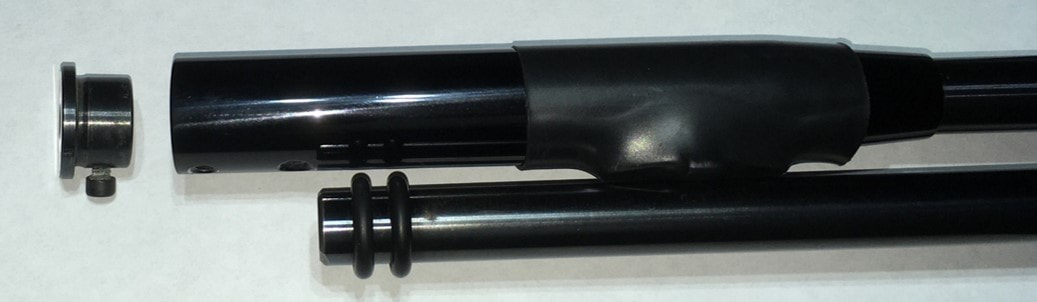
After a few air top-ups with my battery driven compressor it became apparent that the tank was loose in the chassis.

So I took the gun apart and found that the looseness of the tank was really that the tank had backed OUT of the action and therefore the power was very low.

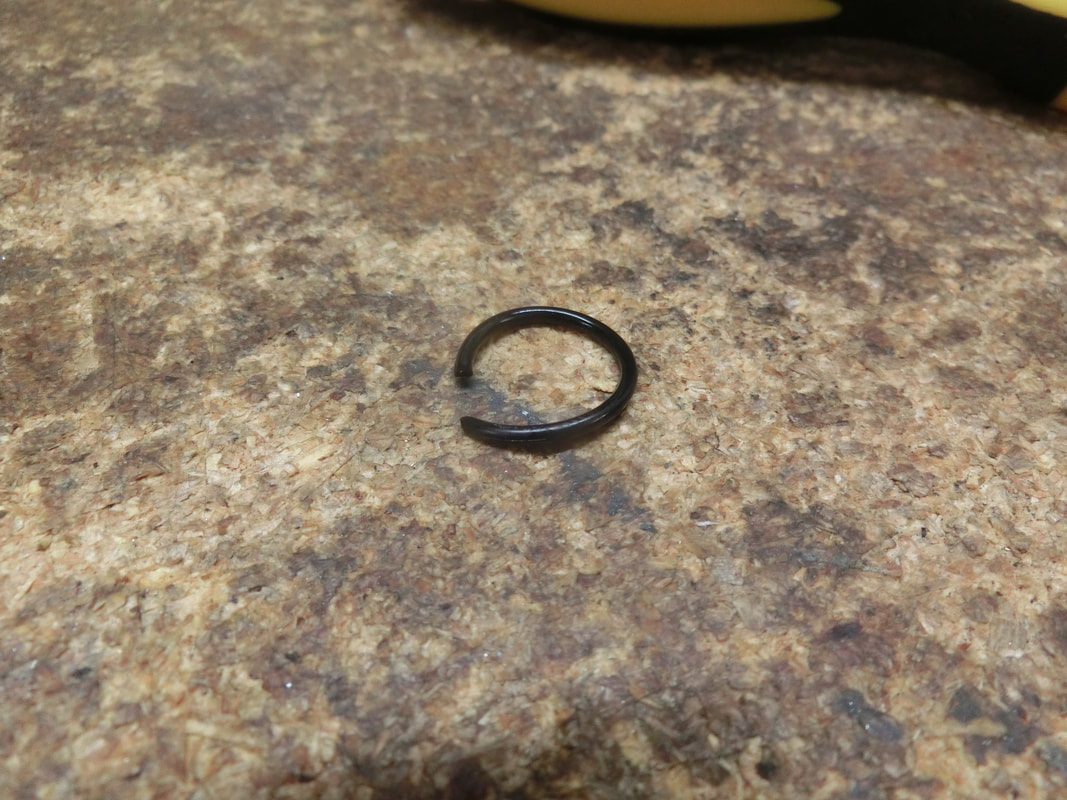
Two ORings had been "overenthusiastically" installed at the plant and the process had sheared off more than ½ section of each.
Picture
So, they were replaced, everything put back in place and the gun tested again.

What a difference!

After the "fix" the power jumped to well over rated power
Picture
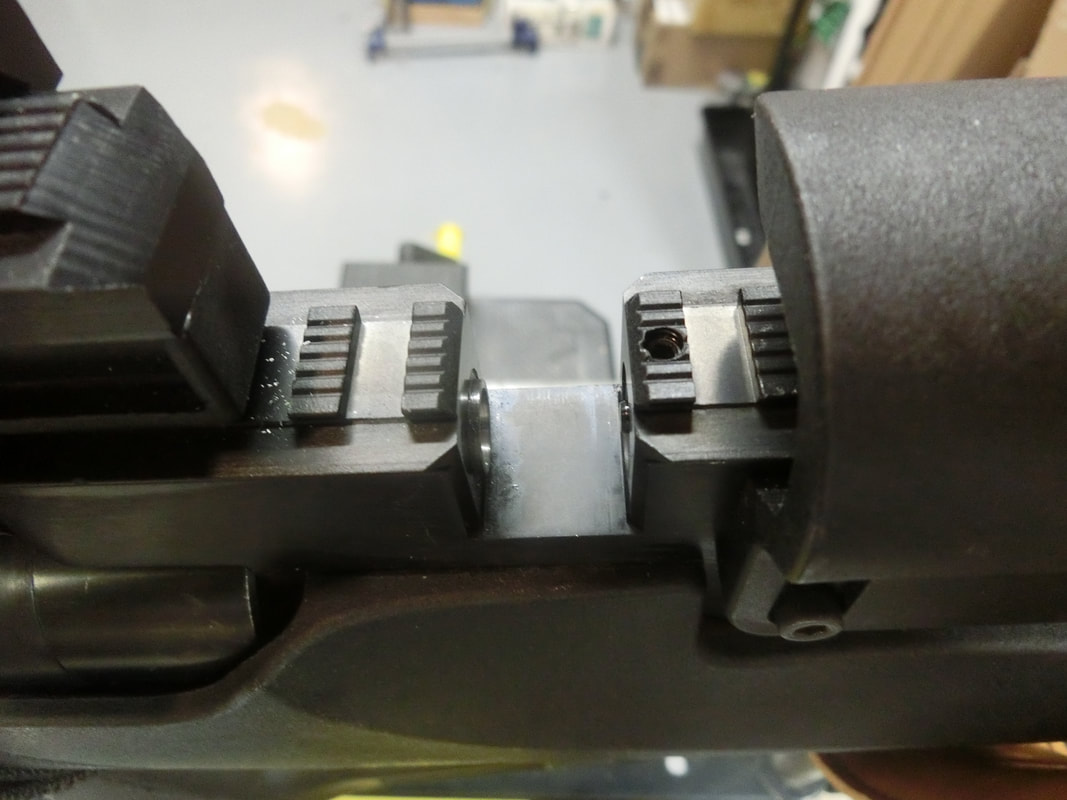
We also took advantage of the take down to reduce the grittiness of the trigger, there is precious little we can do about the "mushiness" because as many bull-pups there is a transfer bar that connect the trigger blade to the actual trigger mechanism:
Picture
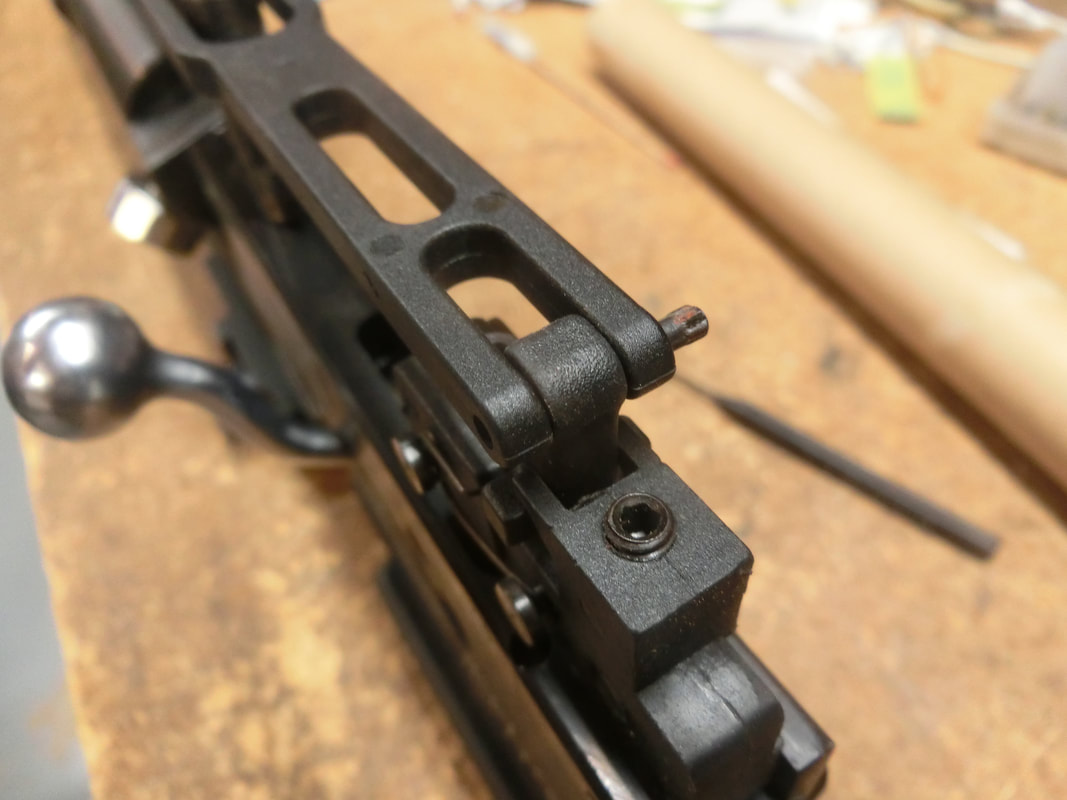
When disassembling these linkages, ALWAYS remember that assembly is right to left, so disassembly is always left to right (along the main axis and direction of the muzzle).
Picture
This really thin connecting rod is what links the trigger you pull with the actual trigger levers and sear in the rear.
It is important to note that the rear connection is RIVETED, so it is better to disconnect the forward conneciton point (see above).
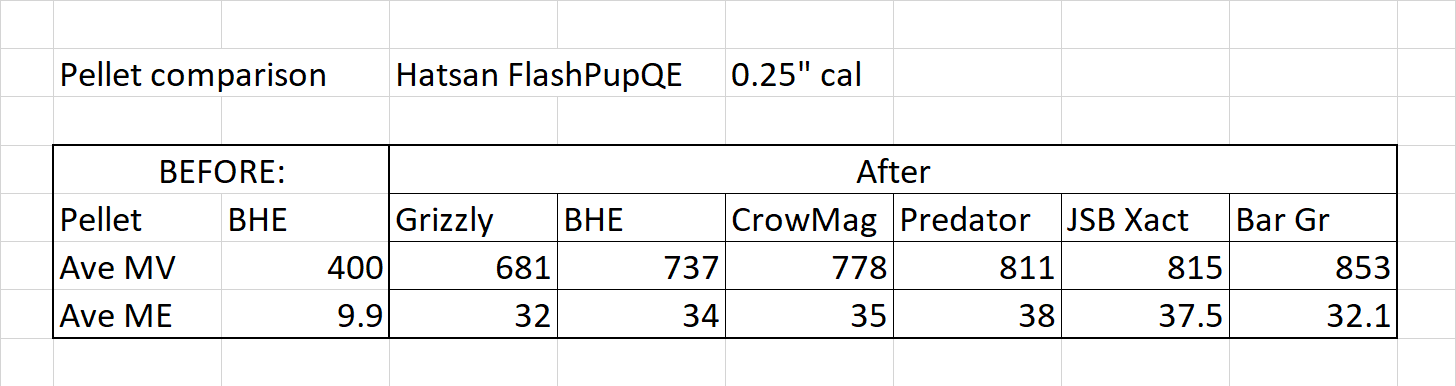
Once the trigger linkage was out of the way, we could access the screws that attach the tank to the action.​
And the screws that govern the trigger behaviour.
While there are many plastic parts in this gun, that is not a low quality indicator on the parts.
What was low quality was the time dedicated to the assembly. There is no excuse for cutting ORings at the assembly point.
One thing I liked VERY much is the substantial bolt handle.
It brings back a familiar feeling long missed.
Picture
The gun is an interesting gun, and in many ways replicates the performance of the Talon that was equipped with the first Opteck scope to be mounted in an airgun in the USA.
​
It was interesting, but not completely unexpected, to see the JSB's perform better than the others.
What was unexpected is that the Predators performed so much better than the Kings.

Now, given the MV's and the energies involved, I opted to suggest my new-found friend, an Opteck scope with a built in laser rangefinder, it is ideally suited to take shots at different things/distances with a stable platform, that will ensure a clean, quick and humane kill.
​
As a reminder, the Opteck scope was reviewed in the first take of this same title: "Nür fur Jäger"

The only update I've done to the system is that now a rechargeable battery is supplied:
Picture
It's good for a full day of shooting and recharges from any USB supply

​If we compare the FPQE to the Talon:
Picture
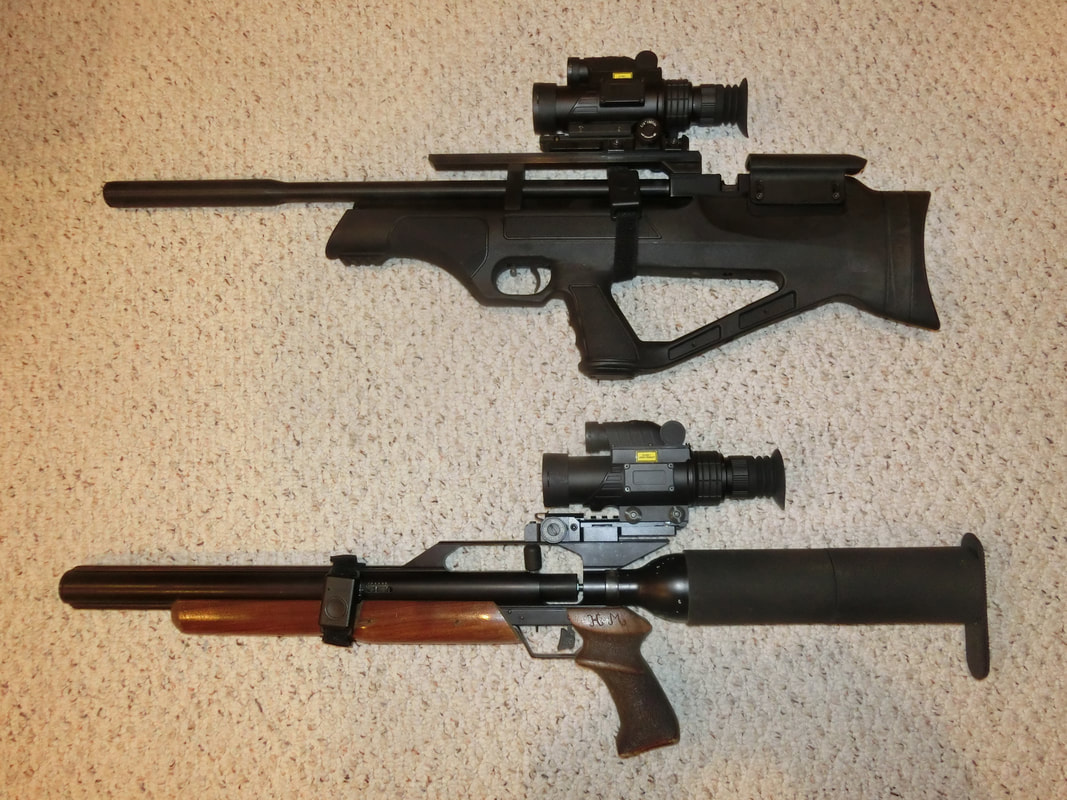
You can see there is not much size difference between the two platforms, the Talon is a bit longer and more svelte, the FlashPup QE is more compact and stodgy.

Truth is they both handle well in the field.

There is not much forearm in the FPQE to put the scope's remote control, so it had to go to the back, where the forward hand can come back and push the rangeing button.

Because of weight distribution, I decided to mount the smart mount "backwards" and this allows better mounting position and more latitude, should the owner decided to choose a different mounting position.
Picture
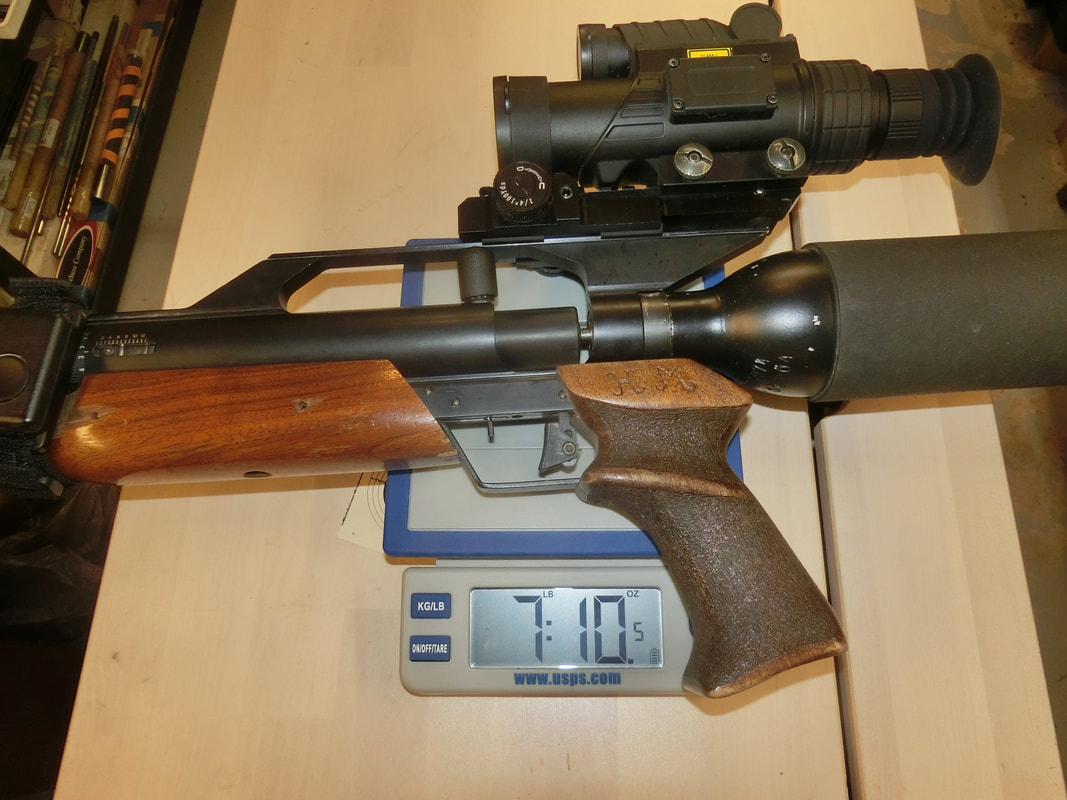
Where there is a substantial difference is in the weight!
Picture
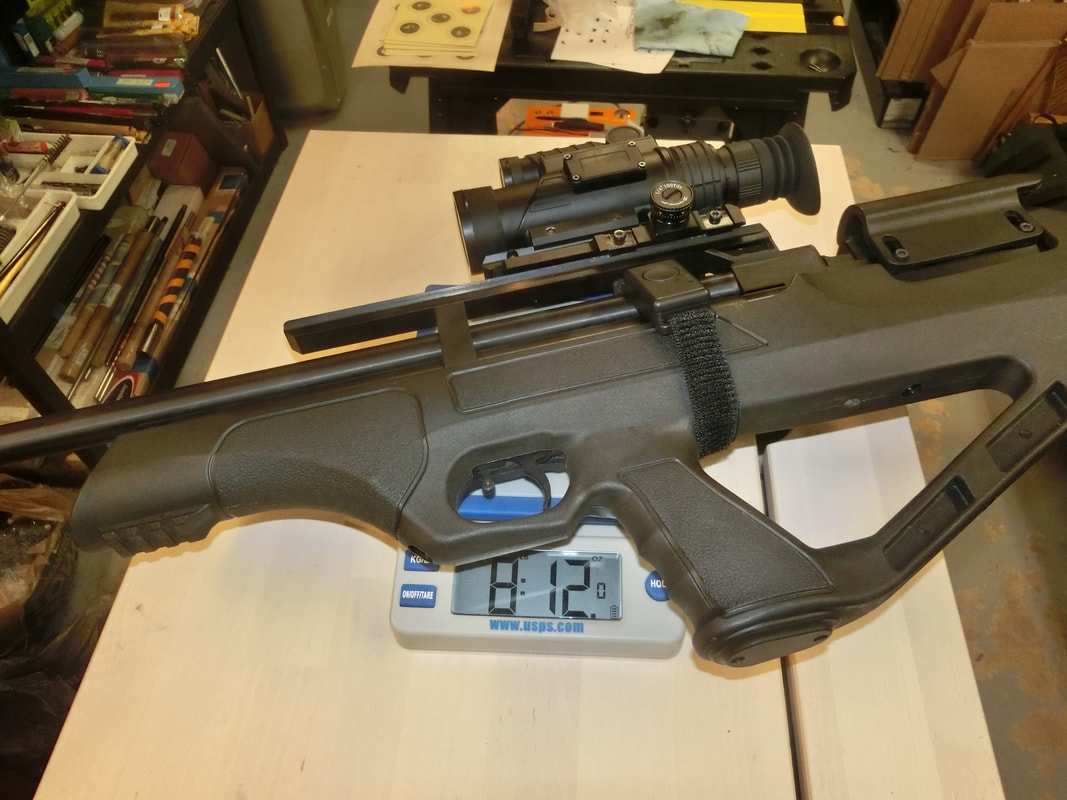
There is a full 1 lb 2 Oz difference when the all-up weights are compared.

Yes, one is a single shot, the other is a repeater. PERSONALLY, I don't value that aspect too much, but to each his own.

There is a fair amount of pellets available in the caliber, but the gun seemed to prefer pellets in the 25-27 grains region; too light and it would not develop more MV, too heavy and the same would happen.
Probably, this makes these guns prime candidates for regulation. But usually, that causes a drop in ME.
With the size of the tank in this gun, it seems quite possible that a proper regulation could be performed as long as the barrel is swapped (and possibly the moderator altered).
HOWEVER, for the price point of this gun, I was very impressed at the uniformity and efficiency of the strings as long as the optimum weight for the valve setting was respected.
Picture
At 25 meters, the gun showed again a marked preference for the Predators, though there COULD be a way to make the gun shoot better with the other good candidates, like he SuperH Points and the BHE.
Picture
Tests to determine the trajectory of the better choices proved more than interesting:
Picture
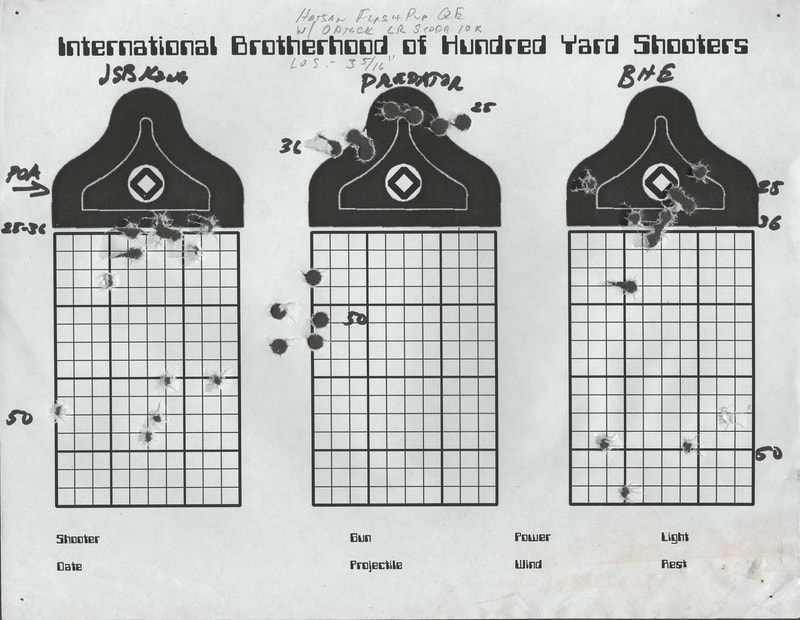
But with the pellet scarcity now in effect, and Predators becoming "unobtainium", in the end we had to retest and make it work with the Kings:
Picture
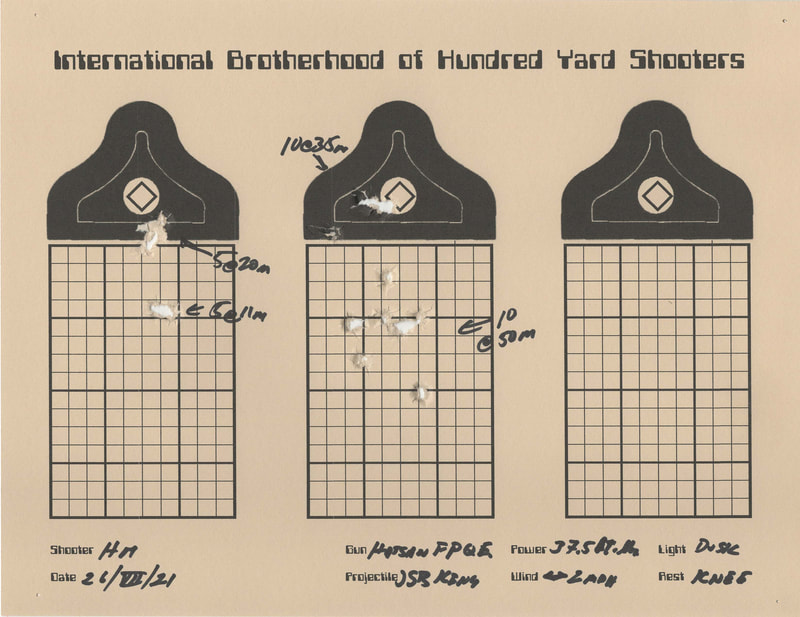
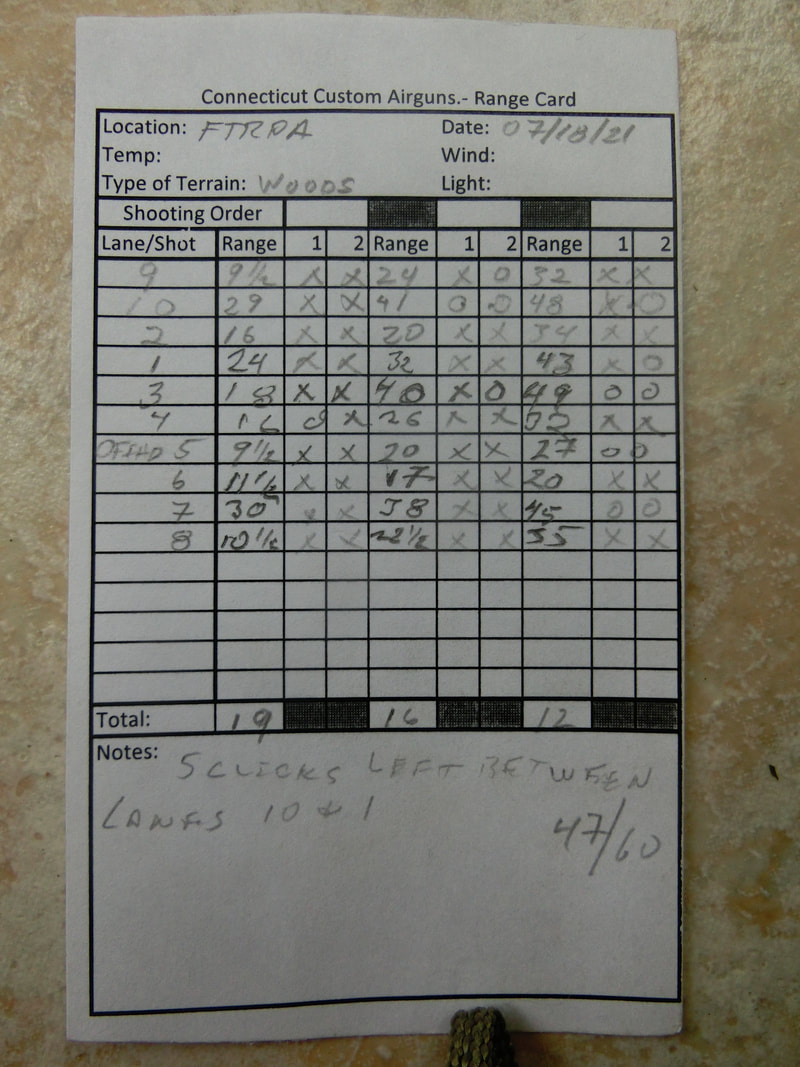
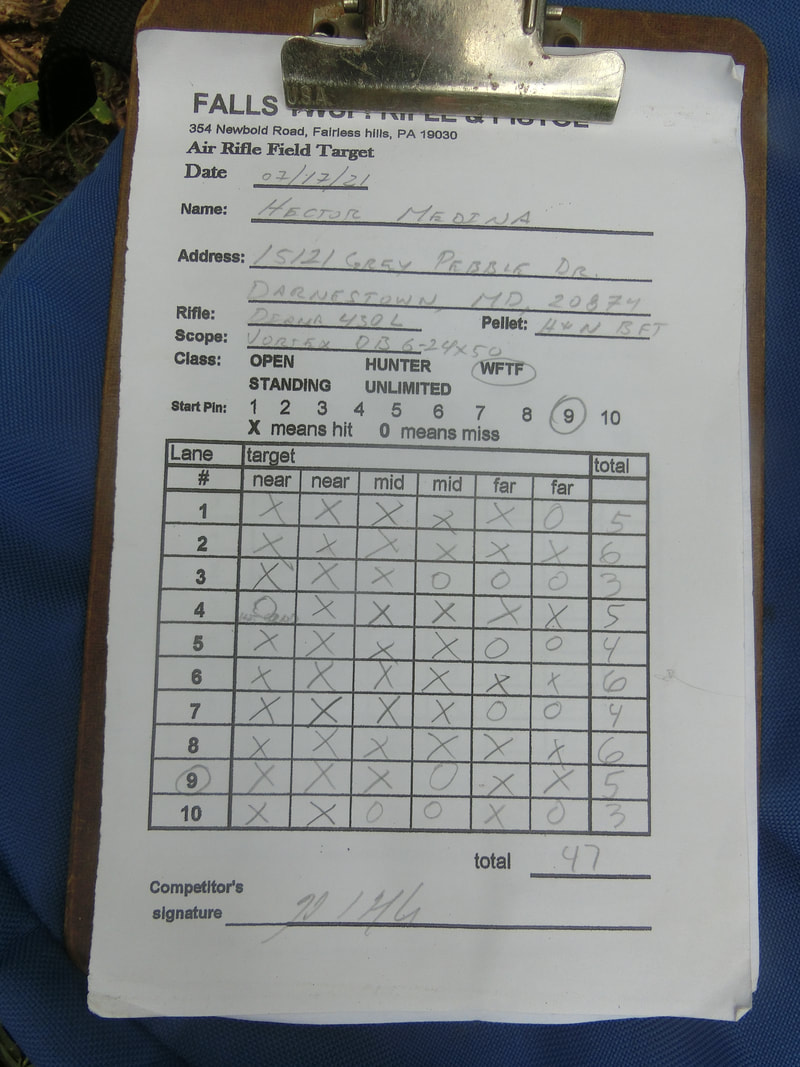
The group of 10 shots at 50 meters tells us that the valve has its limitation as far as repeatability. An obvious solution is regulation, though the architecture of the tank would seem to imply that it would be wise to partition the tank into ¼'s and allow a full ¼ as a "plenum".
Don't know if I will ever do this, but it is an interesting idea.

If the proof  of a pudding is in the eating, then the proof of a hunting gun is in the shooting.

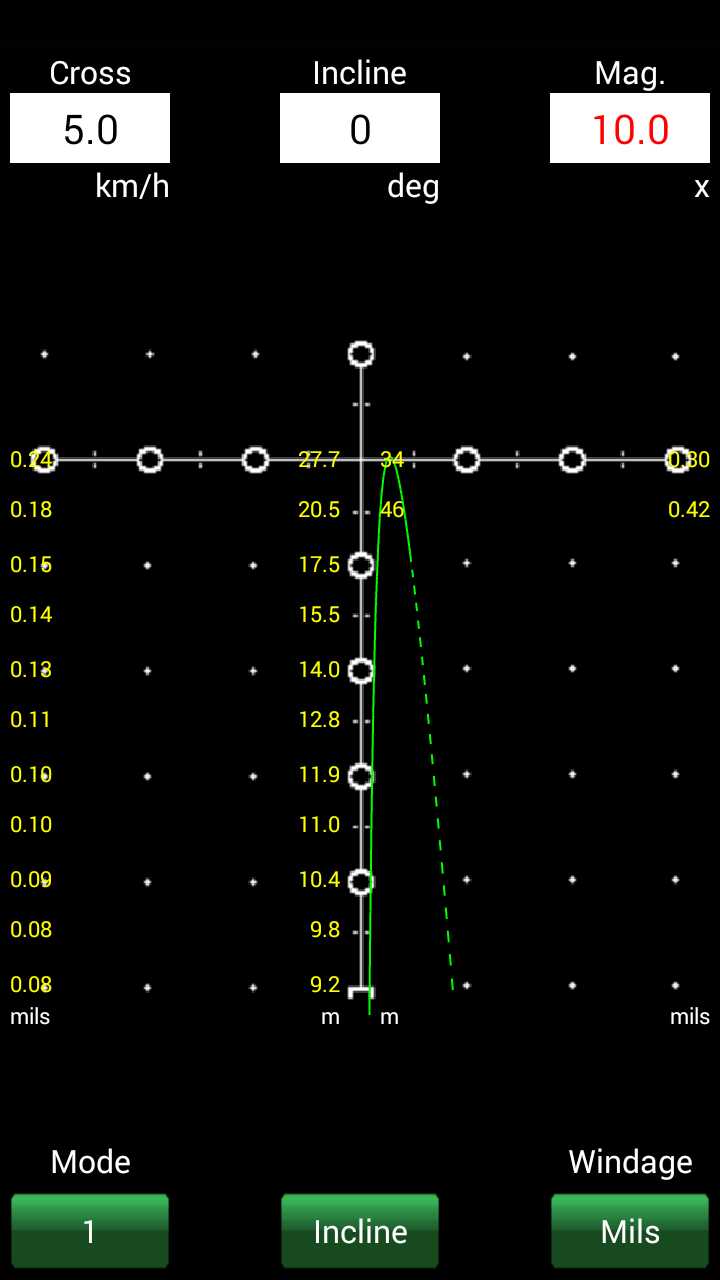
Once the data was put into (the now de-published) PP-Calc, the trajectory showed this for the holdoffs:
Picture
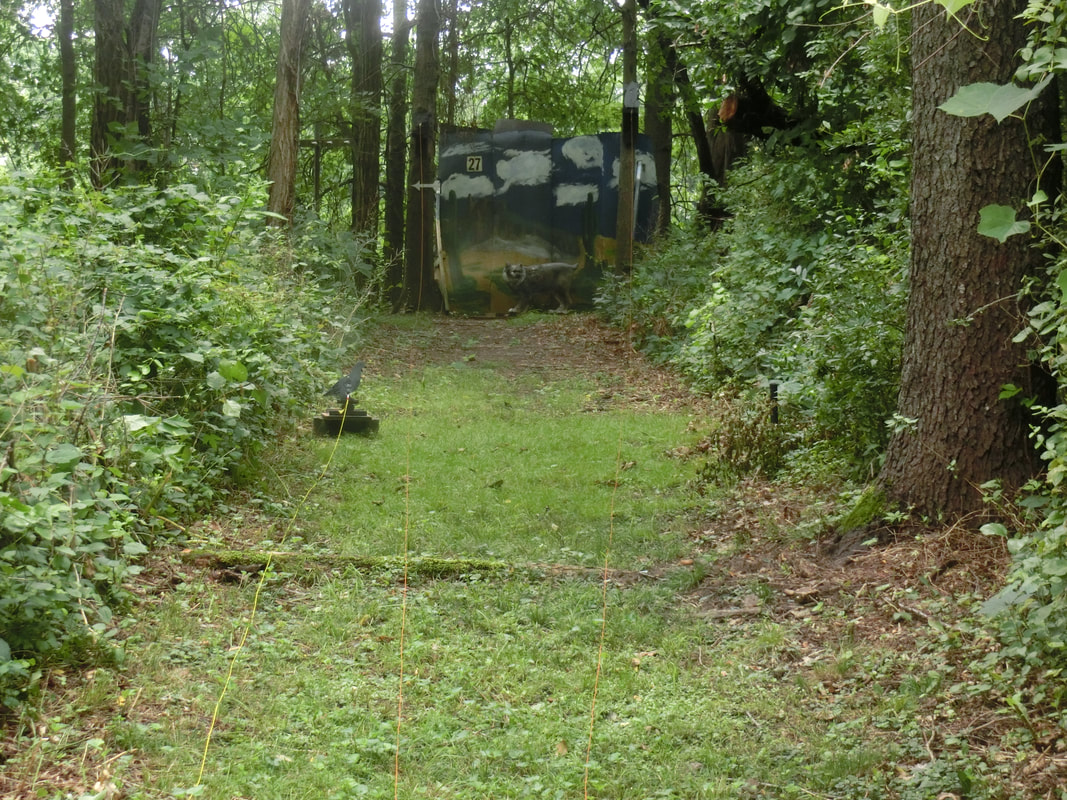
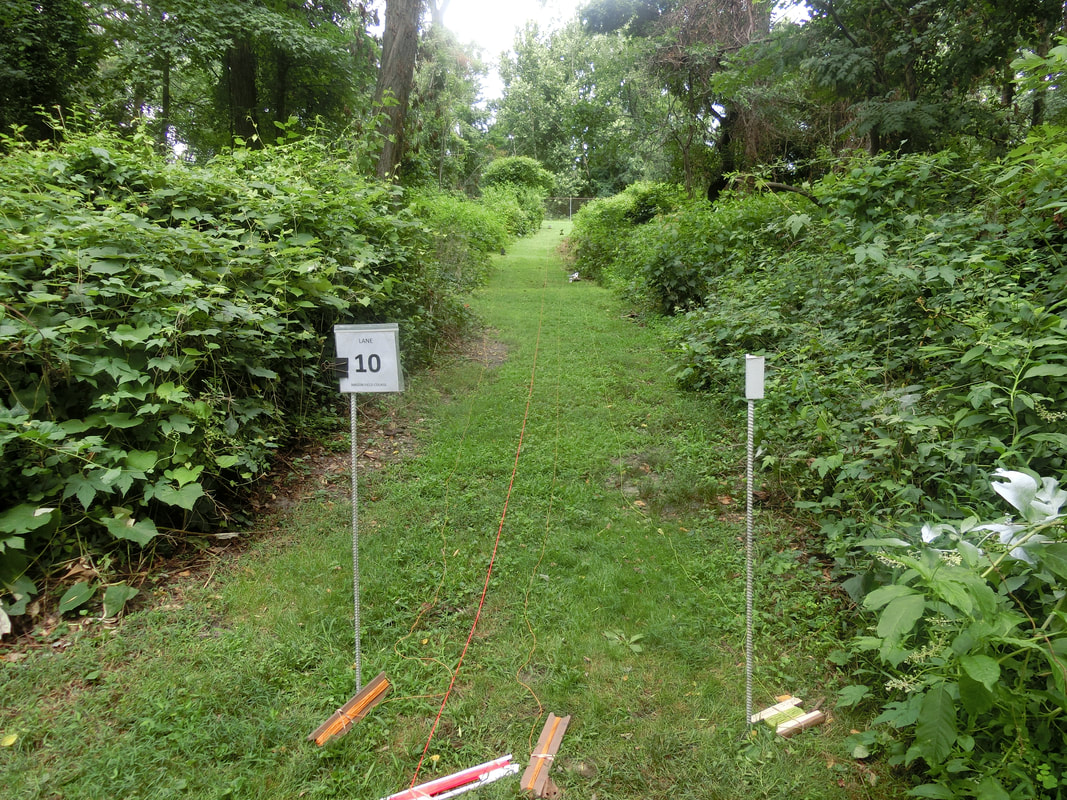
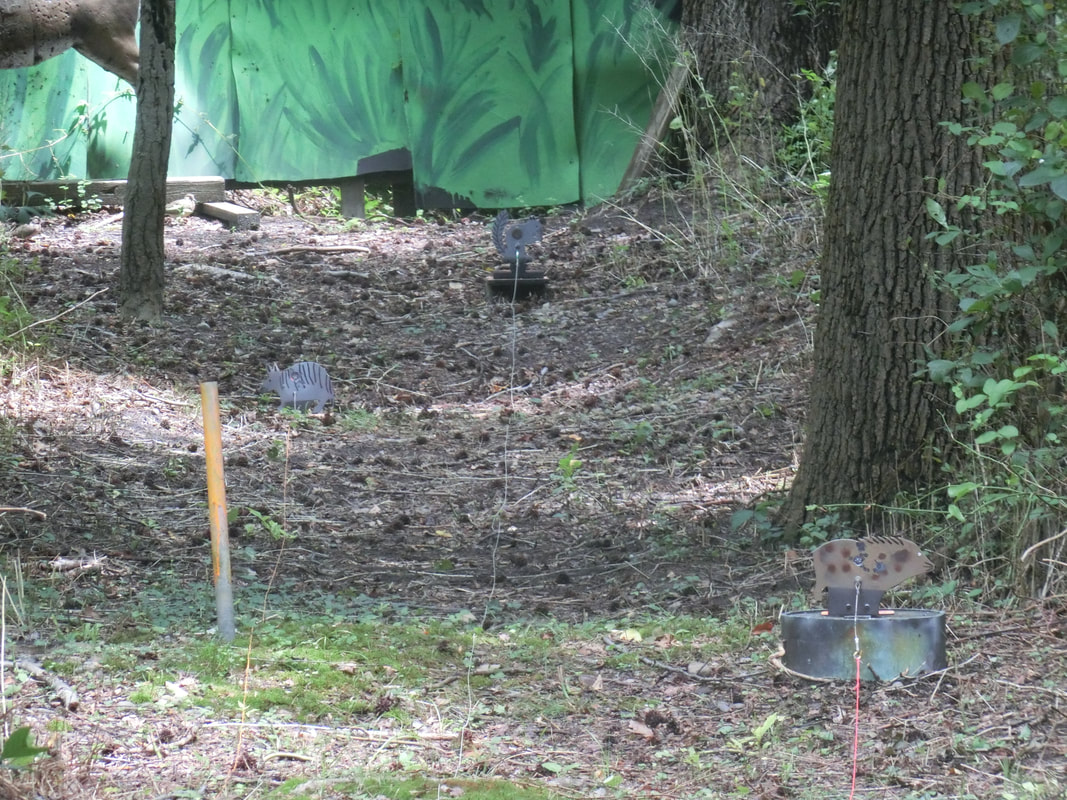
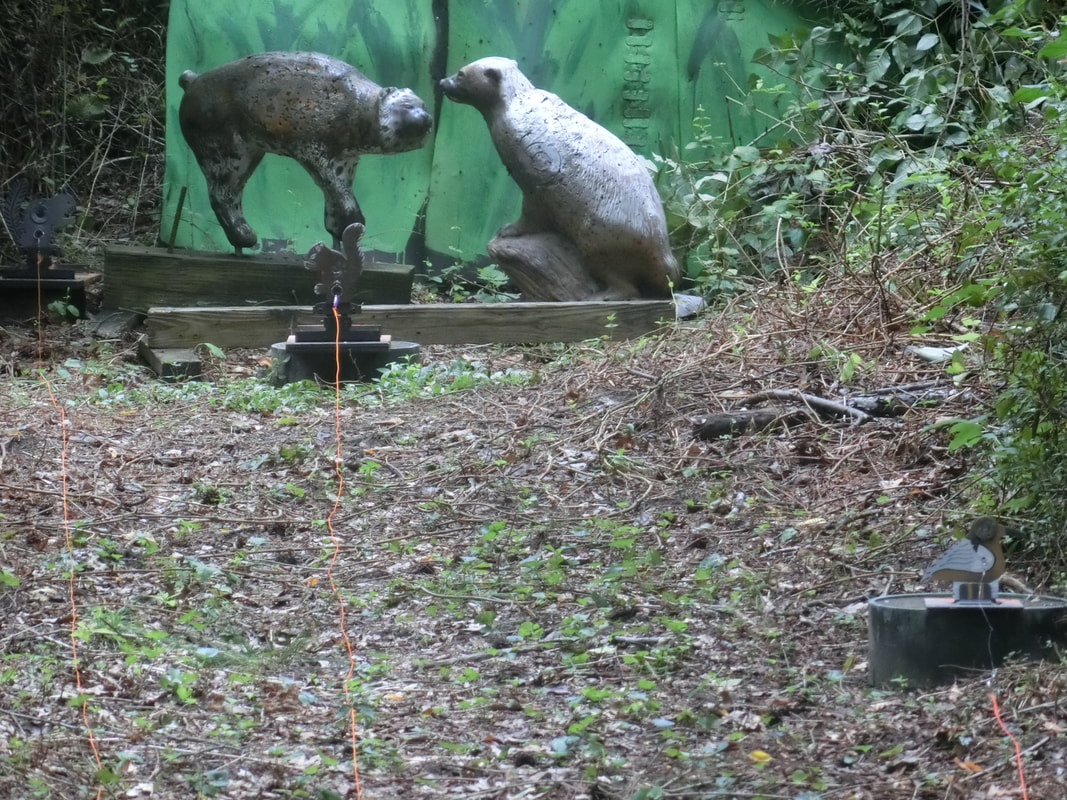
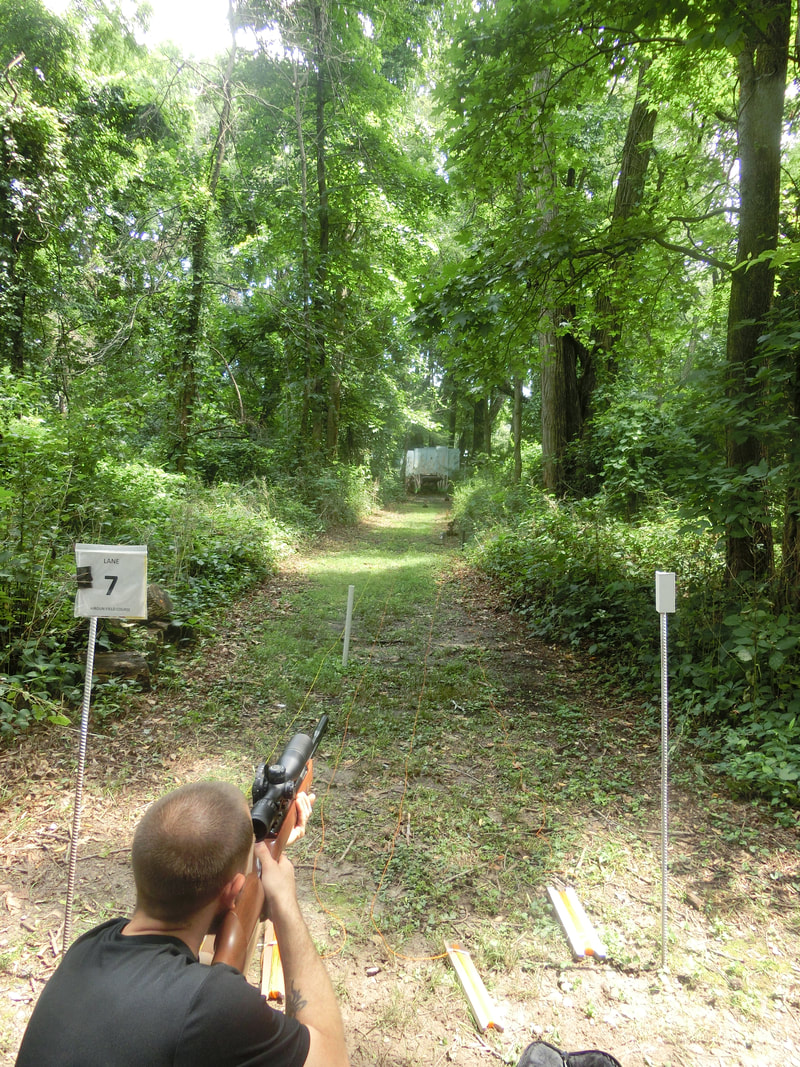
And so, I decided to setup a hunting target, pick up the rifle (that showed about 50 BAR's remaining useful pressure) and, without any further preparation, shoot from different spots in the backyard ONE shot each from different distances and angles:
Picture
Shot #1 @ 35 meters was good, a bit high, but good.
Shot #2 @27 meters was also good, though the wind kicked in, the 0.25" cal is reasonably resistant to drift.
Shot #3 @ 43 meters showed that the wind drift resistance disappeared when the wind changed direction completely! however, the elevation for the shot was good.
Shot #4 @ 52 meters was bit affected by the wind, but it would have still been a good shot.
Shot #5 @ 12 meters was taken quickly (under 3 seconds) and just taking the time to rangefind and without focusing, taking the offhand shot. Was IMHO, a good shot.

The system therefore acquitted itself quite nicely.

For the time being, the rifle will be used with Kings, when the Predators become available, we will follow the same procedure and determine the proper hold-offs.

Having finished the technical side, it became necessary to solve one of the main worries: How to clean this gun?!
Picture
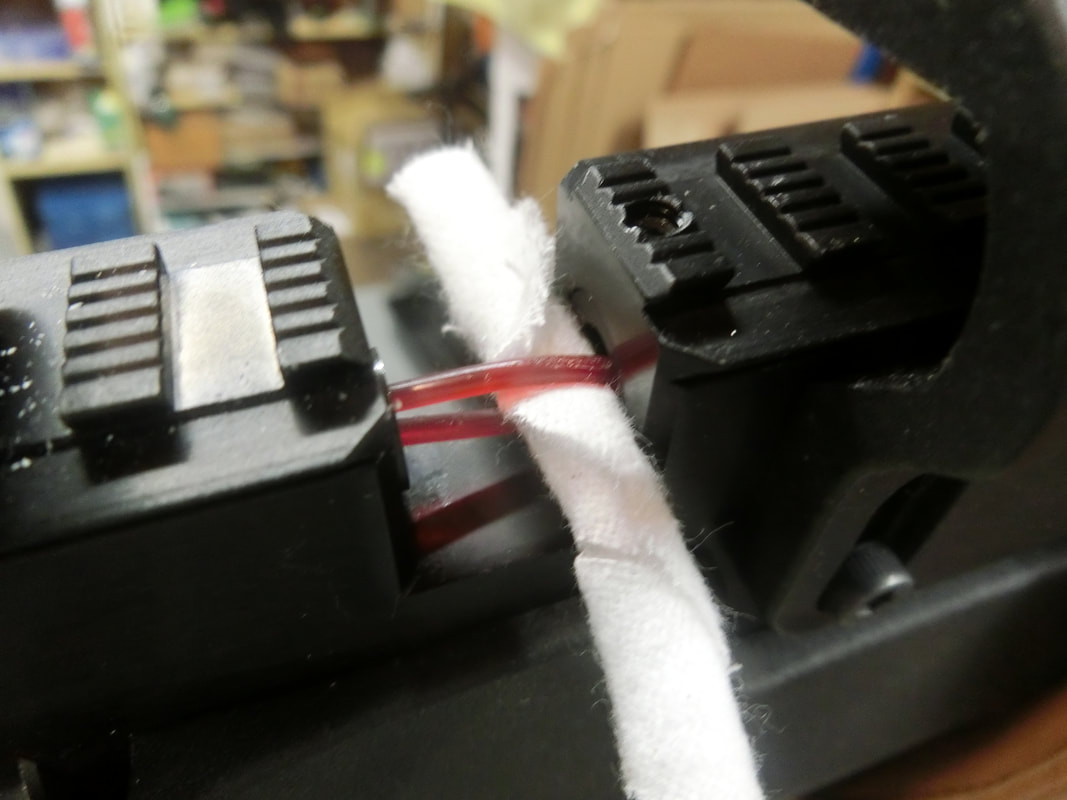
There is precious little space (15½ mm's) in the breech to insert any kind of cleaning instrument.
And the front end really should not be messed with much, any misalignment there will change the POI and you really do not want to do that.
So I decided to make my own solution:
Picture
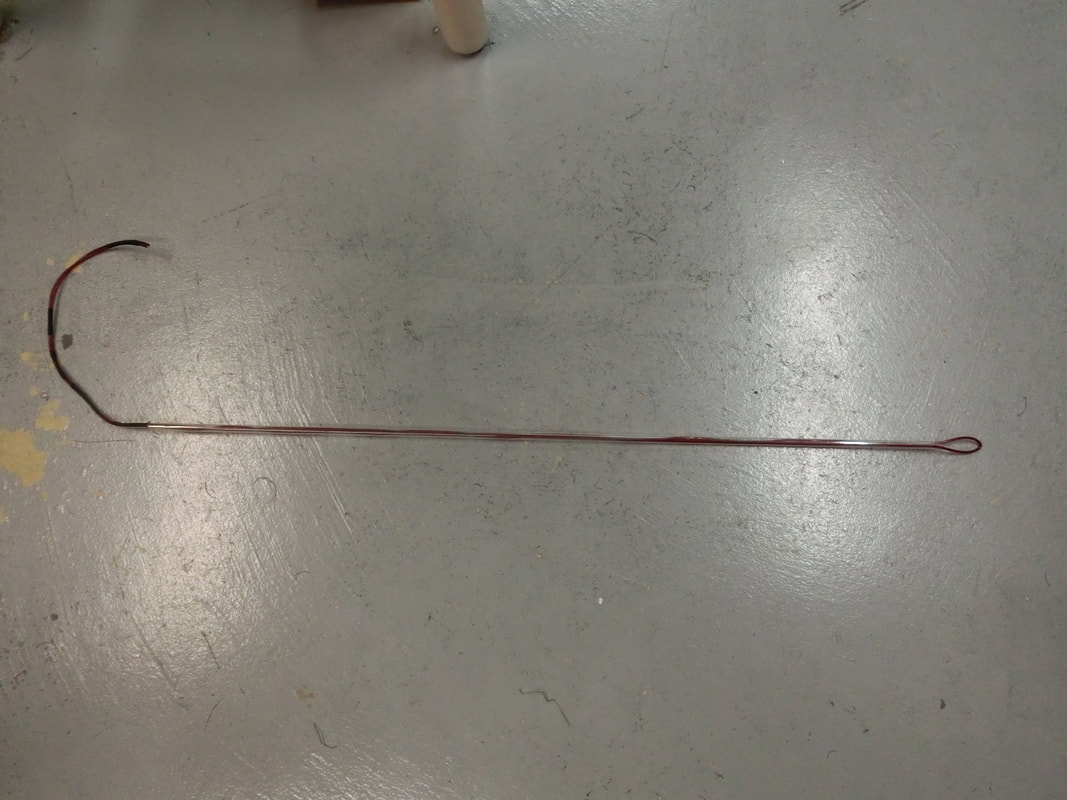
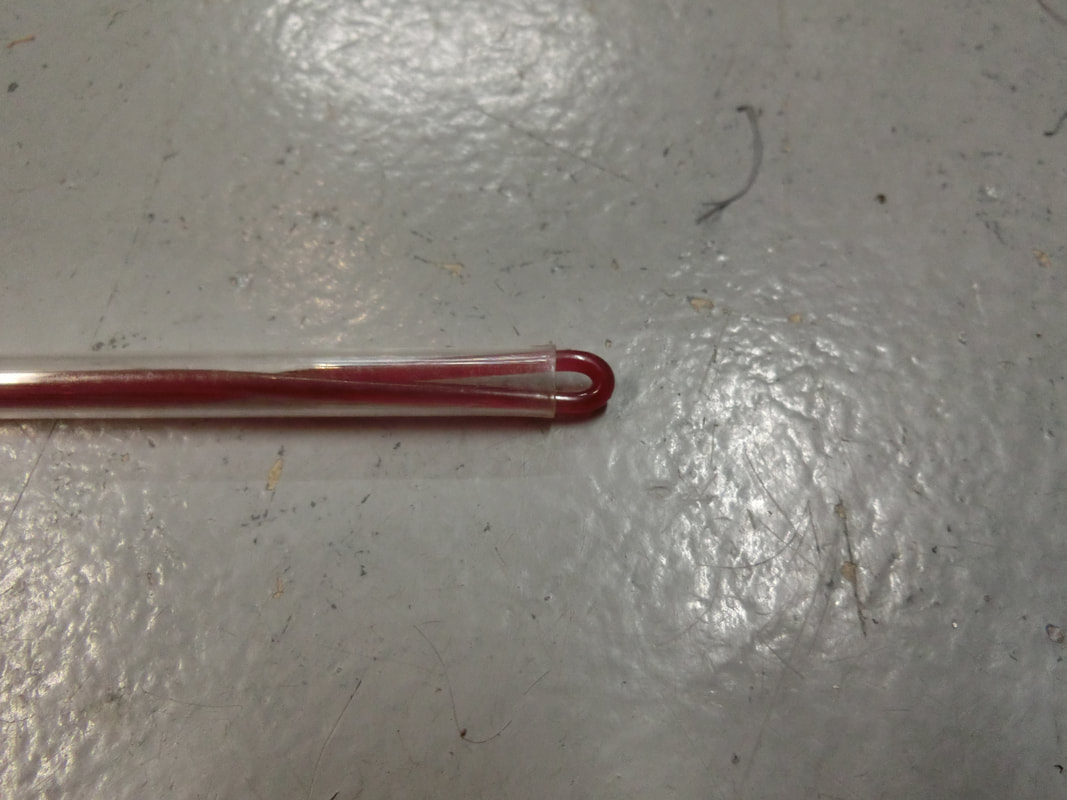
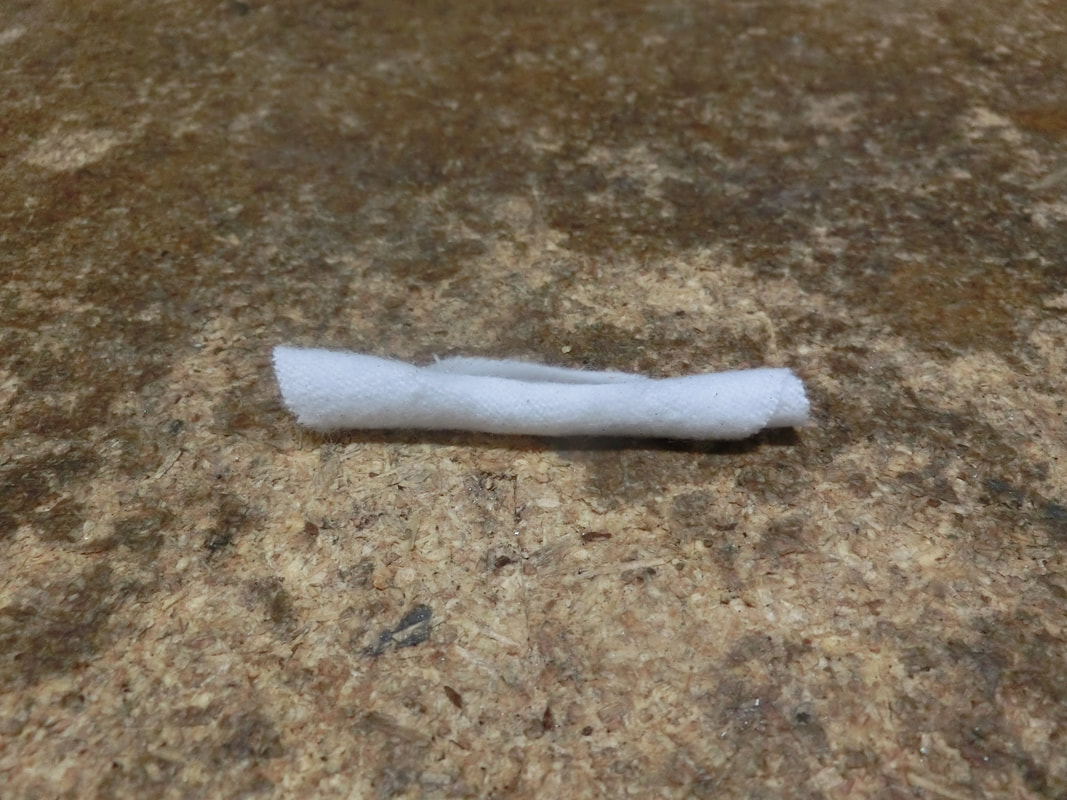
This is a simple loop of weedwhacker line inside a clear plastic tube.
This allows the "loop" to be inserted from the muzzle without any risk to the rifling and, especially, to the crown.
The loop can almost be retracted into the tube:
Picture
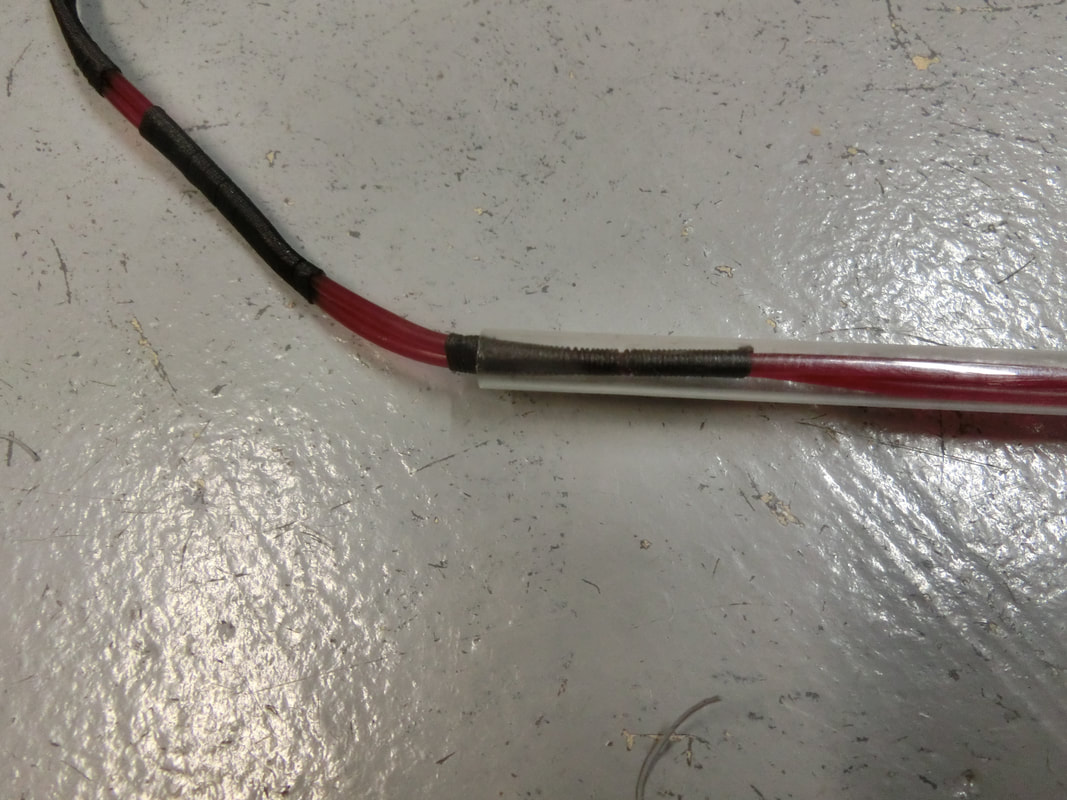
And at the far end, whipping/serving keeps the two sides together and gives a good hold to pull:
Picture
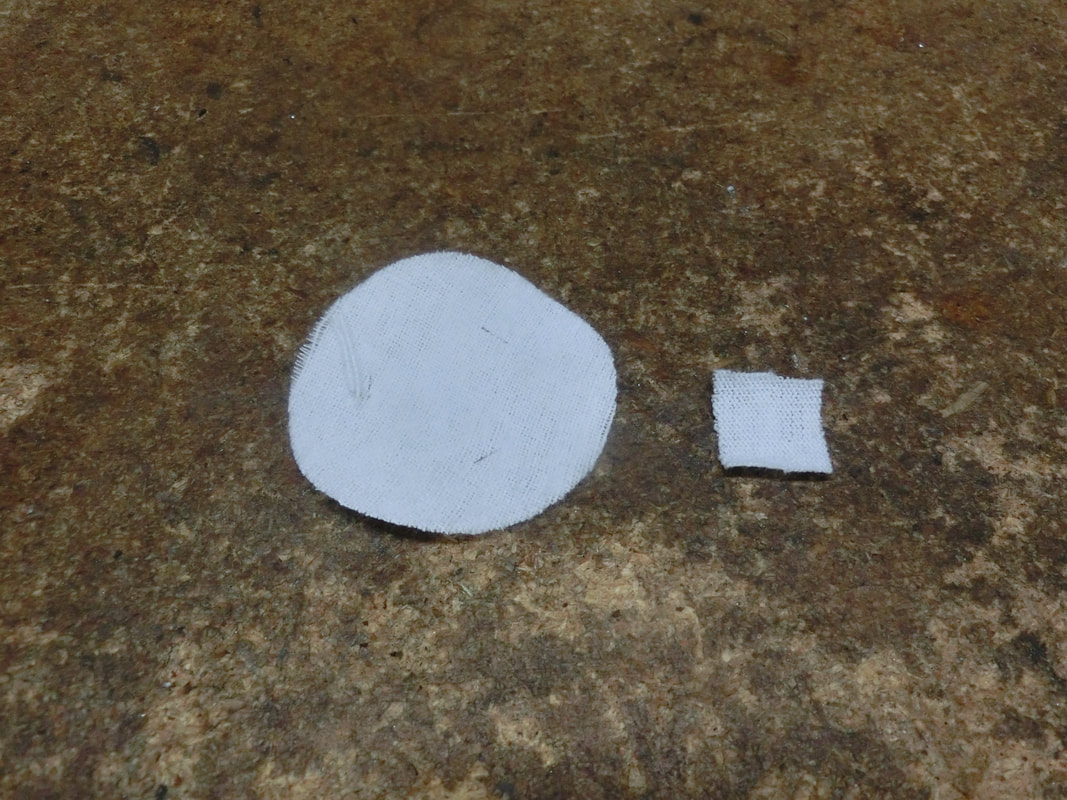
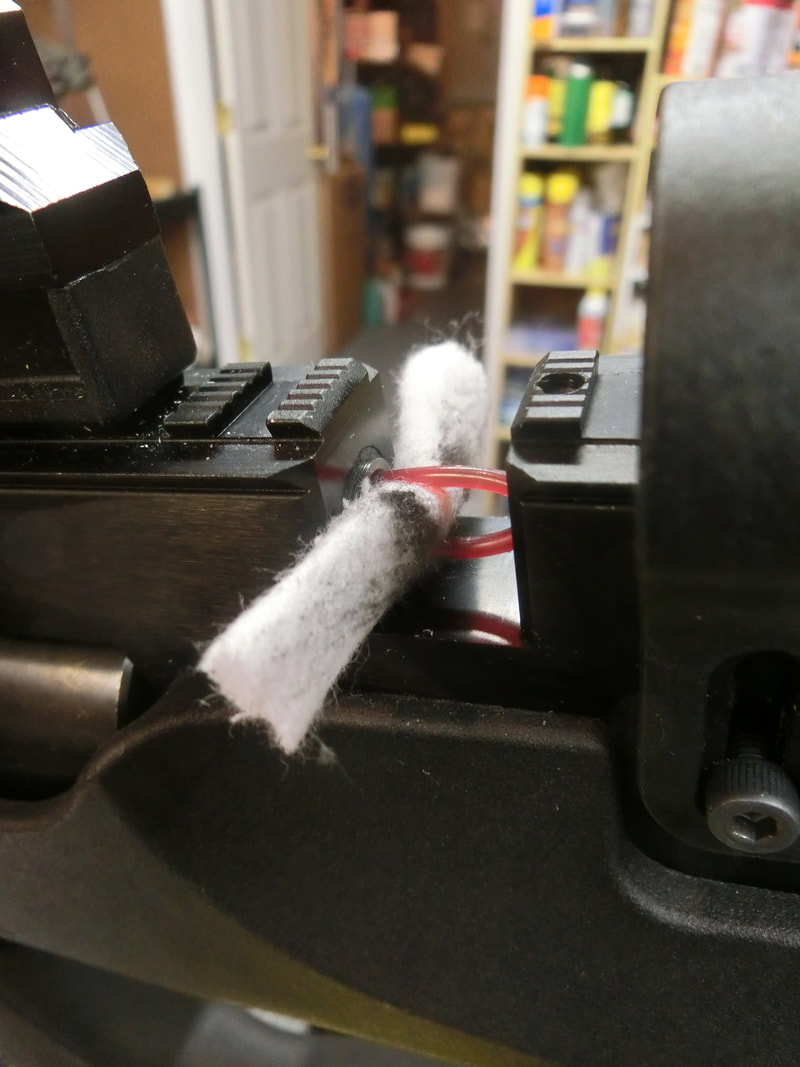
To use, you create a "Taco" using an OTIS patch and a square small caliber patch:
Picture
Picture
Picture
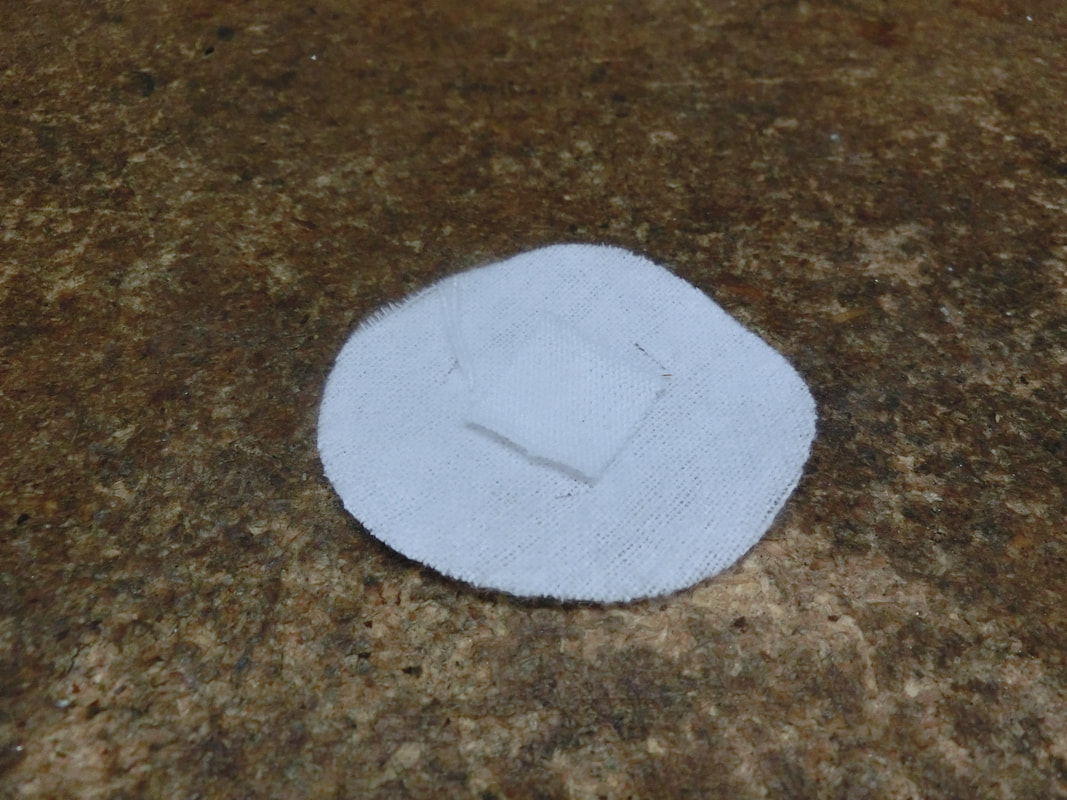
That you can put through the loop once you have inserted the tube bearing the loop from the muzzle:
Picture
And then you pull:
Picture
You can then turn the "Taco" and use the other side:
Picture
Which gives you a bit more cleaning from the same patch:
Picture
After using the two sides, you turn over the patch, using the same "core" and repeat. So for every patch you get 4 strokes.
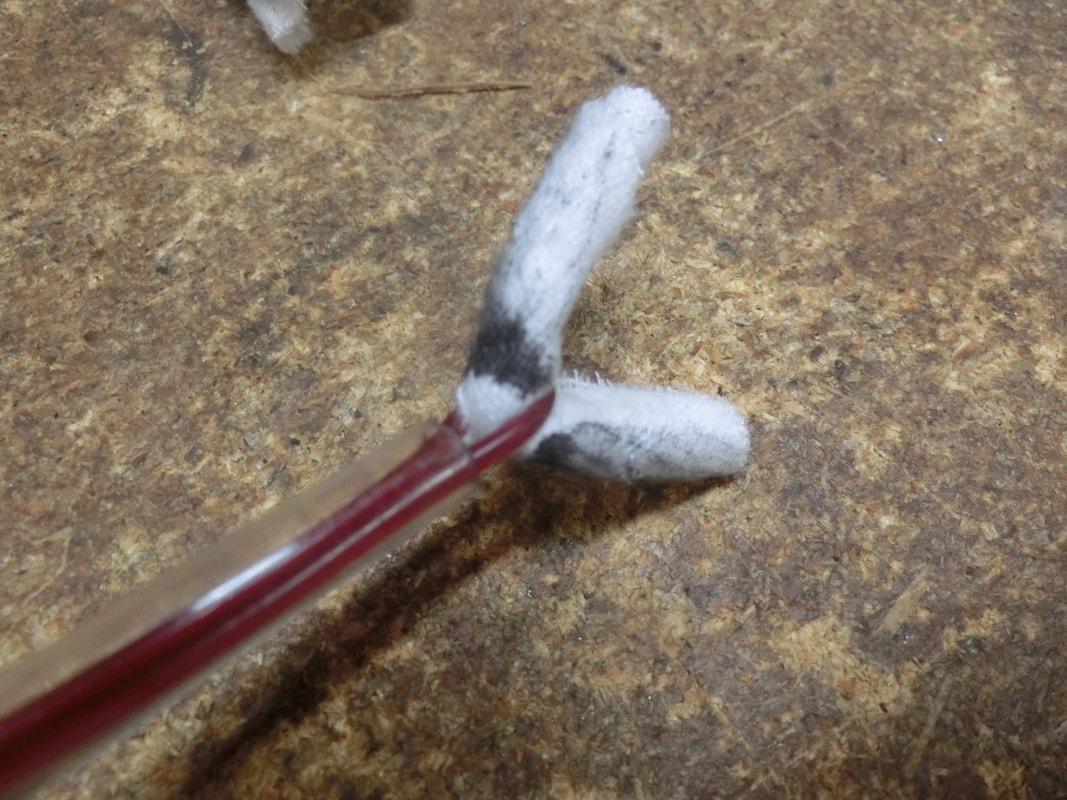
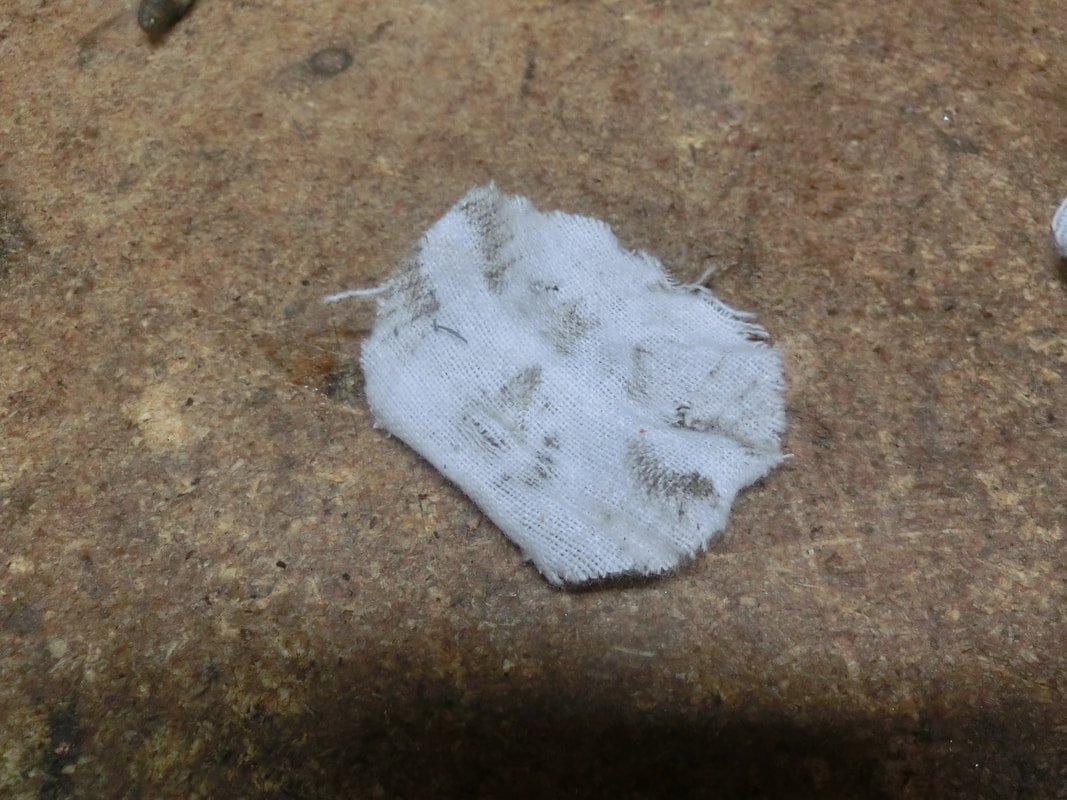
After 3 patches, you get a reasonably clean bore:
Picture
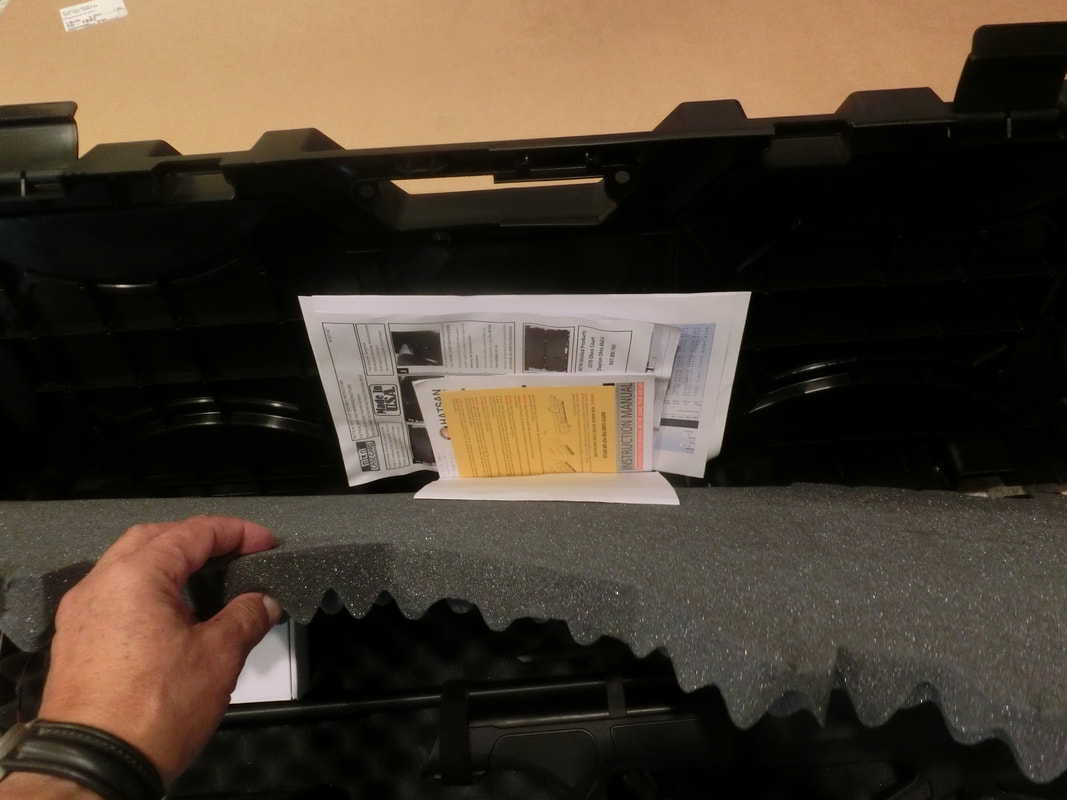
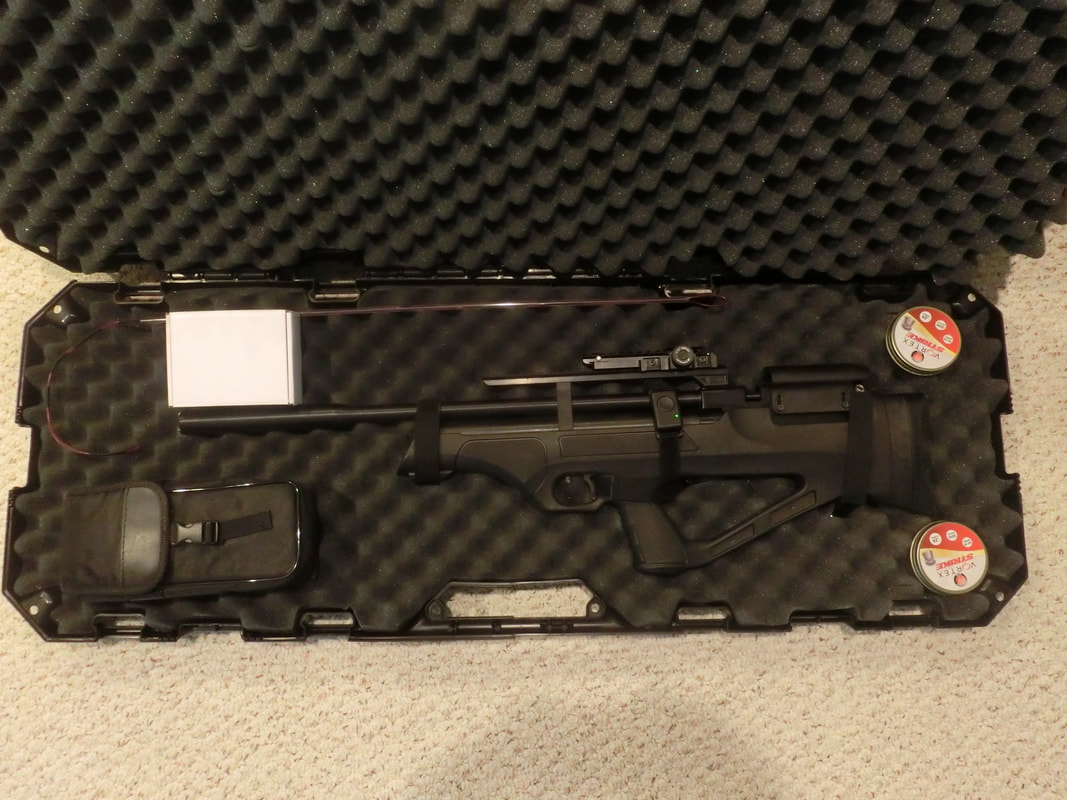
Last point in the agenda was to send back the gun properly outfitted, and so a hard case was procured.
MTM (the ammo box people) make this case and it was interesting because it was just long enough and seemed sturdy enough for shipping and storing.
Some reviews criticize the case, but clearly they did not take the time to read the instructions and fit the straps.
Once you do what your gun needs, the case is sturdy enough, it won't allow the gun to move inside the case.
And so, the FPQE is going home. A different creature with more poise, more reach, and better behaviour:
Picture
Picture
I enjoyed this project very much. With this scope we reach the half dozen installed in different airguns, and all the owners seem to be happy.

Keep well and shoot straight!


​HM
1 Comment

Simple Field Target #3.- FTRPA July 18th 2021

7/23/2021

0 Comments


Preamble and Acknowledgements

This "Simple FT" thing' is becoming a habit (or is it an addiction?) ROFL! a good one at that.
It forces you to always start from the basics, if you forget the slightest thing, BOING!  there goes a shot where it should NOT have gone. And you only have yourself to blame.
Demanding? Yes! but we spring-piston shooters love the challenges!

So, when the Falls Township Rifle and Pistol Association (FTRPA) FT team posted that they would be hosting a shoot in July, I quickly obtained permission from the "High Command" and got my license for "R&R", LOL!

Hotel booked and everything settled, the trip started after a Saturday full of activities with the kids and wife.
The drive was somewhat annoying. Gone are the days of little traffic due to Pandemic's partial lockdowns; statistics say that we are back, if not above, Pre-"Year of the Masks" levels of travel and traffic; the Hospitality Industry has even coined a term: "Revenge Travel" where people travel just to travel, to feel free and unfettered by quarantines and isolation rules.

SOooooo.... After three different traffic jams and an almost 5 hours drive, I arrived into Ewing, NJ to spend the night.

Morning after, I headed to Fairless Hills, where FTRPA is located, just 17 minutes from the hotel.  Funny how some states have much better economic policies than others, and it is a pity that PA does not realize how much business is lost to NJ simply because taxes for travel and leisure are lower. But that is another discussion.

FTRPA is easily one of the prettiest courses/venues in the USA. It's been going strong for MANY years. The first time we (Veronika and I) attended a match there was 2011. MUCH has happened since. Venue though, is still as beautiful as ever.

Between the woods and the lake, scenery is calming and serene.

Range is shared between Airgunners and 3D Archers, and the effort that the Airgunners take to "put the least  possible footprint" into the woods is more than commendable:
ALL tree bases get removed after the shoot.
ALL concrete bases and pavers get taken out
ALL stakes/gates also are taken out
NOTHING remains of the shoot

So, EVERYTHING has to be set out again for the next shoot. You will never shoot the same course twice at FTRPA!

HUGE effort, so VERY COMMENDABLE!

THANKS! therefore to the FTRPA crew that spends many hours setting up the field for us to come and shoot!

It is also clear that the Field Target group gets serious support from the Association's Directives. So THANKS also go to them.

The Shoot

At FTRPA, there's a nice sighting-in range, that is also shared with the Archers, so, if you go, do NOT shoot at the foamies! Targets are too big to have any real meaning when shot with a precision airgun at under 55 yards!
The FTRPA crew puts out a more than reasonable sighting in range with targets every 5 yards in plentiful supply.
Also some spinners, some "shoot to reset", and once in a while even some FT's.
Get there early and you will have a ton of fun just shooting at paper.
Picture
FTRPA sets out a 60 shot match. They believe this is a good balance between costs (travel, time, money) and enjoyment for other shooters to come and shoot, and they are right, it's a darned good "bang for the buck".
​

These 60 shots are laid over 10 lanes with 3 targets each lane and two shots per target.
Shoots are not "impossibly hard" usually in the 28 TDR average, in recent times only ONE shooter (and a truly top one at that) has cleaned a Match. So, it takes a LOT of skill and dedication to get high numbers even in a relatively "simple" shoot.

Another aspect that is common at FTRPA is the assistance of new shooters. A lot of it obeys the clear familiarity and friendliness that all the members exhibit, and the atmosphere that prevails and pervades all the shoots. It is an excellent course to get started, and you never stop learning . . .   ;-)

One most important part of any shoot is the Shooter's Safety Meeting. Make no mistake, we have shortened the name to SM (Shooter's Meeting)  but the real purpose is to re-instill the principles of safe gun handling in all the present shooters, especially the old timers.
Picture
Picture
Picture
Make no mistake (have I emphasized that before?), the first timers are usually VERY aware that they are newbies, it's the "experienced shooters" the ones that need reminding of the safety basics. As in many things in life: "Familiarity breeds contempt", so if you ever need to give one of these, make notes and stick to the notes. Be thorough, be precise, be detailed. The worst series of target failures and cold lines would be a minor imposition/nuisance in the face of an accident.
As a shooter, be aware, be conscious, be courteous, but above all, be SAFE.

Among the WFTF MD's there is the acronym: SFC (no, it does not mean Sargent First Class; it stands for SAFE, Challenging and Fun), which is the aspirational goal of all shoots.

I was paired with Johnathan, a first time shooter, and it was very pleasant to shoot with the young man (I double his age). We proceeded at a good clip and he clearly had done as much of his homework as was possible without actually having gone to a match before.
​
​We started in lane 9:
Picture
Here is a zoomed in picture of the targets:
Picture
I was fairly confident of my "simple" system (a DIANA 430L shooting H&N "Baracuda FT" pellets: 9.57 grs. / 4.51 mm's at around 734 fps) and proceeded to bring down all targets on both shots.
Apologies that you cannot see how small that long target KZ is. If you locate it on the general picture above, you will only see a black dot where the KZ is and, while I cleaned this lane, the impact on the paddles were all clearly visible, perfect elevation, but to the right.
Hmmmmmm Wind? ... mental note.
John proceeded to shoot his stint and we moved to lane #10:
Picture
This was one of the long lanes, I ranged the middle one at 45 yards (41 meters) and the far one at 53 yards (48 meters), and while the near one came down twice, I missed the two shots on the middle one, with impacts clearly one to the right . . . . mental cogs turning . . . and then excessive correction to the left. I hit the long one on the first shot, but under the stress of the SSS (Second Shot Syndrome), missed the second shot.
Here is a zoomed in view:
Picture
I decided to adjust my scope 5 clicks to the left before moving to the beginning of the course. John finished and we moved back to Lane 1, but found it busy, and so, I decided to shoot lane 2 and then return to lane 1, this is lane 2:
Picture
And here is a detailed look at the long targets:
Picture
Before starting to shoot, I took two shots into the ground to settle the scope, since I had clicked 5 clicks between the last lane and this one. It was not a difficult lane at 18 yds (16 m), 22 yds (20 m)  and 37 yds (34 m);  and all 6 shots found the KZ.
After John took his shots, we moved back to lane 1:
Picture
This is another long lane, the near target was already 26 yards (24 meters) away, and from there my rangeings were 35 yds (32 m), and 47 yds (43 m). Here is a detailed view of the long targets:
Picture
Of the six shots, I missed the last one. Ah, well .  .  .
After shooting lane 1, we could advance to lane 3:​
Picture
And the detailed look:
Picture
Got the woodpecker at 20 yds (18 m)  twice, then missed second shot at the near squirrel 44 yds (40 m), and missed both shots at the long one 54 yds( 49 m) . And the problem with grey and brown targets is that it is VERY hard to spot your misses.
After John shot we moved to Lane 4:
Picture
And this is the detailed view:
Picture
Viewed from the standing position, it seems that the short porky is clearly visible, but if you locate the porky in the panoramic picture above, you will see there is a "hump" in the ground that obscures part of the target.
In my, very low, sitting position, the pellet grazed the ground and didn't even touch the faceplate! So that was a miss!
I had to scoot back almost to the limit of holding the muzzle in front of the gate to get the second shot to count.
Distances were not that long:  18 yds (16 m), 27 yds (25 m) and 35 yds (32 m).
After John's turn, we moved to Lane 5 which was the offhand lane:
Picture
And here is a detail of the targets:
Picture
I ranged 10 yds (9 m), 22 yds (20 m), and 27 yds (25 m), so all were doable, but missed the last two shots.
Arghh . . . need more practice!
After John shot his turn, we moved to lane 6:
Picture
With its detailed view:
Picture
Dropped all 6 targets. Ranges were not long: 12 yds (11 m), 19yds (17 m), and 22 yds (20 m).
After John shot we moved to Lane 7:
Picture
This is John shooting his (very well) home tuned HW97. And here would be a detailed view of the targets:
Picture
Got twice the near and mid targets, but the long one eluded me. I suspect that at 49 yds (45 meters), with the sun on my back and a hat made out of rattan that is very airy, but also allows passage of light into the ocular, the budget/simple Diamondback 6-24X50 was having problems giving me the acuity needed to range correctly. I really cannot fault the scope, it is not a "high end scope" and, for the price (under $400),  performs admirably. I will have to remember and get some sort of solid hat that precludes the sunshine shining into the ocular, OR an I-cuff or other similar device (but then we start getting away from the "Simple" in the Simple FT concept.
​
We closed the match at lane 8:
Picture
Picture
​Which was the only lane towards the lake. USUALLY, the wind from the lake plays goofy tricks with the shots, but this time I was lucky and I had some calm.
I had shot the two shots on the first target when John told me:
-There is a person in the lake beyond the middle target, not that you are going to miss, but just to make you aware"
WHAAAT???!!!!
Stood up and tried to locate the person, but he had rowed past, so I deemed safe to shoot again.
I calmed myself down, breathed real deep a few times and asked John which was the next shot.
John informed me that I had to take my first shot on the second target, so I started there and the rest of the shots went well.
Enough to close the Match with a clean lane that is always very nice.
By now, I'm sure some of you are thinking: "How can he remember EVERY shot?"

Truth is: I don't. LOL!

When Veronika started shooting, she made it a point to keep notes of every shot, and so we designed a D.O.P.E. card that I try to keep for all shoots. It is a source of experience, as sometimes after thinking things over a day or two, I come back and find something that needs to be learned.
It is something I would highly recommend:
Picture
For example:
Clearly, the long shots are harder than the short ones.
Clearly I have problems with the second shot: 8 of 13 misses were second shots.
Need to work in my offhand shots (usually, real top matches are decided on the "discipline" - forced position -  shots).
In this way, you can "coach" yourself to improved scores.

Of course, I always take a picture of the official score card:
Picture
And make sure that totals match, LOL!

After all the shooting was done, some of the shooters pitched in to "take out the course":
Picture
It's the least we can do to help the FTRPA crew.
​
After the cleanup, awards were given and conversations got started
Picture
After a while, I was reminded that I hadn't brought the wife, LOL!
So I took leave from my friends and started heading home.
​The drive home was easier than the one out.
Quick refuel, snack, and in 3 hrs and change I was home.
When you analyze the scores of the match, it becomes clear that the course was not THAT hard (measured as TDR), yet the scores were not THAT high.
There is much more to a course difficulty than the TDR, and even when the MD's think it is one of the easiest they have set, results tell that it was not so easy after all.

As far as equipment is concerned, I am still very happy with my "Simple FT rig" the DIANA 430L is a "good" gun to start with, but with some engineering and the right accessories, it is approaching the "great" status.
The combination of the scope, the mount, the gun, and the pellet has proven that FT'ers should not be afraid of running at slow speeds. It's the accuracy, precision and consistency of a system that are most important.
It is also important to have fun and, if your system is becoming too complicated, take a step back, re-think the whole thing, see into yourself and decide what is what makes you truly happy. Then simplify.
You may loose a few points in the first few matches, but if you were honest with yourself and the simplification gives you more enjoyment, then you will practice more, be more proficient, and in the long run, you will score better.

FTRPA's July shoot is now done, it has become part of the collective memory, some things learned, some things re-learned; it was a hoot and I deeply appreciate Larry's, Rick's, and Jim's knowledge, cooperation and efforts on behalf of the sport.
Good times and good memories are created from this.
AND...
Best thing was to meet old friends and make new ones, I've said it many times, but the best part of FT is the people that shoot FT.

Keep well and shoot straight!


HM
0 Comments

Shot cycle Dynamics in 3 Spring-Piston Airguns Chap 8

7/22/2021

9 Comments


​What happens when you remove the LGU’s muzzle cap?

When first got my LGU, I tried changing as many parameters as possible to see if/how they affected accuracy. First, I tested lots of different pellets. The rifle seemed to like Air Arms Diabolo Field (4.52 mm) pellets, which have tended to be the most accurate pellets in all 12-14 ft-lb rifles that I’ve ever tried. The simplest parameter to change in the rifle itself was to remove the muzzle cap. This greatly increased the report of the rifle, producing a sharp popping sound that is similar to my unmoderated Anschütz 2002 CA PCP air rifle. It also seemed to slightly improve accuracy, so in this chapter I’ll take a closer look at how my LGU performs with and without the muzzle cap/baffle.
​ 
Figure 8.1 shows a photo of the LGU’s removed muzzle cap next to the muzzle tube where it was held by a screw. The muzzle cap weighs 36 g (1.3 oz). Since I’m using a computer hard drive magnet to hold the end of the cocking lever in place, I also removed the cocking lever latch. For more info on these mods, please see:
​
https://www.gatewaytoairguns.org/GTA/index.php?topic=168525.0
Picture
Fig. 8.1 Photo of the LGU’s muzzle cap (on left) next to the muzzle tube where it was held by a screw.
​Figure 8.2 shows 5-shot groups shot off the bench at 20 yards with the muzzle cap (top six targets on left card) and without muzzle cap (bottom two targets on left card and all targets on right card). Two out of the six groups with the muzzle cap showed significant vertical stringing (see red ovals). The groups without the muzzle cap tended to be rounder. The mainspring used here was a shortened Maccari (moderate FAC, 30 coils x .125 wire) that was shooting around 11 ft-lb. This was only preliminary evidence that the muzzle cap was affecting accuracy.
Picture
Fig. 8.2 5-shot groups at 20 yards off the bench for LGU with and without muzzle cap on 8/14/19 using shortened Maccari mainspring shooting around 11 ft-lb.
In January 2020 I installed a 16 J factory mainspring that was shooting around 12 ft-lb. Figure 8.3 shows more 5-shot groups with and without the muzzle cap. The left target card was shot with the muzzle cap in place and the right two cards were shot without the muzzle cap. Most of the groups on the left card looked pretty good, but about a third of them, circled in red, showed the vertical stringing that I observed before. Two things happened when the muzzle cap was removed, as can be seen in the right two cards in Fig. 8.3. First, the POI shifted down and slightly to the left. Second, the groups were rounder with less tendency to string vertically. If anything, there may have been some horizontal stringing going on (see groups circled in green) when the muzzle cap was removed!
Picture
Fig. 8.3 5-shot groups at 20 yards off the bench for LGU with and without muzzle cap on 1/20/20 using factory 16 J spring shooting around 12 ft-lb.
​Further qualitative accuracy comparisons can be found in Fig. 8.4, where five 5-shot groups were made without the muzzle cap, followed by four 5-shot groups with the muzzle cap, and finally by a single 5-shout group without the muzzle cap. I used the term “muzzle brake” instead of muzzle cap when I annotated the targets. I overlayed the groups on the right side of the target card and found that the 20-shot composite group without the muzzle cap was significantly smaller and rounder than the 20-shot composite group with the muzzle cap, which again tended to be stringing vertically. Even the 30-shot composite group without the muzzle cap looked better than the 20-shot composite group with the muzzle cap.
Picture
Fig. 8.4 5-shot groups at 20 yards off the bench for LGU with and without muzzle cap 1/28/20 using factory 16 J spring.
​In Fig. 8.5 I try to quantify the accuracy differences better. On the left card in Fig. 8.5, I shot four 5-shot groups, five 10-shot groups, and a 20-shot group, all with the muzzle cap attached. The bottom four 10-shot groups on the left card were made with the muzzle cap removed. On the right card, the top eight 5-shot groups were made with the muzzle cap removed, followed by eight 5-shot groups with the muzzle cap attached, and finally two 5-shot groups with no muzzle cap. I alternated groups with and without the muzzle cap to reduce any artifacts due to accuracy drifting with time. Again, groups without the muzzle cap tended to be smaller and rounder, with a lower POI than groups with the muzzle cap.
Picture
Fig. 8.5 5-, 10-, and 20-shot groups at 20 yards off the bench for LGU with and without muzzle cap on 4/9/20 and 4/12/20 using factory 16 J spring.
​Figure 8.6 summarizes the accuracy test made in Fig. 8.5. The ctc distances for the 5-, 10-, and 20-shots groups shot with the muzzle cap were at least 20% larger than the groups shot without the muzzle cap. The difference became more significant as more shots were included in the groups, since the vertical stringing by the muzzle cap was intermittent and one could still get some pretty nice 5-shot groups with the muzzle cap attached. However, if one shot more groups or put more shots into a group, the stringing tendencies of the muzzle cap started to become more apparent.
Picture
Fig. 8.6 Average ctc group size at 20 yards off the bench for LGU with and without muzzle cap.
​Finally, I wanted to check if the accuracy differences would show up in recoil traces. Figure 8.7 shows the rifle’s velocity as a function of time for three shots with the muzzle cap and three shots without the muzzle cap. They all look the same to me! I think this confirms Hector’s diagnosis that the vertical stringing is due to barrel harmonics, which wouldn’t show up in the overall rearward motion of the rifle. If one could zoom in on the muzzle in time and space, one would see that it’s swinging around like the end of a diving board.
During the middle of the swing, the barrel muzzle is moving the fastest and its direction is changing the most. Therefore, if the pellet leaves the barrel when the muzzle is in the middle of its swing, small changes in the pellet exit time and/or the barrel vibration will cause pellet POI to be more spread out laterally. On the other hand, if the pellet leaves the barrel when the muzzle is at the end of its swing, and therefore stopped and is about to turn around to head back in the opposite direction, there will be much less variation in the muzzle orientation and accuracy will be much better. 
Removing the weight of the muzzle cap changes the barrel harmonics towards the more favorable situation where the pellet leaves at the end of the muzzle swing. Recent measurements have shown that this is the case. Using a DIY angle-o-meter, I found that with the muzzle brake attached, the pellet leaves the muzzle when the barrel is swinging down, near the middle of its swing. Without the muzzle brake, the barrel oscillations are faster and the pellet leaves near the bottom of the muzzle swing, causing the POI to be lower and the vertical dispersion to be less, since the muzzle is stopped at the bottom of the swing when the pellet exits. For more details on this, please see my post in Shooting the Breeze:

https://shooting-the-breeze.com/threads/barrel-vibration-measurements-in-my-lgu.52757/
Picture
Fig. 8.7 Three velocity recoil traces without the muzzle cap (blue) and three recoil traces with the muzzle cap (orange) from my LGU.
​The main lesson that I got out of this is that although manufacturers have good reasons for adding every part on their air rifles, sometimes these parts do more harm than good, depending on one’s priorities. I’m happy to live with a louder LGU if it means that is shoots more accurately. I’m very curious to hear if any readers have noticed a difference. Have you tried removing the muzzle cap on your spring piston air rifle? It may be worth a try!
9 Comments

Shot cycle Dynamics in 3 Spring-Piston Airguns Chap 7

7/8/2021

3 Comments

 
Note from the Publisher:

Please be so kind as to note the corrections made on July 11, 2021.
Corrections have been inserted in Bold Face.
The chart in fig 7.5 has also been corrected to the proper values.
We apologize for the compound mix-ups and acknowledge the help provided by Britt Salter in identifying the issue.

​Does a higher energy spring decrease accuracy in a springer air rifle?

​In this chapter we explore what happens when higher power springs are used in my FWB 124 and LGU air rifles. I’ve heard that these rifles are optimized for 12 ft-lbs, but they did quite well with higher energy springs. Let’s start with the FWB 124. When I lubricated my FWB 124 with Krytox, the muzzle velocity dropped dramatically, so I decided to put an older, higher power spring to get the muzzle velocity back up. This gave me the opportunity to test how the FWB 124 performs with lower and higher energy springs. The lower energy spring was a Maccari Slightly Softer spring, which produced muzzle energies around 11.2 ft-lb. The higher energy spring was a Maccari Pro-Mac, which produced muzzle energies around 13.3 ft-lb.  I would expect that the weaker spring would result in more docile recoil and therefore better accuracy. Figure 7.1 supports this assumption, with the average of eight 10-shot groups for the weaker spring in Fig. 7.1a) being a bit smaller (although within the error bars) of the average of eight 10-shot groups for the stronger spring in Fig. 7.1b).
​The standard deviation and extreme spread of the muzzle velocities were pretty much the same for both springs. 
Picture
Fig. 7.1 FWB 124 10-shot groups off bench at 20 yards with a) Maccari Slightly Softer mainspring (red rectangle) and b) Maccari Pro-Mac mainspring.
​A 2 ft-lb (19%) increase in muzzle energy is significant, so I was curious to see how that increase would affect the recoil traces. I looked at the recoil of the FWB 124 with the two springs over longer times in Fig. 7.2a) and shorter times in Fig. 7.2b). Figure 7.2b) also shows when the pellets exited the muzzle. Surprisingly, the position, velocity, and acceleration traces are nearly identical over the first 0.015s! The main difference is that the later oscillations are shifted slightly to the right (later times) for the weaker Slightly Softer spring (purple traces). These occur well after the pellet has left the barrel, so I doubt that they had much effect on the accuracy or muzzle velocity. Maybe they are just due to the different springs sloshing around differently once the pellet has left the barrel?
Picture
Fig. 7.2 FWB 124 recoil traces showing the position, velocity, and acceleration of the sled-mounted rifle for the Maccari Slightly Softer and the Maccari Pro-Mac mainsprings. a) looks at longer times and b) focuses at shorter times and shows the pellets leaving the barrel (vertical red lines).
​Now let’s take a look at my LGU. For the past year, I’ve been the only competitor in the World Field Target piston class at the monthly Rochester Brooks matches (https://www.rbgunclub.com/field-target/), so I decided to try the hunter field target piston class. HFT has a muzzle energy limit of 20 ft lbs, so I replaced the 12 FT-LB (16 J) factory spring with a 20 J (15 ft-lb) spring that came with the rifle. The higher muzzle energy produces a flatter trajectory that should really help with accuracy and ranging at longer distances. 
Figure 7.3a) shows some targets at 20 yards off the bench with both springs and Fig. 7.3b) shows three targets at 52 yards off the bench with the 20 J spring. At 20 yards, the accuracy was pretty much the same with both springs despite the fact that recoil was significantly stronger with the 20 J spring, which increased the muzzle energy from 11.1 ft-lb to 14.4 ft-lb.
The variation in muzzle velocity was similar for both springs. I was very excited by the accuracy that the 20 J spring produced at 52 yards. The three 10-shot groups at 52 yards are the best I’ve ever shot with a spring piston air rifle past 50 yards. I was especially pleased that the groups drifted only slightly, with the third group back on top of the first group. All the groups had ctc distances under 0.9”, with the first and third groups under 0.75”. Remember, these are 10-shot groups!
​The higher muzzle velocity also took off about an inch of pellet drop at 52 yards, which will help reduce misses due to ranging errors. For comparison with 10-shot groups at 52 yards using the 16 J spring, please look at Fig. 5.6 in Ch. 5.
Picture
Fig. 7.3 LGU 10-shot groups off bench at a) 20 yards with 16J (top) and 20J (bottom, red rectangle) mainspring and b) at 52 yards with 20J mainspring.
​Figure 7.4 shows the recoil traces from my LGU with the 16 J and 20 J springs. Unlike the FWB 124, where increasing the muzzle energy by a couple of ft-lbs didn’t make much difference in the recoil traces, with the LGU a similar increase in muzzle energy made a big difference in the recoil. I aligned the 16 J and 20 J traces using the pellet exit signals (bottom curves in middle plot). The amplitudes of the velocity and acceleration peaks and dips were clearly bigger with 20 J spring. These peaks and dips also were shifted to longer times, suggesting that the shot cycle took a bit longer with the 20 J spring. This is opposite to the behavior in the FWB 124, where the weaker spring shifted the recoil traces to slightly longer times (to the right). Ideally, the traces should be aligned according to when the piston was released, but this is hard to nail down very precisely, so I had to use the pellet exit time, which will be slightly different due to differences in muzzle velocity.
Picture
Fig. 7.4 LGU recoil traces showing the position, velocity, and acceleration of the sled-mounted rifle for the factory 16 J and 20 J mainsprings. Vertical red lines show the when pellets leave the barrel. Note that for the 20 J spring only a single light gate was used, so there’s only one pulse in the bottom orange trace in the middle graph.
​Finally, I checked to see how the efficiency changes when going to a more powerful spring.
Before discussing the efficiencies, I'd like to thank Britt Salter for catching some important errors in the original version of Fig. 7.5. Thanks Britt for catching the inconsistencies between the posted muzzle velocities and calculated efficiencies in the original version of this chapter!
Figure 7.5 has been corrected and shows that the stronger spring required more work to cock for both the FWB 124 and LGU, but for the FWB 124 the resultant increase in muzzle energy actually increased the efficiency, while the stronger spring in the LGU decreased efficiency. One difference with the FWB 124 is that the weaker spring was lubricated with moly/Superlube and the stronger spring was lubricated with Krytox, so the efficiency comparison is not as reliable as with the LGU, where both springs were lubricated with Krytox. The increase in efficiency with the stronger spring in the FWB 124 isn’t very dramatic, but at least one can conclude that efficiency in this case did not go down when a stronger spring increased the muzzle energy by 19%. I’m willing to live with the decrease in efficiency of the LGU with the stronger spring if it can maintain better accuracy at longer distances.
Picture
So for my FWB 124, increasing the muzzle energy from 11.2 ft-lb to 13.3 ft-lb may have hurt accuracy slightly at 20 yards, but not significantly, without affecting the standard deviation nor the extreme spread in the muzzle velocity. The shot cycle at short times was pretty much the same for these two springs, but it looks like the oscillations with the weaker spring were slightly delayed well after the pellet exited the barrel. The efficiency with the stronger spring was slightly better. It would really help to check the accuracy at longer distance to see if the higher muzzle velocity produced by the stronger spring can result in better accuracy at longer distances. The higher muzzle velocity of the stronger string will produce a flatter trajectory, which also will help at longer distances.
​For those of you who want to maximize the muzzle velocity of your FWB 124, I suggest that you try the factory piston seal. I was typically getting up to 50 fps greater muzzle velocity with the factory piston seal over any aftermarket seal that I tried using a variety of mainsprings.
For the LGU, the stronger spring decreased efficiency a bit and didn’t change accuracy at 20 yards. However, at 52 yards the accuracy looks very promising (personal best!) and the flatter trajectory will certainly help ranging and hitting targets at longer distances. The recoil felt stronger, which is backed up by the recoil traces, but that didn’t seem to hurt accuracy. If it weren’t for the 12 ft-lb limit in the World Field Target piston class, I would definitely use the stronger 20 J spring in those matches. Since the muzzle energy limit in the American Airgun Field Target Association’s Hunter piston division is 20 ft-lbs, I’m looking forward to trying the stronger spring in my LGU for hunter FT matches. I wonder if there’s anything that can get me a few more foot pounds out of the LGU?! 
It also would be interesting to see if the efficiency continues to drop in the LGU with even stronger springs. We expect that the shorter, central transfer port in the LGU should work better at higher power compared to the longer, offset transfer port in the FWB 124, but at least for this particular test, the FWB 124 did a bit better in terms of efficiency at higher power.
3 Comments

    Hector Medina

    2012 US National WFTF Spring Piston Champion
    2012 WFTF Spring Piston Grand Prix Winner
    2013 World's WFTF Spring Piston 7th place
    2014 Texas State WFTF Piston Champion
    2014 World's WFTF Spring Piston 5th place.
    2015 Maine State Champion WFTF Piston
    2015 Massachusetts State Champion WFTF Piston
    2015 New York State Champion WFTF Piston
    2015 US National WFTF Piston 2nd Place
    2016 Canadian WFTF Piston Champion
    2016 Pyramyd Air Cup WFTF Piston 1st Place
    2017 US Nationals Open Piston 3rd Place
    2018 WFTC's Member of Team USA Champion Springers
    2018 WFTC's 4th place Veteran Springer
    2020 Puerto Rico GP Piston First Place
    2020 NC State Championships 1st Place Piston
    2022 Maryland State Champion WFTF 
    2022 WFTC's Italy Member of TEAM USA 2nd place Springers
    2022 WFTC's Italy
    2nd Place Veteran Springers

    Archives

    August 2022
    May 2022
    April 2022
    February 2022
    August 2021
    July 2021
    June 2021
    May 2021
    April 2021
    March 2021
    February 2021
    October 2020
    September 2020
    August 2020
    July 2020
    June 2020
    May 2020
    April 2020
    March 2020
    February 2020
    January 2020
    December 2019
    November 2019
    September 2019
    August 2019
    July 2019
    May 2019
    April 2019
    January 2019
    December 2018
    November 2018
    October 2018
    September 2018
    August 2018
    June 2018
    May 2018
    April 2018
    March 2018
    February 2018
    January 2018
    December 2017
    November 2017
    October 2017
    September 2017
    March 2017
    December 2016
    October 2016
    September 2016
    July 2016
    June 2016
    March 2016
    January 2016
    December 2015
    November 2015
    October 2015
    September 2015
    August 2015
    June 2015
    May 2015
    April 2015
    March 2015
    February 2015
    January 2015
    December 2014
    November 2014
    October 2014
    August 2014
    July 2014
    June 2014
    May 2014
    March 2014
    February 2014
    December 2013
    November 2013
    October 2013
    September 2013

    Categories

    All
    Events
    Gear
    Hunting
    Tests

    RSS Feed

Proudly powered by Weebly