This is a long story, but I'll try to make it short.
It all started about a year and half ago when I received a somewhat "peculiar" question from a person that signed his Emails as being part of "Small Arms Dev-Com/US Army"
And the question was peculiar because they asked if I thought that a Daisy Red Ryder could be powered up to shoot steel BB's at 690 fps.
¿HUH?!!!
OK, this merited some research!
As with any other customer, I got in contact with the young man and tried my best to find out what they really needed.
Because I knew what they wanted: A Daisy Red Ryder capable of shooting steel BB's at 590 FPS and that wasn't going to happen!
After some EMails were exchanged I understood the need.
In essence, these are the guys that CALIBRATE the gel blocks used for terminal ballistic testing.
To calibrate the blocks they shoot BB's at them, every shot gets chronographed and the penetration has to fall within certain parameters for the block to be "acceptable" for testing.
So, not only do they need to shoot the BB's at 590 FPS, but they need to keep to a Std Dev of 15 fps.
Once the gel blocks are calibrated then they get shot with serious stuff or form part of the safety equipment testing procedure (helmets, goggles, gloves, vests, chest plates . . .) everything gets tested with the "real thing", but that "real thing" needs to be tested in calibrated gel blocks. A sub-standard Gel block might give "passing grade" to a piece of equipment that can end up being dangerous to our guys in the field.
Now, from my experience in the pellet rifle world I thought that would be a piece of cake.
¡HA!
The Std Dev. proved to be the harder spec to meet, but we're getting ahead of the story.
So, coming back to setting up the project specs, I sent them a communication stating that there would be two possibilities: a spring gun (just not a R-R), or a PCP.
We analyzed the advantages and disadvantages of each powerplant, and originally, it seemed they had settled on a sidelever, I even tested an SPA SR900S sidelever to see what sort of MV's we could get, but then the ideas changed. It so happens that the system they were using was powered by Dry Nitrogen, and so the supply of compressed gas was absolutely no problem.
So, a proposal was made and sent.
Some months passed and I had already thought that the project had fallen through, but then I got a request to "update the proposal". OK, so got that done, and sent.
Some more months passed and another request came in for an update. Got it done and sent.
After some months had passed I was not really expecting anything when I get an EMail from a different person. Telling me they needed to submit the project for funding. That they needed a formal proposal.
OK, so I drafted a two page sheet with terms, conditions and specs, and sent it.
Some more months passed, and then I get an EMail from someone asking me to take a third party liability insurance for a Million Dollars. She also sent the full "Legalese" package.
As a gunsmith I am, above all, pragmatical, and if that was the ONLY way to do business, well . . . . Thanks, but no, Thanks.
And so I communicated what would be acceptable to CCA: I would deliver the system and provide all the information for safe operation. When the system had been tested, approved, and the technical personnel had signed off on the equipment as "fit for duty", then I would collect.
Some more "Legalese" was exchanged, and we finally agreed to a framework. To their credit, it was easier negotiating with the Army than with some construction contractors I know.
And then came a "purchase order". All formal and nice. With the request of some tax forms! . . . WHAT?????
Quick call to my accountant and then to my contact at Dev-Com and it resulted in a simple print-out of a form issued on line by the IRS. Phewwww!
At every step, my wife kept asking: "Are you sure this is all about a BB gun?" LOL!
And yes, I had to admit that it began to sound more and more "barroque".
But I decided to toe the line and get everything started.
The Build
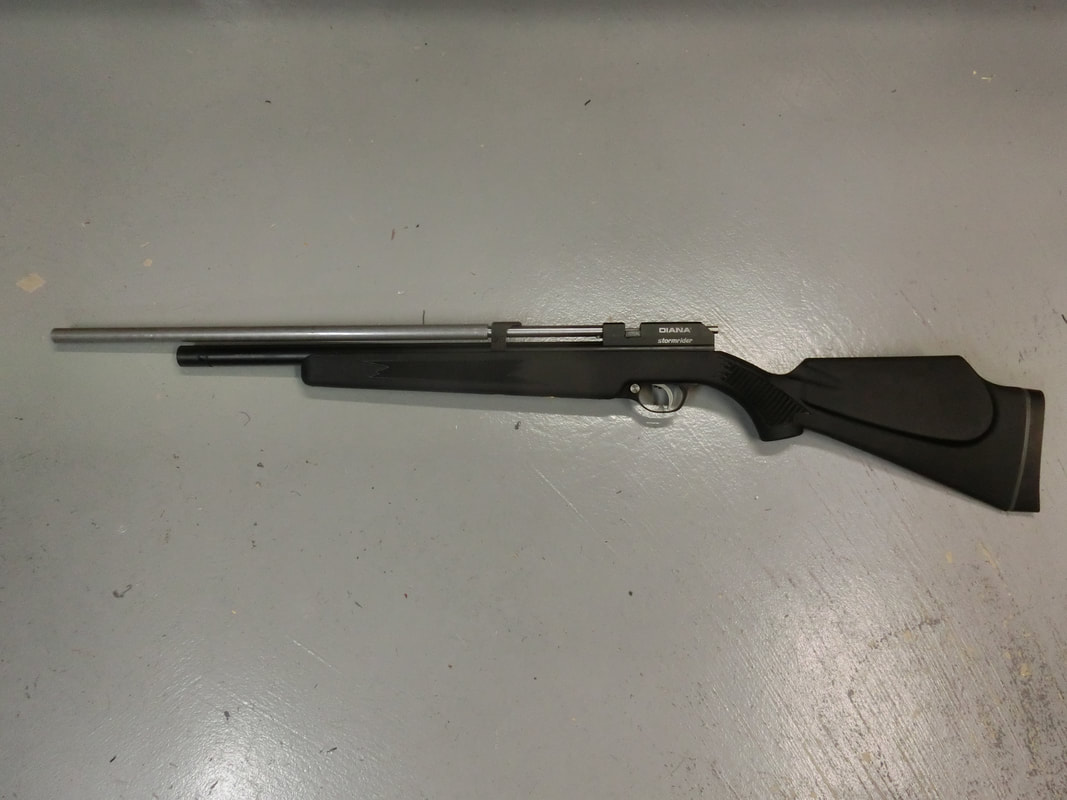
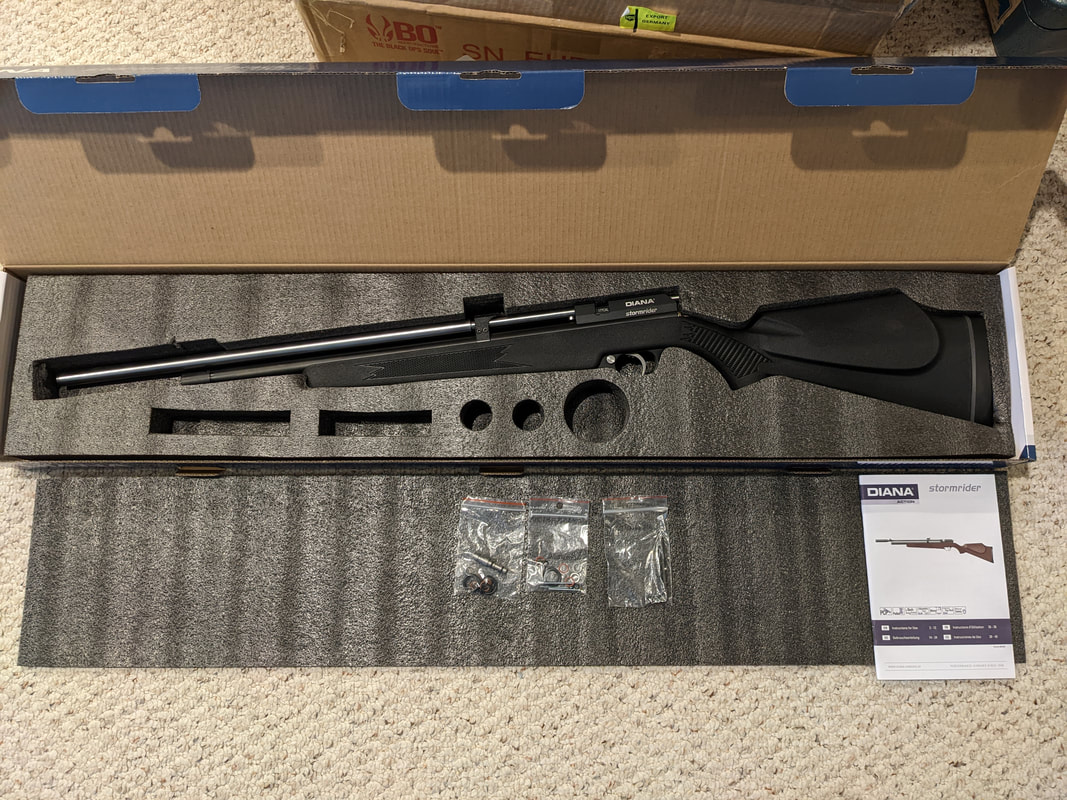
After much discussion, we had settled on a DIANA Stormrider, black, 2nd Generation.
We would install an Altaros vented regulator, and a custom Lothar Walther smoothbore barrel.
We would tune the gun to shoot to the required speed using the techniques we developed many years ago.
Orders were placed for the parts, and within a week, parts started to arrive.
Pyramyd Air delivered the Stormrider
Altaros delivered the vented regulator
And we waited for the barrel.
Just two weeks after, the barrel arrived.
Wow!
So, now chips could start flying!
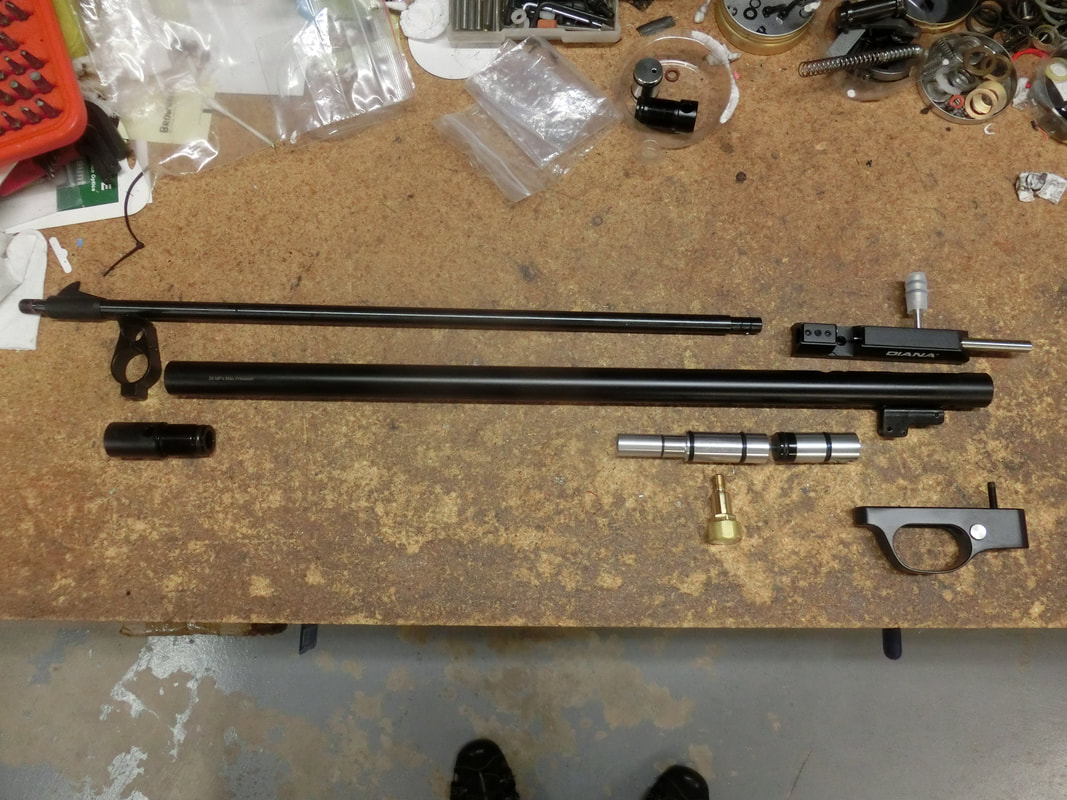
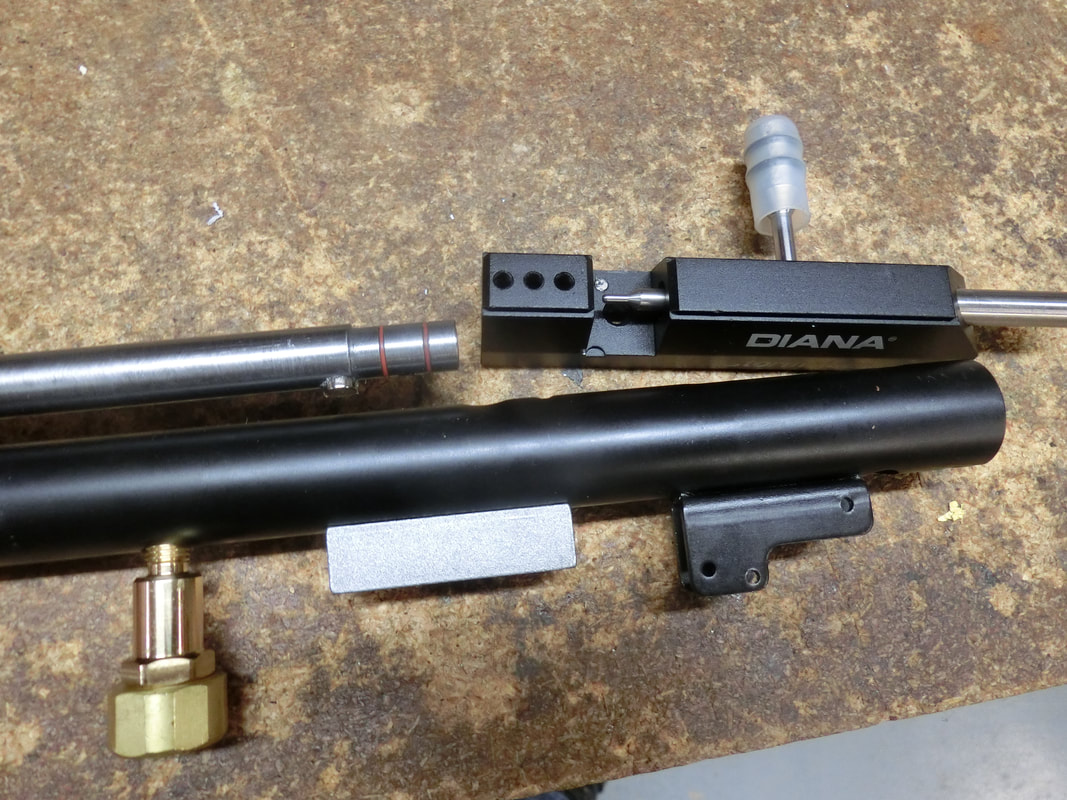
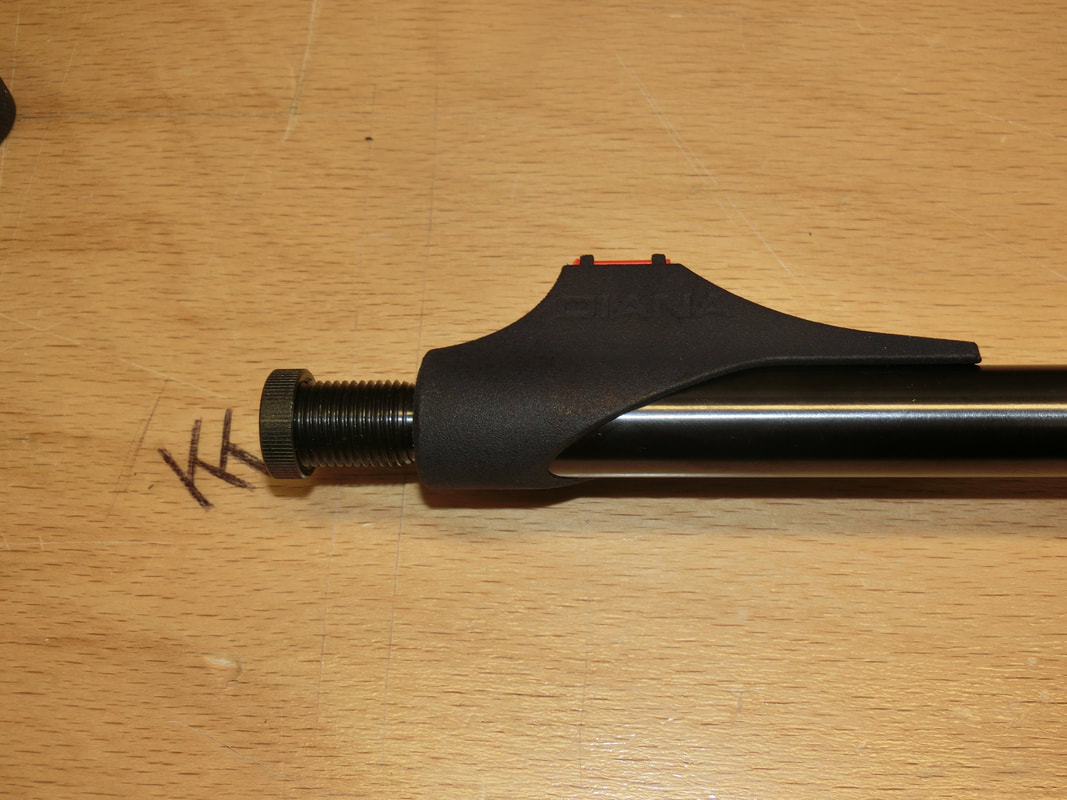
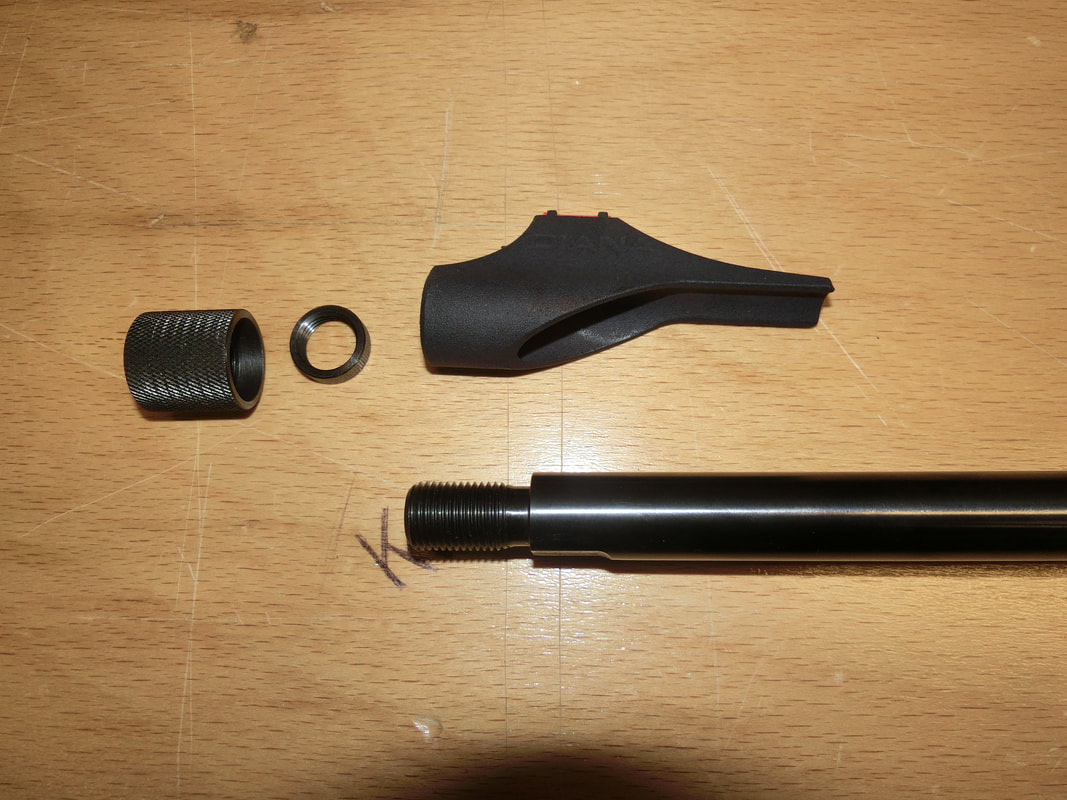
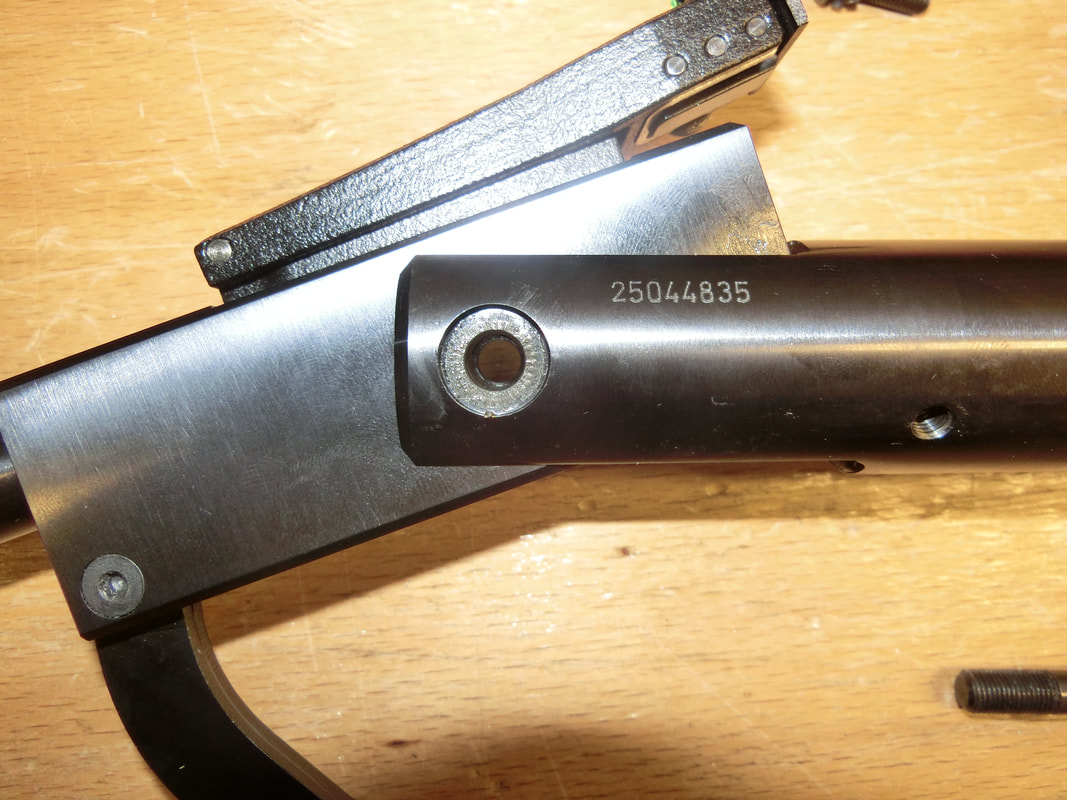
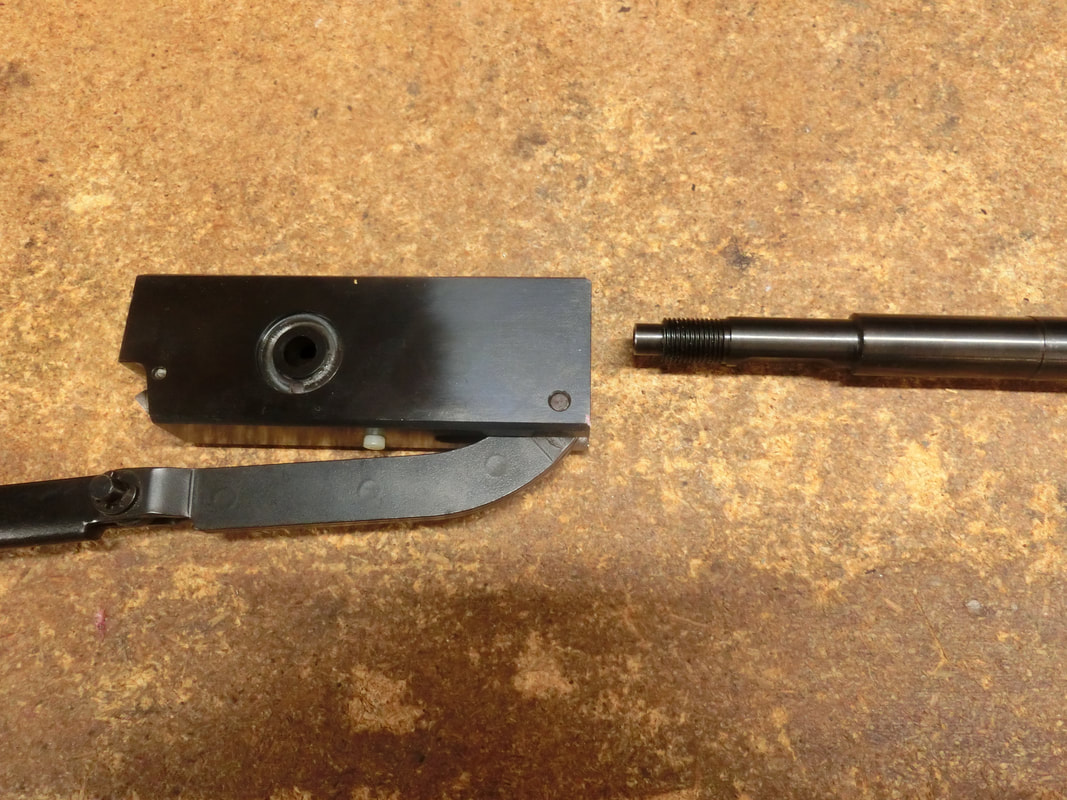
First was the disassembly of the OEM rifle, and "presenting" the parts available:
We would install an Altaros vented regulator, and a custom Lothar Walther smoothbore barrel.
We would tune the gun to shoot to the required speed using the techniques we developed many years ago.
Orders were placed for the parts, and within a week, parts started to arrive.
Pyramyd Air delivered the Stormrider
Altaros delivered the vented regulator
And we waited for the barrel.
Just two weeks after, the barrel arrived.
Wow!
So, now chips could start flying!
First was the disassembly of the OEM rifle, and "presenting" the parts available:
After the regulator and the additional manometer/quick-fill were installed, we tested for leaks by pressurizing the air tube and letting it rest for a week.
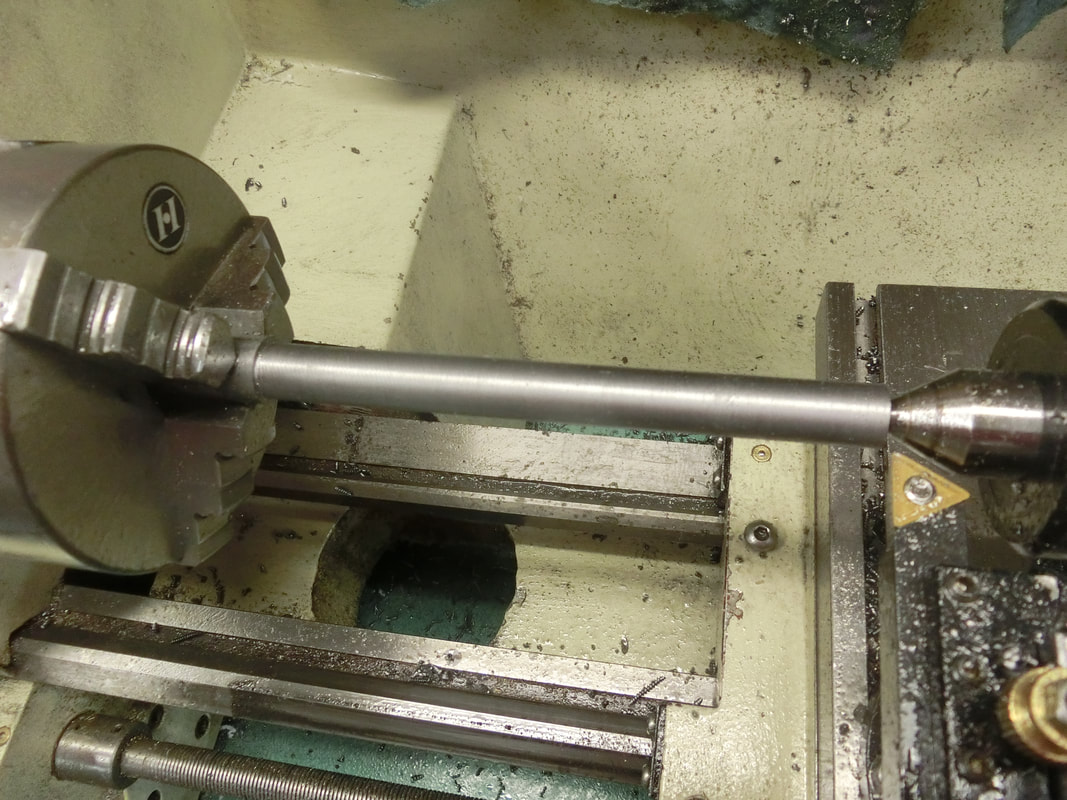
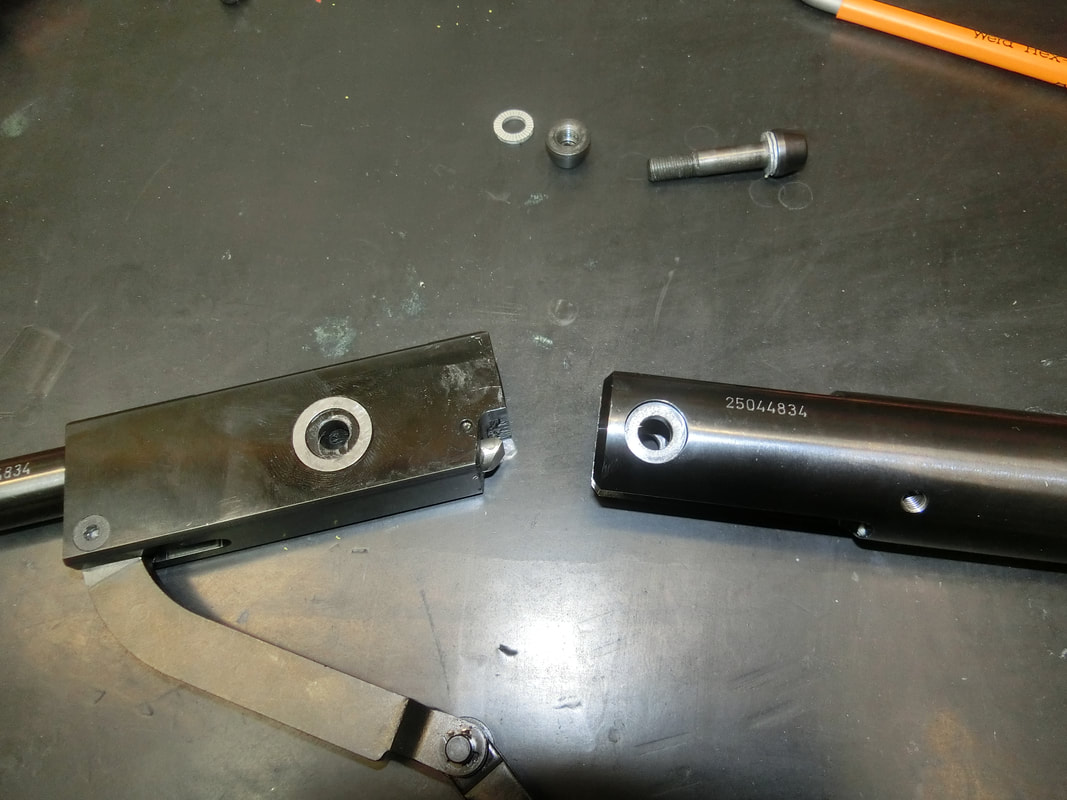
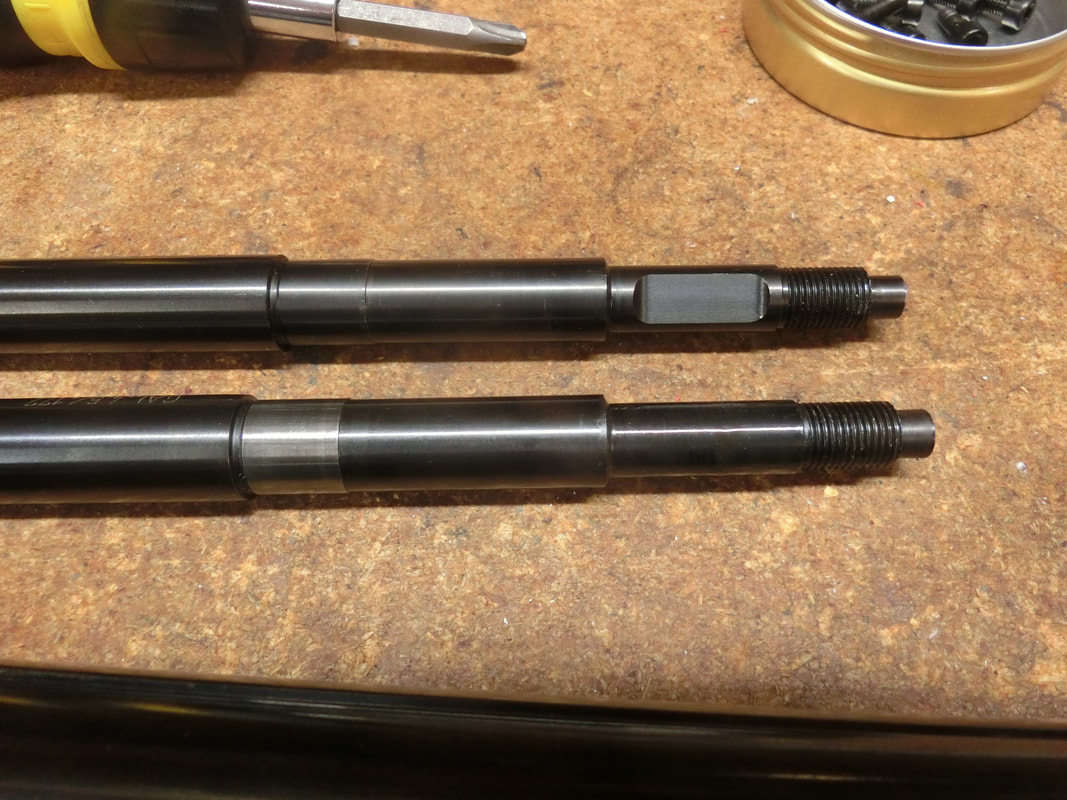
Meanwhile, we took the L-W smoothbore blank and turned it to fit the action:
Meanwhile, we took the L-W smoothbore blank and turned it to fit the action:
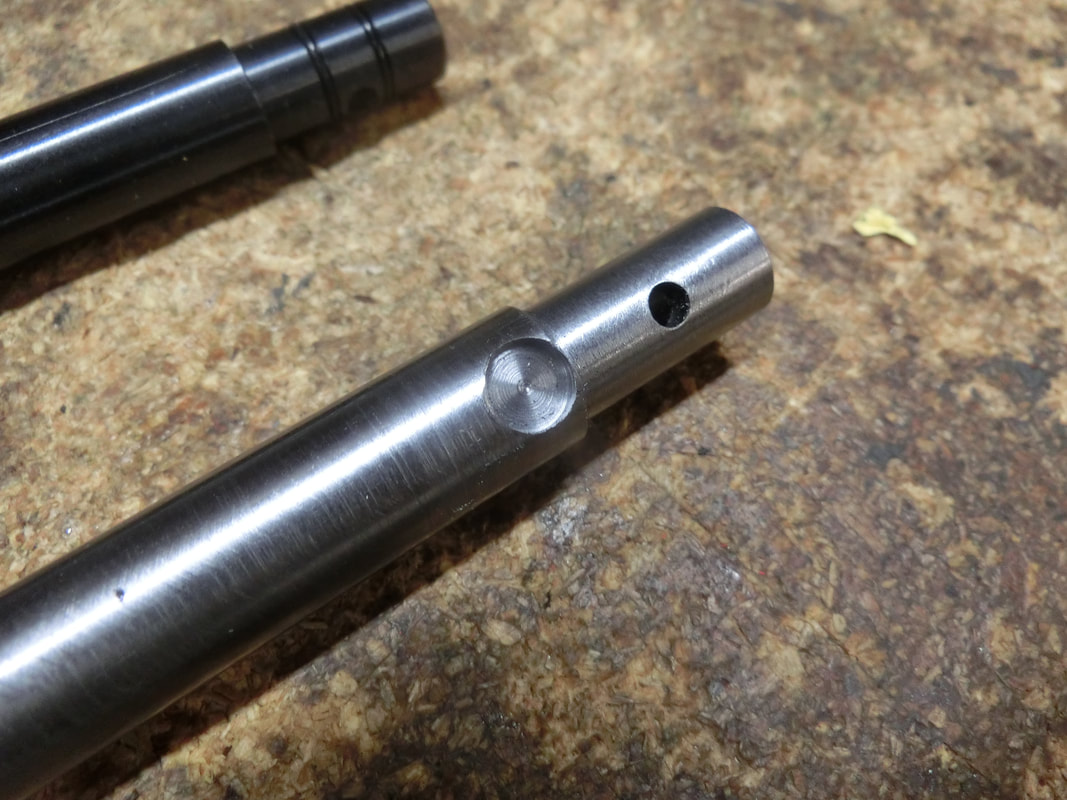
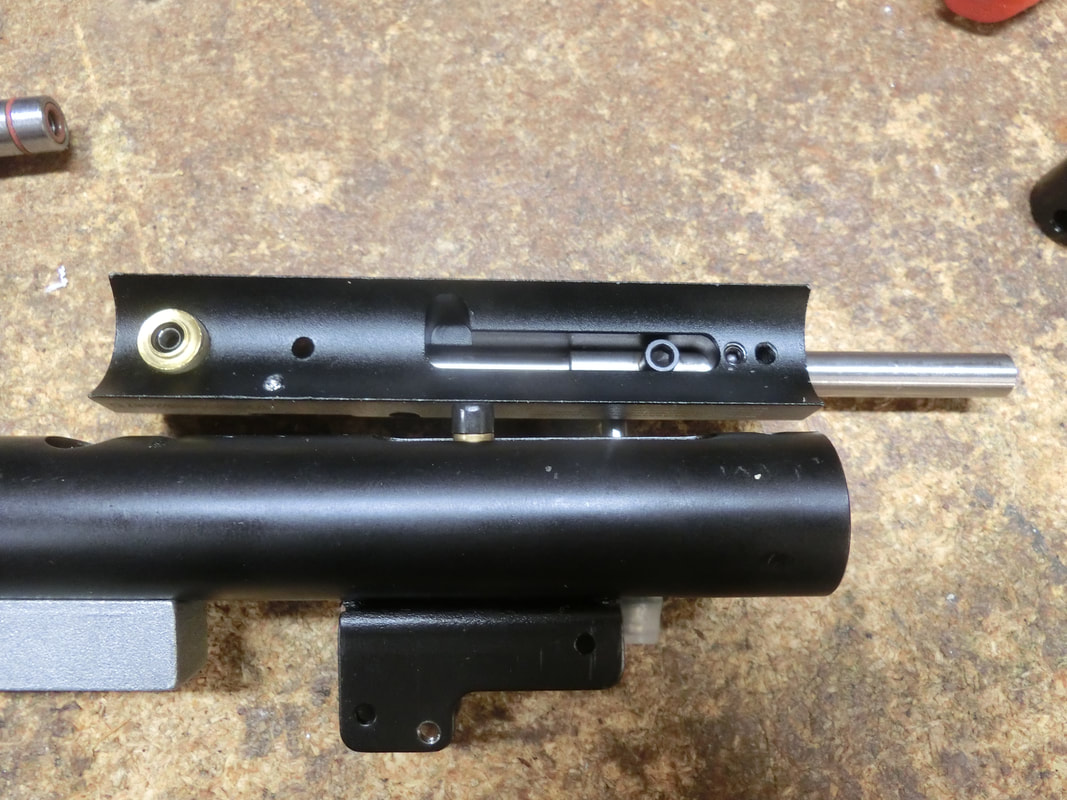
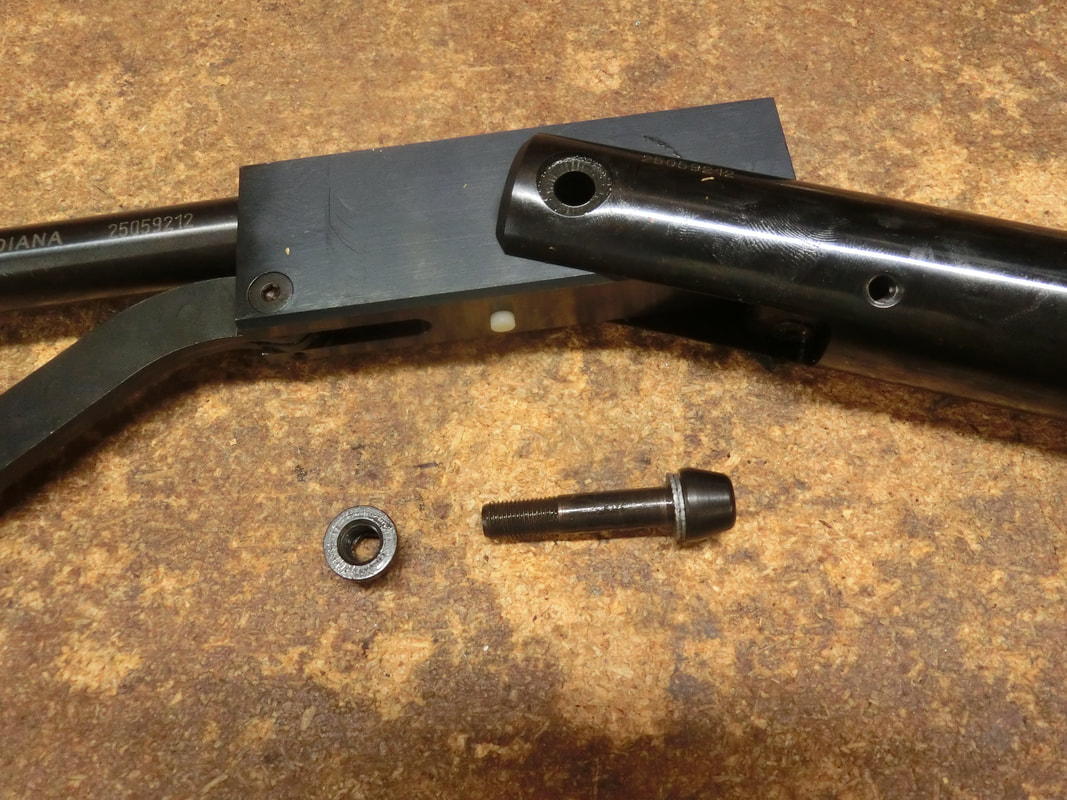
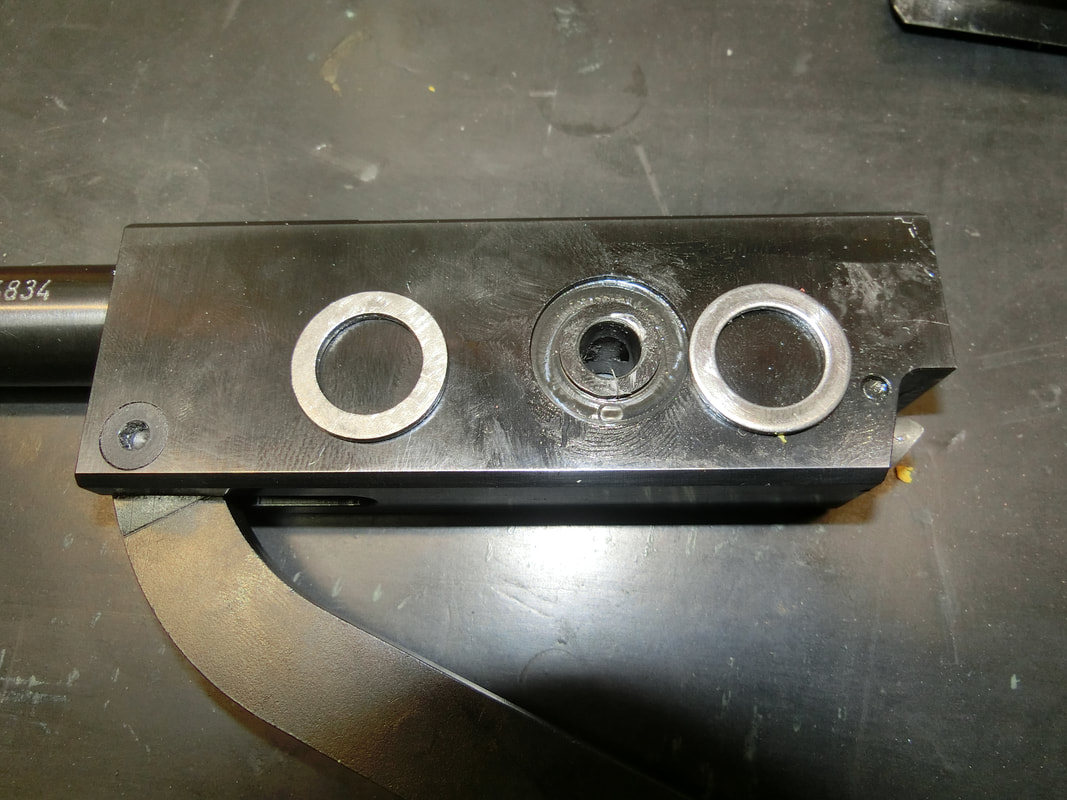
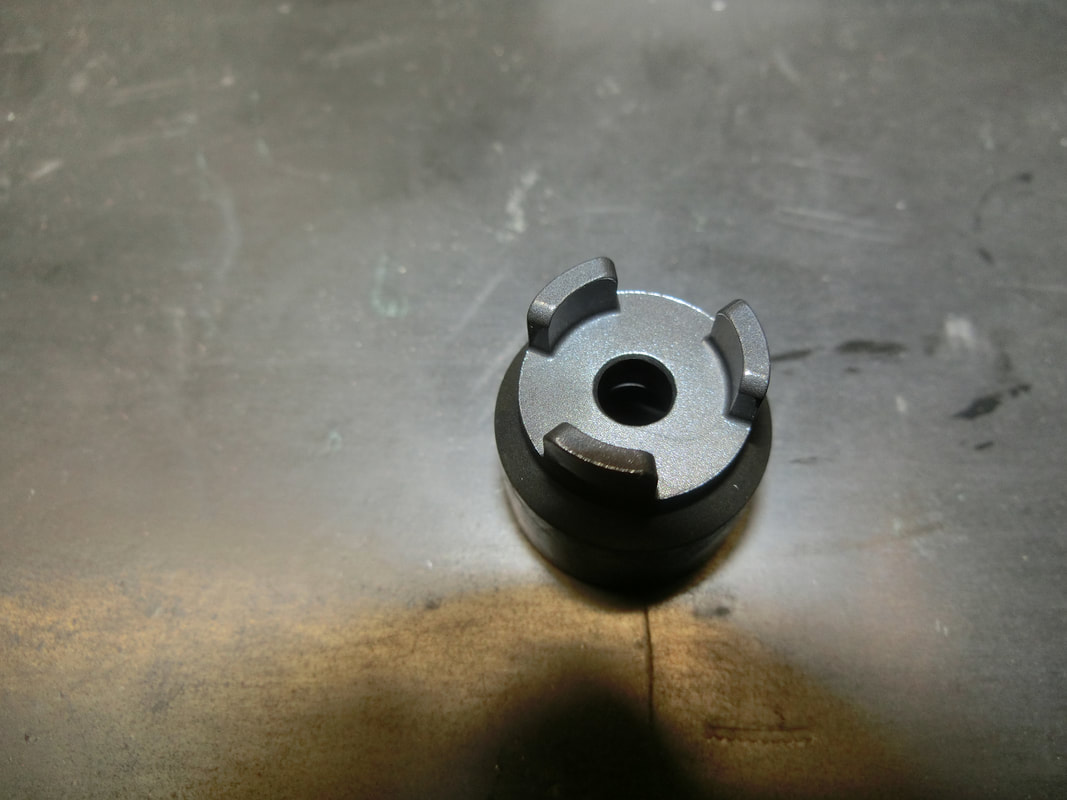
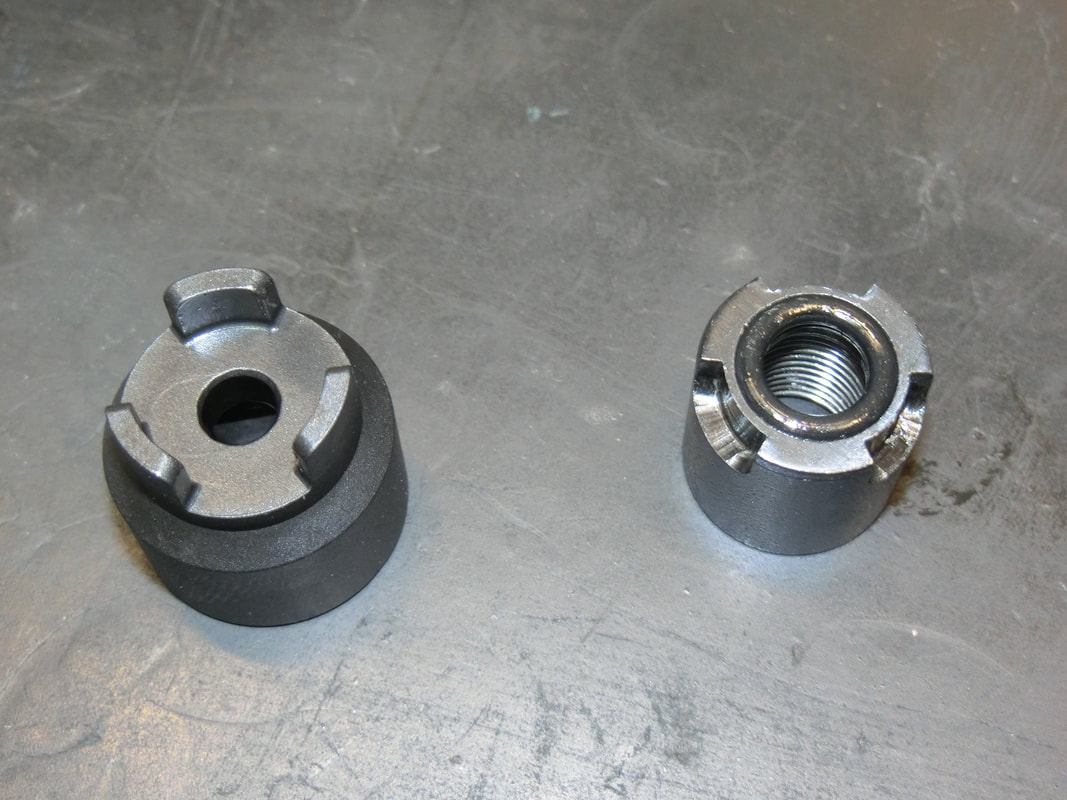
Then the TP and a cavity had to be milled. The cavity would house a magnet that would hold the BB just in front of the point of the probe:
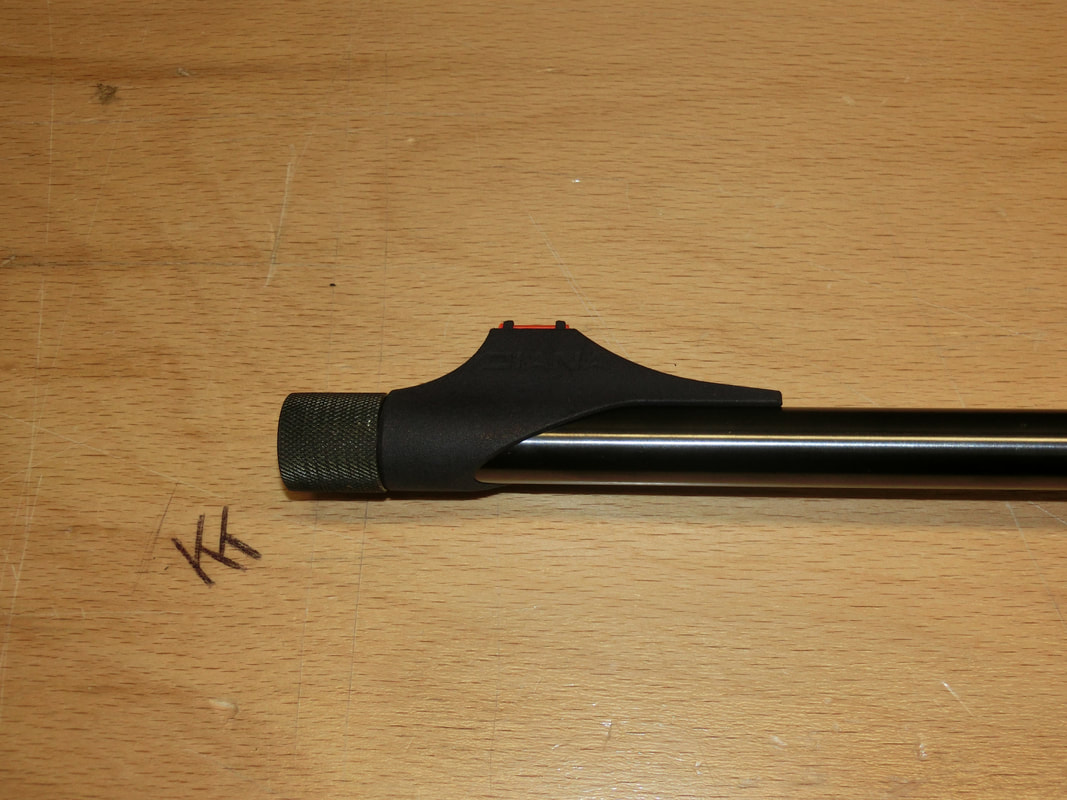
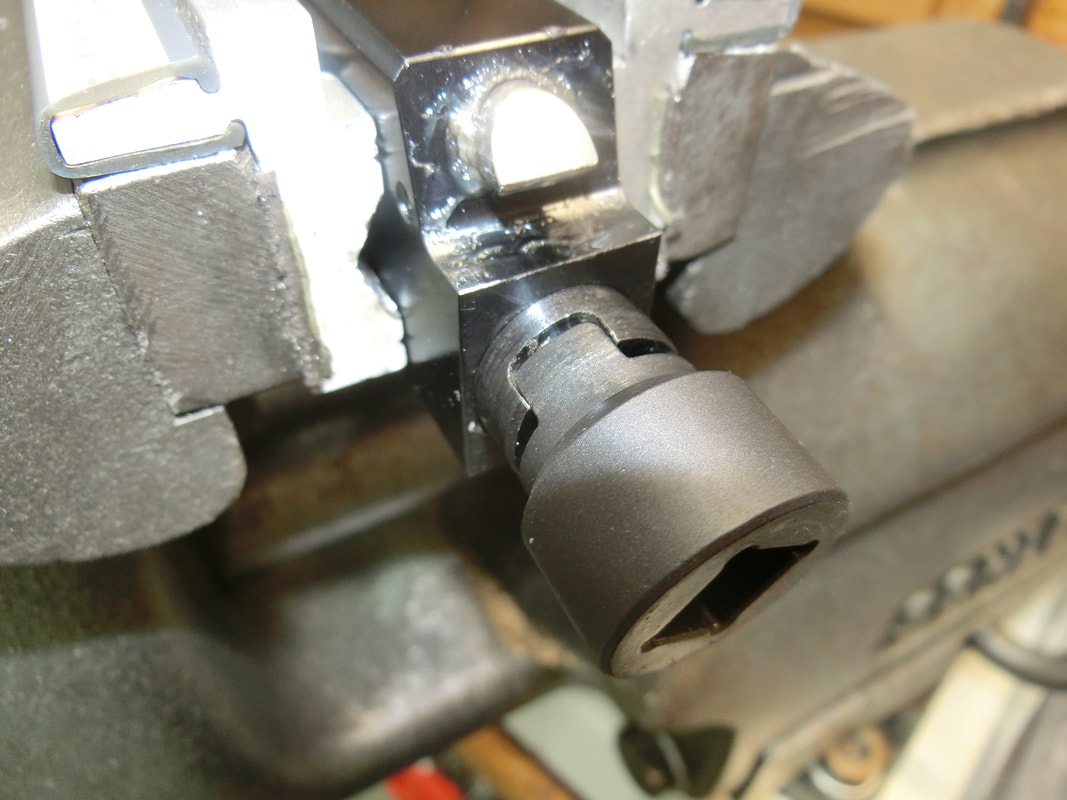
ORing grooves cut and a bit polished, the barrel went into the gun:
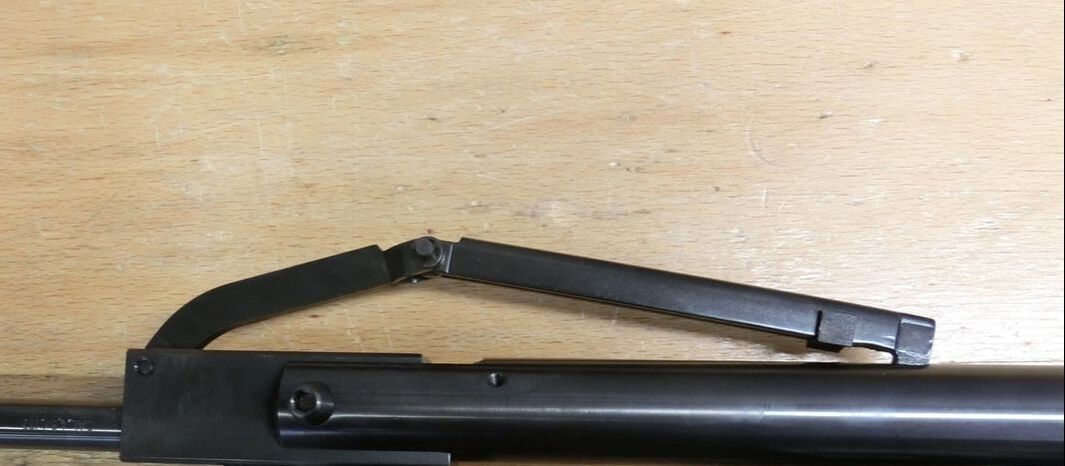
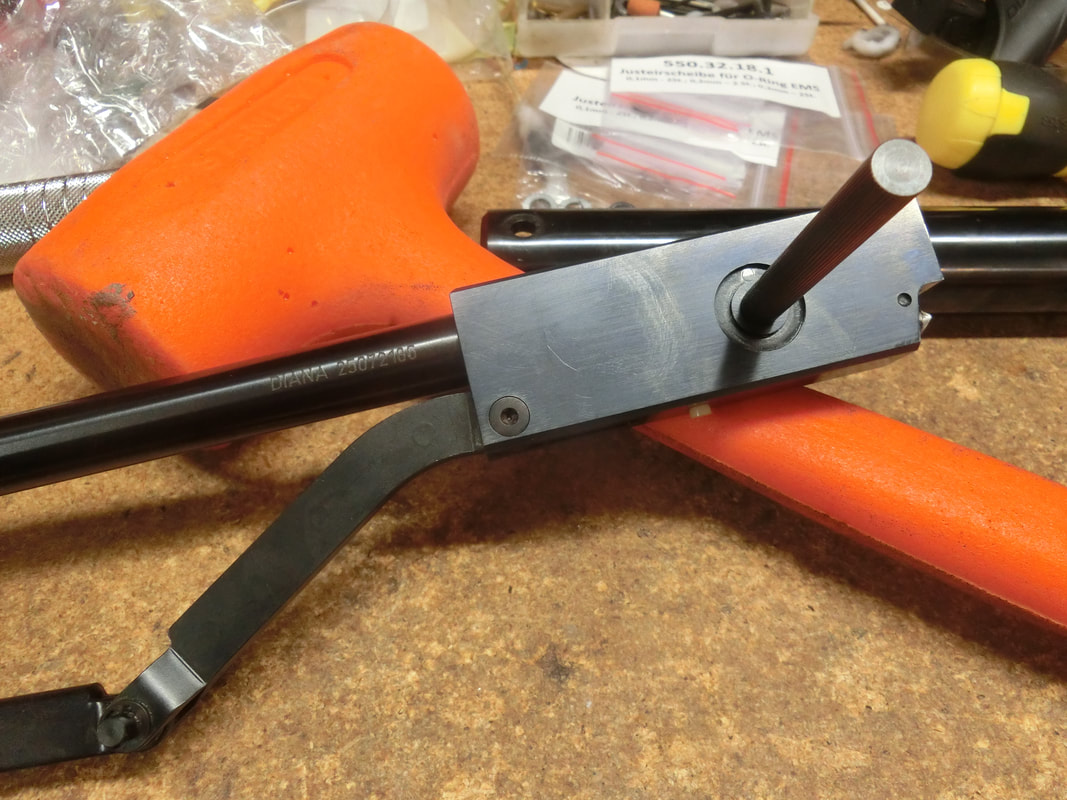
Action was presented and semi-assembled:
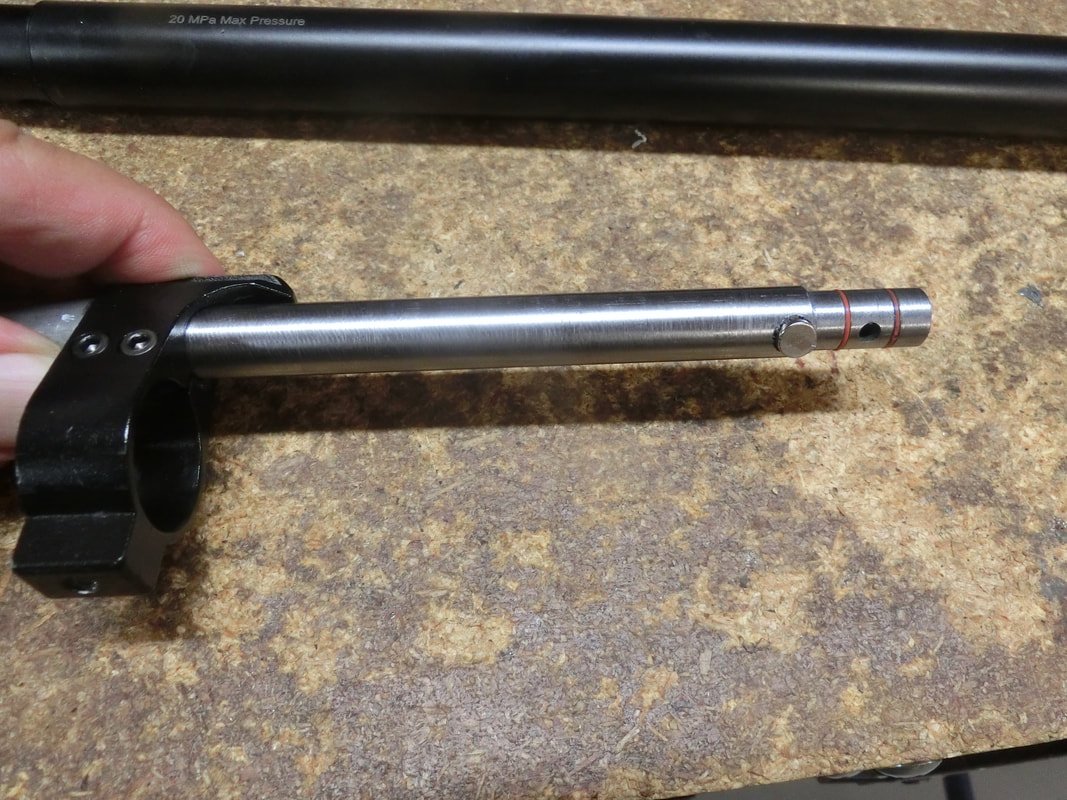
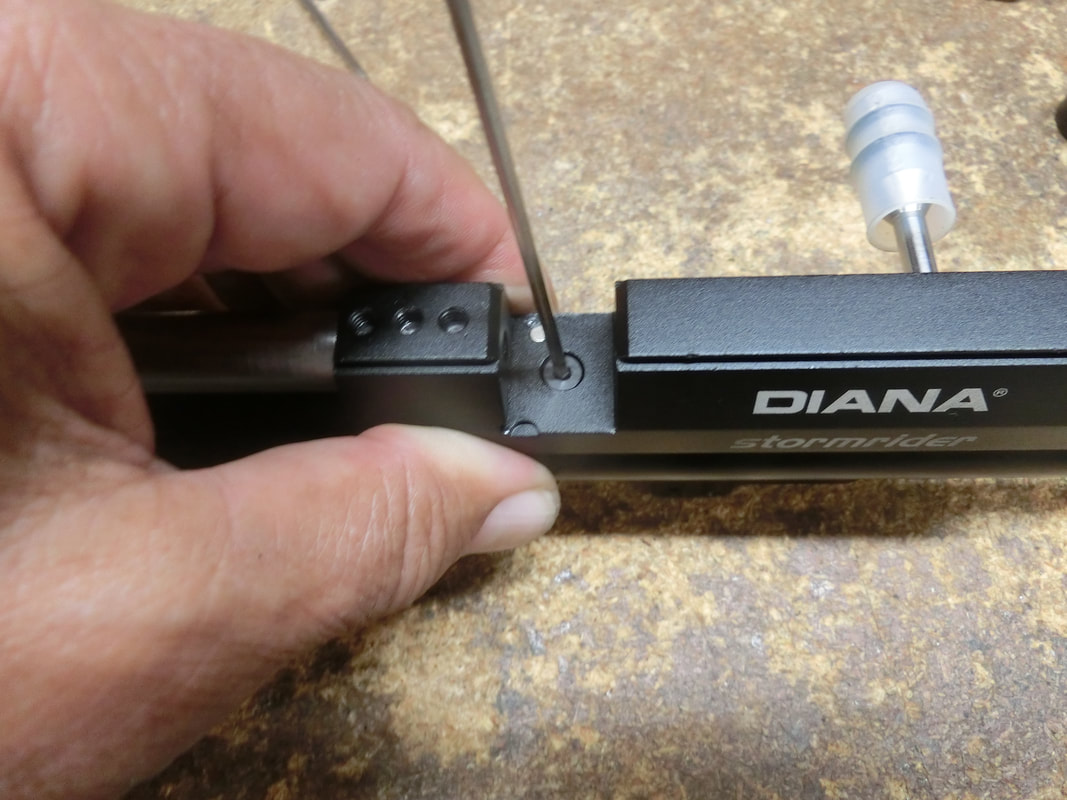
Variable, self-blocking TP was installed:
And gun assembled:
And then we tested.
WHAT A DISASTER!
With the initial calculations pointing to the idea that we should be getting about 12 ft-lbs, the gun yielded 1,016 ± 22 fps Not only too high, completely unacceptable from a regulated gun.
And so, we reduced the TP diameter.
And reduced it.
And reduced it.
Once we reached the 1.19 mm's, we could not reduce that anymore, and MV was still at 616 ± 75 fps
Hmmph!
Something was tricky here.
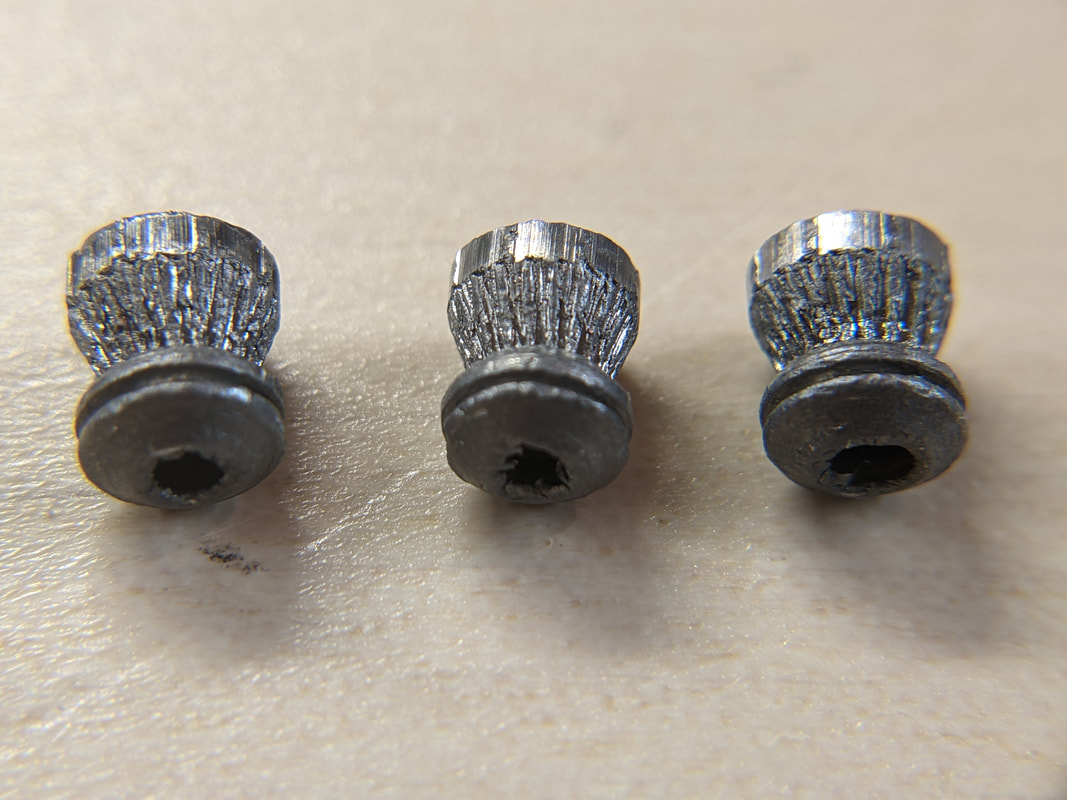
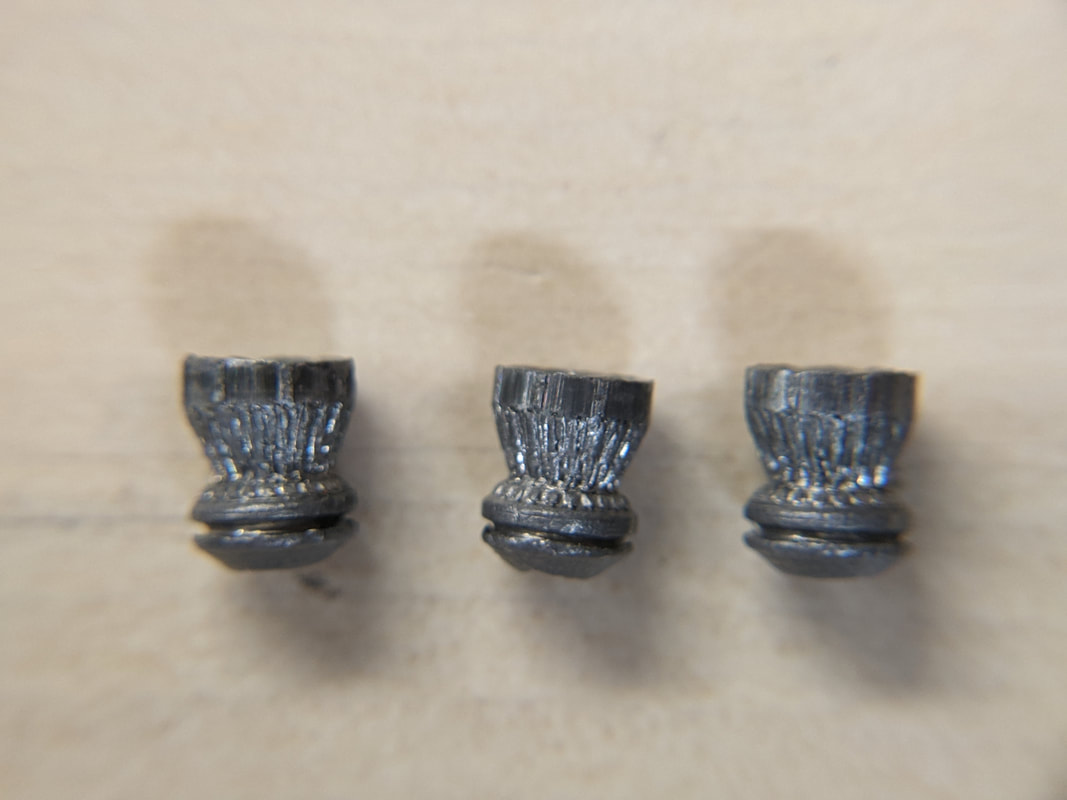
And I started measuring the BB's.
What I had obtained as "Precision Ground Shot" had diameter differences in the 0.0025" region.
Got another lot . . . same thing.
Then I spotted something Daisy calls "Premium BB's"; hmmmm . . . . let's try those.
MV came out at 623 ± 16 fps
Good; now we're cooking!
Since PCP's are nothing but mechanical amplifiers, I thought: "let's reduce the input signal".
Clipped one coil from the hammer spring , output came out to 649 ± 13 fps ¿¡Huh!?
So, we clipped and clipped the hammerspring till we were getting an MV of 587±10 fps
We let the project rest for a week and took a 30 shot string every hour
@ 11:30 .- 583 ± 16 fps
@ 12:30 .- 587 ± 13
@ 13:30 .- 585 ± 9
@ 14:30 .- 583 ± 12
@ 15:30 .- 587 ± 13
I sent the results of the tests to my guys and back came a question:
"If, for whatever reason, we need to change the MV, how do we do it?"
Aaaarghh! I should have seen than coming from the start!
IF (big if) I had known the wide variation in the diameter of the different productions of BB's, I would have, but I was ignorant of that.
And now, I was going to pay the price.
If negotiating the initial "contract" had been difficult, getting a "change order" would be even more. So, chuck it to experience, and service to the country.
Back to square ONE.
Because of the nature of the projectile, the small differences in diameter really throw a wrench into any calculation you might come up with. On top, the fact that there is no rifling means that the projectile is Ultra-Efficient in absorbing energy from the powerplant. No energy is taken form the shot cycle to "swage" the pellet to final shape, and virtually no friction means there is no energy lost there.
I considered a number of solutions but, in the end, settled on doing something that I should have done many years ago: design a free flight hammer system for the Stormrider. Back then, the results obtained by changing the TP were deemed more than acceptable on all grounds: efficiency, uniformity, consistency, and simplicity.
This project was different.
We procured the new hammerspring (because a FFH only makes sense if you start from a full hammerstrike and then reduce the output in a metered way).
We had to reset the regulator, re-do the TP adjusting, and recommence the whole testing protocol.
The stock in the SR had to be modified to accommodate the FFH device, and this posed another small challenge; as the SD's were inexplicably high, we first re-checked the whole pneumatic section but, in reality, it was a simple, intermittent, mechanical interference problem.
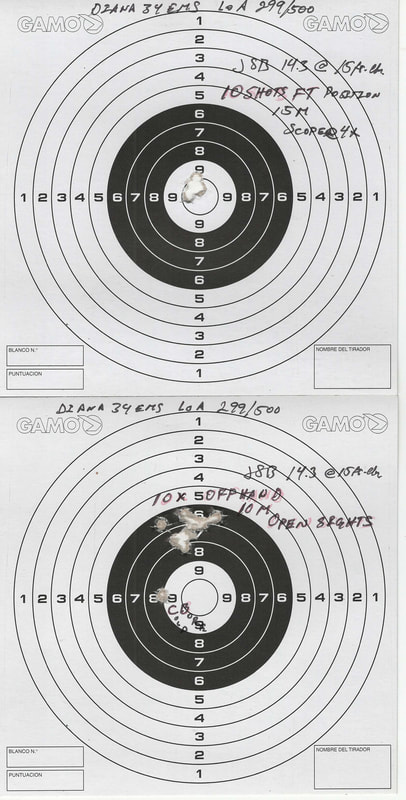
By the end of the 12th adjustment/setting. we finally settled nicely on a string of 30 shots that gave 592 ± 12 fps and then another 30 shot string of 585 ± 14 fps
The gun yields 4 strings of 30 shots at these power levels between 230 Bar's and 115 Bar's, though we recommended refill after every 90 shots.
And so, the gun was shipped to Picatinny Arsenal, and the reports so far is that the system is working "great".
WHAT A DISASTER!
With the initial calculations pointing to the idea that we should be getting about 12 ft-lbs, the gun yielded 1,016 ± 22 fps Not only too high, completely unacceptable from a regulated gun.
And so, we reduced the TP diameter.
And reduced it.
And reduced it.
Once we reached the 1.19 mm's, we could not reduce that anymore, and MV was still at 616 ± 75 fps
Hmmph!
Something was tricky here.
And I started measuring the BB's.
What I had obtained as "Precision Ground Shot" had diameter differences in the 0.0025" region.
Got another lot . . . same thing.
Then I spotted something Daisy calls "Premium BB's"; hmmmm . . . . let's try those.
MV came out at 623 ± 16 fps
Good; now we're cooking!
Since PCP's are nothing but mechanical amplifiers, I thought: "let's reduce the input signal".
Clipped one coil from the hammer spring , output came out to 649 ± 13 fps ¿¡Huh!?
So, we clipped and clipped the hammerspring till we were getting an MV of 587±10 fps
We let the project rest for a week and took a 30 shot string every hour
@ 11:30 .- 583 ± 16 fps
@ 12:30 .- 587 ± 13
@ 13:30 .- 585 ± 9
@ 14:30 .- 583 ± 12
@ 15:30 .- 587 ± 13
I sent the results of the tests to my guys and back came a question:
"If, for whatever reason, we need to change the MV, how do we do it?"
Aaaarghh! I should have seen than coming from the start!
IF (big if) I had known the wide variation in the diameter of the different productions of BB's, I would have, but I was ignorant of that.
And now, I was going to pay the price.
If negotiating the initial "contract" had been difficult, getting a "change order" would be even more. So, chuck it to experience, and service to the country.
Back to square ONE.
Because of the nature of the projectile, the small differences in diameter really throw a wrench into any calculation you might come up with. On top, the fact that there is no rifling means that the projectile is Ultra-Efficient in absorbing energy from the powerplant. No energy is taken form the shot cycle to "swage" the pellet to final shape, and virtually no friction means there is no energy lost there.
I considered a number of solutions but, in the end, settled on doing something that I should have done many years ago: design a free flight hammer system for the Stormrider. Back then, the results obtained by changing the TP were deemed more than acceptable on all grounds: efficiency, uniformity, consistency, and simplicity.
This project was different.
We procured the new hammerspring (because a FFH only makes sense if you start from a full hammerstrike and then reduce the output in a metered way).
We had to reset the regulator, re-do the TP adjusting, and recommence the whole testing protocol.
The stock in the SR had to be modified to accommodate the FFH device, and this posed another small challenge; as the SD's were inexplicably high, we first re-checked the whole pneumatic section but, in reality, it was a simple, intermittent, mechanical interference problem.
By the end of the 12th adjustment/setting. we finally settled nicely on a string of 30 shots that gave 592 ± 12 fps and then another 30 shot string of 585 ± 14 fps
The gun yields 4 strings of 30 shots at these power levels between 230 Bar's and 115 Bar's, though we recommended refill after every 90 shots.
And so, the gun was shipped to Picatinny Arsenal, and the reports so far is that the system is working "great".
The future
Yes it was a complex project, we learned a lot and it opened our eyes to an avenue of research that no one had gone into recently: Smoothbore barrels and their projectiles.
Airguns do not achieve the hypersonic MV's that some current military designs require to work well, but there are alternatives, and the new technology to "turn" lead makes for a VERY interesting duo.
We will follow a bit this development because it truly is an interesting avenue that I hope will garner some interest from the industry.
The next smoothbore L-W barrel is here... ;-)
Closing thoughts
I am very proud to have been able to help our military, even in the minuscule way we did.
The fact that, perhaps, some safety equipment will help keep a soldier safe in the field due to the thorough Terminal Ballistic Testing that the Army puts the protective equipment through is a matter of consideration to me.
And, it was really a pleasure and a privilege to deal with technically qualified people. Would love to meet them one day, but as with many friends in this airgunning world, I know it's going to be hard to meet them in person.
AND I need to add that without the support from great companies like DIANA, Lothar Walther, and Altaros Air Solutions, this project would have been MUCH more difficult to tackle properly.
To all our readers, thanks for one more year of your time and attention, we wish you all the very best of the Holiday seasons, do not eat too much Ham, nor drink too much Eggnog, and remember that everything is better in moderation . . . even moderation itself!
;-)
Ho Ho Ho!
HM
 RSS Feed