Connecticut Custom Airguns
  • Welcome!
  • Hector's Airgun Blog
  • Products and Products Blog
    • One-Off's
    • The "Héctors Special'" scope by Sightron
    • K1050i FT
    • The Hex Louver or "Secret Sunshade"
    • Pellet Path Calculator >
      • Questions, Answers and Comments on P-P Calc
      • Privacy Policy for PP-Calc
    • The Nautilus SideWheel
    • The X-10 TiltMeter
  • Zimmer-Silhouetten
    • Results 2017-2018
    • Results 2016-2017
    • Results 2015-2016
    • Results 2014-2015
    • Results 2013-2014
  • References and Links
  • Contact us
  • Store

Hector's Airgun Blog

Where we discuss, CIVIILY,  anything airgun.

Return Home

A Yankee tune for the Walther LGU

12/28/2014

22 Comments

 
When you think of the word "Yankee", all sorts of things come to mind, both positive and negative. But in the context of what we want to relay here, the best interpretation of what "Yankee" means would be to say that we align ourselves with the great Samuel Clemens (Mark Twain) and think of Yankee as that indomitable spirit that can be transported to the Middle Ages and still looks forward to making the world a better place. A bit by science, a bit by engineering, a bit by well placed, and played, bluffs. It's all in the "character".
Luckily, that character has not been lost. I have more than a few good friends that are true "Yankees" in the best sense of the word. One of them lives in Pennsylvania. So we'll call him the Pennsylvania Yankee.

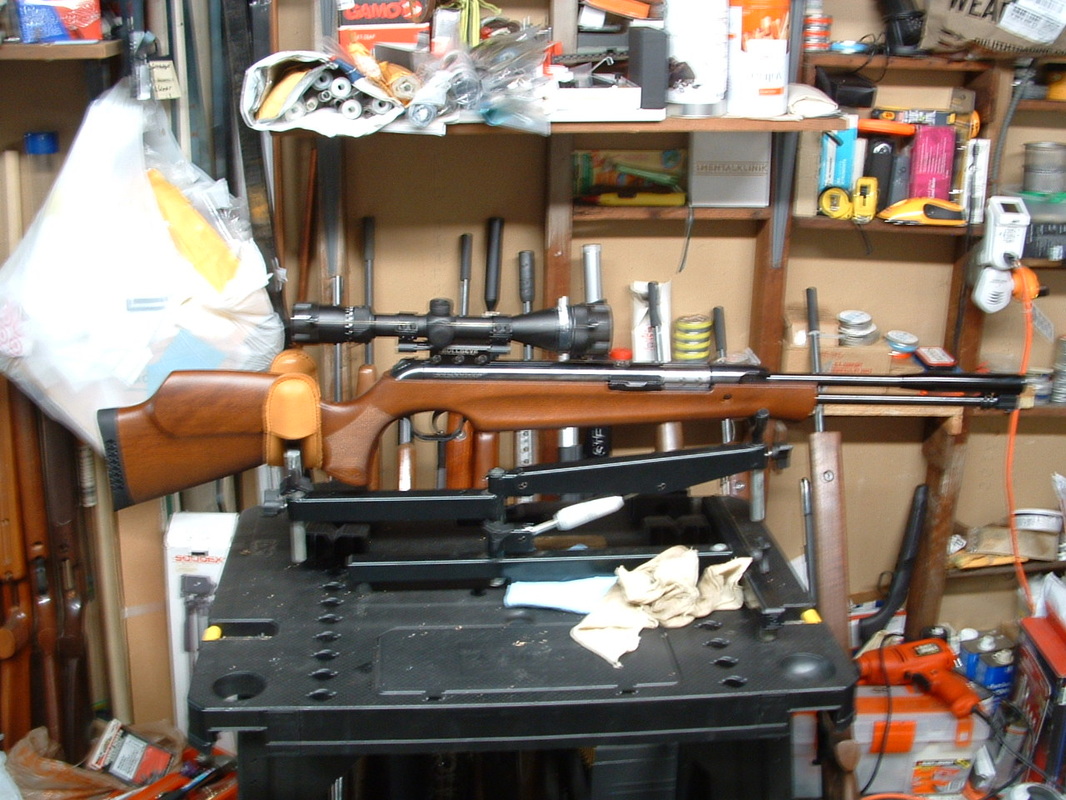
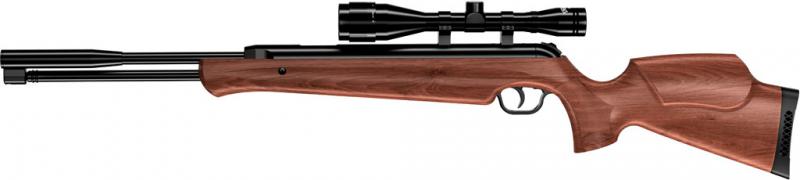
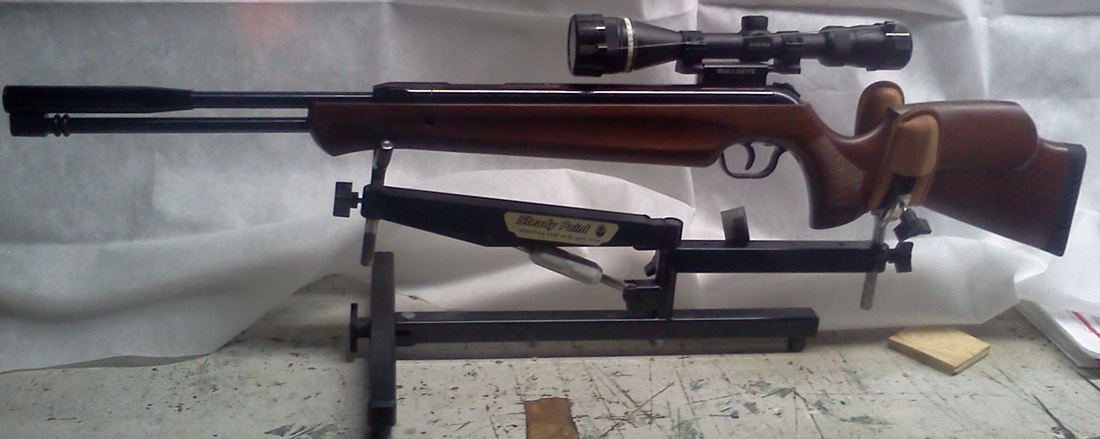
When the LGU first arrived to American shores, we invited some shooters to be part of the pioneering group to purchase the first few. From there, our first review and testing came out:
 
http://www.ctcustomairguns.com/hectors-airgun-blog/the-walther-sport-family 

Because the trigger was so terrible and we knew that in advance, from some reviews of the LGV that bears exactly the same trigger unit, we got Match triggers for everyone and posted detailed instructions on how to swap the blades, where 2 out of 3 adjustments are located. That set of instructions can be found here:

http://www.ctcustomairguns.com/hectors-airgun-blog/swapping-the-walther-lgus-trigger 

Do note that ALL DISCLAIMERS posted there also apply for this post.

But after a while, my good Pennsylvania Yankee friend and airgun tinkerer extraordinaire came up with some comments and some tests that warranted a further look into the trigger unit first, and then into the power plant.

The first thing our good "Pennsylvania Yankee" told us was that there was really no need for the metal trigger.

WHAT!!!!!  LOL!

¿After all the chastisement Diana went through when Doc. Beeman started his negative disinformation campaign stating that Diana triggers were plastic and therefore inferior to the point that the T-06 version now incorporates a metal trigger blade?, and now ¿a dyed in the wool airgunner tells me that he prefers the plastic triggers? Well, the world is changing indeed!

For the UK market (and with a substantial price difference), Walther made available the adjustable metal two screws trigger blade they call the "Match Abzug" or "Tuning Trigger".
Picture
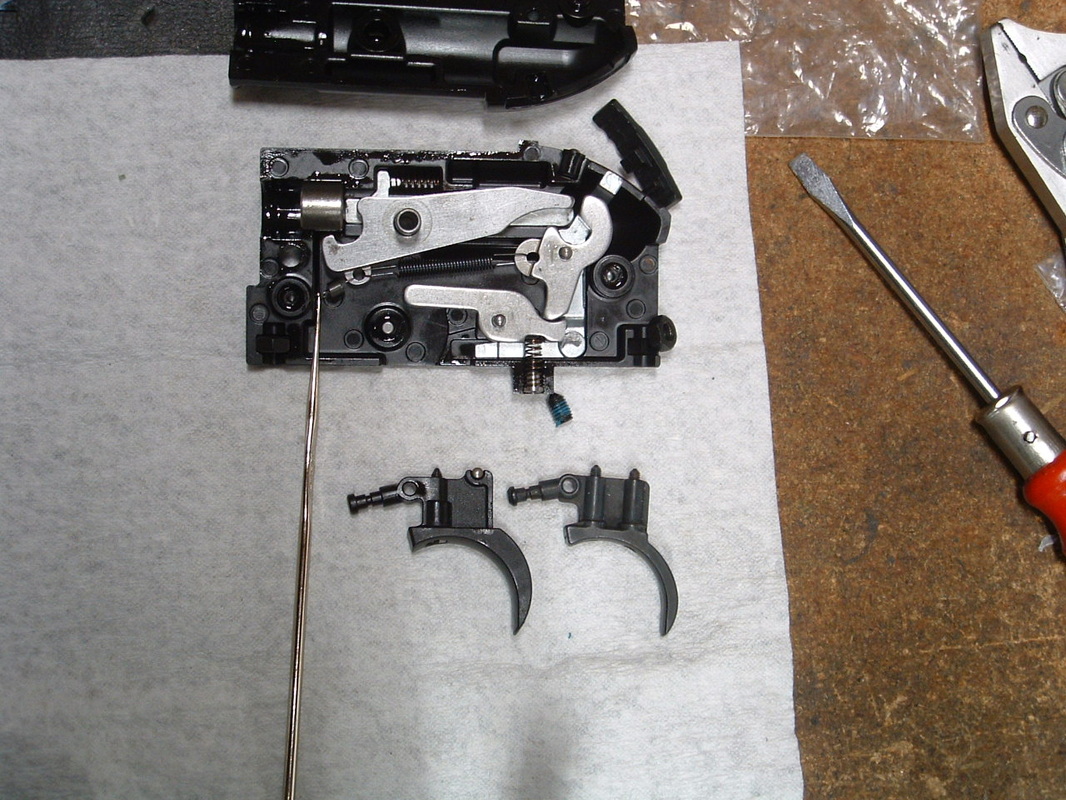
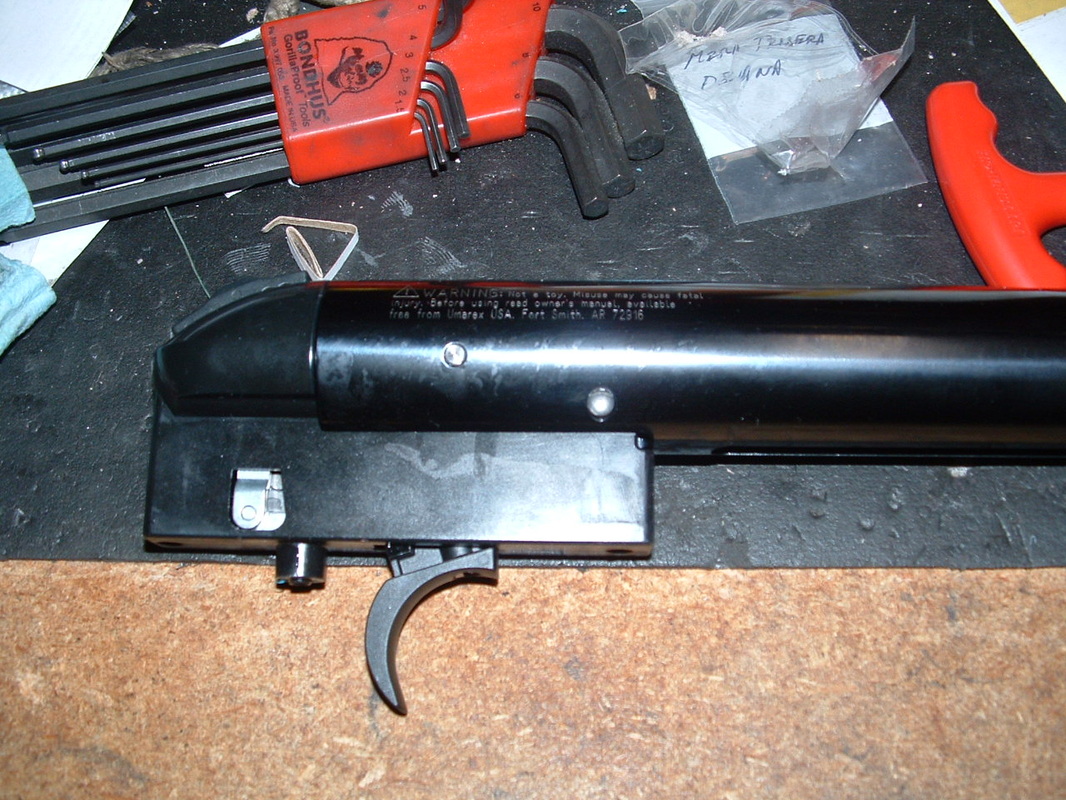
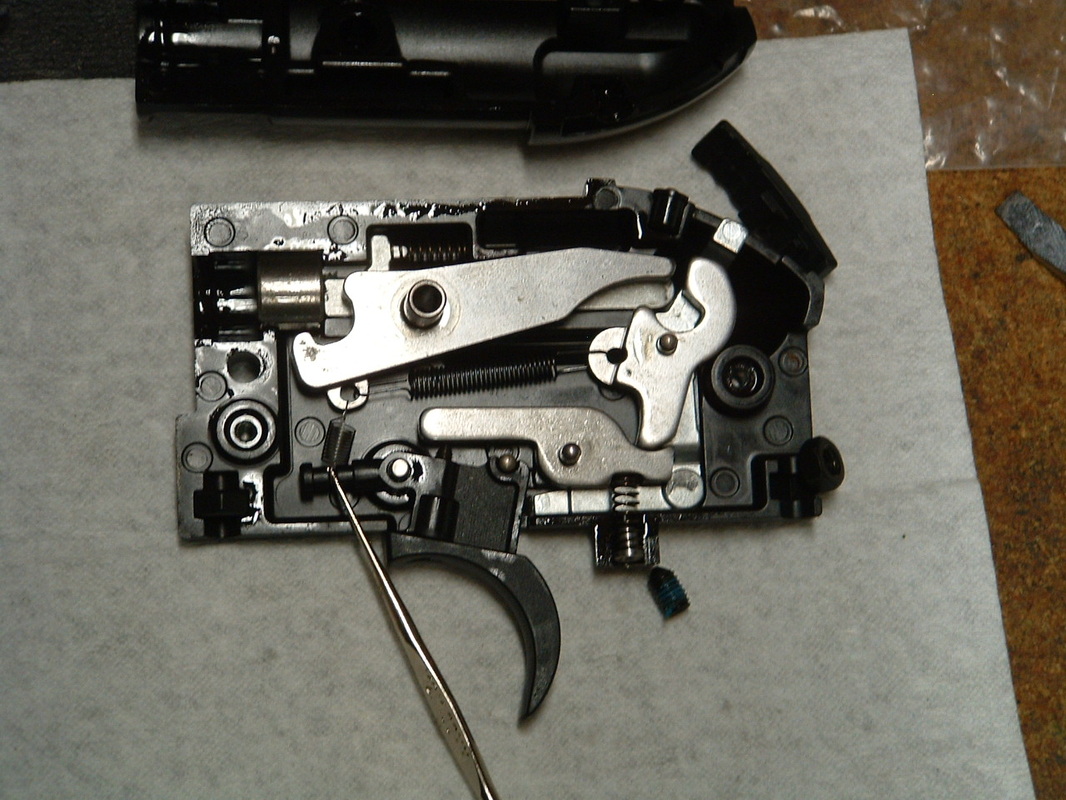
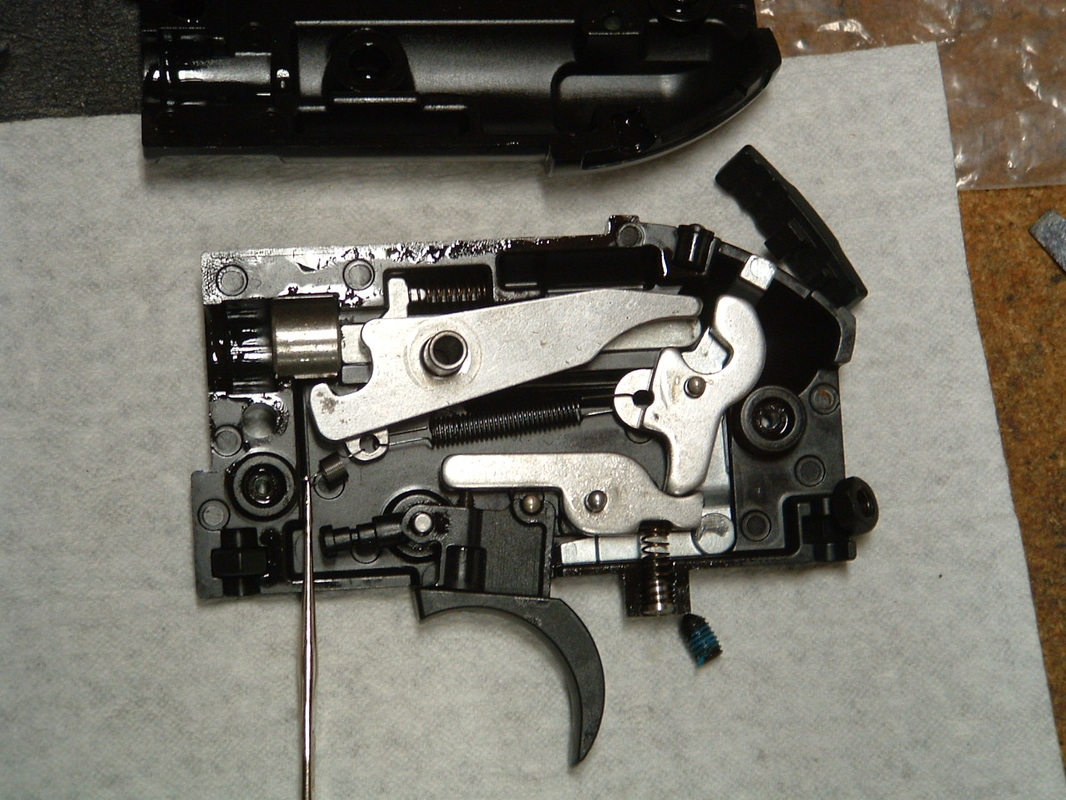
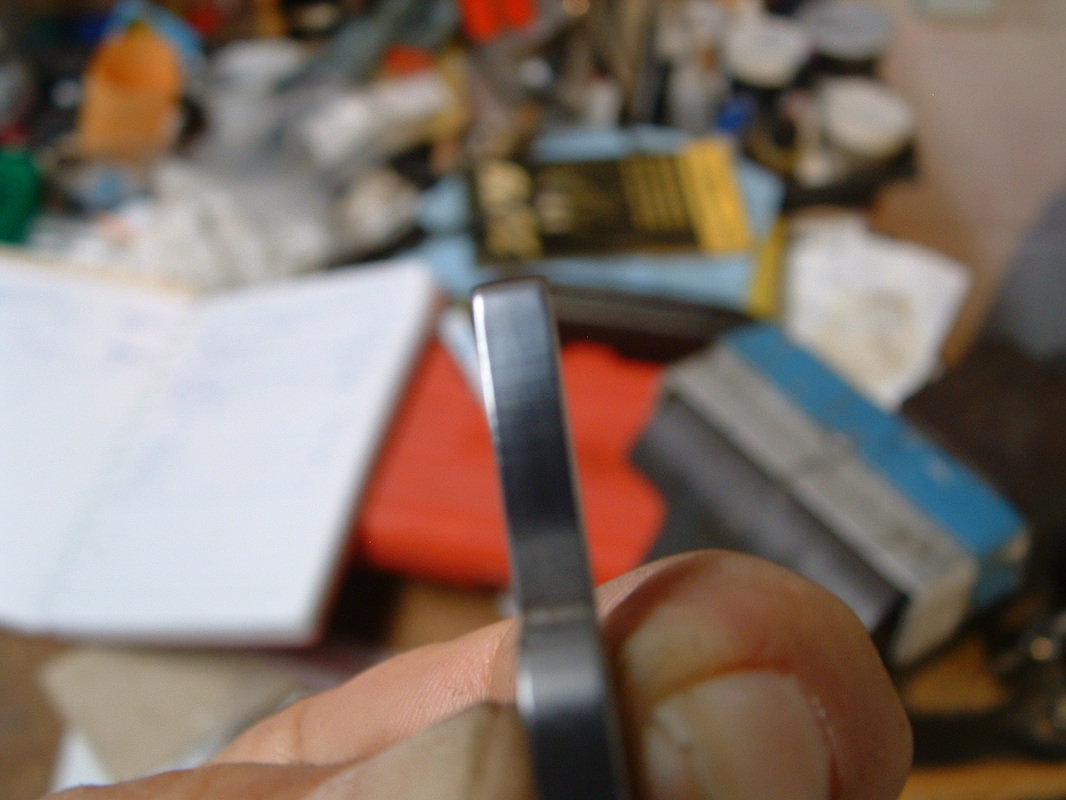
On the left, the OEM plastic trigger blade. On the right, the "Match Abzug" or "Tuning Trigger". Do note the one screw of the first and the two screws of the second.
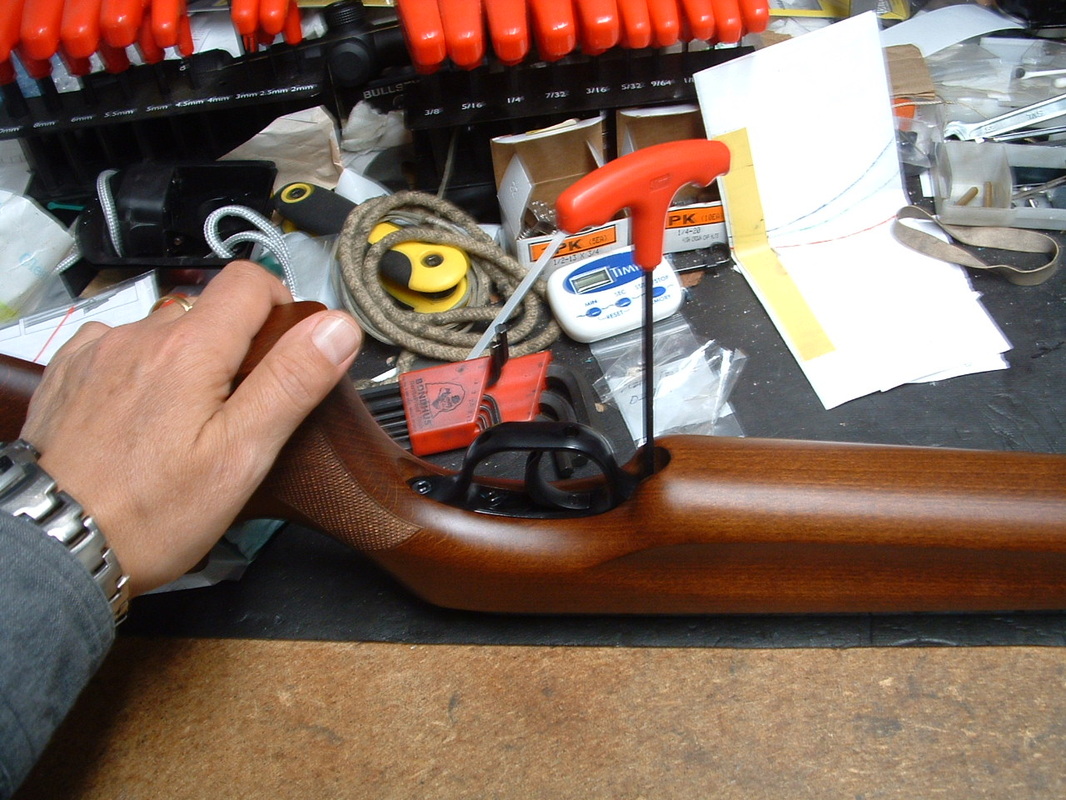
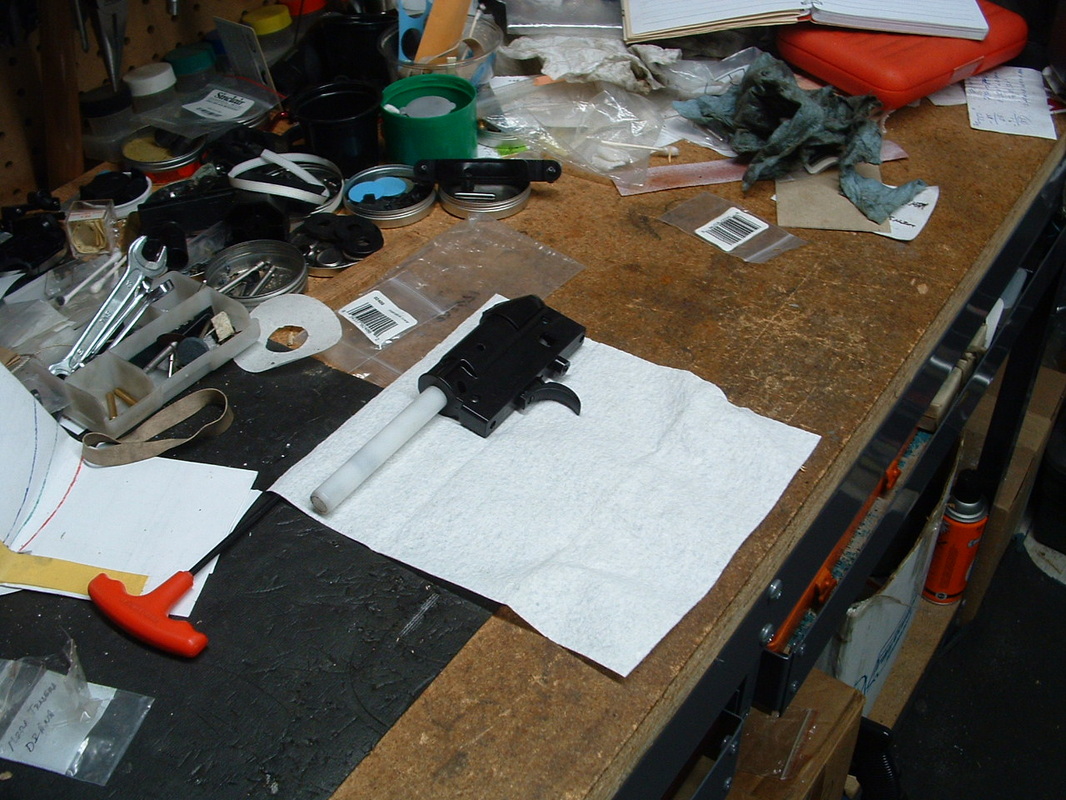
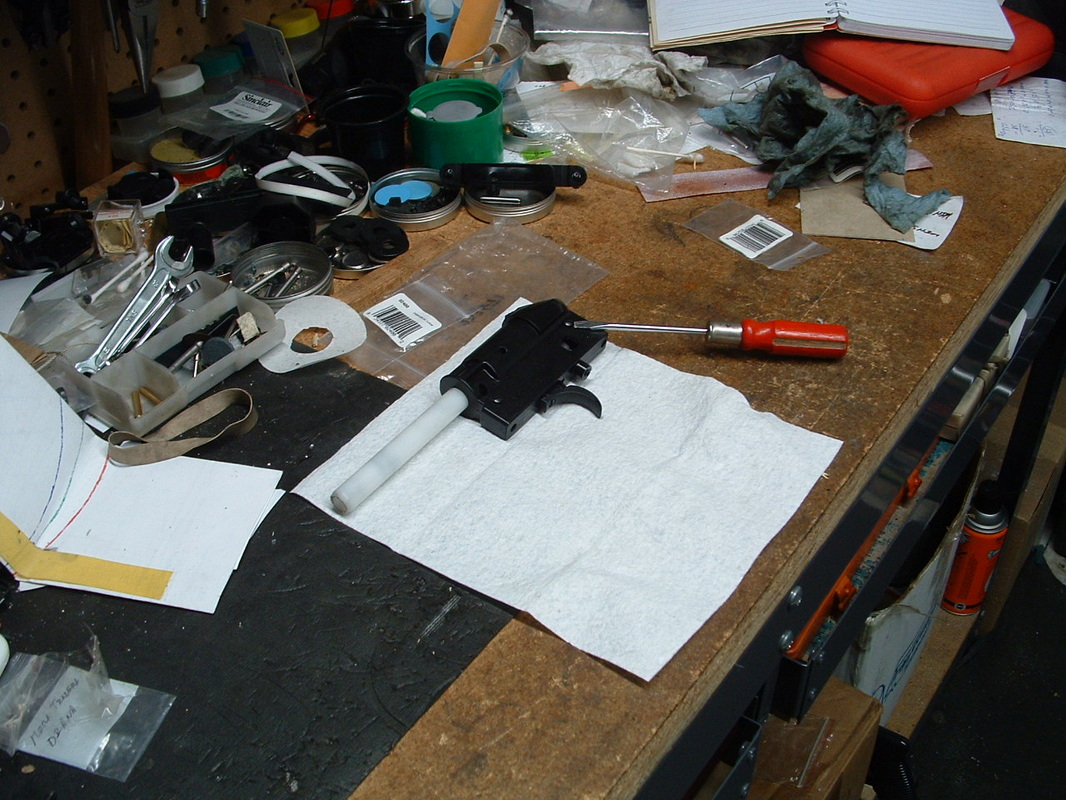
But once the trigger is installed (not a complicated operation in itself), it is the adjustment of the trigger what takes more time and is overly complicated. You can swap the triggers in about 10 minutes, but it takes at least 1 hour and multiple firings to get the trigger set to a good, usable, shootable point.

It is so complicated that one of the foremost spring-piston shooters in the world, wished someone would post somewhere a "starting point" of where the screws needed to be so as not to loose so much time.
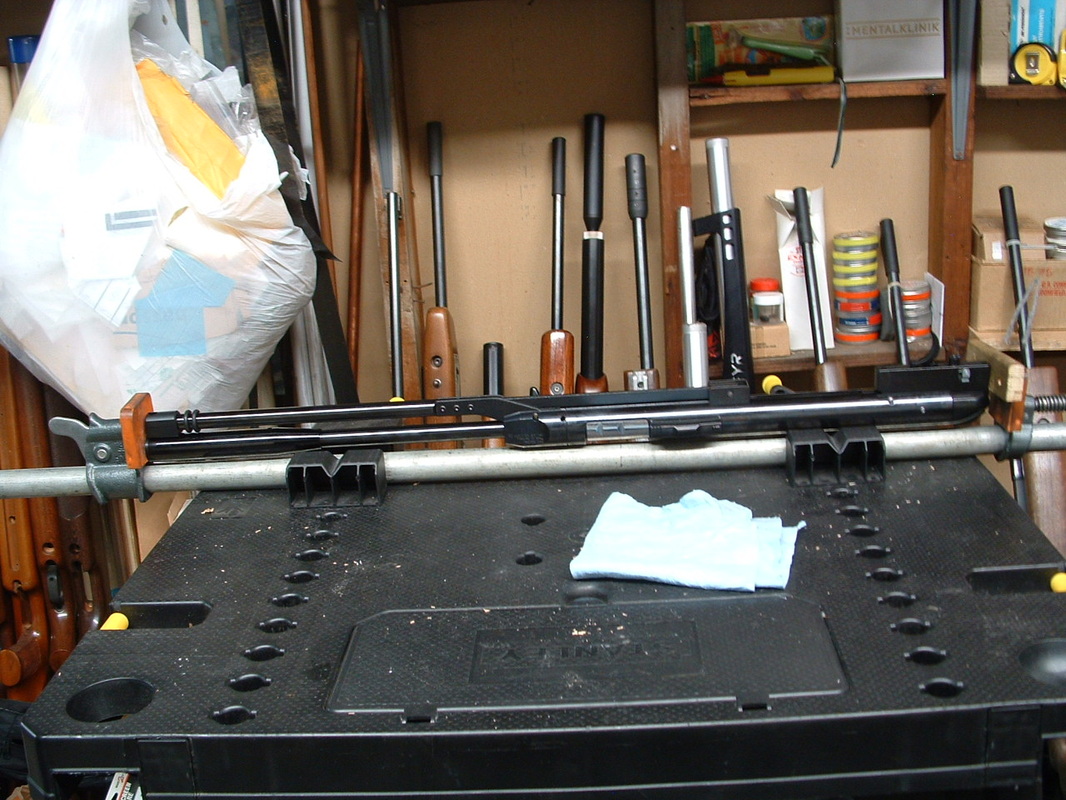
Here is what worked for me in my gun:
Picture
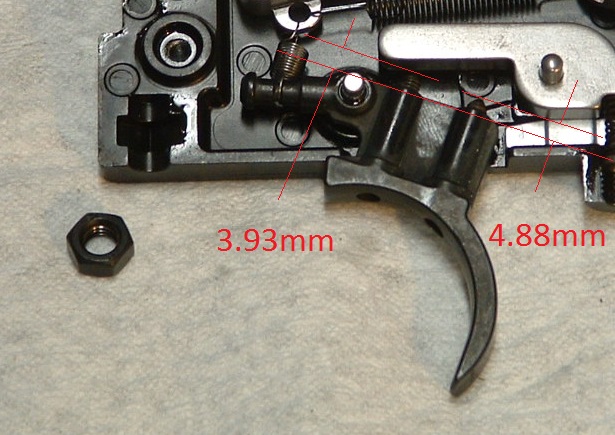
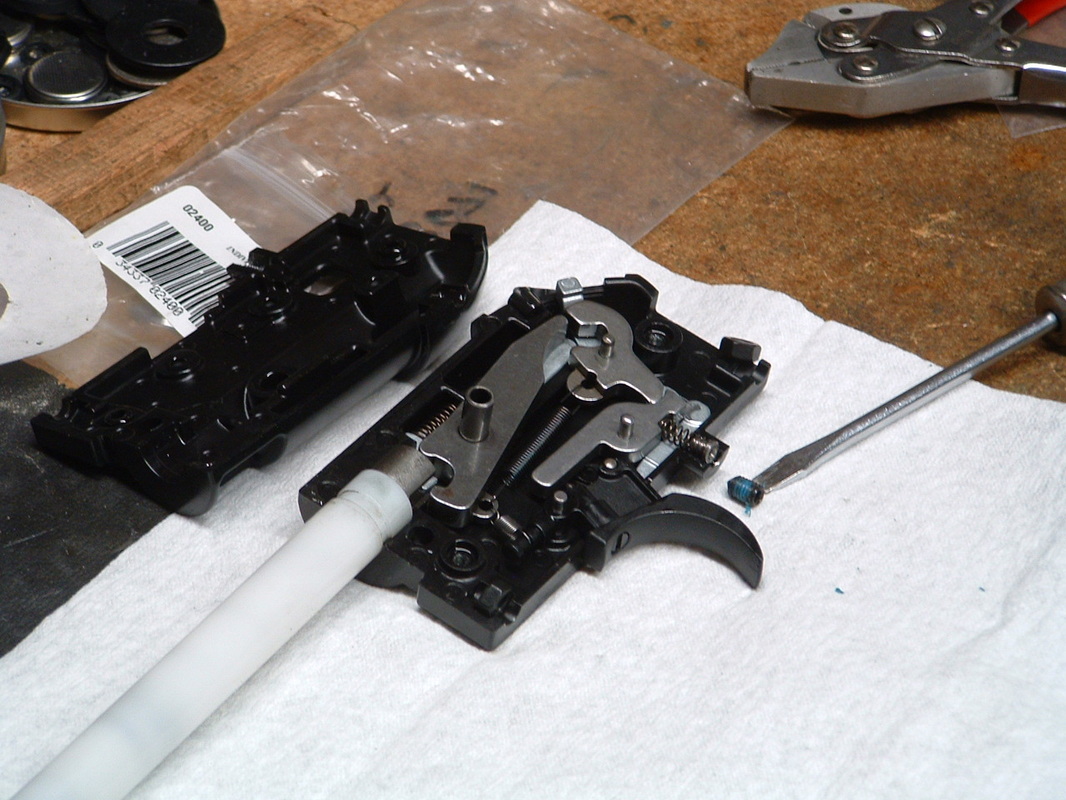
The screws' protrusion is measured from the flat web between the two screws.
Users should start at slightly lower protrusions and then work their way to whatever final adjustment each shooter prefers.

BUT, ¿what could be done with the OEM plastic blade to make the trigger crisp and clean-braking?

Part of the answer is to polish the surfaces. Stoning is one way, but not the safest. 
Jeweler's rouge works better, though it takes patience in hardened surfaces, it is also the least prone to failure method because it removes so little material that the surface hardening of the trigger parts is preserved.
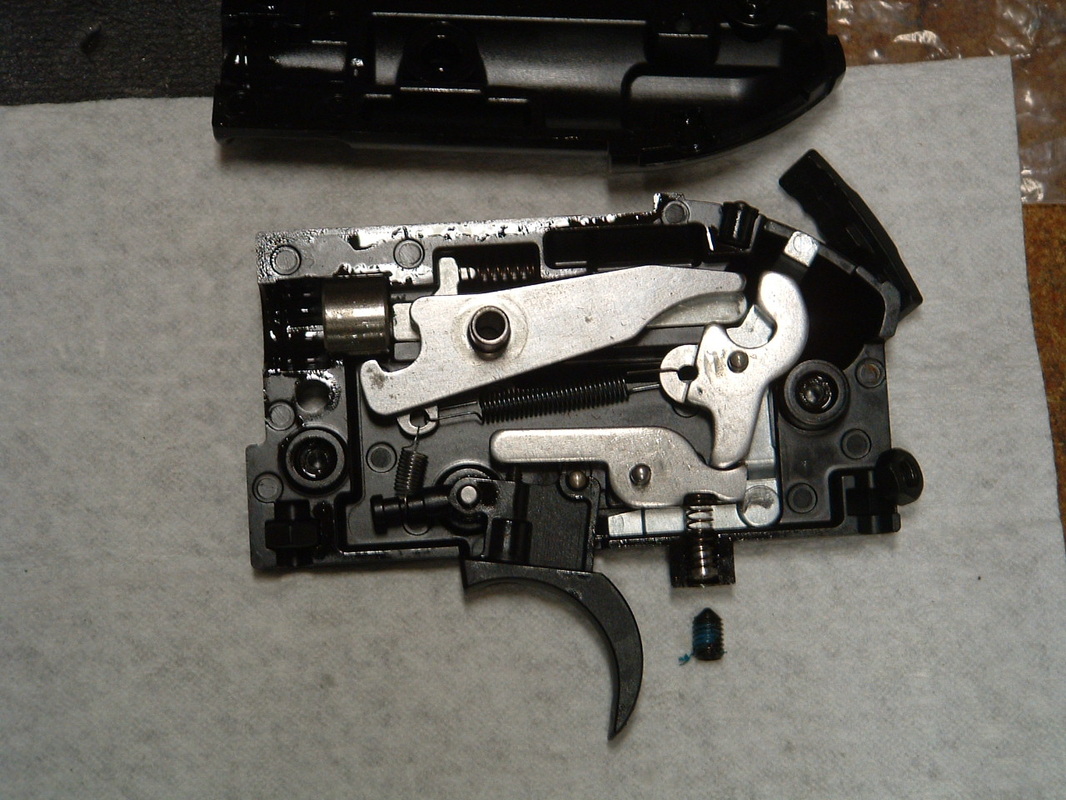
The other part is to round and polish the screws' faces, whether it is the one screw of the plastic blade or the two screws of the metal blade, making the screws pointed against a gritty surface is not precisely the best way to get a smooth, crisp, clean, repeatable trigger release.
Picture
Round faced screws provide a much better feel to the trigger pull.
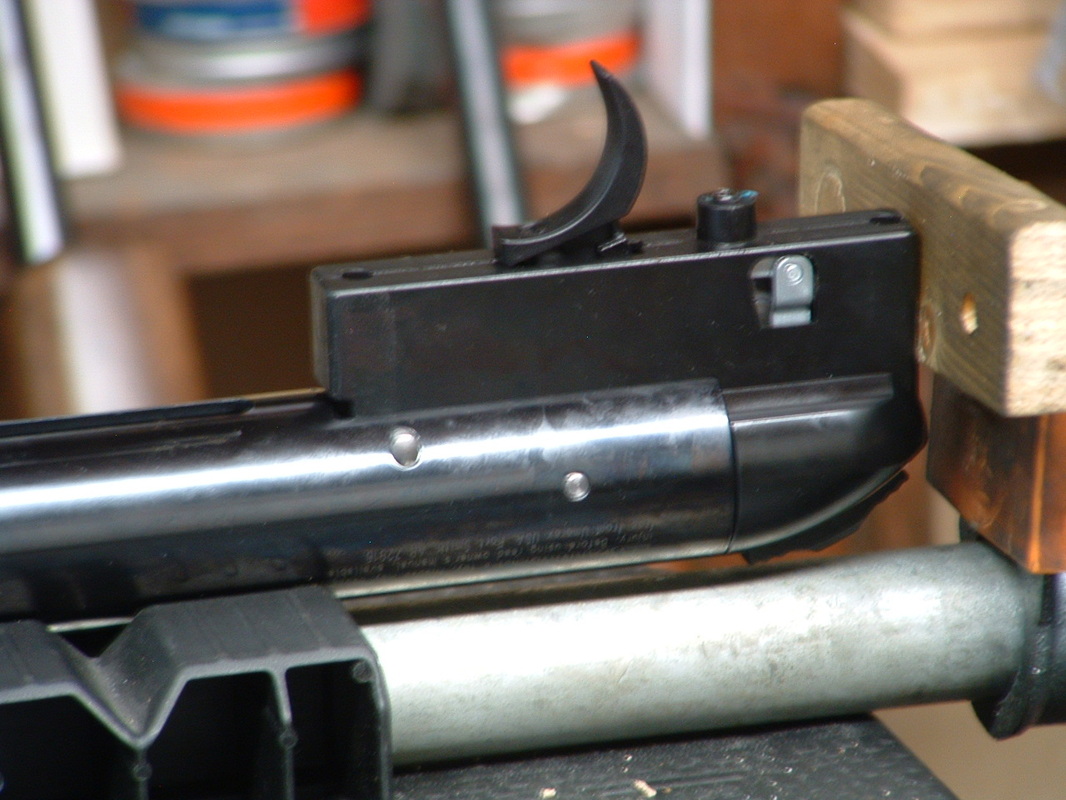
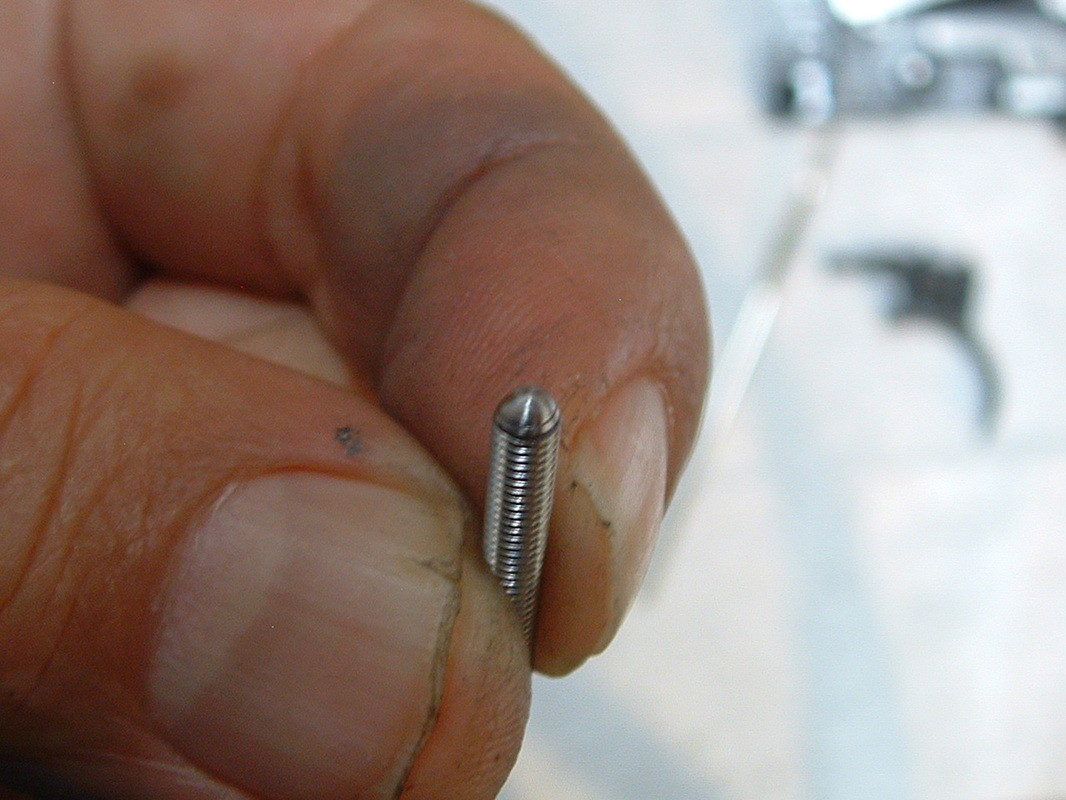
But even after that, the OEM plastic single screw blade refused to give a good "feel". Yet, it had no further adjustment, it was "bottomed out". So . . . . .  a change of screws was in order!
Picture
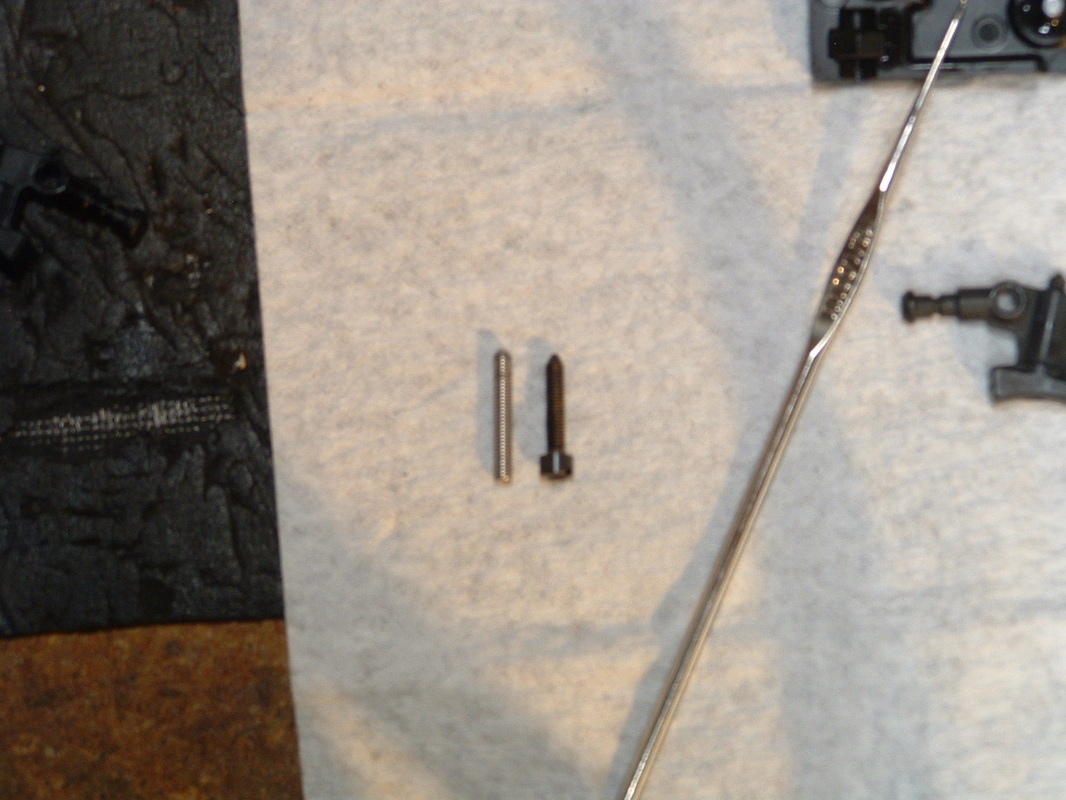
On the left, my custom screw. On the right the OEM screw.
Picture
And this is the Pennsylvania Yankee screw. A longer, button headed screw. He needs that because of the ugly color of the urethane fuel line short section he uses to hold the screw's adjustment. Without the head, you cannot but see the bright yellow bit in there.
Picture
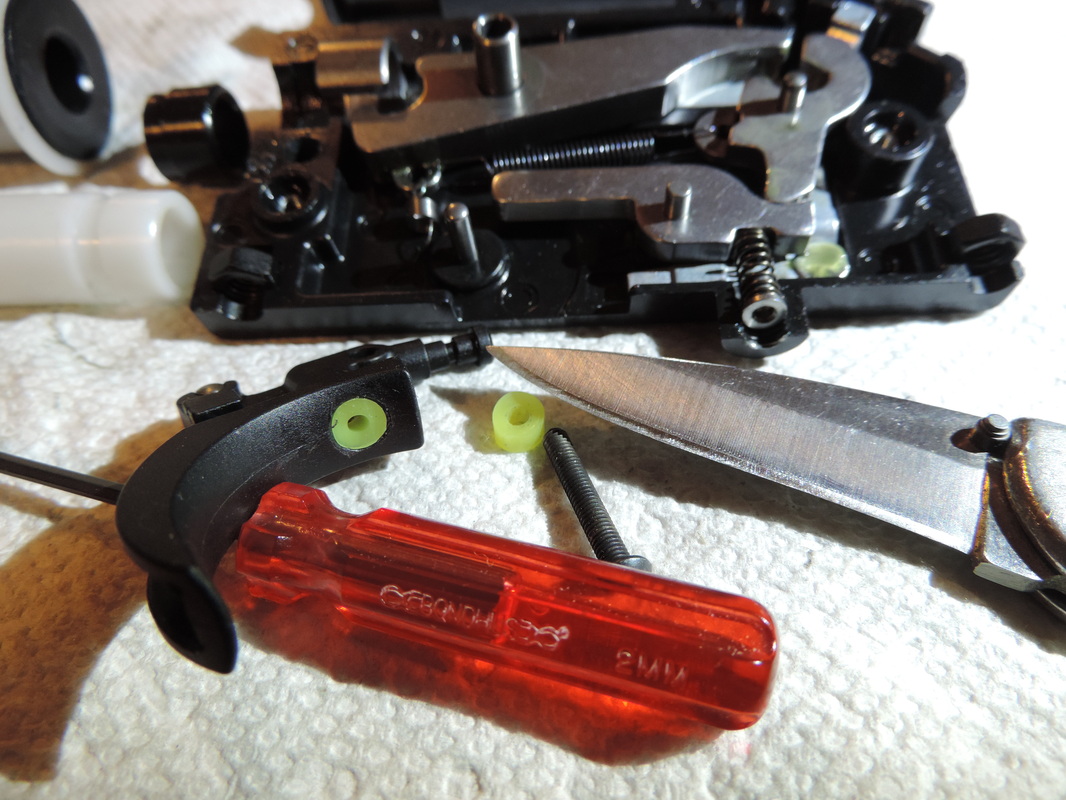
The urethane fuel line is inserted to keep the button screw from turning on its own. Once the line has been inserted it is cut with a really sharp knife to follow the blade's curve.
Picture
Like this. The button head hides the fuel line
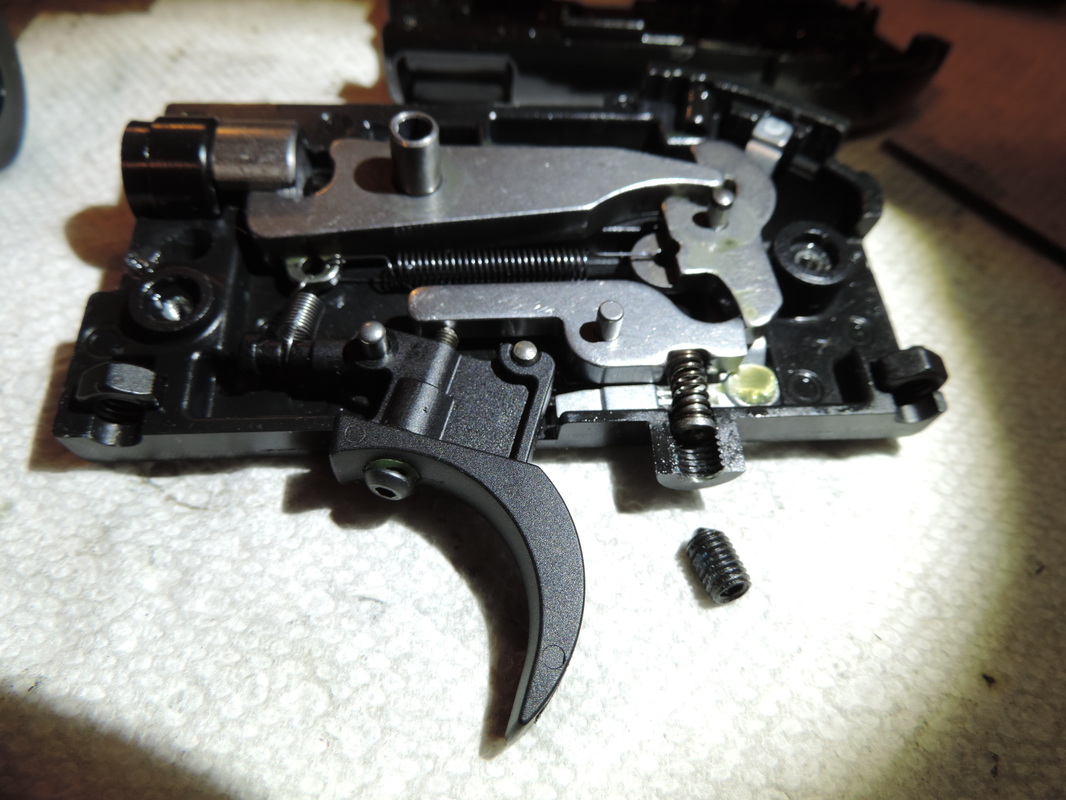
The combination of the rounded trigger screw face, with more reach and the rear roller give indeed a much better feel to the trigger pull than the metal trigger blade.
After thorough testing I can say that it is true, the single screw trigger blade feels better, releases crisper, is more gentle, predictable and consistent than the metal blade with the two screws.
The metric screw (M3X0.5X20 or 25) will cost you substantially less than the metal trigger blade and, above all, you do not need to disassemble the trigger unit/rifle to do this swap.

Doing more with less, ¿what could be more "Yankee" than that? LOL!

But that was not the full extent of his discoveries. He had tested the Maccari and the Vortek kits that would fit this gun and came up with an interesting proposal:

To use the HW77 25mm's kit

Dimensions seemed to be spot on, there was no slop and only a hollow section of the trigger unit needed to be filled to maintain the piston's stem alignment.

So we also tried that.
Picture
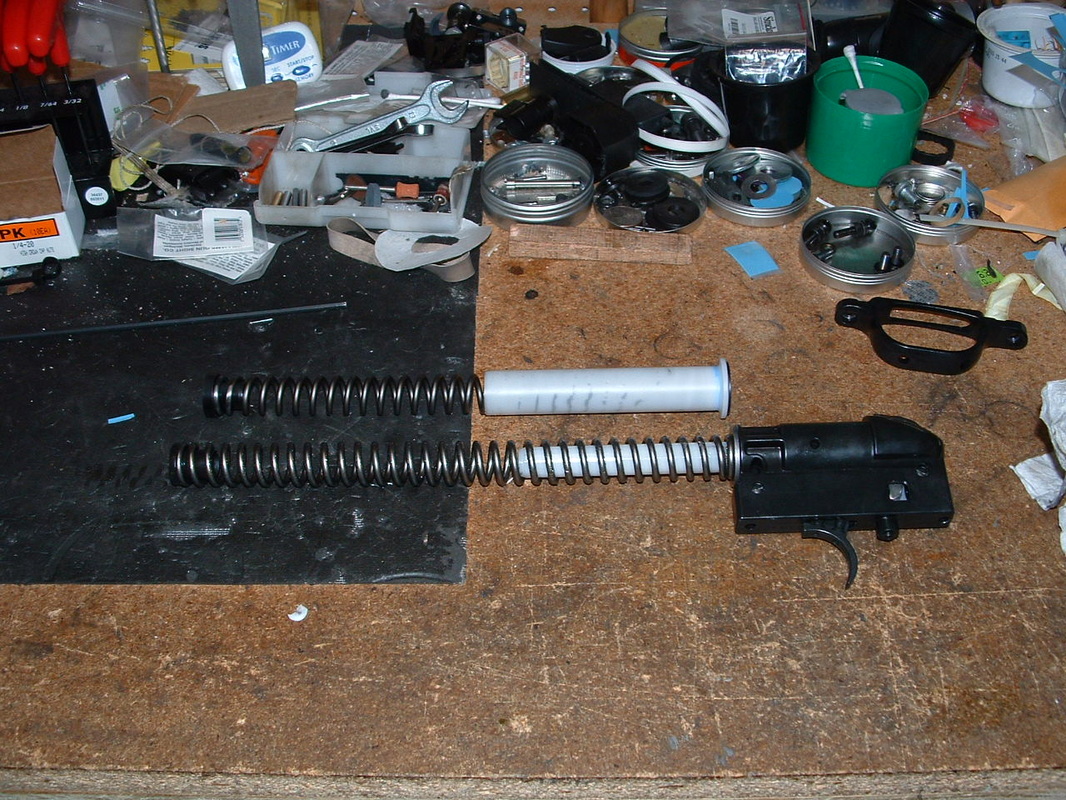
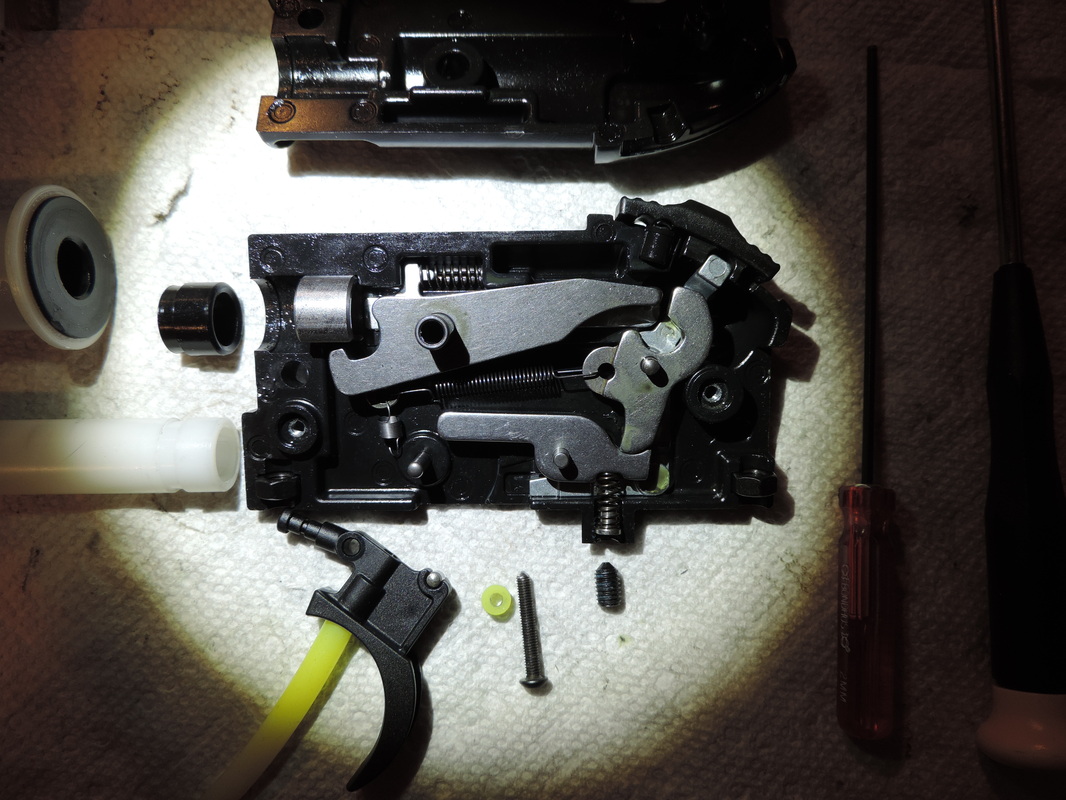
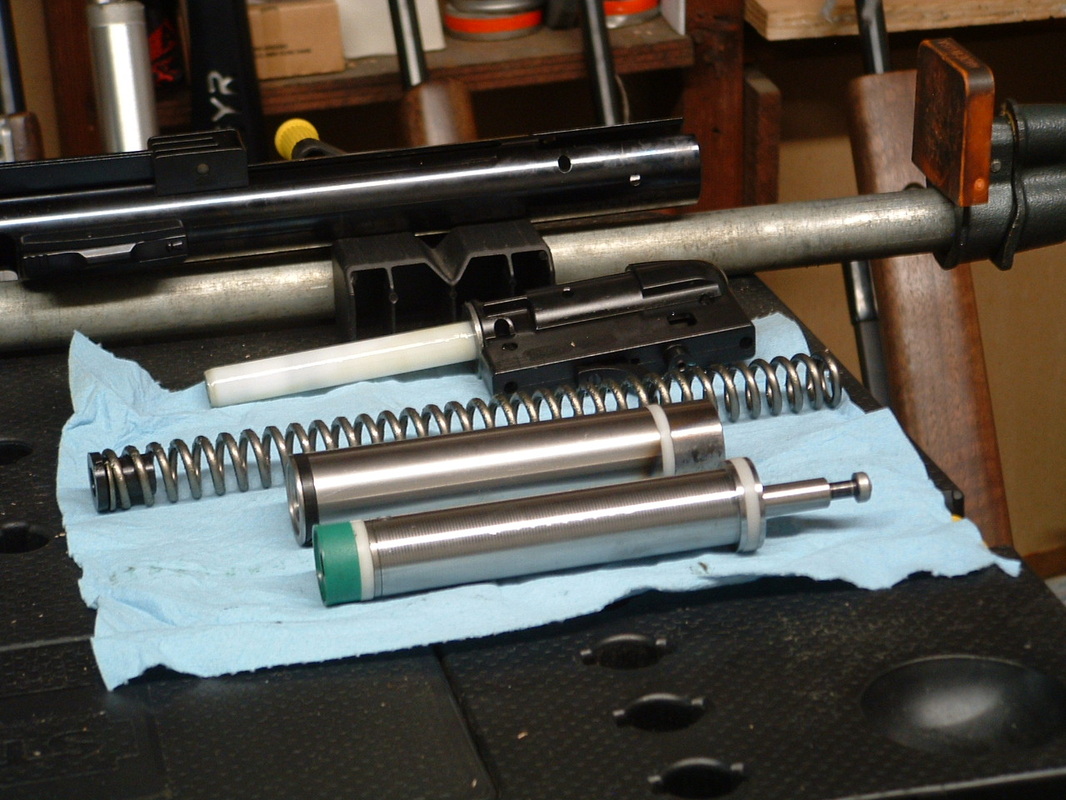
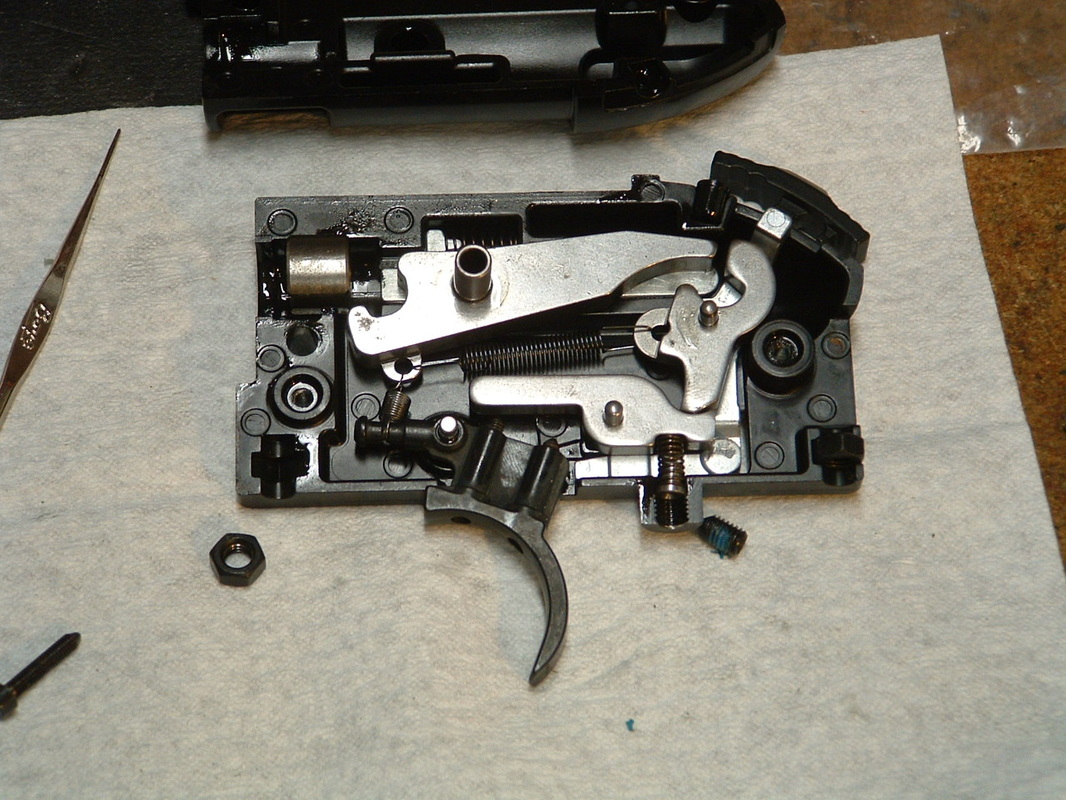
On the top, the Vortek kit for the HW97. On the bottom, the OEM trigger unit with guide, thrust washer and spring installed.
Picture
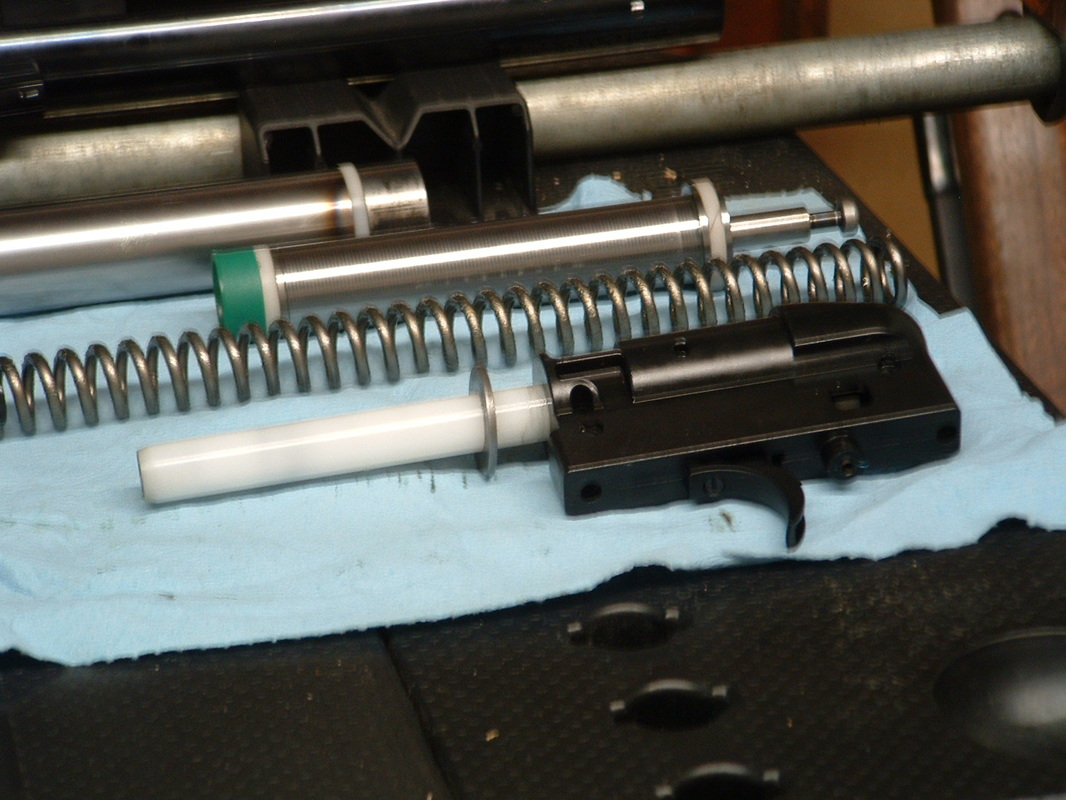
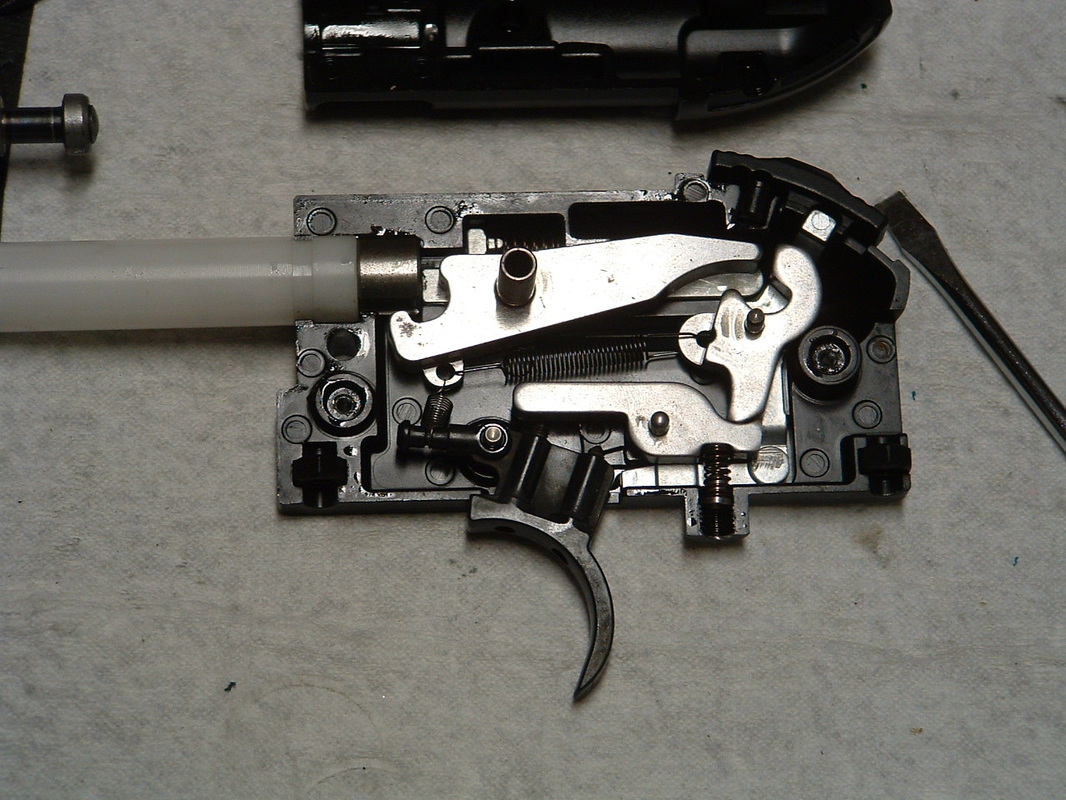
This is how everything fits together. The white spring guide has a groove that is caught in the trigger housing casting. That keeps the steel insert against which the piston's stem is kept by the hook. If the OEM plastic guide is removed, then there is a gap through which the piston's stem's button has to travel unsupported.
As you can see from the photos above, our friend chose to use a short black plastic guide to fill this gap.
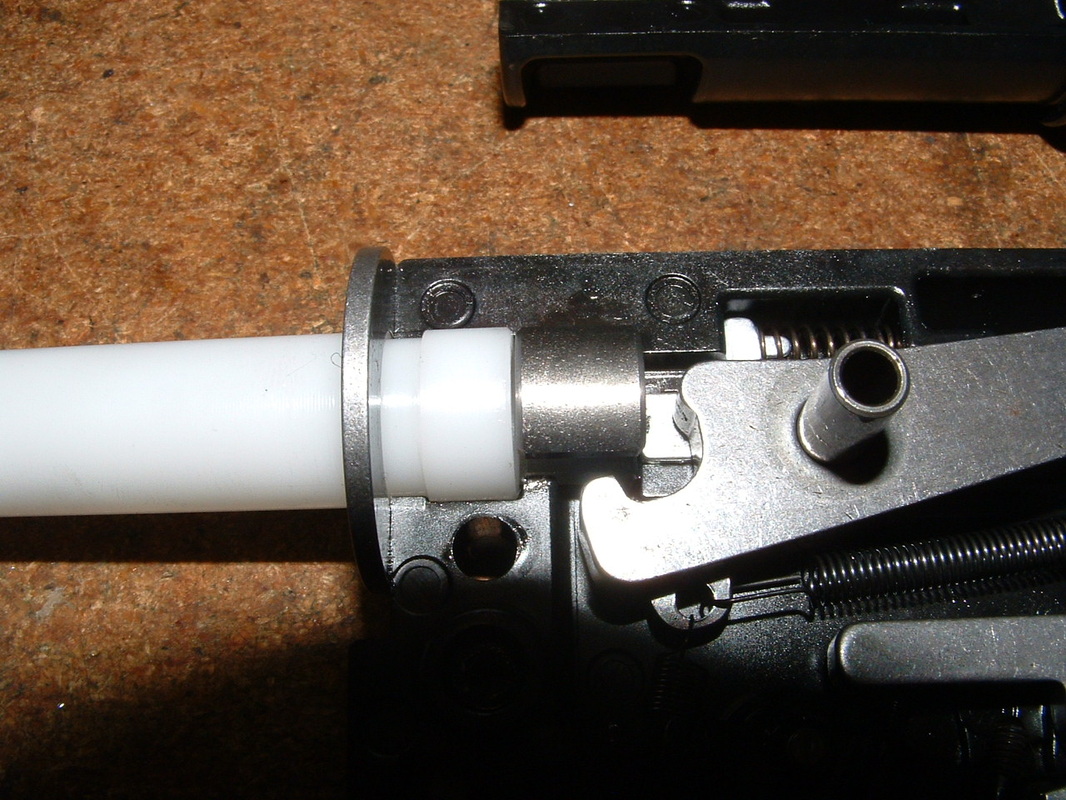
I have never had too much success turning plastic, so I turned an aluminum one:
Picture
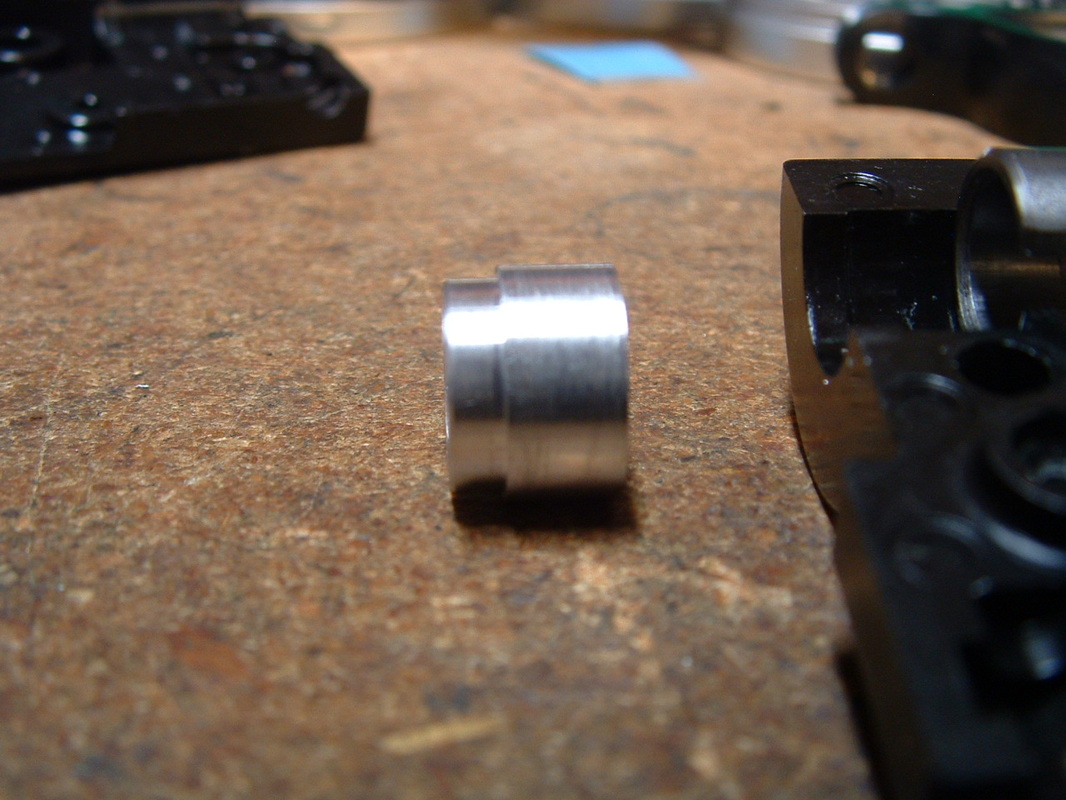
This is the aluminum short guide turned, and placed in its proper relative position.
Picture
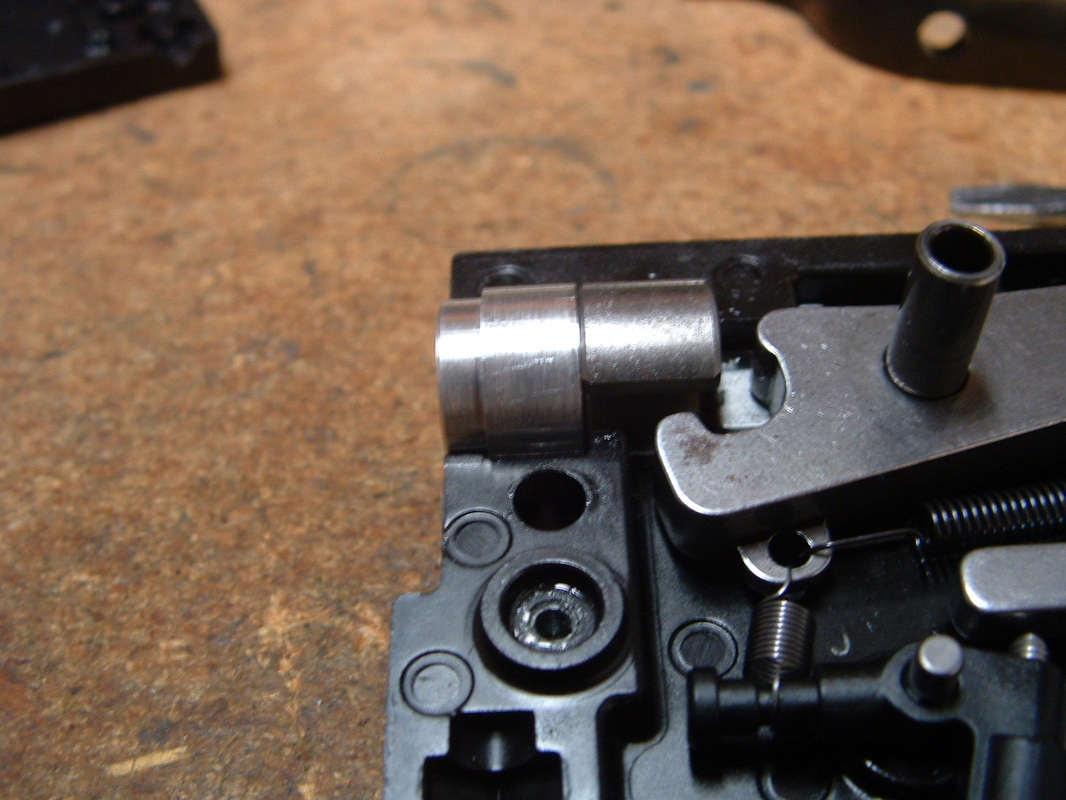
And this is how the part fits inside the housing.
Picture
And this is how it fits inside. Because the Vortek kit has a flat rear end, it is important that the insert also fits flush.
Picture
It is interesting to note that once the kit is inserted and everything put into place, the whole assembly sits, feels and works almost like a single unit. The Vortek TopHat fits better than the OEM one and this, while not creating a resisting force to keep the two together (spring and piston), still has a very good fit.
Once the gun was assembled and everything had been worked once or twice by cocking and de-cocking manually, we tested the feel of the shot cycle. Impressive indeed.
The very obvious piston bounce of the OoB shot cycle was gone. The "thud" was sudden, quick, indubitable.
Very pleasant, indeed.

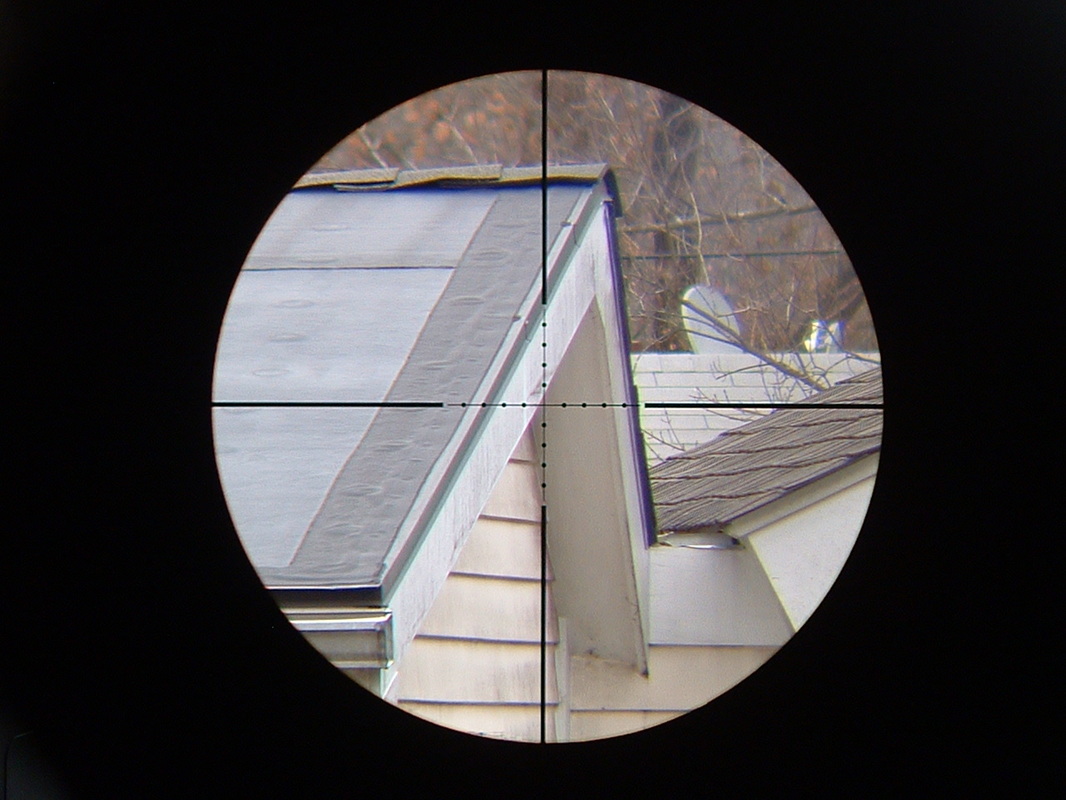
An interesting aside here is that the guns we receive in the US ALREADY have the "large" transfer port. Whatever you read on the U.K. and S.A. fora is not necessarily applicable to the guns we get here.

I've tried and tested many spring guns over the years with different tunes and from different corners of the world, but this combination is among the best I've tried. Not perfect, because the gun is slightly overpowered for WFTF shooting and the gun still recoils vertically, but it was like that before we started and now what needs to be done is to reduce the power to "legal" levels.
The recoil characteristics cannot be changed without serious changes in the weight distributions and that is changing the gun too much for my tastes.
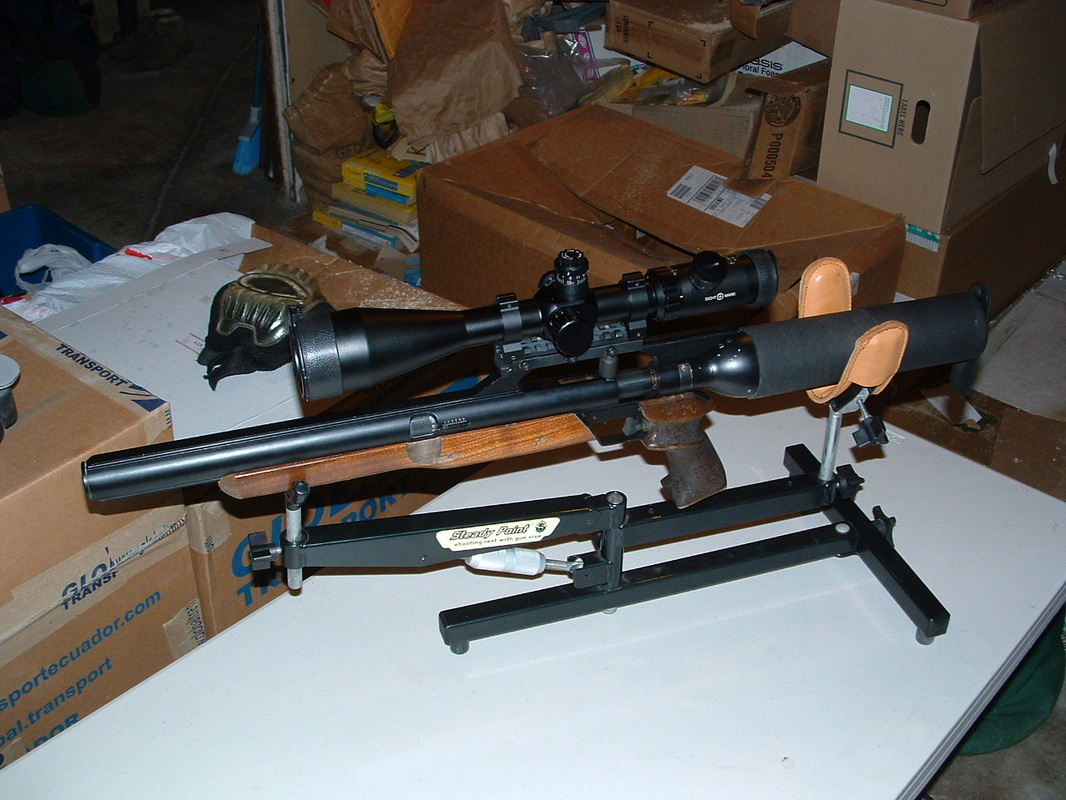
There are a few other things about this rifle that need attention to. One of them is the distance between the pistol grip, the cheekpiece, and the scope rail.

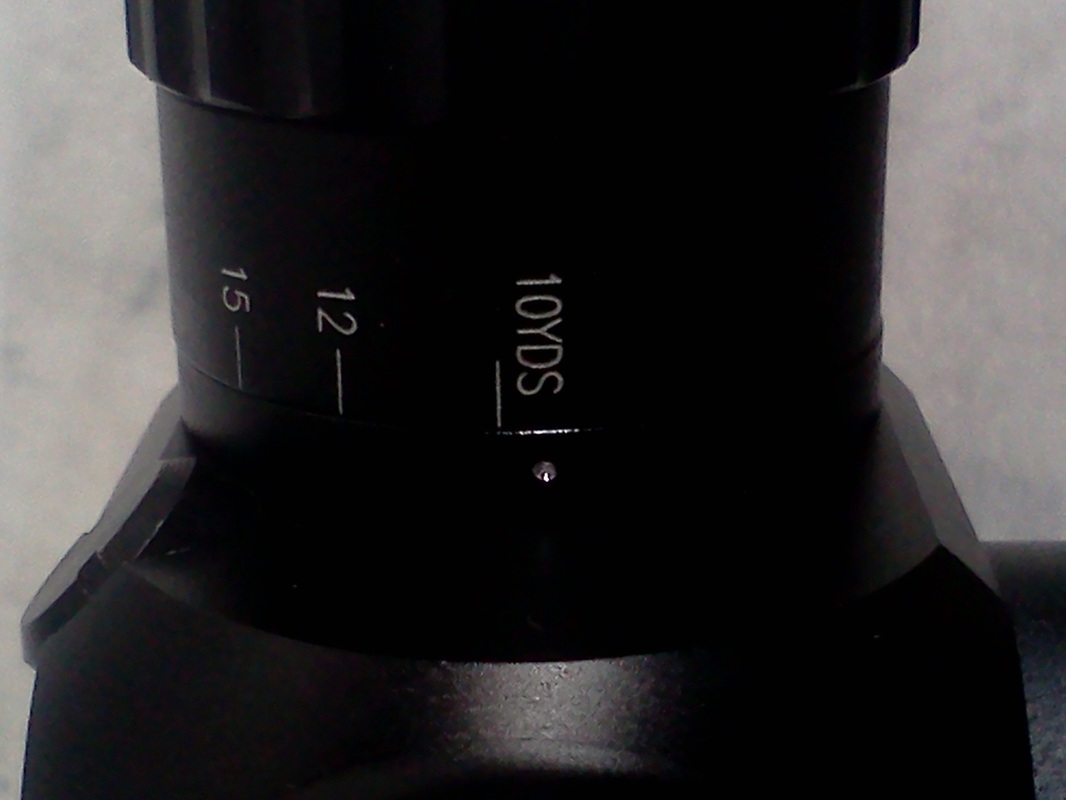
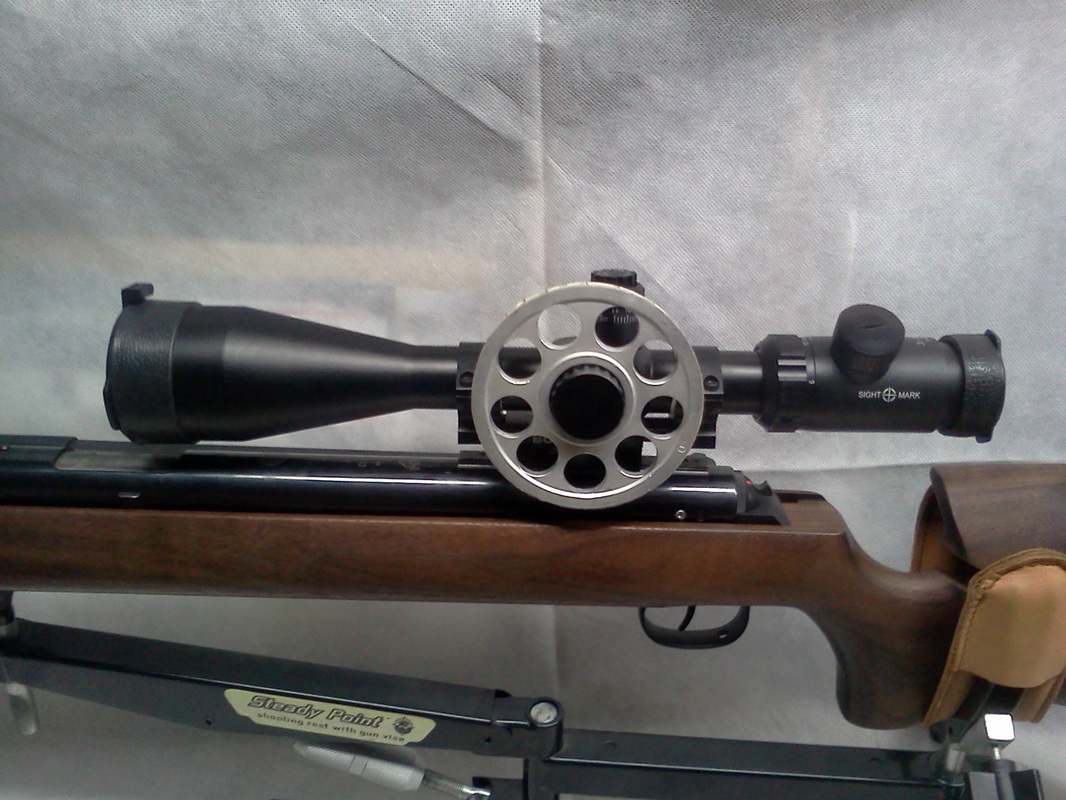
Most scopes nowadays have reasonable eye reliefs, but there are exceptions, notably the short scopes that are most useful in hunting. In this particular case the scope of interest was the Tac-Vector Optics Gladiator, a 2-12X32 FFP MD scope made for very peculiar applications but uniquely suited to airgun hunting.

And also, the fact that the rails are cut INTO the receiver makes for a very low L.O.S. unless you use very high bases.
When you couple that with the need in a piston gun like the Walther that kicks UPWARDS, you need to get something to put everything at ease.

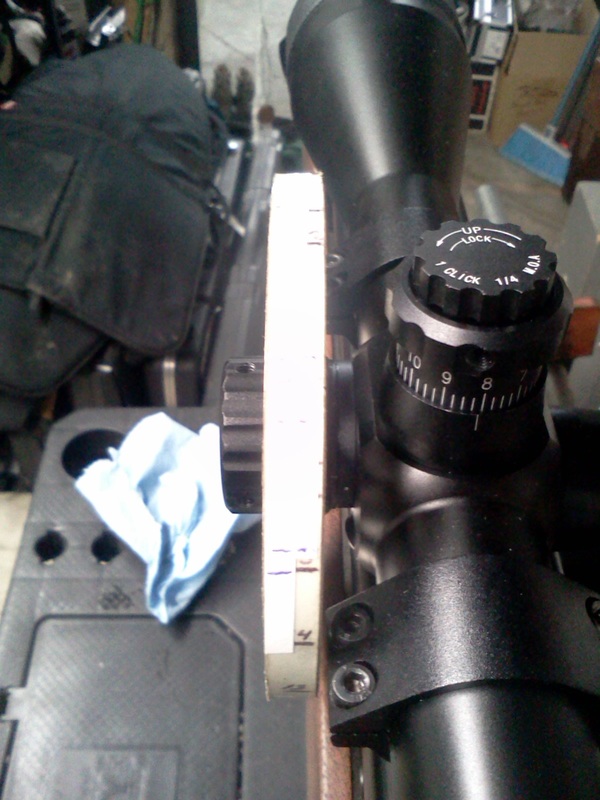
A good alternative is to use a rail, which also gives us a chance to correct the "droop" that is needed to keep an optically centered scope on target with a perfectly concentrically mounted barrel.

In order to "cure" both inconveniences I decided to alter an UTG rail to fit what needed to fit.
Picture
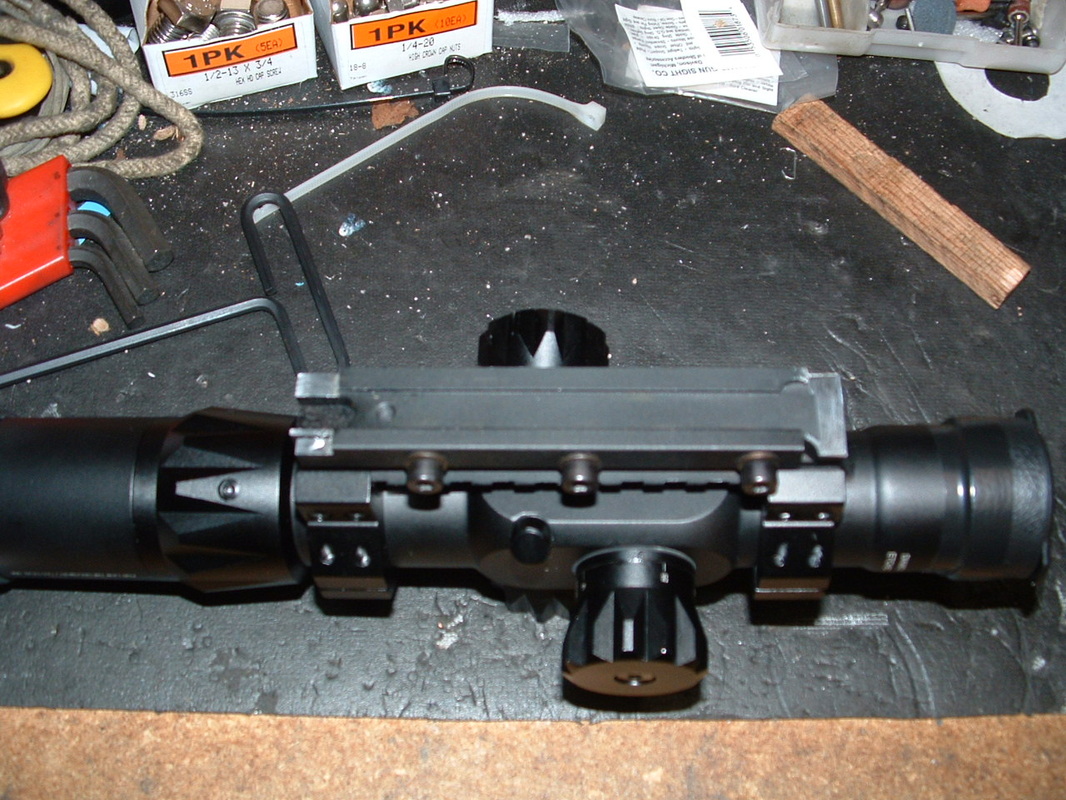
An UTG rail with droop compensation milled to fit the LGU
Picture
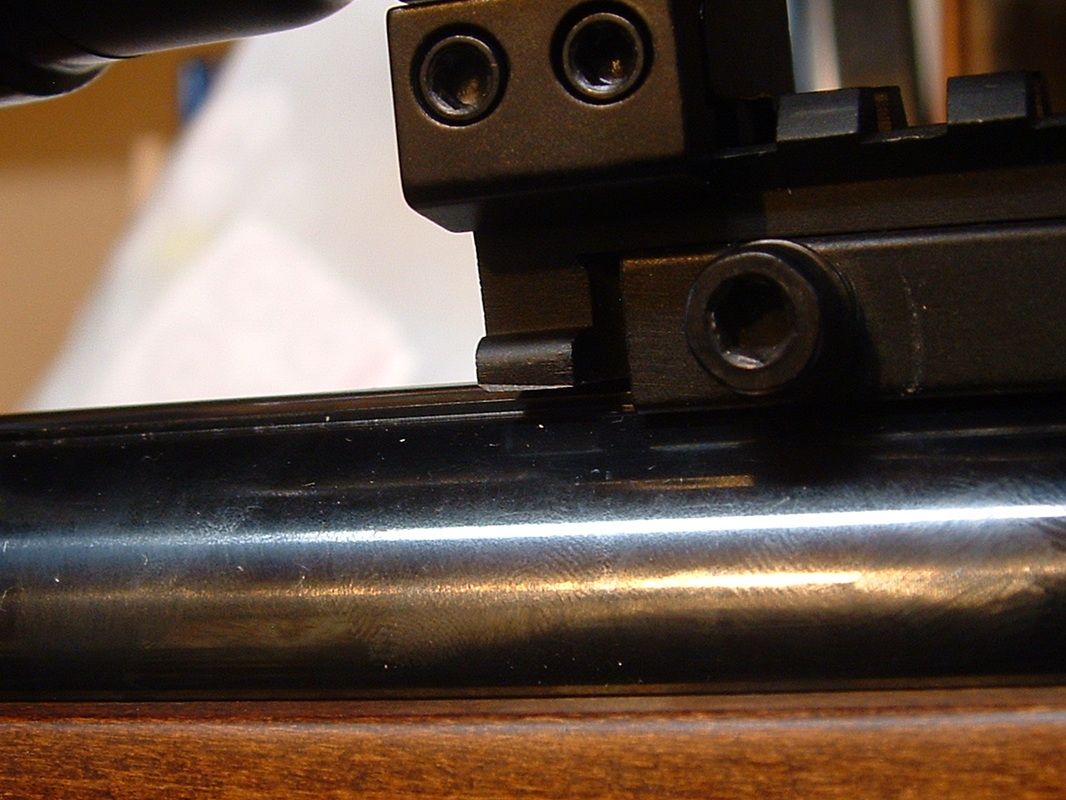
There is reasonable clearance in front.
Picture
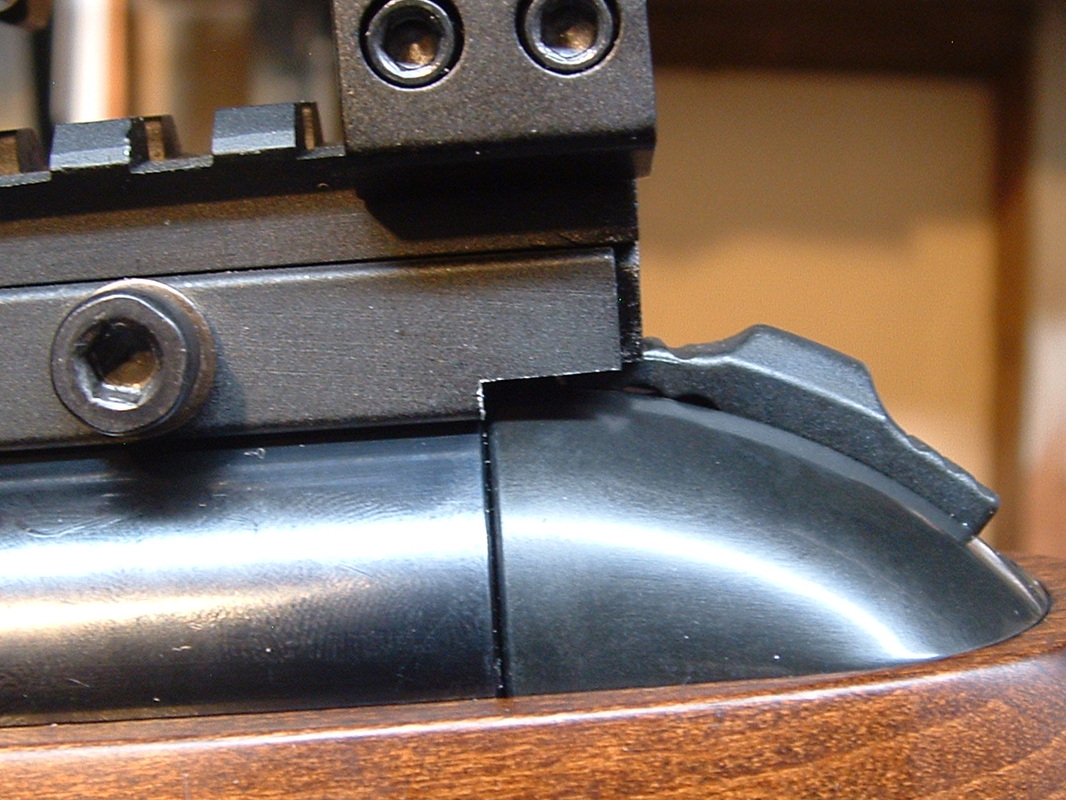
And the "overhang" has been kept to the point where it is useful to get the scope near to the eye and still allow the safety to go on / off.
Picture
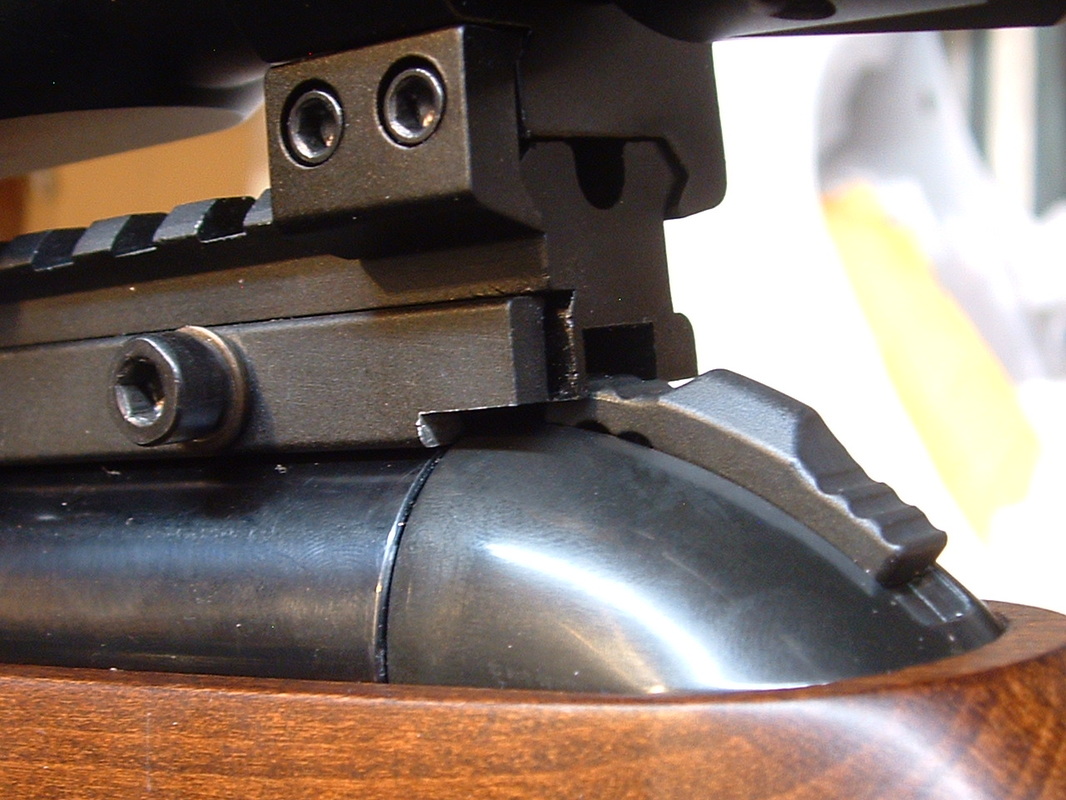
By combining the recess that Leapers puts into the rails to accommodate Diana's rear rail screw and overhang, the safety goes on and off.
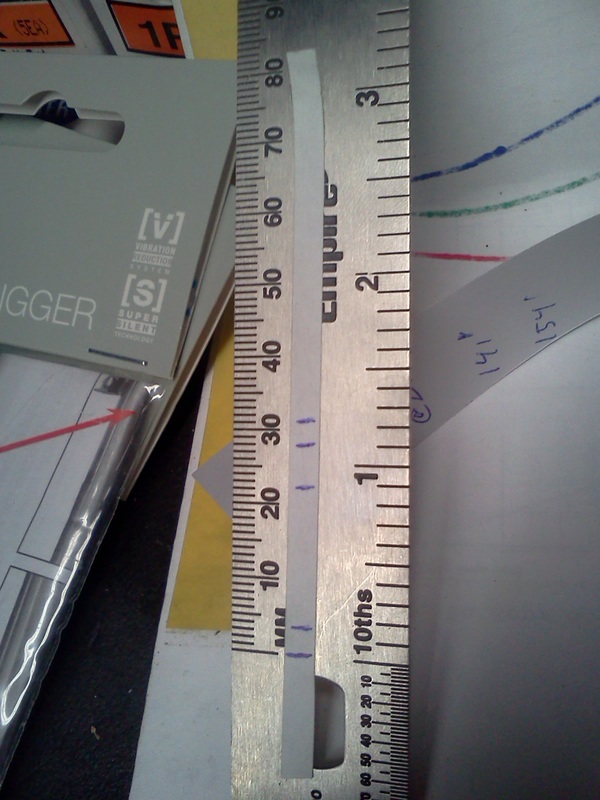
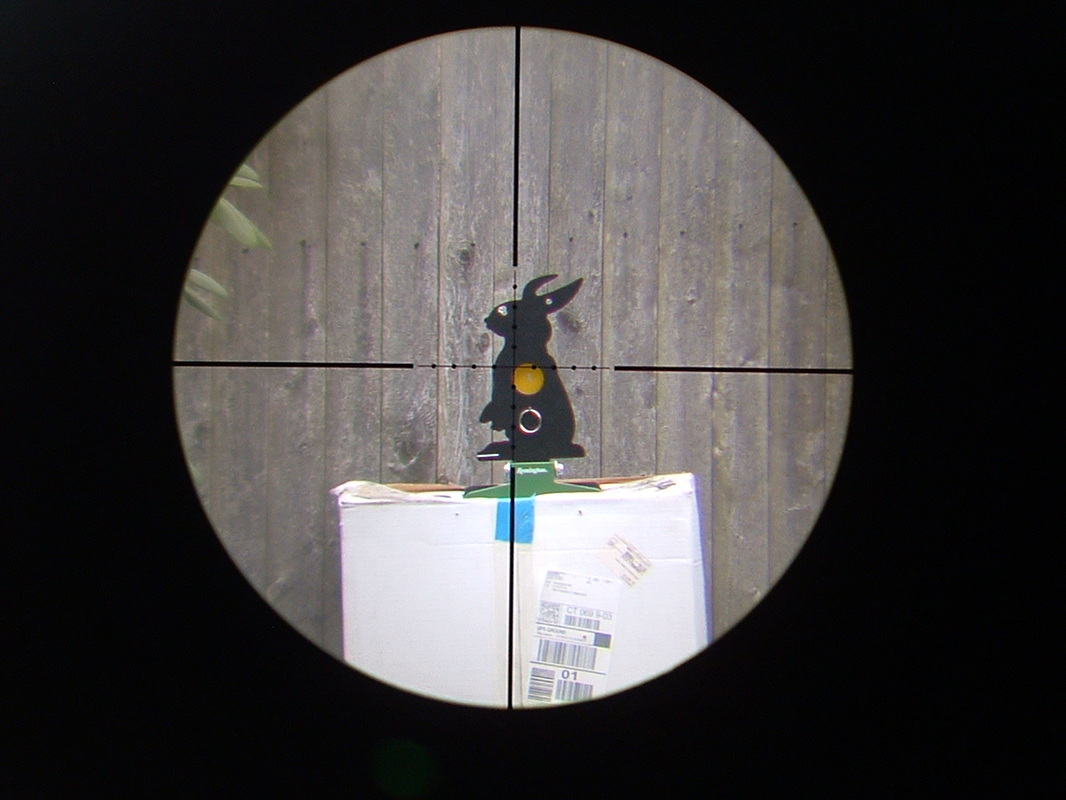
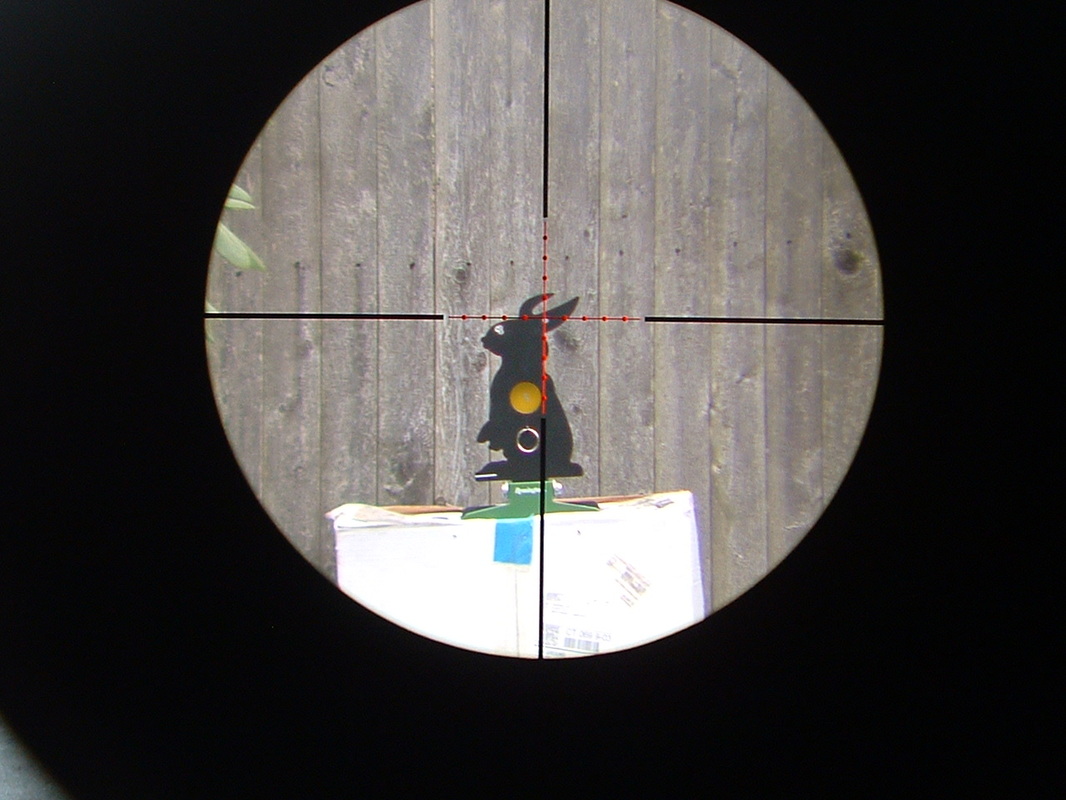
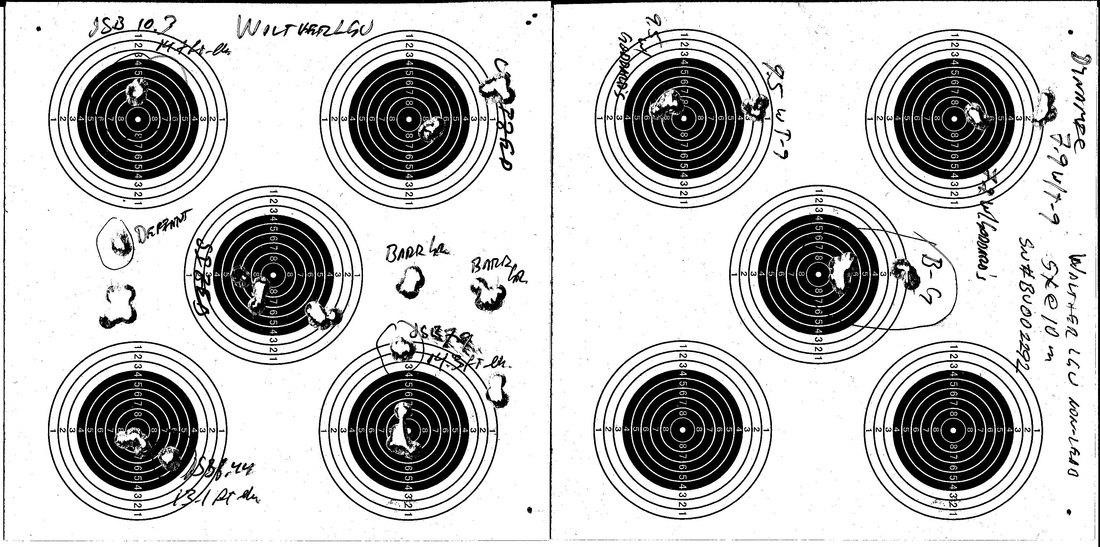
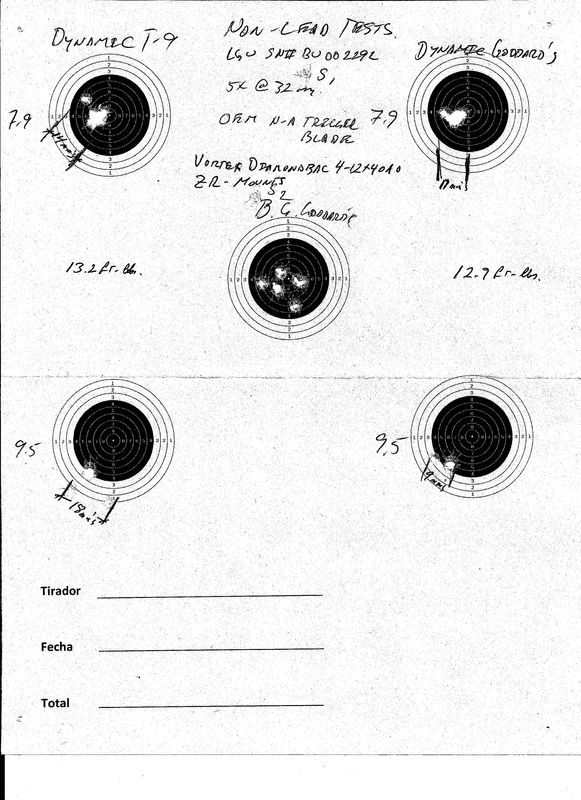
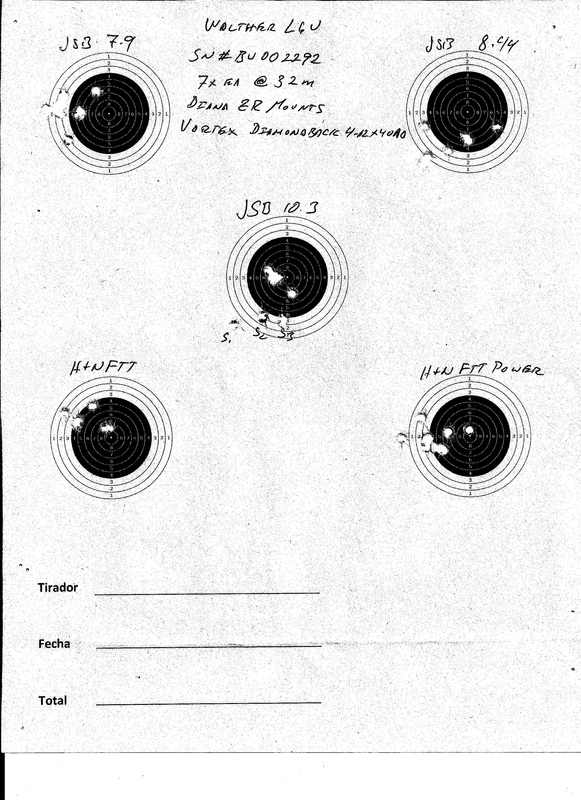
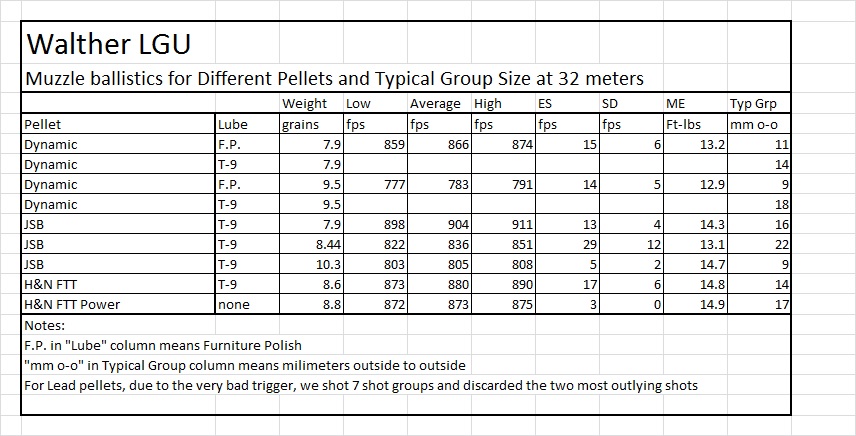
We'll continue with this gun later, for the time being it is rewarding to see itty bitty groups appear in the targets at the far side of the range.


;-)
22 Comments

Swapping the Walther LGU's trigger

12/12/2014

8 Comments

 
BEFORE ANYTHING ELSE, I am required to post this, the legal disclaimers:


1.- Swapping the trigger blades WILL invalidate the warranty of your rifle.
2.- ANY user intervention in the triggers MAY result in an UNSAFE condition. Once you get into the trigger you are on your own.
3.- I have no control of YOUR actions, so I can take NO responsibility for the results YOU get. This process proved safe and sound in MY gun. I cannot guarantee that it will be the same in YOURS.

Having said that to the satisfaction of the company's counsel, lets start:

Following our initial experiments with the Walter LGU and its excellent performance, but horrible trigger; we decided to distribute the "Match Abzug" (or "Tuning Trigger") to all those that got their guns from Ct Custom Airguns free of charge. We saw no reason to have an excellent gun saddled by a hideous trigger . . . or so we thought! LOL! but more on that later.

The "Tuning Triggers" were obtained and mailed to all, but time precluded the real effort of creating a detailed swap-guide for people that are not experienced tuners till yesterday, when we could afford the time and tranquility needed to tackle the operation with the mind set of a beginner. Those of you that are experienced airgun tinkerers will have to bear with me and if I go too fast, then those that have questions, do feel free to post them as comments to this entry.

SO, here we go.
Picture
Take all accessories off the gun: scope, slings, sights, anything that is extraneous must come off.
Picture
Undo FIRST the two FRONT screws and then undo the rear TWO screws. NOTE well how tight each screw is. NOTE that the front screws have TWO washers each: a star washer near to the screw's head and a FLAT washer next to the stock. Reversing this order will destroy the stock's fine screw hole finish, expose your stock to humidity entry and create a mess. Do NOT reverse the order of the washers! Since the action cannot be completely bedded to the stock in an airgun, the tightness of the screws plays an important role in the accuracy of the rifle.
Picture
If you cannot remove the trigger guard, don't worry, remove the stock with the trigger guard and then remove the guard from the stock. Do NOT loose any of the screws! Though they are common screws, they are metric and not easily replaced in the typical US general store.
Picture
Note how the action is held closed by two pins. Note their relative size and position. Since the two pins are different, there is no chance of putting the wrong pìn in a hole, but DO pay attention to the SENSE the pins go into the action. In European habits and customs, pins usually go INTO the action from right to left (the right and left sides are ALWAYS referred to with the gun pointing AWAY from the gunsmith). Because most pins in well made guns will have a slightly better chamfer on their LEFT (so that they can go into gun from the right), take the pins out by using a punch ALSO from the RIGHT. These are cylindrical pins, so they should be taken out in the same sense they went in.
Picture
Now, to set the gun into a spring compressor, make sure you protect the trigger block casting and the muzzle by using pads and wooden blocks to apply the pressure.
Picture
I would be standing to the right of this picture, BEHIND the action and spring compressor, holding the light hammer on my right hand and driving the pins from RIGHT TO LEFT. Don't loose the pins.
Picture
Once the pins are out, holding the action down with your left hand use your right hand to unscrew the spring compressor. Easy does it, no one is in a hurry.
Picture
When the spring has decompressed all its pre-compression, you can recuperate the wooden block and allow the action to be pulled apart.
Picture
In the Walther, the guide (the white plastic tube that holds the spring and the piston's stem in place) is attached to the trigger block. This is one of the reasons why there is little spring bounce in this gun. Also note the steel "thrust washer" at the base of the guide abutting with the trigger block. This washer allows the rotation of the spring. All springs rotate when compressing and decompressing.
Picture
For the trigger swap operation you do not HAVE to take out the piston and the spring, but most probably you will want to take them out, just because curiosity is what it is. Here you can see the trigger block (top to bottom), then the spring, and then the piston. The black thingy at the rear of the piston's stem is the "Top Hat" a device that acts like a spacer and also centers the spring in the piston's body. IF you had purchased a replacement spring (springs are "consumables" in most spring-piston airguns), or an aftermarket spring (like Maccari's) you would swap the springs at this point.
Picture
If you wanted to clean the compression cylinder, or replace the breech seal (also a consumable item in most airguns), you would have to extract the compression cylinder (here flanked by the spring and the piston). The rings in the compression cylinder are NOT seals. They are bearing rings and they are split diagonally. In this photo, you can see the front bearing ring in the piston (the white one) as well as the rear bearing ring in the piston's skirt (also white). The green front end of the piston is the piston seal and although not strictly a parachute seal, it does have a buffer ring. This is another reason for the perceived smoothness of the gun. The piston seal is made of a relatively hard elastomer, but it definitely does NOT act as a bearing. NOTE: some people call the linear bearings shown here: "buttons", out of the old habit of placing round buttons at the piston's skirts. But these are NOT buttons, nor should the piston be termed a "buttoned" piston. It is a piston with linear bearings.
Picture
Now remove and store the thrust washer.
Picture
And now let's get to the trigger itself.
Picture
The trigger block is a cast housing that is held together with two screws. Screws will need a flat head screwdriver. Make sure that the blade FITS PERFECTLY the screw. If you have to polish or change the blade, then do so. NOTHING detracts more from the value of a gun than having burred screw slots. It tells anyone looking at the gun that an amateur got in there and raises the doubt about what else could have been changed (if not spoiled) by the person in question.
Picture
The casting is well made and even with loose screws it will not come apart easily. It has to be pried open VERY carefully, the screw the driver's blade is pointing to will always fall, so be careful. This is the screw that regulates the trigger OVERALL RELEASE WEIGHT. Note how the plastic guide also holds a steel bushing in place that will hold the piston's stem when the stem is engaged by the trigger hook.
Picture
This is the trigger in the fired position and with the guide removed.
Picture
This would be the trigger in the cocked position with the guide removed.
Picture
Now, borrow a crochet hook from your wife's and very carefully remove the return spring from the trigger blade's front stub.
Picture
With the return spring's tension removed, the trigger blade is free to come out.
Picture
Side by side comparison of the trigger blades: On the left, the OEM "non-adjustable" plastic trigger blade. On the right, the "Match Abzug". You can clearly see that the plastic blade has one screw, the Match blade has two.
Picture
Even with the bad, out of focus picture you can see that the plastic blade is wider than the metal one. In normal, European usage, the finer the trigger can be adjusted the thinner it will be. Wide trigger shoes and very light trigger weights make UNSAFE guns. Specially in cold weather. So, BE CAREFUL!
Picture
Some writers have claimed that the engaging surfaces of this trigger unit have been polished, this is NOT so. They have a good finish, but they have not been polished. In this picture you can see the point of contact of the FRONT screw of the plastic trigger blade.
Picture
A little bit of jeweler's rouge in a felt drum and the surface becomes so polished that the autofocus of the camera has difficulty focusing into it.
Picture
If you are going to polish the lever surface shown above, then also take the time to polish the screw's tips.
Picture
Now, insert the Match blade into its place and restore the return spring. NOTE that the nuts that are tightened by the stock screws are loosely held in a cavity in the casting. While this is good because non-ferrous casting should never be allowed to be threaded (unless they are high strength aluminum), it also poses the problem that the nuts may turn out of position and then the casting may not close as well as it should. Make sure that all parts are in their proper place: Nuts, safety's detente, safety, trigger wieight spring, guide and bushing. When EVERYTHING is in its rightful place the casting can be closed by hand and the edges will align perfectly. If ANY edge does not close completely, you have something out of place.
Picture
Everything in place and ready to close. You CAN test the trigger once it is closed by pushing the piston into the closed trigger block and allowing it to be taken out of safety and the trigger blade pulled to release the piston. The piston should release completely. Making sure everything works without the mainspring tension is a good idea! Do NOT overlook this test!
Do NOT overtighten the two screws that hold the cast housing together. It would be easy to strip those threads and then you are in big trouble.
Tighten to something between snug and slightly tight and use thread locker, the blue one that is "medium strength" to make sure that the whole housing will not vibrate loose, open, and dropping trigger parts all over the field.

From here, just follow the reverse procedure to put your gun together.

Make sure that you insert the piston into the compression chamber BEFORE you insert the compression chamber into the gun.
Make sure that the Top Hat and Thrust washer are inserted into the spring and guide respectively.
Make sure that you release the anti-beartrap safety when re-inserting the compression chamber.
Make sure you align the compression chamber to the slot in the action for the cocking lug. NOTE that the cocking lug is held onto the compression chamber by a claw that has no hook. It is held in place by the location of a plastic runner that rides on a slot in the stock. The stock is, therefore, a MECHANICAL component of this gun.

Once you have everything together, cock the gun and holding the cocking lever firmly, make sure the trigger fires. Re-cock and fire several times. Once you are satisfied that the trigger unit is working well, then de-cock the gun and head for a test range.

You will need to fire the gun at least 50 times before attempting to reach the final adjustment of the trigger screws. If you polished the lever surface and the trigger screws discussed above, then you can start adjusting, but if not, do not worry, surfaces will become "burnished" by each other and you probably need the trigger time anyway.

Once you have fired the gun at least 50 times, you will need to start screwing IN both screws: first the front and then the rear.
Screw them in by ¼ turns, you will see how the trigger release becomes lighter and crisper. Lighter and crisper.
Adjust till you have the letoff you want.

The adjusting was tougher than the swapping, but once done, you're good for a substantial number of shots. You will have to adjust the fine details after every 1,000 and then after every 5,000 shots, or thereabouts.

HTH

Un abrazo!


Héctor Medina


PS.- in the next blog entry we will tackle what can be done to the PLASTIC trigger blade to make it a good trigger blade.
8 Comments

The Ezekiel.- A special Riflescope

12/5/2014

1 Comment

 
It is not common for manufacturers to listen, REALLY listen to the boots in the field.

When modern warfare started evolving into more urban guerrilla style of combat, most optical riflesights became obsolete in one stroke.

Some manufacturers opted for red-dots and prismatic sights. Others opted for low magnification scopes, some of them even integrated into the carry-handle of the infantry trooper's rifle.

Then came the battles of Central Asia.

Places where troops may need to engage at inside-the-room distances, or out-the-window into the next hill distances.
On top of that, squads started having a DMR's, someone with the technique and training to do some precision shooting, perhaps he will not have the FIELDCRAFT that defines the sniper, but his shooting requirements are quite high.

So, scope manufacturers started looking at scopes with wide zoom ranges. The 3 times usually available (like the 3-9X or the 4-12X simply did not cut it. Bushnell, Leupold and other companies started coming out with zoom ranges of 4 times (3-12X), and even 5 times (2-10X), but the big leap was still in the future.

And then came several manufacturers that took the jump to 10 times (1-10X, 2-20X, 3-30X, all the way up to 8-80X). MOST of the companies that came out with those extreme scopes were companies in the high end of the market ($1,500 to $4,000). And, curiously, some of them accomplished the goal of the zoom range, but missed completely the REAL goal of achieving the versatility of the scope for most situations because scopes did not focus down to across-the-room distances.

Part of the blame layed with the top brass.

None of them actually understood what the boys were facing in the field.

As time passed, new brass came up and changes started being made. But companies are slow to respond unless they get a specific request from the Requisitions Departments and so we still have quite a few scopes with very large zoom ranges that do not focus to close quarters.

Sightmark is one of the companies that actually takes the time to think about what they are doing.

I had tested a few of their scopes, mainly the old Triple Duty scopes and, apart from the problems inherent to the massive double recoil dished out by Diana 54's, they pretty much behaved as well as one could wish within their price bracket. And in this day and age, $360 don't buy too much quality glass and/or mechanics. The US Dollar ain't what it used to.

Sightmark would need to go to a coil spring erector architecture and a much more robust reticle (possibly at the same time developing their own "christmas tree" design) to make these scopes Diana 54 worthy . . . or the shooter could use a ZR Mount and deal with the shortcomings separately.

After the economic crisis, with a change of admin at Sightmark, and with the revived interest of "jack of all trades" guns (the "Black Sporter Rifle" trend), Sightmark came out with a very special scope, it is called the "Ezekiel". 

¿Why such a ponderous name?, you may ask. Well, I think it is a suitable name. In Hebrew Ezekiel can mean either "strong in G'd" or "strengthened by G'd" in any case, the name implies strength and far-seeing powers, as Ezekiel was a prophet.

The Ezekiel is one of the few mid-priced scopes that has a 10 times zoom range. It goes from 3X to 30X
It is neither a small nor a lightweight scope. But pretty much approximates the weight and dimensions of the 50 mm's objective lens AEON's:
Picture
In the foreground an AEON 50 mm's objective scope, in the background the Ezekiel
Picture
No doubt about the large range of magnifications here
Picture
Picture
The Ezekiel's objective is slightly larger, at 56 mm's, but the difference is not really noticeable.
Scope comes with TALL Weaver rings in the box, not that that helps a lot of airgunners, but it is interesting to see more and more manufacturers include some kind of rings.
Both turrets are re-zero-able and lockable, both clearly marked and, theoretically, clicks are ¼ MOA.
Even though the sideknob says that the scope focuses down to 10 yards, that is true ONLY at 6X and below. At any FT useable magnification scope does not focus down to 10 yards, scope focuses to 38' @ 12X and 40' @ 30X .
The usage of a close-focus adaptor will solve this issue, but only for PCP's, as the recoil of a spring-piston airgun will surely dislodge the adaptor from the spring-loaded covers usually employed for mounting.
To add to this problem, up to this date I have not found a close focus adaptor for lenses larger than 44 mm's.
Picture
Picture
Paper tape on scope at the start of the marking process.
For well camouflaged hunters, or for hunting from blinds, this scope is very versatile because you can use it @ 3X for "glassing" a tree in search of tails, whiskers, or feathers and then zoom in to identify clearly the target and pellet path before taking the shot.

The Ezekiel can be easily endowed with a larger sidewheel. The knurled end of the knob is slightly smaller than the body itself, so that you can easily have a sidewheel made or adapt one. With a little electric tape I adapted the 4" one I had used for years in the HorusVision for this test:
Picture
Once the ocular has been focused and with "targets" set at different distances, I started finding out the limits of this scope.
Using non-stretching paper tape. I identified the longest mark, the average mark, and the shortest mark. Plus a few other marks to try to establish the "resolution" that the scope can give.
For starters, the whole excursion between the shortest range (38') and a long range (154') is covered in the first 135º of rotation of the wheel aprox. Not much, but better than some of the Nikko Stirlings, Leapers and other scopes in the same price bracket.
I used the "back and forth" focusing technique that works best for me. That implies focusing on the way up and going past. Then focusing on the way down and going past. Then refining the limits till I can be confident that my "hand memory" can set the scope to its optimum focus. This technique proved to be repeatable and reliable at 12X; at 30X the scope does snap in-and-out of focus pretty sharply. It also does it at 24X, where max luminosity is achieved.

Once all the marks had been reliably located, I REMOVED the paper tape and measured the distance between marks in mm's.
In the field it is hard to rely on marks closer than about 1 mm. So that is the number I look for to deduce the distance resolution capability.
Picture
Fully marked paper tape removed from sidewheel and then set in a mm's ruler.
Picture
Since the Ezekiel sideknob turns contrary to most scopes, the mark on the "bottom" is a FAR mark of 154'; then comes a mark for 141', at 4 mm's; then a mark at 120' at 22 mm's; then a mark for 105' at 28 mm's and the last one is for 102' at 31 mm's
Resolution, therefore, is quite good.
With some good training, I think that shooters with good eyesights could resolve well between the 53 and the 55 yard mark.
A larger sidewheel, or a "coma" style sidewheel would also help.
I doubt that anyone could mark this scope at ½ yard intervals, as some like to do, but the performance at 12X is quite remarkable; look at the following picture; it shows a favourite "target" of mine. The sloped roof has a near corner, then the top cusp of the roof and then a far corner.
The near corner is at 154', the far corner is at 166' and the cusp is at 160'. In this photo, though not a very good one, you can see that the near corner is in focus, then the cusp is a bit fuzzy, and then the far corner is definitely out of focus.
From this we can establish that UNDER THESE CONDITIONS, the scope's depth of field is in the region of 6' (about 2 yards).
Again, I emphasize that it DOES require good eyesight and the "hand memory" focusing technique.

And ¿how does a REAL FT look like? I can hear the question! LOL!

Well this next picture tells you how it looks at 12X when placed at 30 meters/33 yards:
Picture
This next picture tells you how the Max Illumination in green looks like
Picture
And this one tells you how the min illumination in red looks like:
For REAL night/dusk shooting both are a little bit on the bright side, but for FT purposes they are fine.

And, if you do not like the lit reticle in a scope, there is an easy solution: do not install the battery!   ;-)
Picture
Last, but not least, I like to test scopes when there is LITTLE light, usually at dusk.
A good scope should let you see details when you cannot see more than volumes, shapes and angles with your plain eyes.
I conduct my tests at light levels that usually challenge the auto-focus function of the cameras, but believe me when I tell you that the reticle was in focus in these two next pictures.
In this sense, I have to say that the scope's "brightness" decreases considerably between the 24X and the 30X mark. BUT at 24X it does a VERY creditable job in VERY LOW light conditions:
Picture
The edge of a roof under very low light. This target is located at 141' note that the window frame is clearly "less focused" than the corner. The near corner of the window frame is at 154' 6"
Picture
The top of the roof under very low light conditions.
I am sure that, by now, some of you are asking ¿WHY the h . . . is he giving distances in feet? LOL!

Reason is simple: scope's reticle is "true mrad" at 10X. So that makes the scope an "IPHF" (Inch Per Hundred Feet) reticle when set at 12X. A situation that makes sense for American shooters used more to the Imperial System than to the Metric System.

¿Would I buy this scope?, well if I was looking for a scope for one of my PCP hunters, I would:
OR, if I was truly interested in shooting "Hunter" Division, PCP Class, under AAFTA rules.
I would have to dial down this Talon to about ½ its current power, but it could be fun.

;-)

If you can, give the scope a test drive at your sports equipment dealer / friendly gunshop. Go in the evening and test the scope under low light. Look at HVAC units in the vicinity, they have small details that you can either resolve or not. Set it at 12X and test how sharply the focus snaps in and out.
It may, or may not, be the scope for you. But it is definitely worth the time to look it over.

Un abrazo!


HM
Picture
1 Comment

The Walther "Sport" Family

12/3/2014

0 Comments

 
I have to admit I was wrong.

In a way, I am VERY happy to do so. 

You see? 
When UMAREX bought the Walther brand I had MUCH more than simply mixed feelings. I had seen Walther struggle through the 2k boundary layer and the products they were bringing out, while good, still needed a LOT of work. Their International Match and Olympic performance was less than "golden" (pun intended), and the future was not at all promising.

Then (2004-2005) the first Alu-Schaft Dominators started to fail. Some quite dramatically: the pin that held the knee/toggle that locked the breech close (a la Luger) failed and some shooters got a little more than they expected upon releasing the shot.

So, when we learned that UMAREX had purchased the Walther brand we came away from the IWA (2009) with very mixed feelings. 

Questions arose: 
¿What was UMAREX planning on doing with Walther? 
¿Were they going to use the brand to milk it and then drop it?
¿How could a 100 years old weapons factory simply fold up and be sold?

Most of my enquiries went unheeded. All the plans about new guns were cancelled (among them a VERY interesting bolt action). The brand went from a worm into a chrysallis. It wrapped itself up in a cocoon and went silent.

Couple of years passed and the same happened to Hämmerli.  ¿WHAAAAT?

Still more time passed and we started seeing very cheap airguns come out with the Hämmerli brand.

Hmmm . . . . not good.

But still nothing major from Walther. Some strong steps were taken to remediate the 300/Dominator and some more models brought out using the same engine in different bodies, but nothing outstanding. 
At the same time, the medium power guns (12 ft-lbs), were taking the market by storm. New entries from Steyr, Anschütz, FWB, etc. were marking the way. Even Hämmerli started staging a comeback in the PCP world.

A couple more years passed and suddenly (2011), we learned about the first breakthrough in this saga: Walther was coming out with a completely new airgun! 
Rumours and more rumours till, at last, the official website for the "sporting" rifles by Walther was setup. 
The only model: the LGV.

Funny, it seemed, to use an old designation. The LGV had been the best of the Walther line when it was introduced around 1964 as the crowning model of the "55" series, but only for 10 years or so; by 1974 Walther had started the SSP revolution as a response to the recoil-less rifles like the FWB300, the Diana 55, 65 and 75; and the Anschütz 380. 
The Single Stroke Pneumatic LGR (possibly as an offshoot of the LP3), like the later FWB 600, Diana 100, Anschütz Super-Air, and the Steyr SSP quickly became the dominant technology, for a while; there were some CO2 Match guns, but the step to PCP was quick and relentless. And that was the end of the Spring-Piston Match airguns.

So, exactly WHAT was the idea behind the "new" LGV?
For starters they completely redesigned the mechanics and using a cocking shoe, allowed the piston to rotate inside the compression chamber. This eliminated the normal torque of most spring-guns when released, except those given a thrust bearing interphase between spring, guide and trigger group or frame.
The piston received bearing "rings" and a new seal, and the transfer port was now specific to the caliber and power level.
The guide was relatively tight, and it had no end-washer, just a tube.

They KEPT the breakbarrel's lockup wedge lever. 
Moving away from a wedge, or an even cheaper ball lockup, the wedge lever provided a "positive" barrel lockup, thereby ensuring better consistency in the alignment of the barrel and the mechanisms tube where the scope rail is. In the old LGV this had not been as important because the old LGV was an iron-sighted rifle, so if the barrel ended up pointing a thousandth of an inch lower or higher, so did the front sight. 
In the old LGV the main advantage of the wedge lever was the ability to break the barrel open without having to slap the front end of the barrel to overcome the spring loaded wedge or ball. That is STILL a characteristic that is highly pleasing.

BUT, Walther did not stop there. They proceeded to engineer and fabricate the LGU, the Underlever version of the LGV (or almost, as we will see later).

The similarity between the two guns is evident to anyone:
Picture
This is the Walther LGV Competition Ultra
Picture
And this is the LGU Master
The trigger units, the rear "hump", the safeties, the location of all screws. Basic frame patterns that make life easier for the manufacturer.

I had read a few good reviews about the guns, mostly from our UK "cousins", but still nothing outstanding from the run of the mill shooter. 
Comments about the unboxing of the gun, videos and praises to the box and packing! As far as I know, no rifle has ever won anything or bagged any game by being well packed, but . . .  to each his own!
Mostly, videos and articles posted by tuners and gunsmiths, and top level shooters that "do" their own guns. Curiously, one of them maintained in public that the gun was OOotB but; in private, he admitted to having  swapped, changed, or modified almost each and every part internally. Go figure. . . . LOL!

A few victories here and there, but nothing "to take the field by storm".

My own personal, first hand, views of the guns were not too favourable, given the performance of the gun at the 2013 FT Welt MeisterSchaft in Ebern, Germany.

Then came 2014 and the opportunity to shoot at the Pyramyd Air Cup in Ohio; when we started our trip, little did we know that our outlook on the Walthers was about to be radically changed.

Even though my personal performance in Ohio was lackluster; my wife, Verónika, placed second and she got to choose (second, obviously) from a pile of prizes that Pyramyd Air had set for the winners and placers. Having a good eye for breakbarrel guns (she started shooting with an HW-95 that she terms her "engagement gun") , she chose a Walther LGV with the synthetic stock. Truly an impressive gun:
Picture
The LGV Challenger Ultra a handful of a gun with very impressive performance.
For a while we really did not know what to make out of the gun. But as the saying goes: "Curiosity . . ." and by late October I was experimenting with the gun.

The lockup wedge lever is indeed very pleasant to use. The size of the gun is about Max for me, but perhaps other shooters will find it too small, or too big. Weight was surprising, but in this example the weight is surprising because the synthetic stock is indeed VERY light.
Moulding of the stock is agreeable to the touch and the quality of the plastic is high as revealed in the capacity of the material to withstand normal treatment and hold fine detail even in the working areas.

As stocks go, and ambidextrous ones at that, this is one of the more comfortable ones I've used.
Comb is low, it is basically a hunter, designed to mount small scopes or even be used with iron sights.
Power output goes between 14½ ft-lbs and 15½ ft-lbs, depending on the weight of the pellet and the material the pellet is made of. Top power is achieved towards the lighter end of the spectrum with Barracuda Green's topping the list. Surprisingly good performers were both versions of the H&N FTT lead model: the FTT and the FTT Power. This usually indicates a light piston, maybe in the future we can research into that.
Groups were typically in the 11 to 20 mm's range at 32 meters. Not bad at all for a break barrel in the hands of a non-breakbarrel shooter.

MOST important: the gun was not difficult to shoot well. EVEN with the HIDEOUS trigger with which the guns are imported into the US. But more on that later.

I liked the gun, but when Veronika saw me using it, she very gently reminded me that it was HER prize.  ;-) ROFL!

I packed it up and returned to my usual experiments.

Now a small flashback: Just after the Euskadi open (July), one of the shooters came back absolutely astonished at the LGU. Theoretically, the Underlever version of the LGV. Now, THAT got my juices flowing, he even intimated that he would be willing to part with some hard-earned cash to get one directly from Europe.

I explored my European connections and sure, we could bring in a few. But prices were a little bit steep for American purposes. In Europe, these guns sell for between €465 and €420 (roughly equivalent to US$540 to US$600) , and on top of paying overseas shipping, inspections, handling, insurance and customs/duties, we would have to buy the kit to convert these guns to either 12 ft-lbs. or High Power, as in their "native form" they could ONLY ship 5.5 ft-lbs guns; depending on what each shooter wanted. Here we must say that the LGV can/should not be converted to other power levels because the transfer ports are drilled for one specific caliber and power level. The LGU, with the travelling compression cylinder arrangement holding the transfer port, makes it possible to do the conversion.

But, as life is, one of my explorations had been with UMAREX USA. And I had let them know that there were shooters who wanted these guns as soon as they arrived to these shores.
True to their commitment, as soon as they landed they let me know and I, in turn, posted in the FT forum the news.
Funny that the originally interested party ended up not getting a gun, LOL! but we did manage to put together an order for 6 guns. As soon as they arrived, I shipped them out to the respective owners and waited for news.

If not the next day, perhaps three or four days after, I started getting back some reports: MV's of around 780's with heavies, groups of about ½" at 50 yards . . . hmmm. . . .  interesting!  Specially interesting and noteworthy is Mark Bouchard's report.

As soon as I had the time, I mounted an airgun rated scope atop the LGU and started testing.
Curiously, I could not get the gun to stay put at a zero. POI climbed and climbed and climbed and climbed still some more.
Since that cannot be, I got to analyzing the scope and mounts in detail. The dovetail of the adjustable B-Square was completely destroyed. Funny, because this scope and mounts combo is one of my favourites when testing Diana 54's but then the area held by the dovetail in the Diana rifles is much bigger than the cut into the receiver grooves of the LGU/LGV.
Ah, well, things that happen, so I got off the Vortex Diamondback in the Diana ZR mount from the Tyro-stocked 0.20" cal. D54 and started testing for real the LGU.

The first thing that I test is a bunch of different pellets and lubes at short range. 10 meters does nicely. Why?
My theory is that unless a rifle stacks the pellets at 10 meters one on top of the other, there is no sense in testing them any farther ¿is there? I have never heard of converging pellets.

By testing a bunch of different pellets, I can narrow down those pellets and lubes that DO warrant testing at 32 meters (the longest distance I can shoot from in all weather in my yard).
We all have our favourite pellets, those that we feel do best across the board. Still that makes for about 7 or 10 pellets that need to be tested with at least 3x5 shot groups at close range before weeding out those that should not even be attempted.
These are two typical 10m tests:
Picture
Lots of small groups, but even at this distance there are groups that clearly merit more attention than others.
So, further tests were conducted, I was particularly intrigued by the performance of the "long" pellets. Like the JSB's 10.3's or the Dynamics (non-lead, therefore substantially longer than normal)  7.9's and 9.5's.
Curiously enough the JSB and AA 8.44's do not seem to agree with this or any other LGU/LGV I've read about.

Now, part of the problem with an extensive testing program is that the bad trigger took its toll. By the end of the 200th shot I had developed a flinch.

But the improved "Match-Abzug" or "Tuning" triggers were still not here, and  . . .  the show must go on.

I also wanted to test different lubes in the "hard" pellets (non-lead pellets are very hard and their accuracy is greatly dependent on using the right lube).
So I tested the Dynamics in their two weights with two different lubes:
Picture
Wasn't pleased by the Barracuda Green's, but I was pleasantly surprised by the performance of the Dynamics.
I also started noticing that all groups, even with the utmost care on my part presented one or two outliers. It was then that I suspected myself of flinching, and yes, that was the cause. Still, even taking into account the outliers, the groups are more than reasonable and perfectly suited for FT (reason why the groups are measured outside to outside).
Do note that the ZR mount also performed more than creditably. The Vortex Diamondback is a known and trusted performer.
With the Thanksgiving interlude, and the Opera interlude, and the bad weather interlude, it was only recently that I got to test the lead pellets, and these are typical results:
Picture
Because I knew that I would be flinching, I decided this time on 7 shot groups to discard the outliers. Some may object to the methodology, and that is OK, I will do another test when I have installed the "Match Abzug" and confirm my suppositions.
I was favourably impressed by the performance of the JSB's 10.3's, and I think that further research needs to be done with the FTT Power and different lubes, as it occurred to me that a copper plating that adds 0.2 grs to a pellet has to be thick enough to make the pellet a "hard" pellet, like the Dynamics.

Cocking effort in MY gun is 32#, which seems rather stiff when compared to the CCA WFTF D54 cocking effort of 20# for very nearly the same ME output, but we'll see if it settles down and how.

Of course, EACH barrel will be different as far as pellet predilection and efficiency.

To summarize my findings, I came up with this table:
Picture
All in all, I think that the LGU and the LGV are VERY WORTHY of carrying the "Walther" brand and I am VERY happy to admit that all my misgivings and doubts were wrong.

UMAREX has seen fit to keep the Match and Sport Walther divisions relatively separate, and the emphasis now for them is getting away from the toy/cheap guns to the high quality airguns that we all like, especially at the prices we can get away with on this side of the Atlantic.

;-)

Work in the future with these guns will be, of course, installing the Match Abzug; designing and making some real reflex baffles for the resonant cavity; getting the 12 ft-lbs kits here; and coming up with a shooting strategy.
Picture
Some may criticize these rifles as an amalgamation of characteristics taken from the best guns in the field today. Some bits from the HW-97, some from the TX-200, some from other guns but, in reality, the LGV and LGU have more than a few unique advanced characteristics that set them apart.

With these rifles, all airgunners have a good, viable option in the mid-price range. 

They recoil, and hard, even if you do not feel it. To some, that is part of the spring-piston mystique.

Keep well!


HM
0 Comments

    Hector Medina

    2012 US National WFTF Spring Piston Champion
    2012 WFTF Spring Piston Grand Prix Winner
    2013 World's WFTF Spring Piston 7th place
    2014 Texas State WFTF Piston Champion
    2014 World's WFTF Spring Piston 5th place.
    2015 Maine State Champion WFTF Piston
    2015 Massachusetts State Champion WFTF Piston
    2015 New York State Champion WFTF Piston
    2015 US National WFTF Piston 2nd Place
    2016 Canadian WFTF Piston Champion
    2016 Pyramyd Air Cup WFTF Piston 1st Place
    2017 US Nationals Open Piston 3rd Place
    2018 WFTC's Member of Team USA Champion Springers
    2018 WFTC's 4th place Veteran Springer
    2020 Puerto Rico GP Piston First Place
    2020 NC State Championships 1st Place Piston
    2022 Maryland State Champion WFTF 
    2022 WFTC's Italy Member of TEAM USA 2nd place Springers
    2022 WFTC's Italy
    2nd Place Veteran Springers

    Archives

    August 2022
    May 2022
    April 2022
    February 2022
    August 2021
    July 2021
    June 2021
    May 2021
    April 2021
    March 2021
    February 2021
    October 2020
    September 2020
    August 2020
    July 2020
    June 2020
    May 2020
    April 2020
    March 2020
    February 2020
    January 2020
    December 2019
    November 2019
    September 2019
    August 2019
    July 2019
    May 2019
    April 2019
    January 2019
    December 2018
    November 2018
    October 2018
    September 2018
    August 2018
    June 2018
    May 2018
    April 2018
    March 2018
    February 2018
    January 2018
    December 2017
    November 2017
    October 2017
    September 2017
    March 2017
    December 2016
    October 2016
    September 2016
    July 2016
    June 2016
    March 2016
    January 2016
    December 2015
    November 2015
    October 2015
    September 2015
    August 2015
    June 2015
    May 2015
    April 2015
    March 2015
    February 2015
    January 2015
    December 2014
    November 2014
    October 2014
    August 2014
    July 2014
    June 2014
    May 2014
    March 2014
    February 2014
    December 2013
    November 2013
    October 2013
    September 2013

    Categories

    All
    Events
    Gear
    Hunting
    Tests

    RSS Feed

Proudly powered by Weebly