BEFORE ANYTHING ELSE, I am required to post this, the legal disclaimers:
1.- Swapping the trigger blades WILL invalidate the warranty of your rifle.
2.- ANY user intervention in the triggers MAY result in an UNSAFE condition. Once you get into the trigger you are on your own.
3.- I have no control of YOUR actions, so I can take NO responsibility for the results YOU get. This process proved safe and sound in MY gun. I cannot guarantee that it will be the same in YOURS.
Back in May 2018, I wrote a note about the then available "Super Custom" Triggers for the LGU/LGV rifles.
In the original post we discussed European versions, but on this one we will discuss an American design.
For those that have not followed my interest in these fine guns, I would suggest you take the time to read these entries:
https://www.ctcustomairguns.com/hectors-airgun-blog/the-walther-sport-family
https://www.ctcustomairguns.com/hectors-airgun-blog/swapping-the-walther-lgus-trigger
https://www.ctcustomairguns.com/hectors-airgun-blog/a-yankee-tune-for-the-walther-lguhttps://www.ctcustomairguns.com/hectors-airgun-blog/a-yankee-tune-for-the-walther-lgu-second-version
https://www.ctcustomairguns.com/hectors-airgun-blog/the-walther-lgv-a-second-look
https://www.ctcustomairguns.com/hectors-airgun-blog/the-walther-lgv-pushing-the-power-limits
https://www.ctcustomairguns.com/hectors-airgun-blog/the-supercustom-triggers-for-the-walther-lgu-and-lgv
As you can see, I am a great fan of the LGV, considering it the best breakbarrel rifle in recent production. We would have to go a few decades into the past to get something better.
These models had been in production for less than 6 years, and in those 6 years, not less than 4 trigger blades came into the market, WHY?
Savvy airgunners have been puzzled about how could Walther put such a bad trigger on such a good gun.
And here is where I sometimes ask myself questions that I know would be very "uncomfortable" for a manufacturer to answer, but that definitely point to a marketing strategy that fails to take into account the simple truth that "There are no second 'First Impressions' "
If we analyze the cold facts, they are:
- Rifles are very good rifles, among the breakbarrels, the LGV has no peer. The LGU faces stiff competition from other fixed barrel rifles that are just as good, if not a bit better, depending on the criteria used for judging.
- Price, when they hit the market was high. Granted, ALL airgun prices were high back then; in general, prices have come down as demand has grown, production volumes have gone up, and more brands/models are available.
- Simultaneous to the launch of the rifle itself, Walther launched a "Match Abzug" (MA) that promised a better release but, again, price was high.
- In at least one market, the rifles were ONLY available WITH the MA, at considerably higher price still.
- At some point, up to 6 different "variants" were offered of the LGV. From "De Luxe" models to "Workhorse" models.
To be honest, as a marketing strategy, this is a recipe for trouble.
Those that could ONLY buy the expensive versions thought about it and probably didn't, or if they did would always question their decision.
Those that bought the "economy" versions would not buy the accessory trigger.
Everyone agreed that the guns were between good and great, but still the market response did not justify the costs of production, one by one, the different variants of the LGV were dropped. Unconfirmed information says that Walther has decided to discontinue ALL breakbarrel rifles. Even when the attempt was never made to market the "Century" (a sort of economy LGV with all the good characteristics, but none of the fineries) in the USA
Which is a pity.
And it is what brings us to this entry.
As with many things in this "CoVid-19" world of "stay at home and do something", some people with the skills and the machines in their workshop now have the time to actually do some serious stuff.
In my cybertravels through the airgunning community, I came across an interesting post about "yet another offering for triggers" for the LGU/LGV, and it piqued my curiosity.
And this is how I met Eric. Eric lives in Texas, and he is a great guy. Modest and unassuming, it's a pleasure to deal with him. He is also talented. At first he said he had developed another trigger for the LGV/LGU rifles but that he needed to polish some aspects, a few months later, he comes up with fully finished prototypes. So many corporations would LOVE to have that time of "Start to Finish R&D", LOL!
SOooooo...
Let's get to the trigger:
As you can see, it uses a quite novel way of making it adjustable without making it expensive. At $80 retail, it is in line with what European triggers cost, and it does provide some advantages.
Among the advantages: there are two possible positions for a second stage, one that provides for a light pull, and another one that provides for an even lighter pull, at the expense of a little "crispness".
In a way this is similar to the Rowan Engineering version, but if we compare them side by side they are not quite the same:
From left to right: Walther's MA, Eric's trigger, and Rowan Engineering (RE) Trigger.
While the RE trigger allows the user to move the whole trigger blade back, it also ends up needing a "shoe" that is far too wide to operate/work on the trigger. If you want to remove the stock, or adjust the second stage (in the "heavy" position), you need to remove the blade and the holding post.
Eric's trigger does away with that.
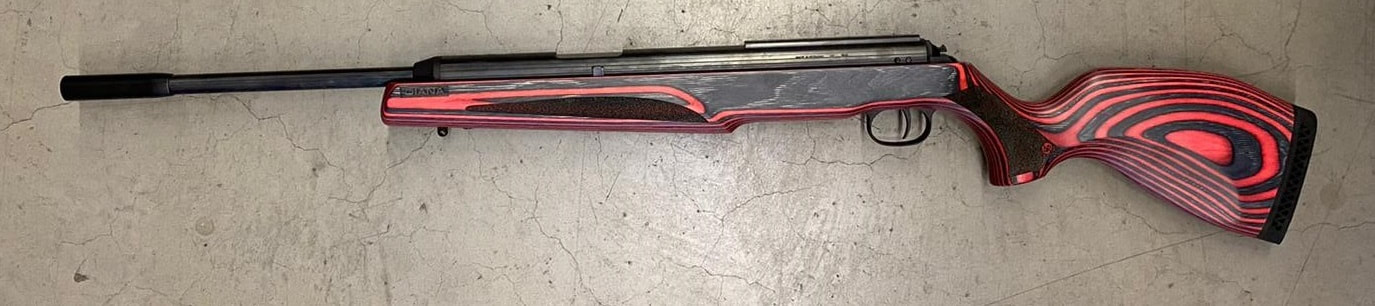
Eric's blade is further back, and one of the common complaints about the LGU/LGV stock is that the pistol grip is really big and seems to be made for giant's hands.
Some shooters (even one previous World Champion) hold that huge pistol grips prevent the shooter from inadvertently twisting the gun when releasing the shot, and that is very true, but it is also true that techniques exist to teach ourselves to apply a slowly increasing force that does NOT twist the gun and therefore does not affect the shot. IN any case, the most common versions of the LGU that you see in the competition circuit have ALL had their stocks replaced.
As far as adjusting the distance between pistol grip and trigger blade, Eric's trigger uses a novel approach, and that is a pressure plate that can be moved in/out meaning that it shortens or lengthens that distance.
Eric's trigger is also a bit more swept back, and so the pressure plate could be used as a "Register Mark", ensuring uniform trigger finger placement.
While the RE trigger allows the user to move the whole trigger blade back, it also ends up needing a "shoe" that is far too wide to operate/work on the trigger. If you want to remove the stock, or adjust the second stage (in the "heavy" position), you need to remove the blade and the holding post.
Eric's trigger does away with that.
Eric's blade is further back, and one of the common complaints about the LGU/LGV stock is that the pistol grip is really big and seems to be made for giant's hands.
Some shooters (even one previous World Champion) hold that huge pistol grips prevent the shooter from inadvertently twisting the gun when releasing the shot, and that is very true, but it is also true that techniques exist to teach ourselves to apply a slowly increasing force that does NOT twist the gun and therefore does not affect the shot. IN any case, the most common versions of the LGU that you see in the competition circuit have ALL had their stocks replaced.
As far as adjusting the distance between pistol grip and trigger blade, Eric's trigger uses a novel approach, and that is a pressure plate that can be moved in/out meaning that it shortens or lengthens that distance.
Eric's trigger is also a bit more swept back, and so the pressure plate could be used as a "Register Mark", ensuring uniform trigger finger placement.
When comparing the positions of the three screws we see that RE's trigger uses a fairly uniform spacing between screws, whereas Eric's trigger uses a skewed distribution that, while providing for an even "lighter" trigger pull, will definitely loose some "crispness" to the release.
We also note that RE's trigger has rounded screw faces, while Eric's trigger has pointed faces. This is a result of the market they are oriented at; RE's trigger is sold mostly to fairly amateur airgunners, as a "drop-in", while Eric's trigger assumes that users have ALREADY taken the time to stone and polish all interacting surfaces.
Yes, if you are looking for the LIGHTEST possible trigger pull in an "untreated" trigger block, then RE's trigger will give you that, BUT, if you are looking for a compromise between extreme lightness and total crispness and you are willing to stone and polish your trigger parts, or send them out to a Pro, then Eric's trigger can more easily accomplish this, and with less fuss because you can adjust all aspects of the trigger pull with the trigger blade in the gun, without the trigger guard (more on that later).
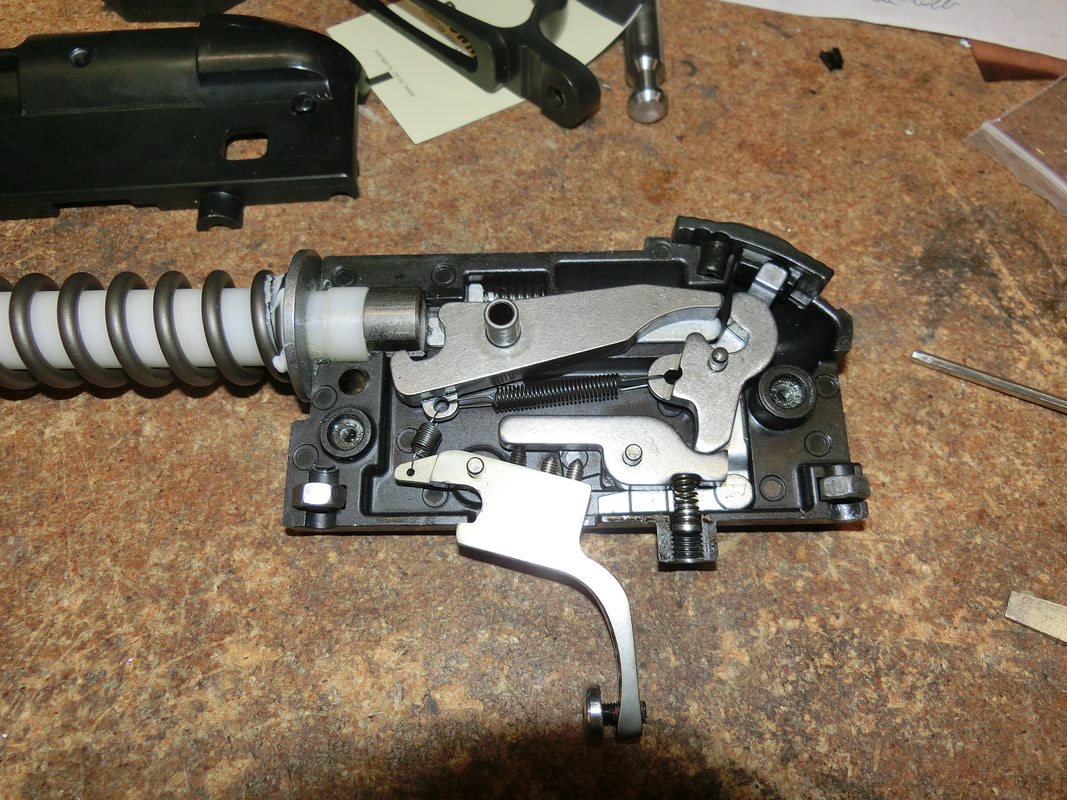
To install Eric's trigger is simple; you take apart the gun and when you have the trigger block out and the clamshell disassembled, you take out the old trigger (on the left is the OEM "economy" trigger with the lengthened screw of the "Yankee tune", on the right is Eric's trigger):
We also note that RE's trigger has rounded screw faces, while Eric's trigger has pointed faces. This is a result of the market they are oriented at; RE's trigger is sold mostly to fairly amateur airgunners, as a "drop-in", while Eric's trigger assumes that users have ALREADY taken the time to stone and polish all interacting surfaces.
Yes, if you are looking for the LIGHTEST possible trigger pull in an "untreated" trigger block, then RE's trigger will give you that, BUT, if you are looking for a compromise between extreme lightness and total crispness and you are willing to stone and polish your trigger parts, or send them out to a Pro, then Eric's trigger can more easily accomplish this, and with less fuss because you can adjust all aspects of the trigger pull with the trigger blade in the gun, without the trigger guard (more on that later).
To install Eric's trigger is simple; you take apart the gun and when you have the trigger block out and the clamshell disassembled, you take out the old trigger (on the left is the OEM "economy" trigger with the lengthened screw of the "Yankee tune", on the right is Eric's trigger):
And put in the new one:
Eric recommends cutting one coil of the extension spring that is the return/no slack spring, but I did not find it necessary.
You will need a crochet hook or some other hook to get that spring out and then in again, so DO REFER the blog entry about "Swapping triggers" above mentioned.
Once you have swapped the triggers, you will need to adjust the screws.
Eric sends a very interesting manual that details STARTING points for the protrusion of those screws and I found the manual absolutely right. SO, DO READ IT!
Once that is done, you can close the gun and start the actual fine tuning.
It's important to note that once assembled, the gun should be checked that everything is in its place and the clamshell is properly closed and aligned.
Upon some extensive testing, I found that FOR ME, the flat pressure plate gave a "strange" feel, to the point of being distracting, because the pressure plate always keeps the same orientation, when lowered to the last hole, the feeling was that I was pulling in a "crooked" way.
Upon some extensive testing, I found that FOR ME, the flat pressure plate gave a "strange" feel, to the point of being distracting, because the pressure plate always keeps the same orientation, when lowered to the last hole, the feeling was that I was pulling in a "crooked" way.
While this would be ideal for shooters with custom stocks that almost always have a "vertical" pistol grip, it was somewhat off-putting to use with the sporter stock.
So, Eric agreed to make two versions: one with a curved blade, and another with the "flatish" trigger blade
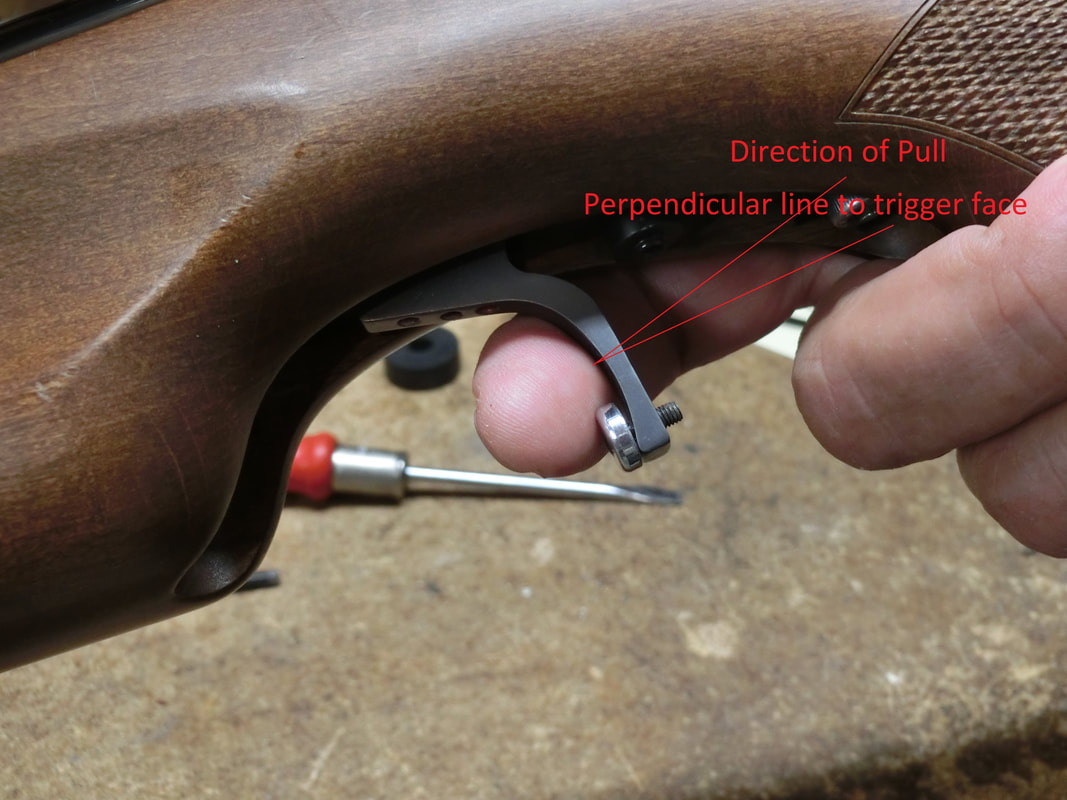
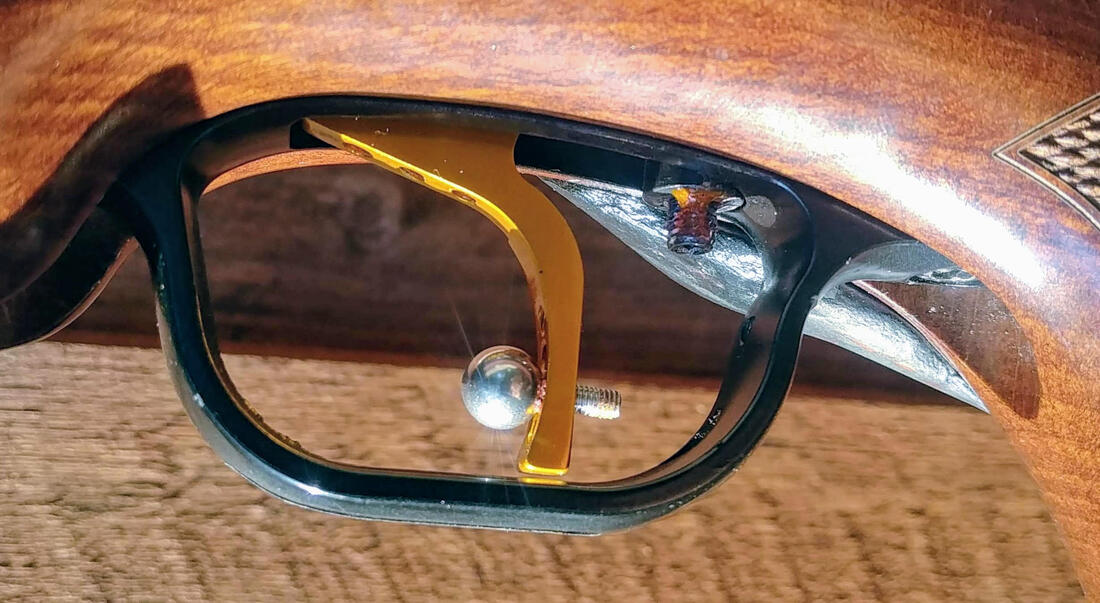
I found also another solution that is truly viable only at very low trigger pulls, and that is replacing the screw with a button headed allen screw that presents a hemispherical shape to the touch of the hand:
So, Eric agreed to make two versions: one with a curved blade, and another with the "flatish" trigger blade
I found also another solution that is truly viable only at very low trigger pulls, and that is replacing the screw with a button headed allen screw that presents a hemispherical shape to the touch of the hand:
The other thing I like is that I can use a locknut at the rear, to ensure that the setting does not get "out of place".
At trigger pulls above 1# this is somewhat tiring in the long run, but below that it is an eminently usable solution.
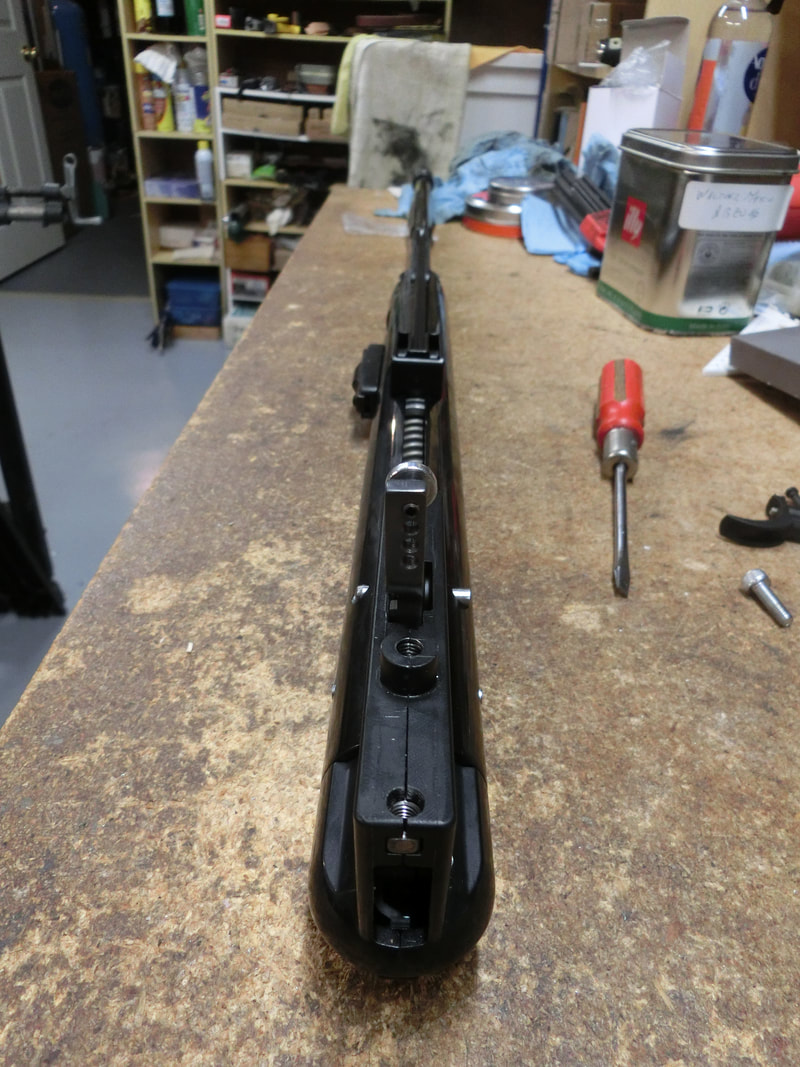
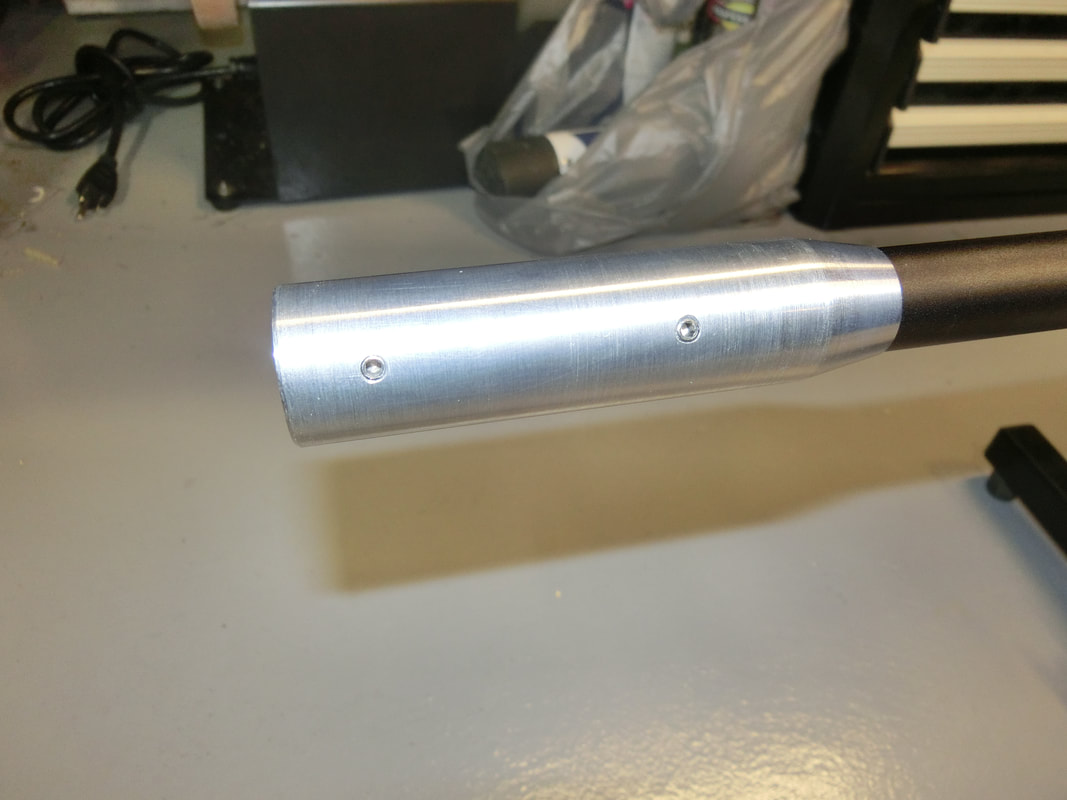
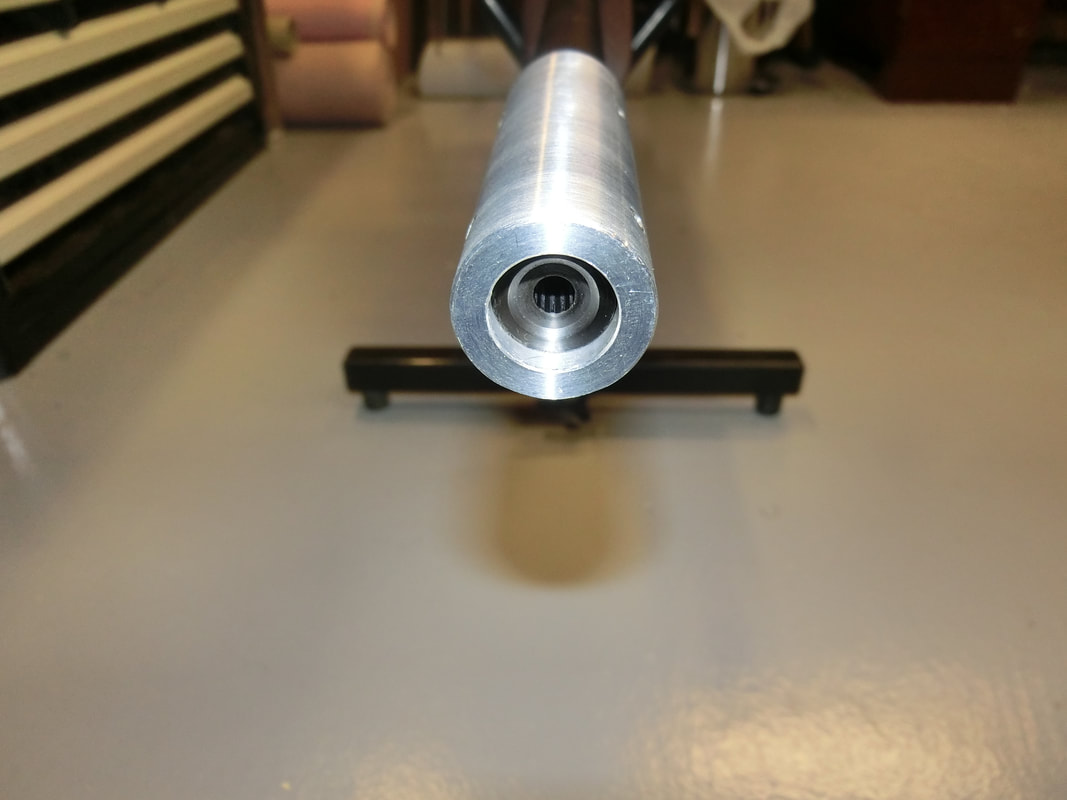
If you note, here I have a fully assembled and functional gun without the trigger guard, how is this possible?
Well, Eric designed and will include as part of the kit two plastic "D"s that allow you to get the gun back together to the point where you can actually shoot it, and still have completely open access to the screws for adjustment.
You can see one of the "D"s in the picture above.
I tested the trigger in an "untreated" LGU trigger block (my LGV being "on loan" for a lengthy and really serious experiment), mainly to see what difference the 40-60 minutes of stoning and polishing parts would gain a shooter, but also to get a feeling of how narrow the market would be for Eric (difference would be between a few hundred to a few thousand).
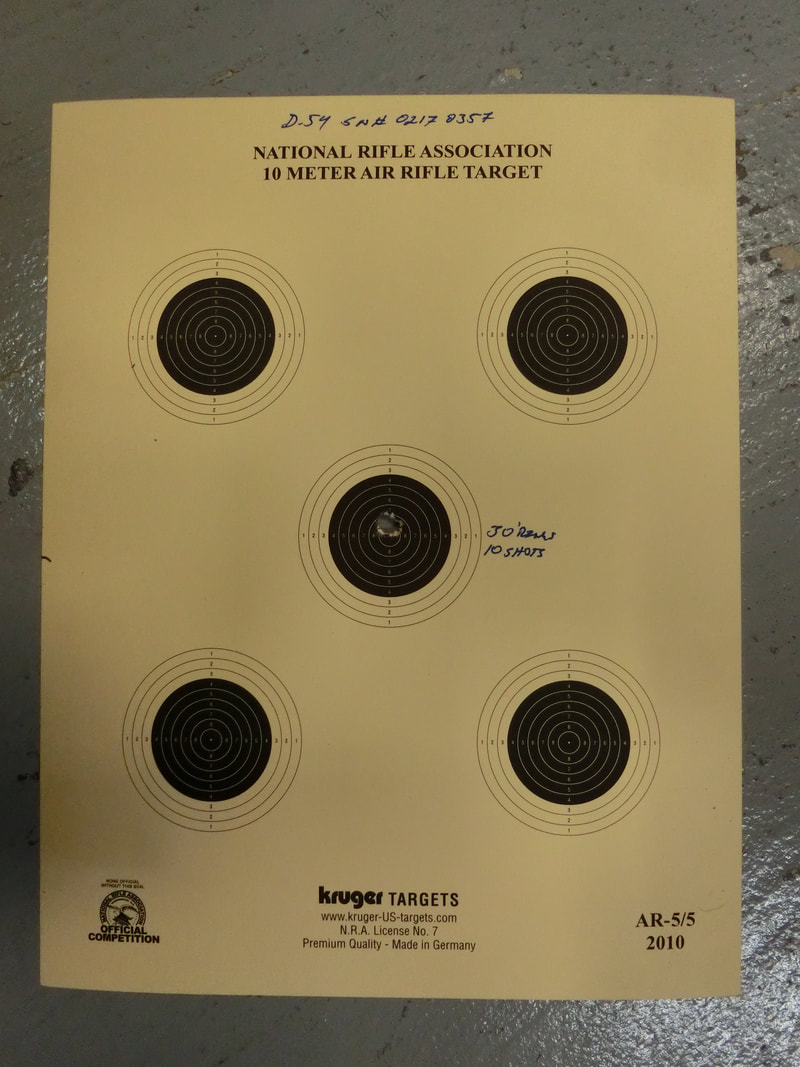
And I found out that the lightest trigger pull I could get was an extremely rewarding 1# 2 oz. with great consistency.
Almost anyone should be able to live with that.
In a stoned and polished trigger block, pulls can be lowered to levels that I would not consider safe for 90% of the shooters (just watch Eric's video referenced below), but in the end it is each and every one of us who are responsible for our actions.
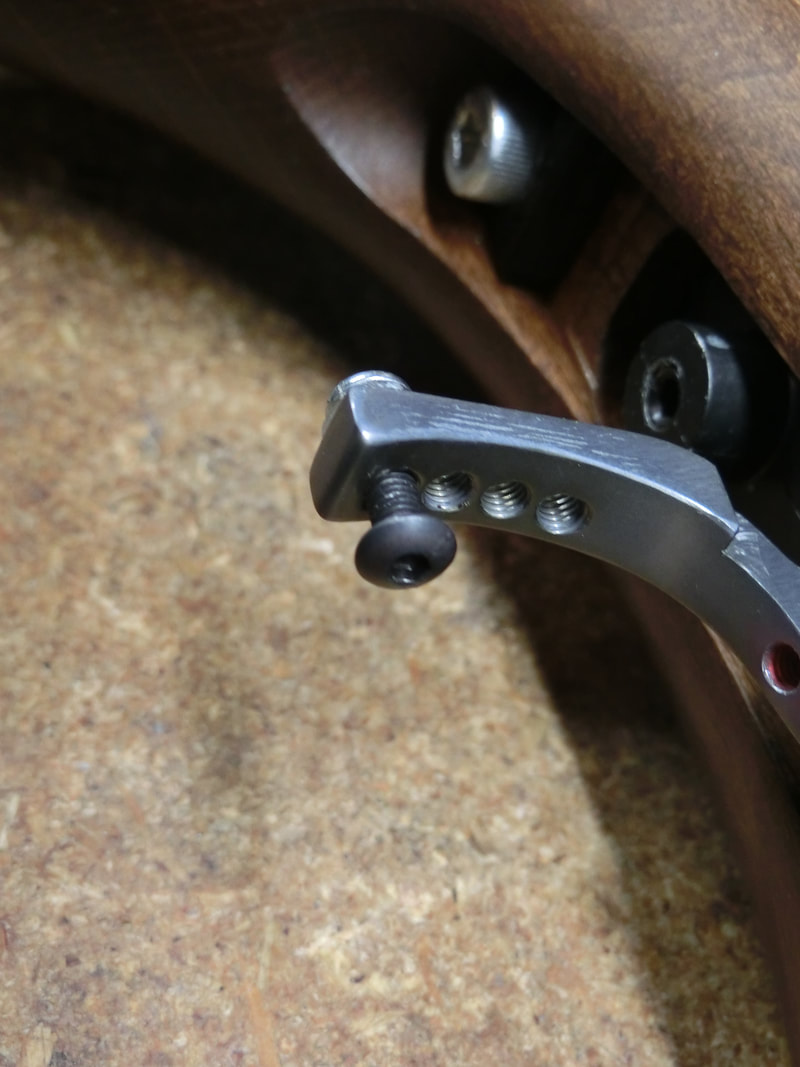
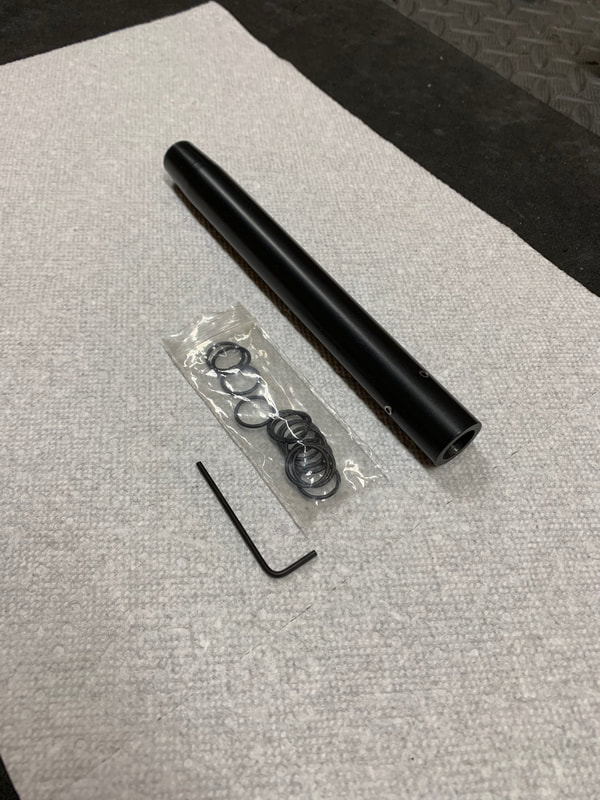
Eric has also agreed to send, to those that request it, a "ball end" for the pressure plate, something like this:
At trigger pulls above 1# this is somewhat tiring in the long run, but below that it is an eminently usable solution.
If you note, here I have a fully assembled and functional gun without the trigger guard, how is this possible?
Well, Eric designed and will include as part of the kit two plastic "D"s that allow you to get the gun back together to the point where you can actually shoot it, and still have completely open access to the screws for adjustment.
You can see one of the "D"s in the picture above.
I tested the trigger in an "untreated" LGU trigger block (my LGV being "on loan" for a lengthy and really serious experiment), mainly to see what difference the 40-60 minutes of stoning and polishing parts would gain a shooter, but also to get a feeling of how narrow the market would be for Eric (difference would be between a few hundred to a few thousand).
And I found out that the lightest trigger pull I could get was an extremely rewarding 1# 2 oz. with great consistency.
Almost anyone should be able to live with that.
In a stoned and polished trigger block, pulls can be lowered to levels that I would not consider safe for 90% of the shooters (just watch Eric's video referenced below), but in the end it is each and every one of us who are responsible for our actions.
Eric has also agreed to send, to those that request it, a "ball end" for the pressure plate, something like this:
Have not tried it, but it makes a lot of sense.
I was very happy to work with Eric on this project, and since he is still in the pre-production phase, there are some changes that will be inevitable.
BTW, you can see Eric's video here: https://www.youtube.com/watch?v=jvndvLfzug0&feature=youtu.be
If you are interested in finding out more about this trigger, or if you want to buy one, drop Eric a line at:
[email protected]
Let him know you saw this, please.
;-)
Keep well and shoot straight!
HM

 RSS Feed