Open Sights vs. Low Power Scopes
Guest Blog by Matt Coulter
INTRODUCTION.-
One of the privileges, and pleasures, of being a custom airgunsmith and, partly, a sort of "Ambassador" for a well known brand (DIANA), is that I get to meet extremely interesting persons.
In particular, I have found airgunners to be a special breed of shooters and hunters.
Most of us are VERY ETHICAL in our hunting practices, and also extremely sportspersonlike.
Not that we can be characterized as "Adults", LOL! but we are truly mature and rational "human beans" (yes, I do joke now and then).
For the most part.
Yes there are exceptions, but they are few and far between.
I met Matt Coulter when he reported in a well known forum (GTA) that his DIANA 48 would not cock and, finally, the cause was traced to the stem coming completely separated from the body of the piston. That, obviously, was a "Red Alert"; and with Matt's help, we were able to trace the lot and date where that piston was produced and steps were taken, and are still being taken, to improve on a method that is about 80 years old and that was useful when materials and precision machining capabilities were not what they are today.
Matt has an excellent background on Photography and Technical Writing, so it was almost natural for me to invite him to write, not about that piston, UMAREX stood honourably up to the plate and that situation was resolved, but on a specific interest of his, which was shooting with light-weight guns and, in particular, iron sights.
We've been working at this over the last 8 months, and there have been some of the normal (to spring-guns) disruptions and "events". All in all, Matt handled them all with aplomb and the resulting article is full of useful information that, for sure, will help those airgunners that are interested in good marksmanship, but not at the cost of adding a 2 lb optical "brick" atop their airguns.
So, without further ado, here are Matt's experiences and findings, hope you all enjoy the hard work presented here as much as I did.
Part 1.- The gun, The scope, The shooter
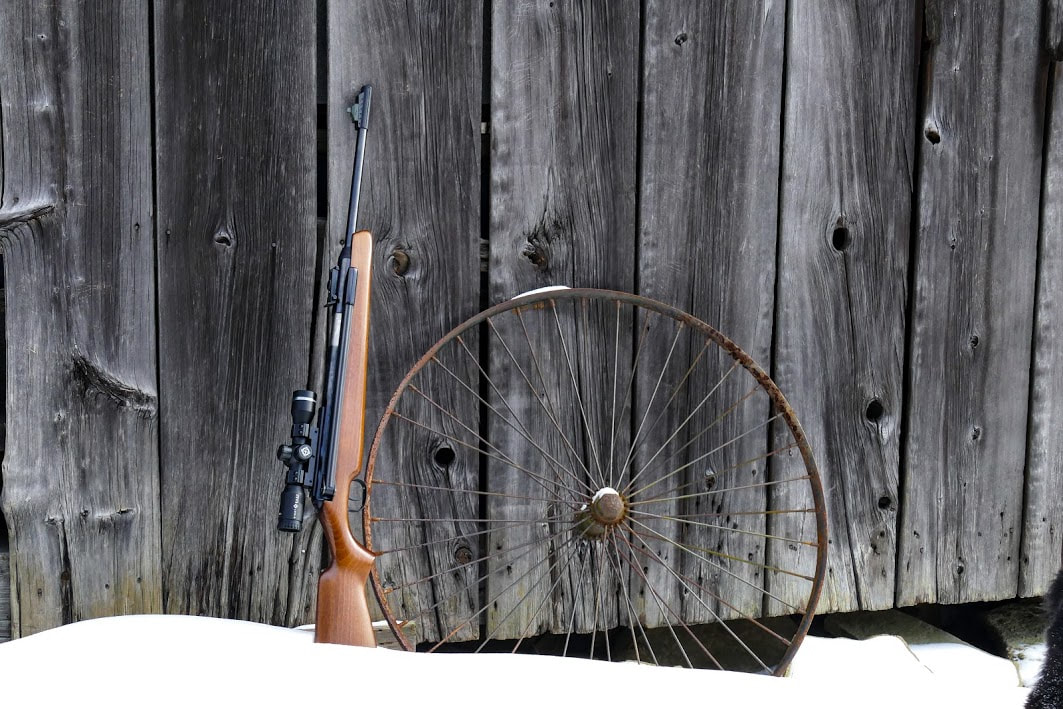
OK, I will admit that I’m guilty of having a “Turn it up to 11!” mentality when it comes to rifle scopes and their magnification. Having studied photography and being a former photojournalist, I have always enjoyed and appreciated anything with a lens. But, as “luck” would have it, my .22 caliber Diana model 48 ate my scope and fortunately, an opportunity to try a very different scope was presented to me and I jumped at the opportunity!
Late last year I shared this scope-busting experience in an online post titled “Open sight fun w/D48” on the Gateway to Airguns forum. Following this post came an offer to evaluate a diminutive, low-power scope. To be quite blunt, I would have been quick to overlook this little scope when researching options for a new scope. Outside of this offer to check it out, this specific model scope would not have been on my radar.
And I’ll just come out and say it... on paper it’s really hard to get excited about a 3x32 scope. But hold on a minute - I’m really glad that I’ve been able to shoot with this glass. There’s a TON that can be learned from a low-power scope.
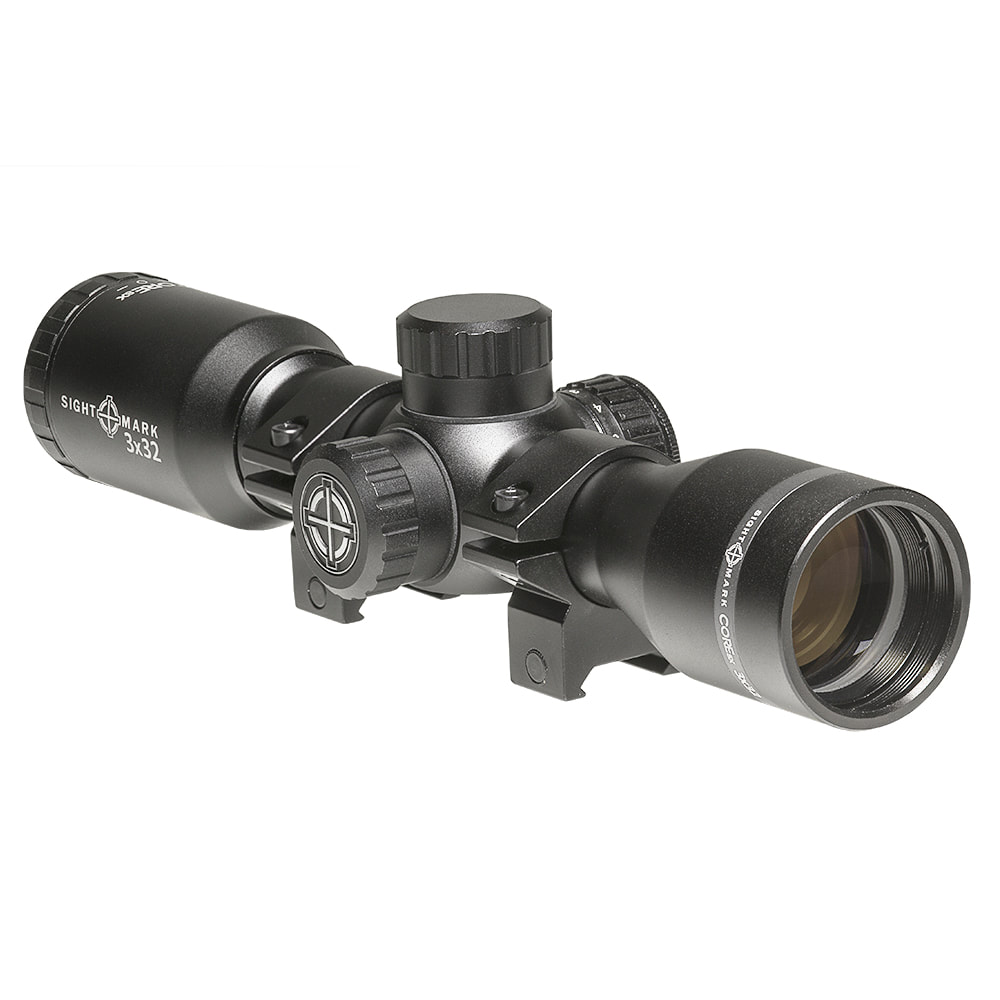
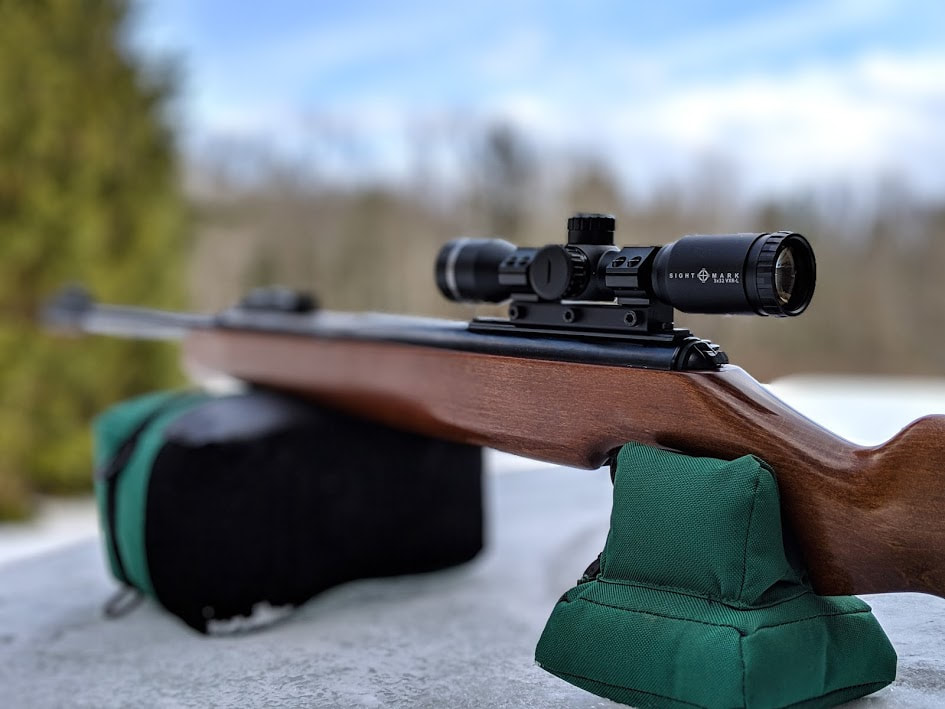
Oh, by the way, I should also mention this is actually a crossbow scope. Yes, a crossbow scope. Specifically the Sightmark Core SX 3x32 Crossbow Scope. (Note by the Editor.- This scope is now discontinued and has been replaced by the 1.5-4.5X32 scope that presents the same facilities and more versatility)
Below are five revelations from shooting with the Core SX scope:
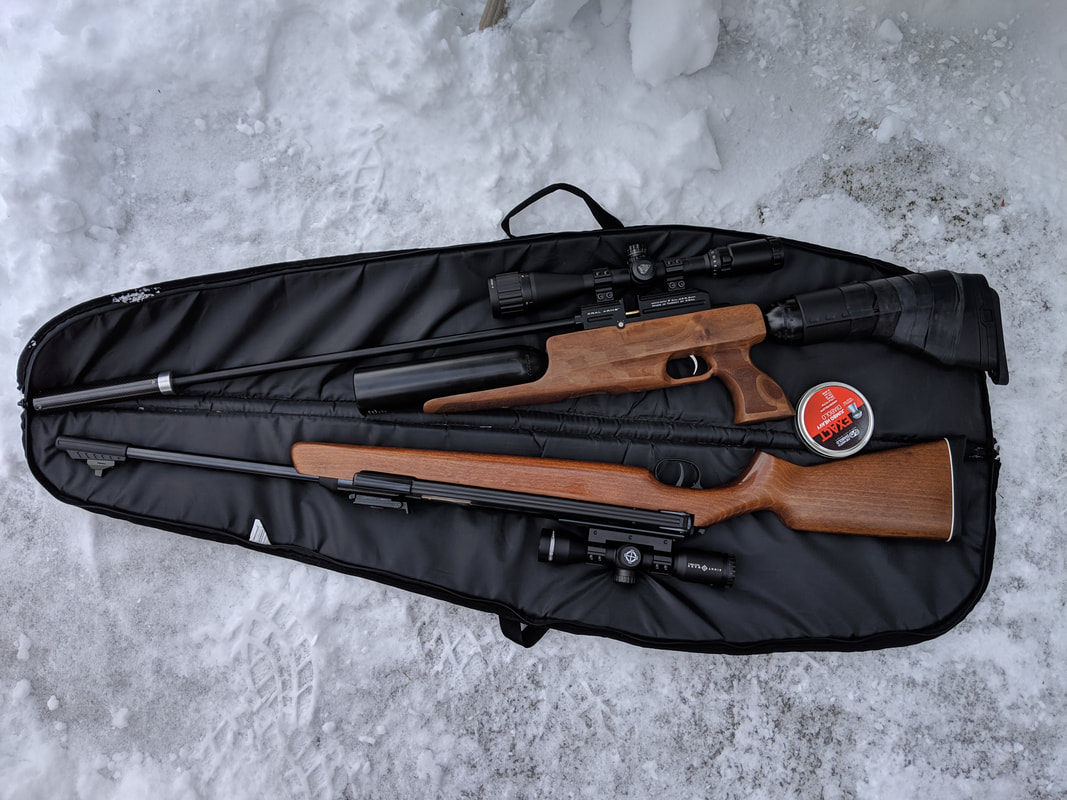
1. Weight matters
Eight ounces may not sound like much, but when this mass is perched up on top of your rifle in rings, that extra half-pound difference can definitely be felt. The Core SX scope weighs in at 14 ounces and that’s a nice savings that can be felt over the 22 ounces of the other scopes I’ve used.
Late last year I shared this scope-busting experience in an online post titled “Open sight fun w/D48” on the Gateway to Airguns forum. Following this post came an offer to evaluate a diminutive, low-power scope. To be quite blunt, I would have been quick to overlook this little scope when researching options for a new scope. Outside of this offer to check it out, this specific model scope would not have been on my radar.
And I’ll just come out and say it... on paper it’s really hard to get excited about a 3x32 scope. But hold on a minute - I’m really glad that I’ve been able to shoot with this glass. There’s a TON that can be learned from a low-power scope.
Oh, by the way, I should also mention this is actually a crossbow scope. Yes, a crossbow scope. Specifically the Sightmark Core SX 3x32 Crossbow Scope. (Note by the Editor.- This scope is now discontinued and has been replaced by the 1.5-4.5X32 scope that presents the same facilities and more versatility)
Below are five revelations from shooting with the Core SX scope:
1. Weight matters
Eight ounces may not sound like much, but when this mass is perched up on top of your rifle in rings, that extra half-pound difference can definitely be felt. The Core SX scope weighs in at 14 ounces and that’s a nice savings that can be felt over the 22 ounces of the other scopes I’ve used.
In fact, here’s an open challenge to people reading this article, if you use a scope, try something new and remove it for a weekend of shooting. Not just a target, but a weekend! Use this “scope-free-weekend” as a reminder of what it’s like to shoot with open sights again. From my experience, doing this will give you a renewed understanding of not only the weight a scope adds to your rifle, also it will serve as a reminder of just how small targets are at the distances at which we commonly shoot and hunt.
2. Size matters
Admitted “your mileage may vary” here, but the action of “pointing” my Diana 48 feels great and more natural with the smaller scope just like with open-sights.
Also, low rings can typically be used with this 32mm scope where my other 44mm scopes need medium or high rings.
2. Size matters
Admitted “your mileage may vary” here, but the action of “pointing” my Diana 48 feels great and more natural with the smaller scope just like with open-sights.
Also, low rings can typically be used with this 32mm scope where my other 44mm scopes need medium or high rings.
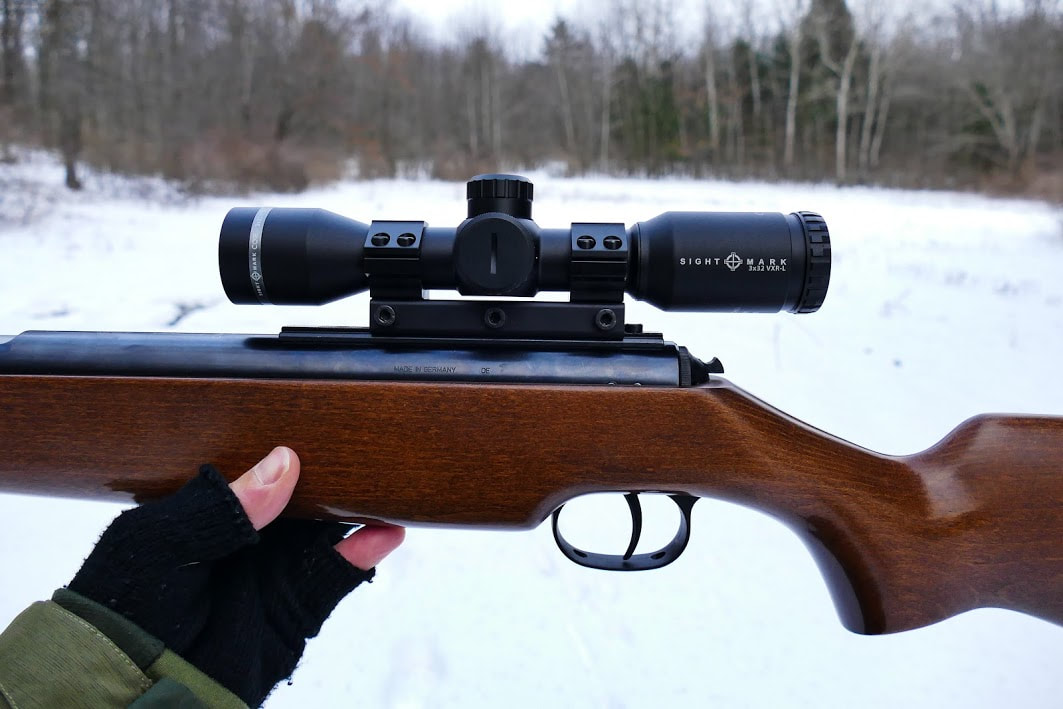
This 9-inch long scope works particularly well with the shorter length-of-pull on the Diana 48. Would this smaller scope work on every gun? Nope. Using the Core SX scope on some rifles (without offset or cantilever mounts) simply would not be feasible. My Kral PCP, with its very long (15-inch) length-of-pull, is barely usable with my 3-12x44 compact scope. For reference, here is how the Sightmark compares in length with a couple other of scopes:
Sightmark Core SX = 8.9 inches long
3-12x44 compact = 11.2 inches long
4-16x40 = 14.6 inches long
3. KISS and relax
“Keep It Simple, Stupid” or KISS is a laudable credo to follow. It is also one that pretty much defines the Core SX. Its magnification is fixed at 3-power and its parallax set for 30 yards. It does have an adjustable diopter (3 to -3), of course it has windage and elevation adjustments (.5 MOA), and an illuminated reticle. The reticle markings are finely etched (not fat wires) and are quite crisp. The crosshairs and four holdover points below it are very easy to read and are specifically configured for crossbow usage. These holdover points and are calibrated to 20, 30, 40, 50, and 60 yards with a crossbow shooting at 320 fps.
Spoiler alert - you may not need very many of the hold-over points with your typical airgun at 3x power :-)
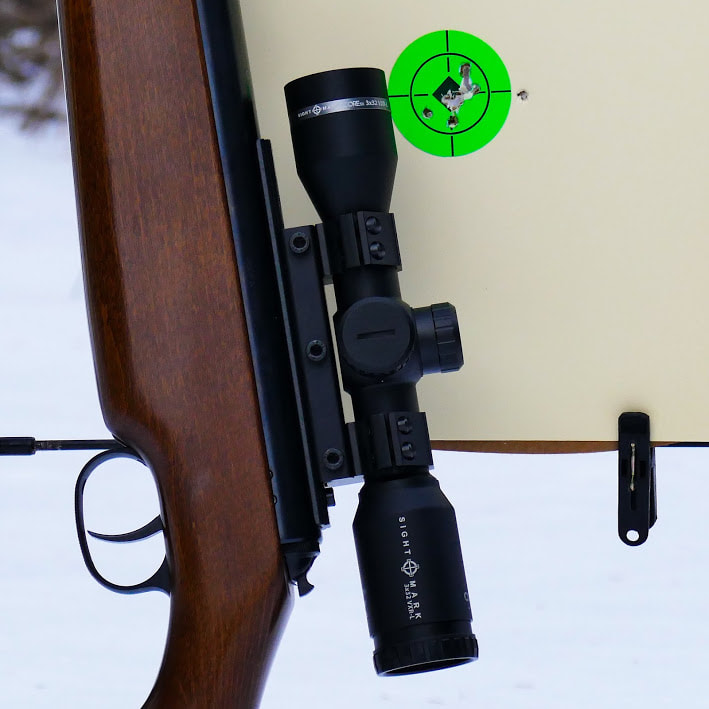
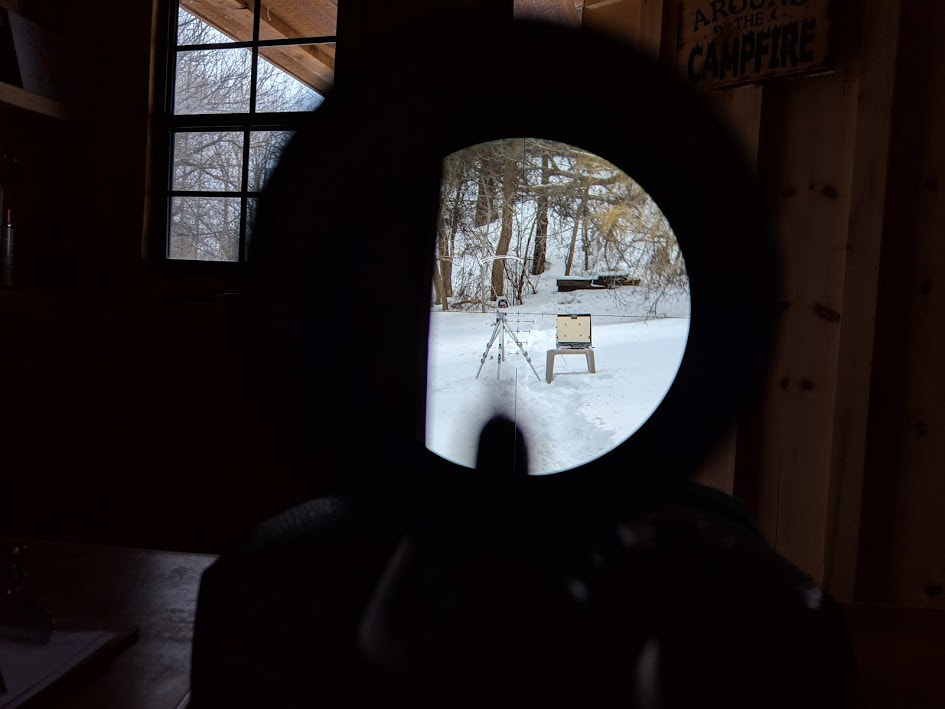
During my first weekend of informal testing I shot the Diana 48 off a monopod at distances that ranged from 10 yards to nearly 60 yards using JSB 15.9 grain pellets. Here in Central New York it’s winter and temperatures during this testing were just above 20f. The scope’s image at my zeroing distance of 10 yards was soft but usable. The actual zeroing of the scope was uneventful. Five shots downrange and I was hitting my bullseye. Aside from my initial zeroing and then an elevation adjustment for a further distance, I did not do ANY further fiddling with the scope.
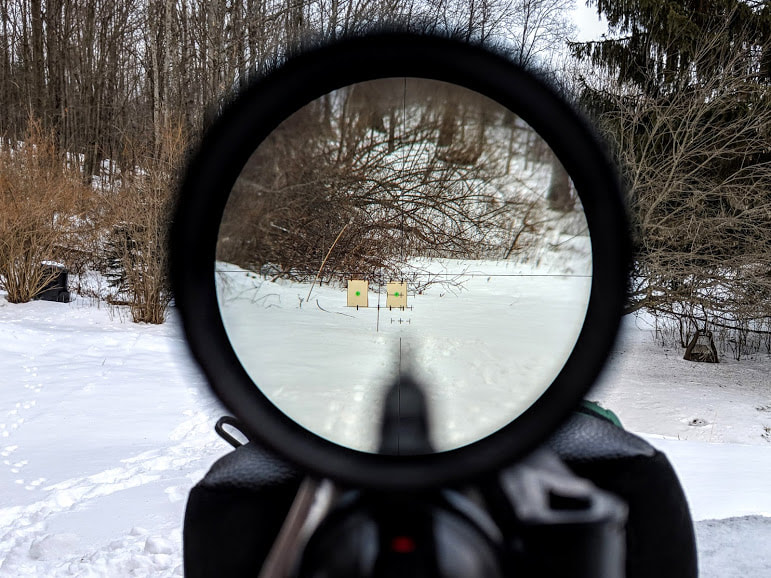
The bulk of my shooting at 25 yards. I can truly say that I was all smiles shooting at this distance with the Core SX. While seeing how this scope and my rifle got along, it was not long before individual shots became groups. Then those groups became defined enough to see through - even with a 3x scope at 75 feet!
The bulk of my shooting at 25 yards. I can truly say that I was all smiles shooting at this distance with the Core SX. While seeing how this scope and my rifle got along, it was not long before individual shots became groups. Then those groups became defined enough to see through - even with a 3x scope at 75 feet!
At this point I realized just how relaxed I was while shooting. This became even more apparent when switching from the Diana 48 with the 3x Sightmark scope to my Kral PCP with a 4-16 scope. One would presume that greater magnification would translate into better accuracy. Well, my experience was a bit different. I would consider accuracy between the Diana 48 springer and Kral PCP quite comparable at this distance. What WAS significantly different was the additional energy and “focus” that was required to keep the crosshairs on target when shooting the Kral with the higher-powered scope. I found that some of the fundamentals of shooting - natural breathing, relaxed muscles, and generally being in the “zone” - just came more naturally with the lower powered scope.
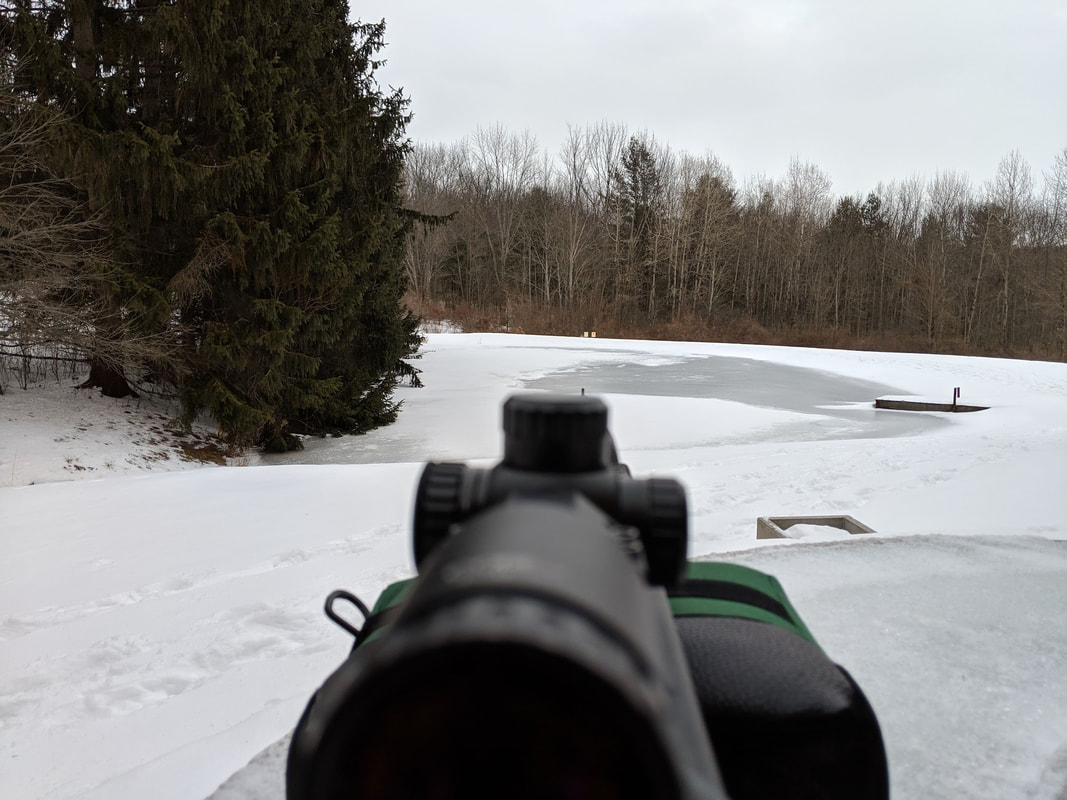
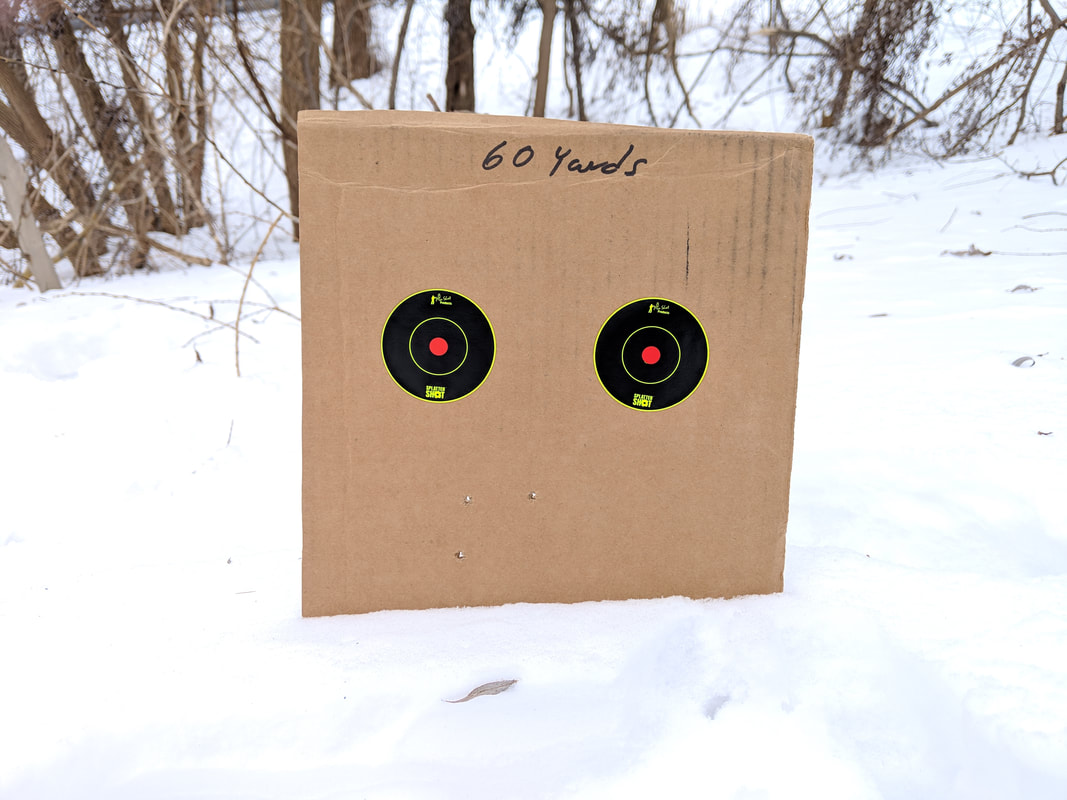
With the winter cold beginning to reach my bones and my fingers getting numb, I figured it would be time for my final “Hail Mary” shots at a longer distance. I set my target at roughly 58 yards and guessed the holdover might be the second mark below the crosshairs. Fire the shot and listen… No telltale smack of the pellet punching its hole in the target. Hmmm… This would be my 1st lesson on holdover with a 3x scope. I was simply shooting too high. A little bit of holdover at this distance was all that was needed. A lower point of aim resulted in that satisfying smack of the pellet hitting the target. No, I didn’t have a chance of seeing the .22 inch holes on my 60-yards target, but what is missing in magnification is made up for by a wonderfully bright and clear image. Ultimately, I was quite pleased with not only hitting the target with a minor adjustment, but when I walked around the frozen pond that I was shooting over, I was actually pretty pleased with the resulting groups!
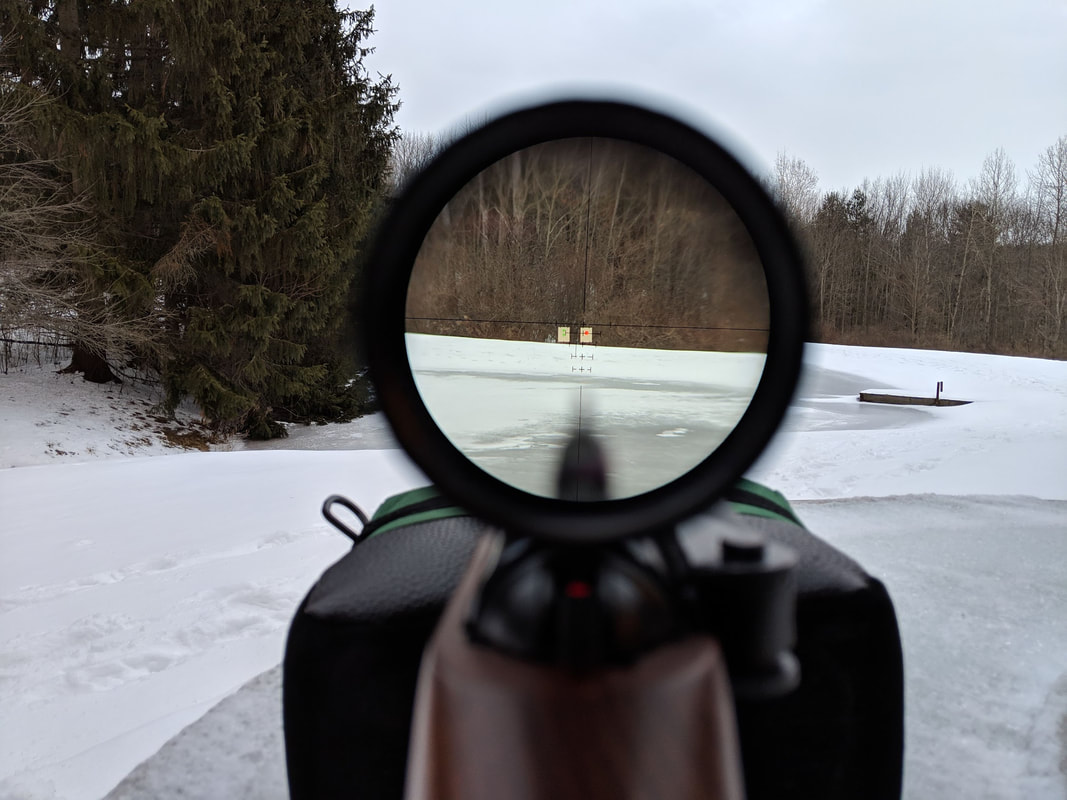
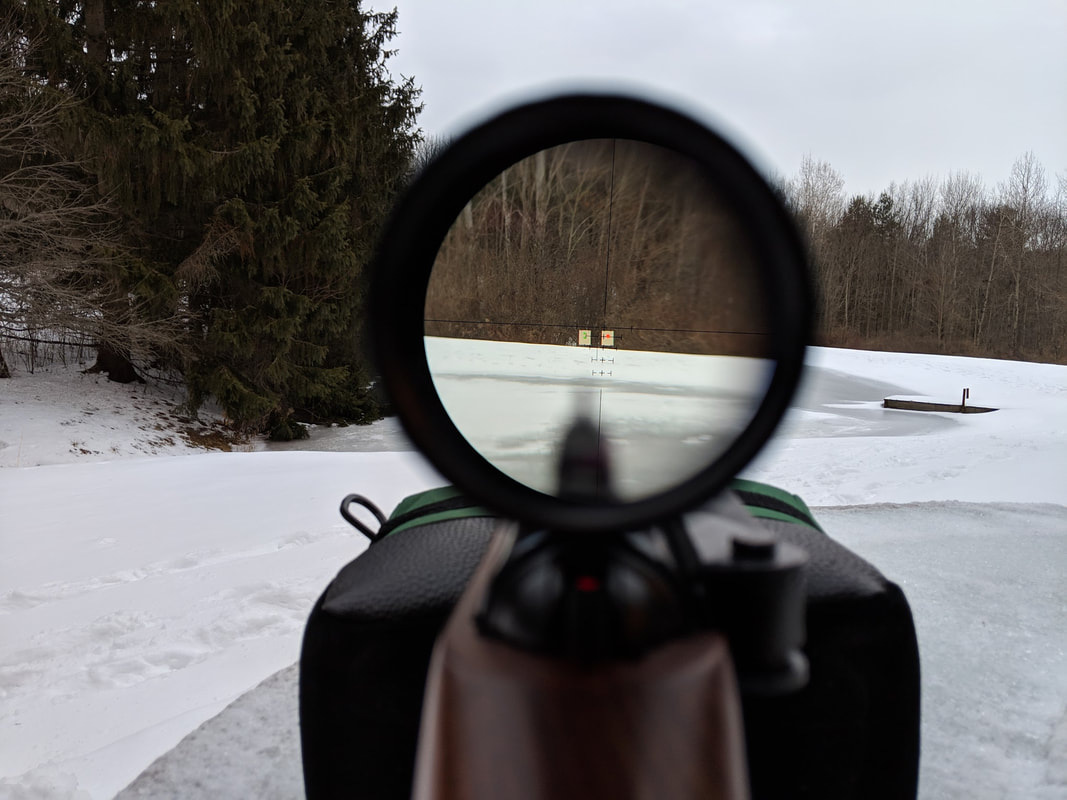
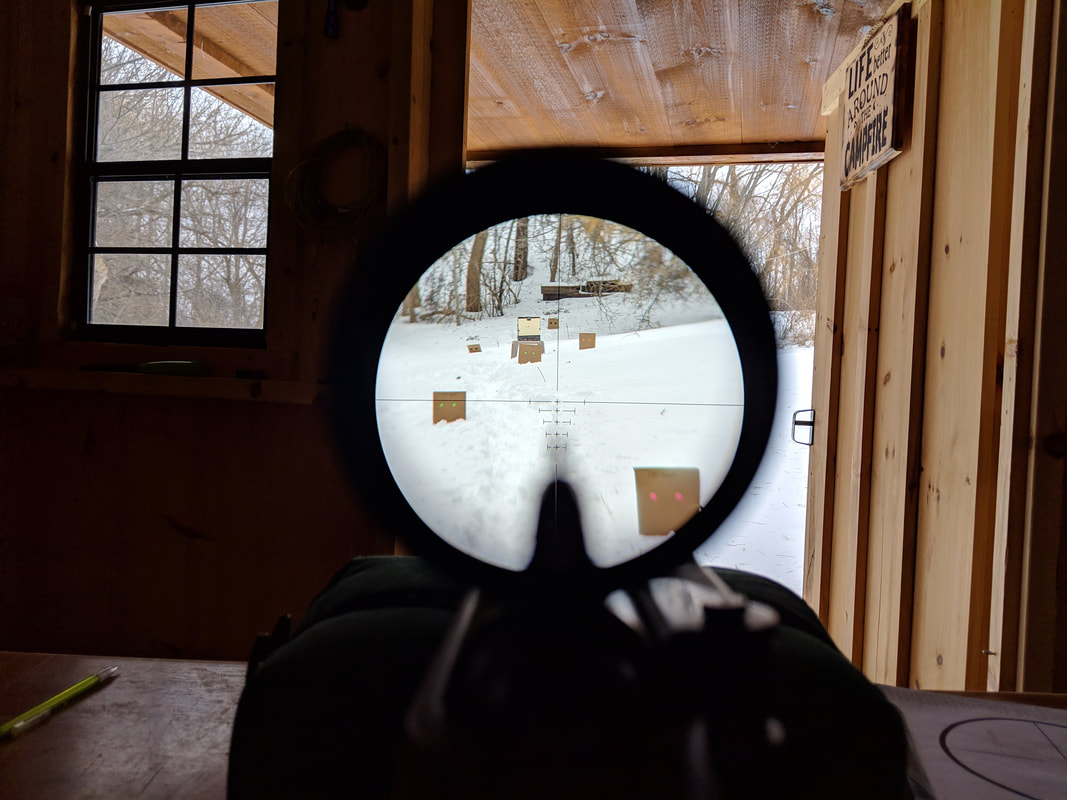
4. Is seeing the barrel a bad thing?
The first view that I took through the scope after mounting it was an interesting combination of amazement and disappointment. I was amazed at the brightness and sharpness of the image, but I was feeling deflated by the fact that the scope’s low-magnification allowed the barrel to be clearly visible in the bottom of the scope’s sight picture. This dark blob at the bottom of the sight-picture slowly became something new and rather unexpected. Seeing the barrel can actually be a HUGE advantage!
The first view that I took through the scope after mounting it was an interesting combination of amazement and disappointment. I was amazed at the brightness and sharpness of the image, but I was feeling deflated by the fact that the scope’s low-magnification allowed the barrel to be clearly visible in the bottom of the scope’s sight picture. This dark blob at the bottom of the sight-picture slowly became something new and rather unexpected. Seeing the barrel can actually be a HUGE advantage!
Perhaps this is commonplace to shooters using lower-power scopes, but the barrel, or perhaps more specifically the front-sight, essentially became a built-in level or “cant detector” while acquiring the target! You may notice in some of my scope photos where the alignment of the barrel/sight isn’t perfect. When your alignment and/or cant isn’t perfect, that the dark splotch in the bottom of the sight tilts one way or another. When your eye and scope are aligned and cant is compensated for, the barrel/sight and target all come into very nice alignment. Using this visual aid to help eliminate rifle canting really became second-nature in just one afternoon of shooting.
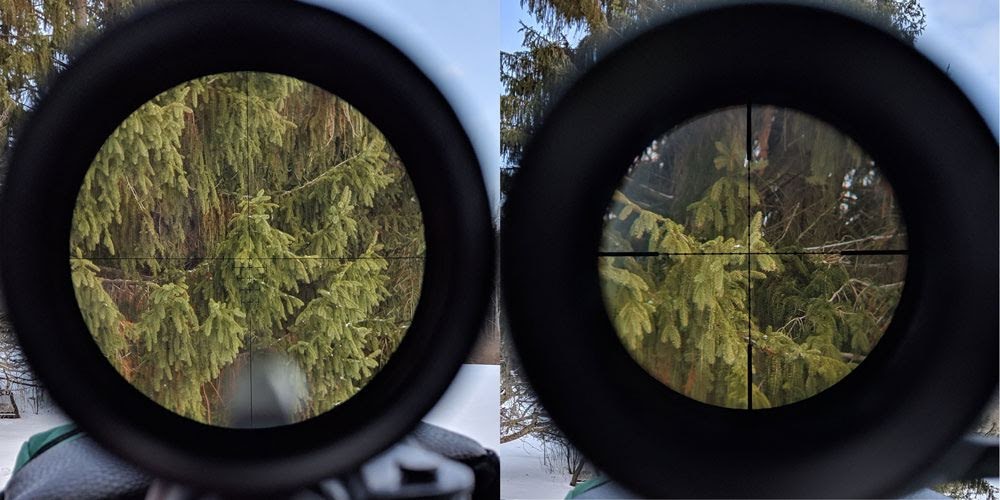
5. The incredible disappearing scope
No, I’m not talking about hocus-pocus here, but saying that the scope “disappeared” really was the best way to describe how it seems shooting with this scope. I’m sure this effect is just a combination of the scope’s low-magnification and large exit pupil, but more than any scope that I have used, this one allows me to see and visually engage both what is inside the scope’s field-of-view along with what is within my peripheral vision. I found my brain really was able to blend the two seamlessly.
No, I’m not talking about hocus-pocus here, but saying that the scope “disappeared” really was the best way to describe how it seems shooting with this scope. I’m sure this effect is just a combination of the scope’s low-magnification and large exit pupil, but more than any scope that I have used, this one allows me to see and visually engage both what is inside the scope’s field-of-view along with what is within my peripheral vision. I found my brain really was able to blend the two seamlessly.
Trajectory Testing
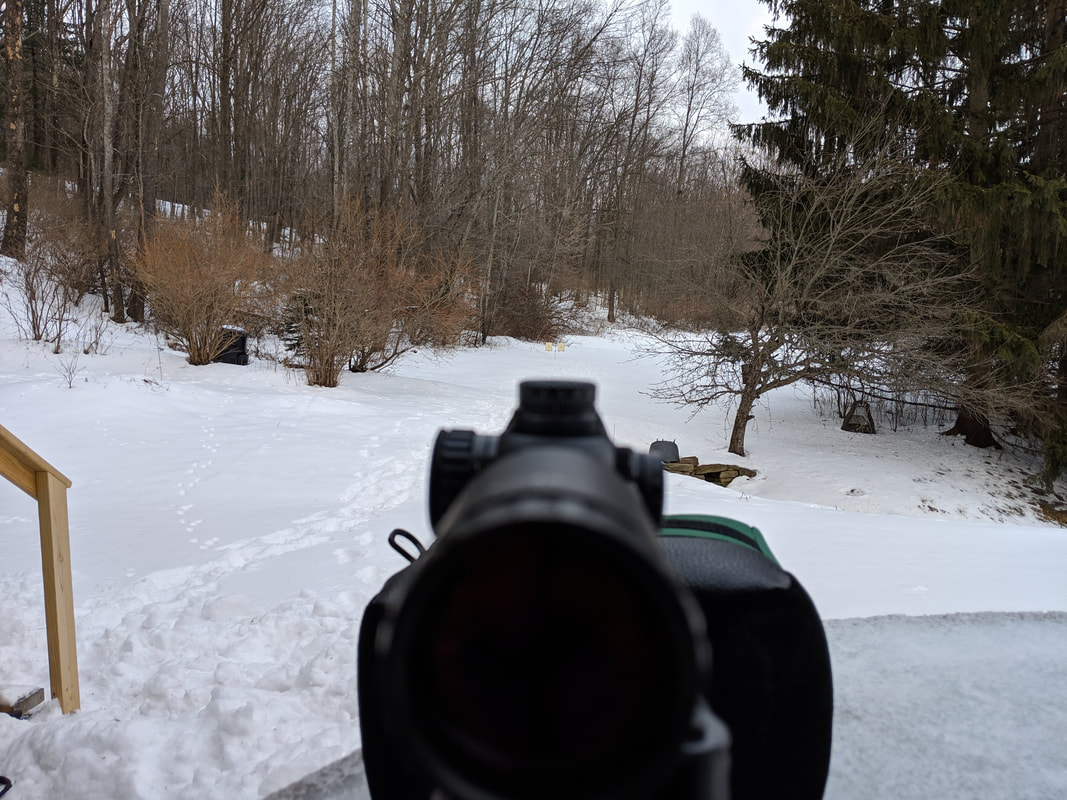
The week following my initial scope testing brought weather that cooperated well enough to continue testing with the Sightmark crossbow scope. Even though the weather in Central New York is typical for mid-winter - cold with temperatures hovering around 20f - the wind was manageable, so testing was a go!
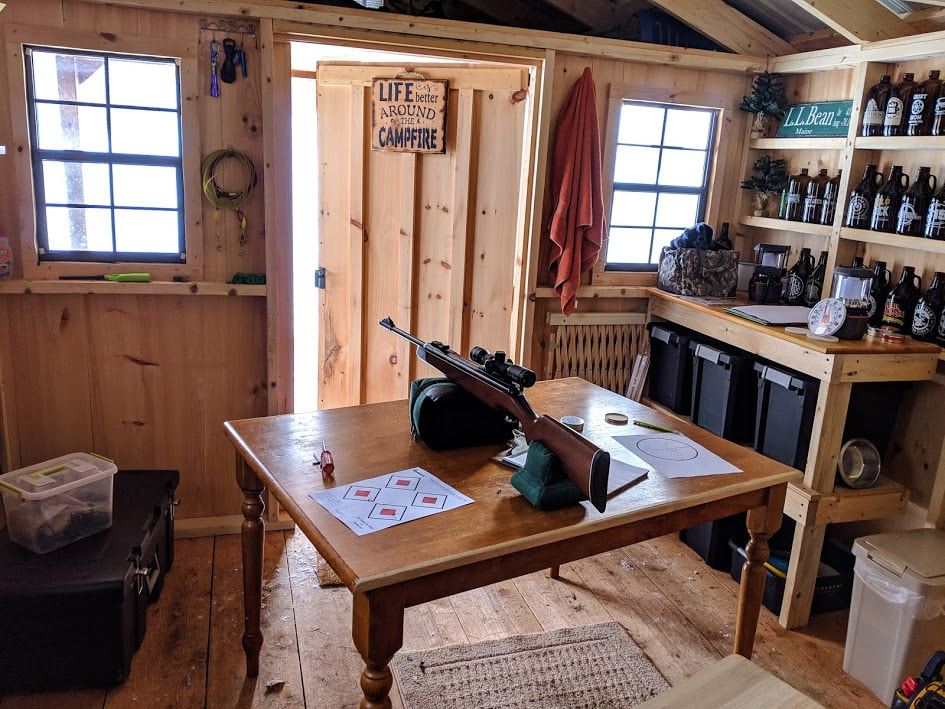
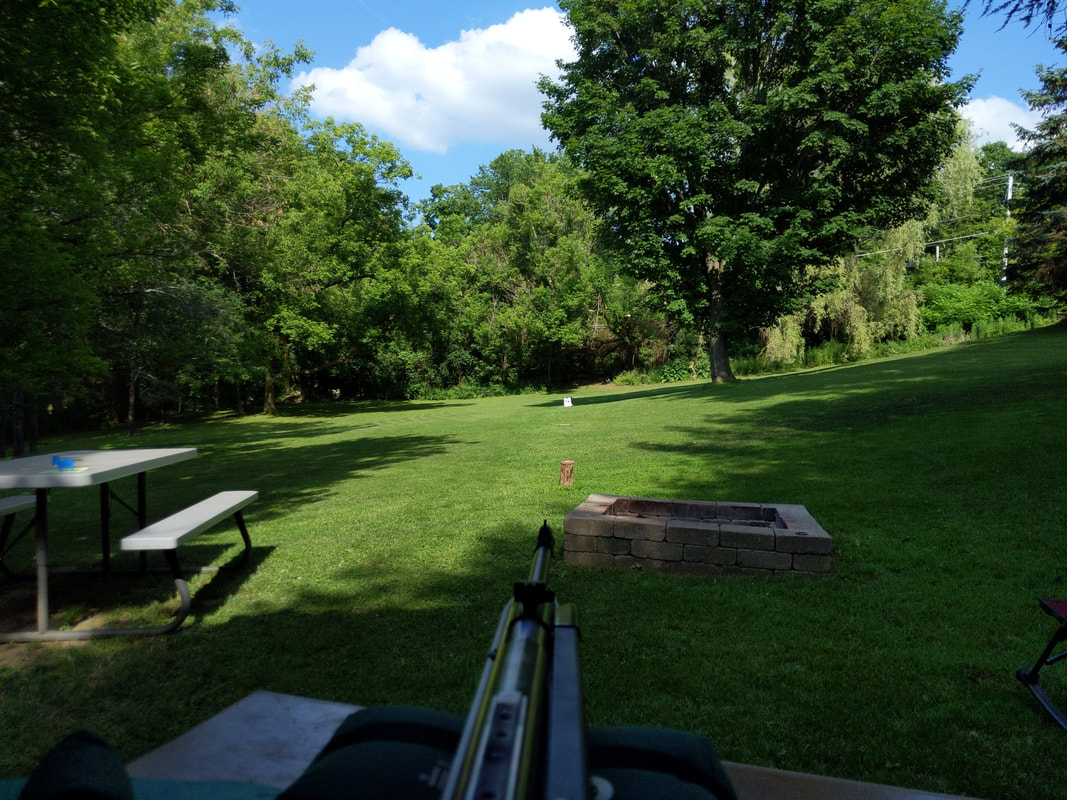
I’m fortunate enough to live in a location where I’m able to shoot to distances just over 60 yards in my backyard which I would consider a reasonable upper limit for target shooting with a 3x scope. Most importantly, this time of year, I was able to do this from inside a nice shed to be out of the elements.
The week following my initial scope testing brought weather that cooperated well enough to continue testing with the Sightmark crossbow scope. Even though the weather in Central New York is typical for mid-winter - cold with temperatures hovering around 20f - the wind was manageable, so testing was a go!
I’m fortunate enough to live in a location where I’m able to shoot to distances just over 60 yards in my backyard which I would consider a reasonable upper limit for target shooting with a 3x scope. Most importantly, this time of year, I was able to do this from inside a nice shed to be out of the elements.
My plans were to establish a baseline and confirm my assumptions regarding pellet accuracy and velocities. This initial testing was with JSB Exact Jumbo Express (14.3 grain) and JSB Exact Jumbo (15.9 grain) pellets. The JSB Exact Jumbo pellets were noticeably more accurate, so these were used exclusively after my initial velocity testing. The 15.9 grain JSBs were shooting at 740 fps. For “giggles” I also measured their velocity at 23 yards from the muzzle. The velocity at this distance dropped 50 fps to 690 fps.
Initial scope calibration and trajectory testing began at 23-yards. One of the first evaluations I wanted to run testing how changes to the point-of-aim (by using the hold-over points or “subtensions” on this 3-power scope) would translate into changes in the point of impact.
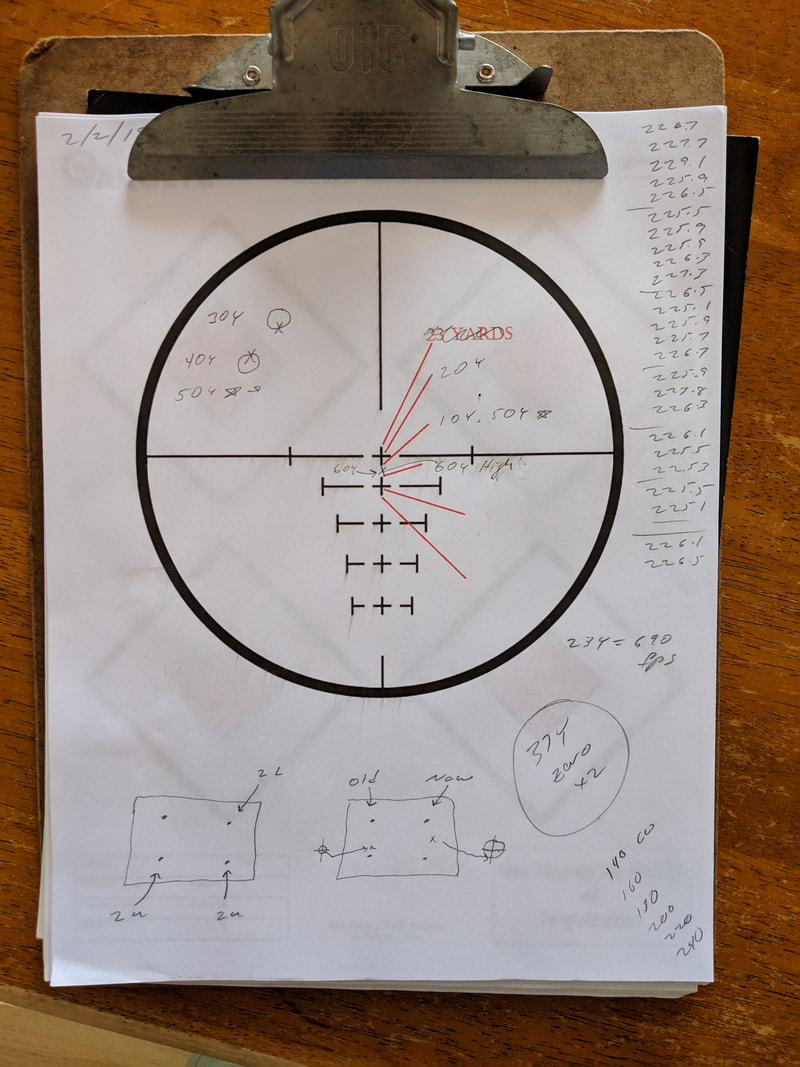
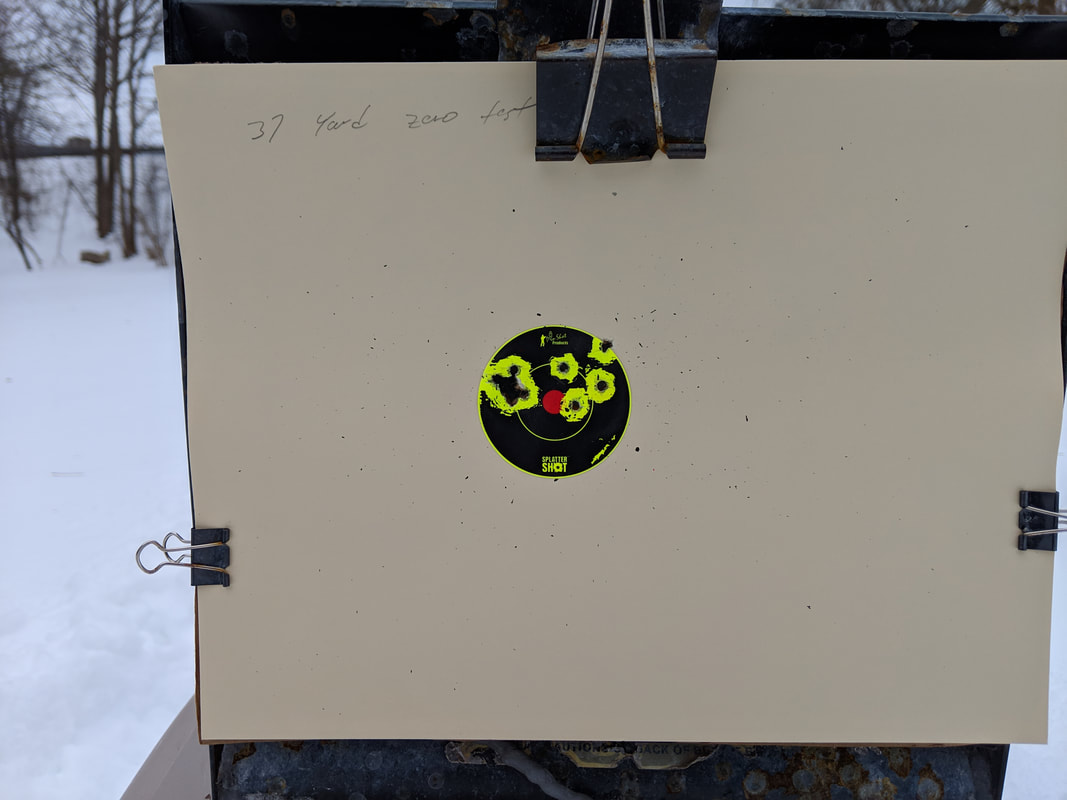
As we can see, the results were quite uniform and as expected we can see greater changes in point-of-impact between the reticle’s “plus-sign” markers than with the aimpoints within the “plus-signs”. However, as I moved my target to different distances, I soon noticed that the trajectory was still rising and I soon ran out of scope markings ABOVE the main crosshairs. Using Chairgun Pro’s “Optimum Zero” function, I selected 37-yards as my next distance for my zeroing the Sightmark Core SX scope. Chairgun Pro estimated a 1-inch “killzone” from 10 yards out to 40 yards.
Having used scopes in the 12+ power range for years, I was shocked how little adjustment (holdover) was needed with a 3x scope!
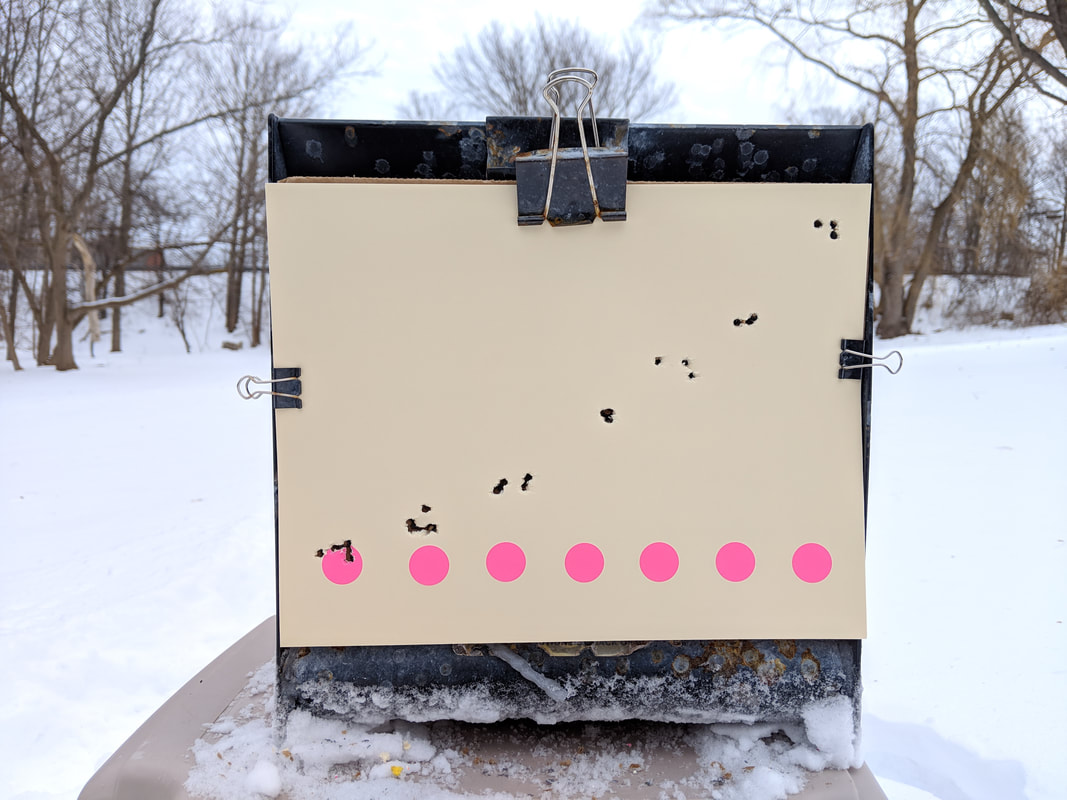
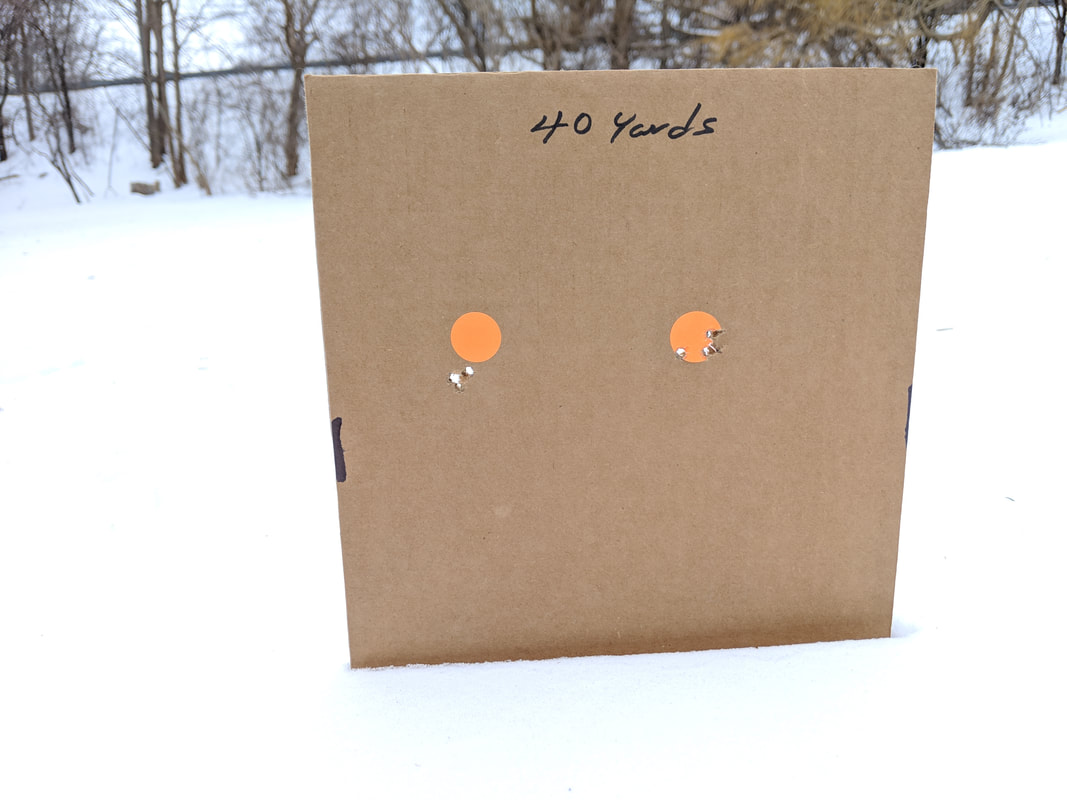
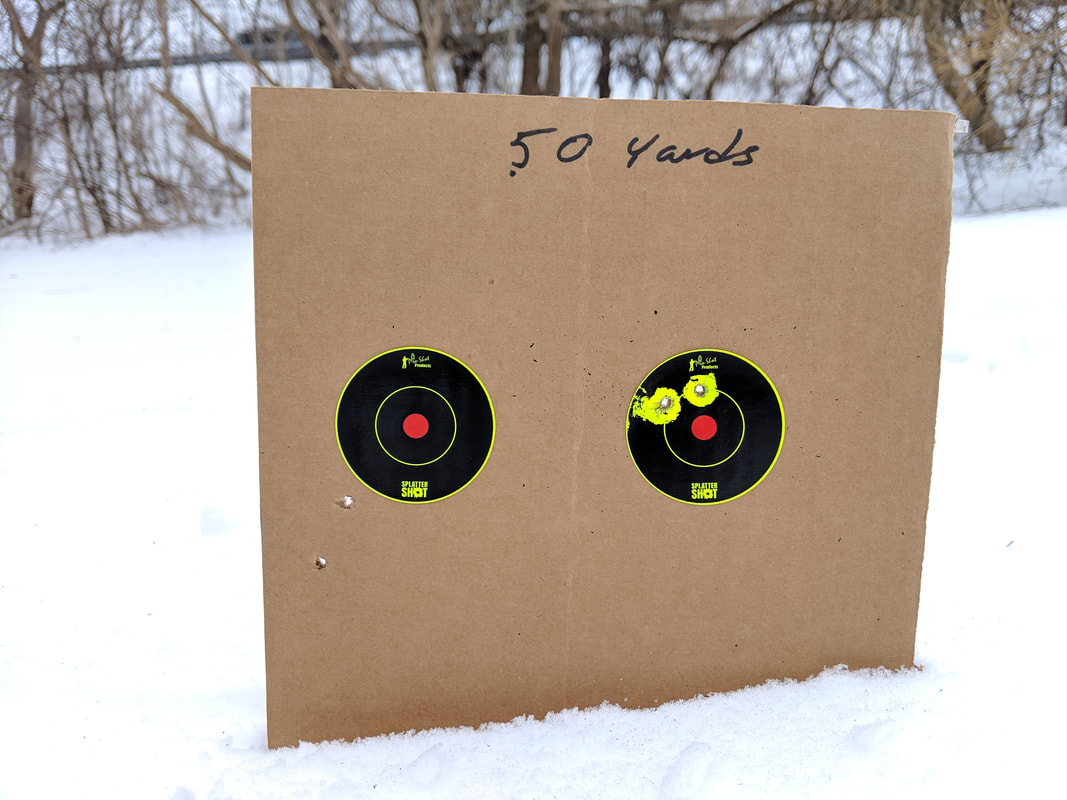
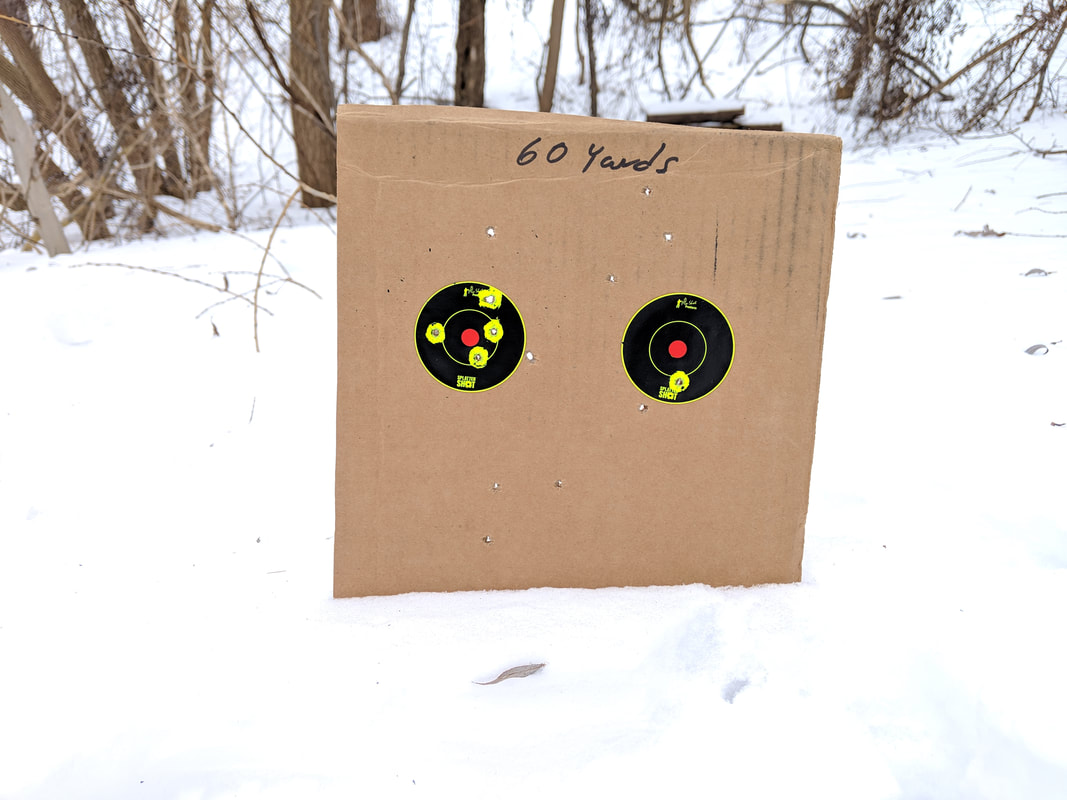
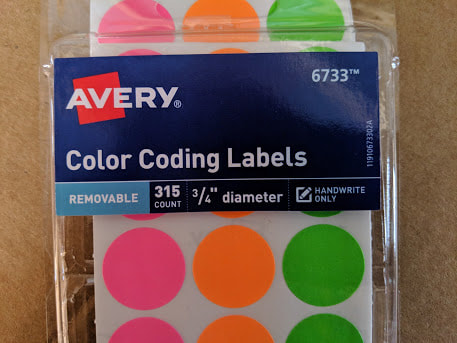
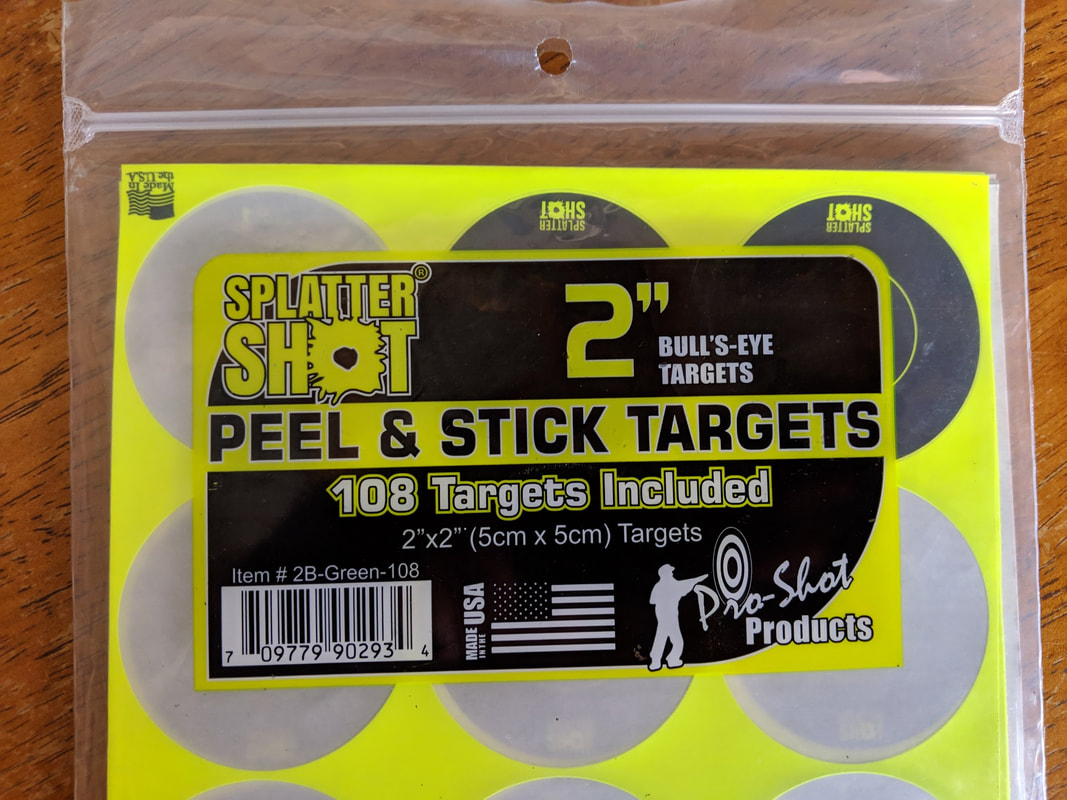
Speaking of bullseyes, I did not have any trouble seeing ¾ inch stickers at distances up to 40 yards. At 50 and 60 yards I switched 2 inch splatterburst stickers for better visibility and perhaps better consistency.
Speaking of bullseyes, I did not have any trouble seeing ¾ inch stickers at distances up to 40 yards. At 50 and 60 yards I switched 2 inch splatterburst stickers for better visibility and perhaps better consistency.
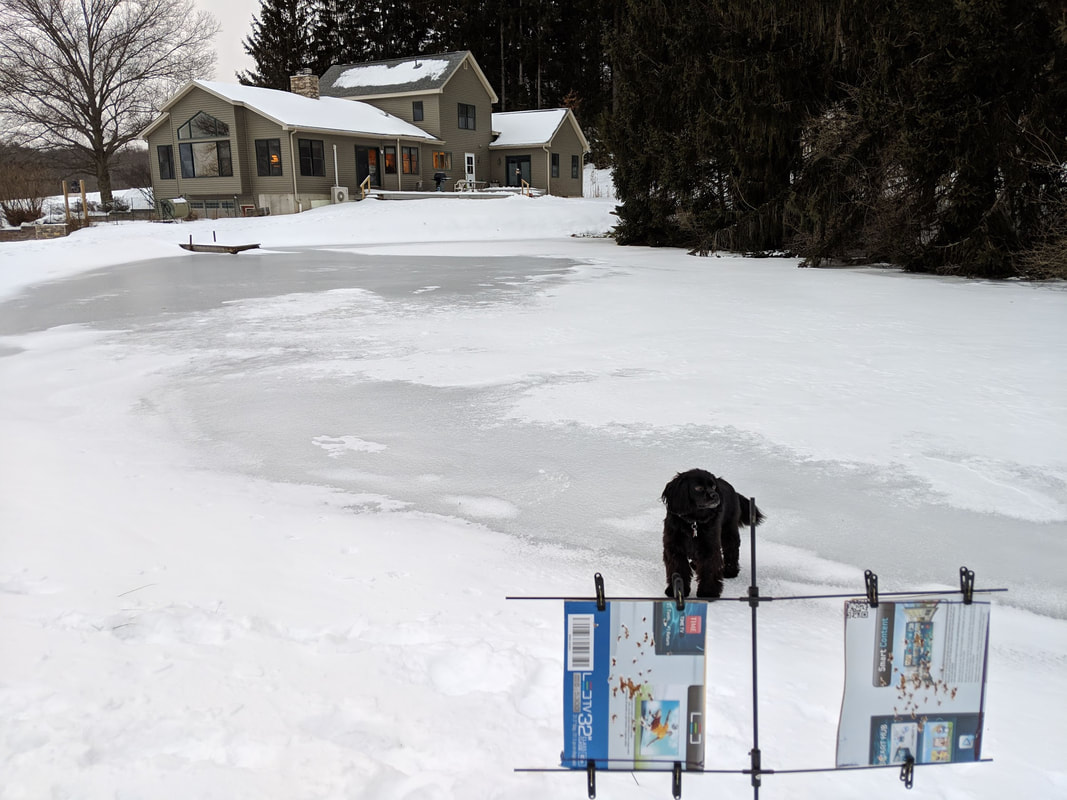
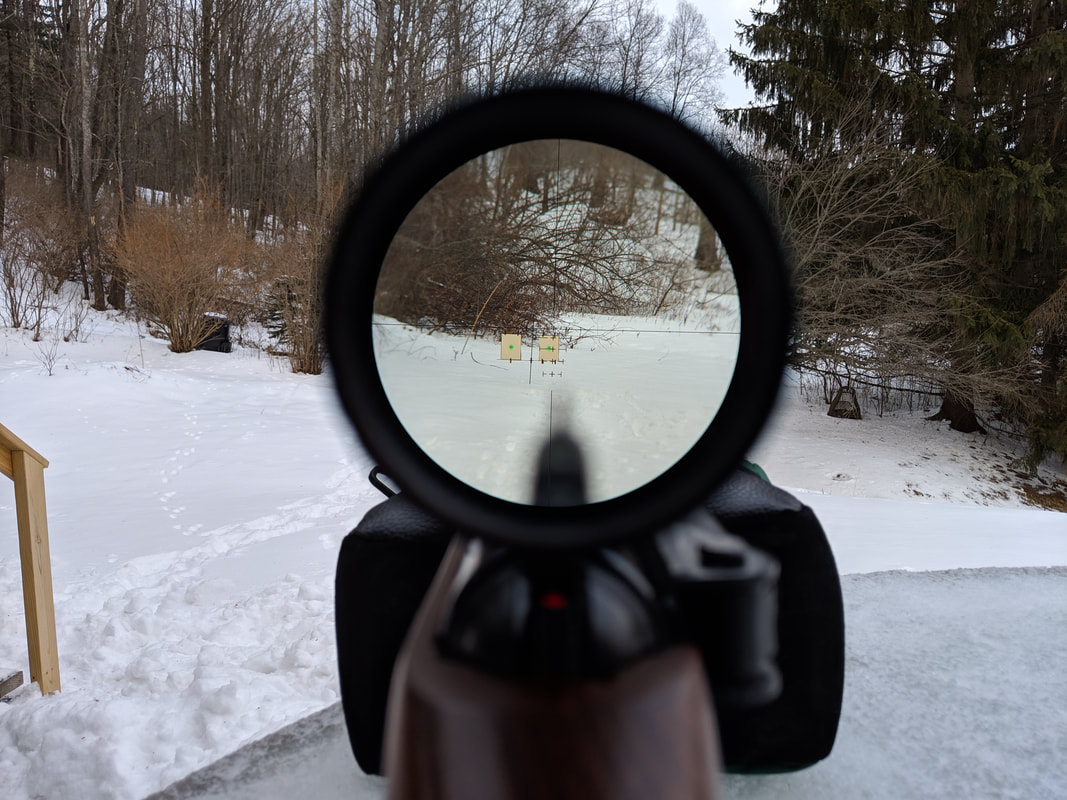
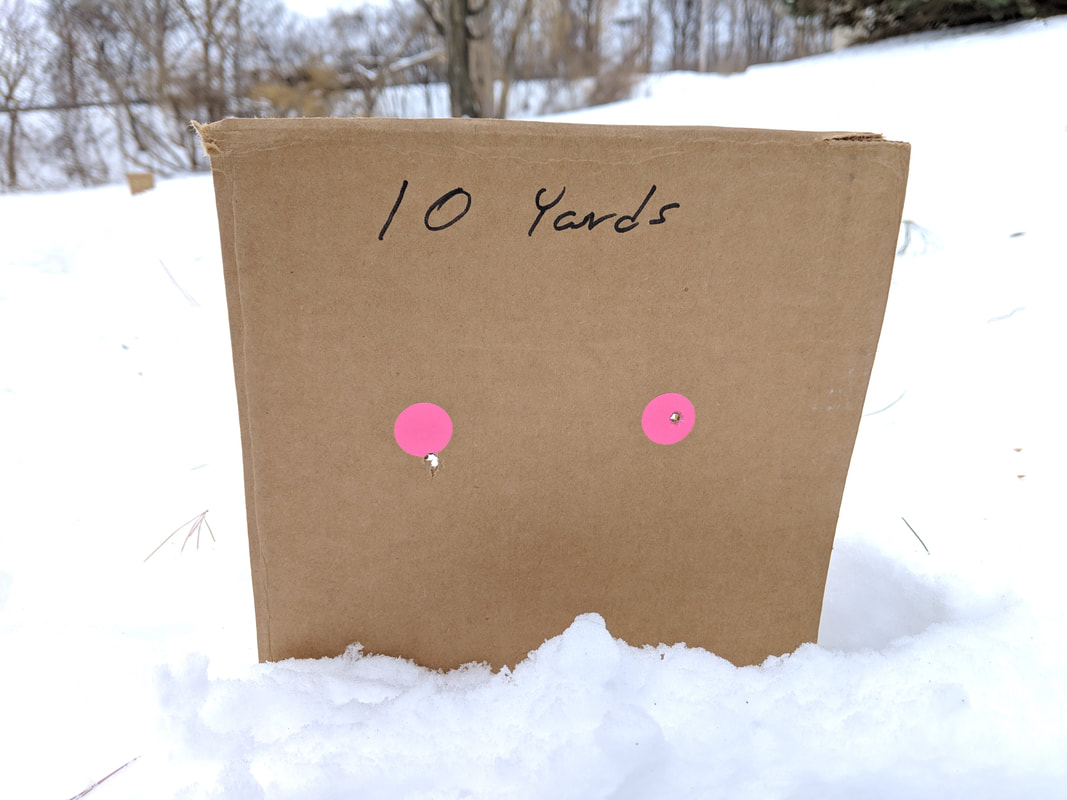
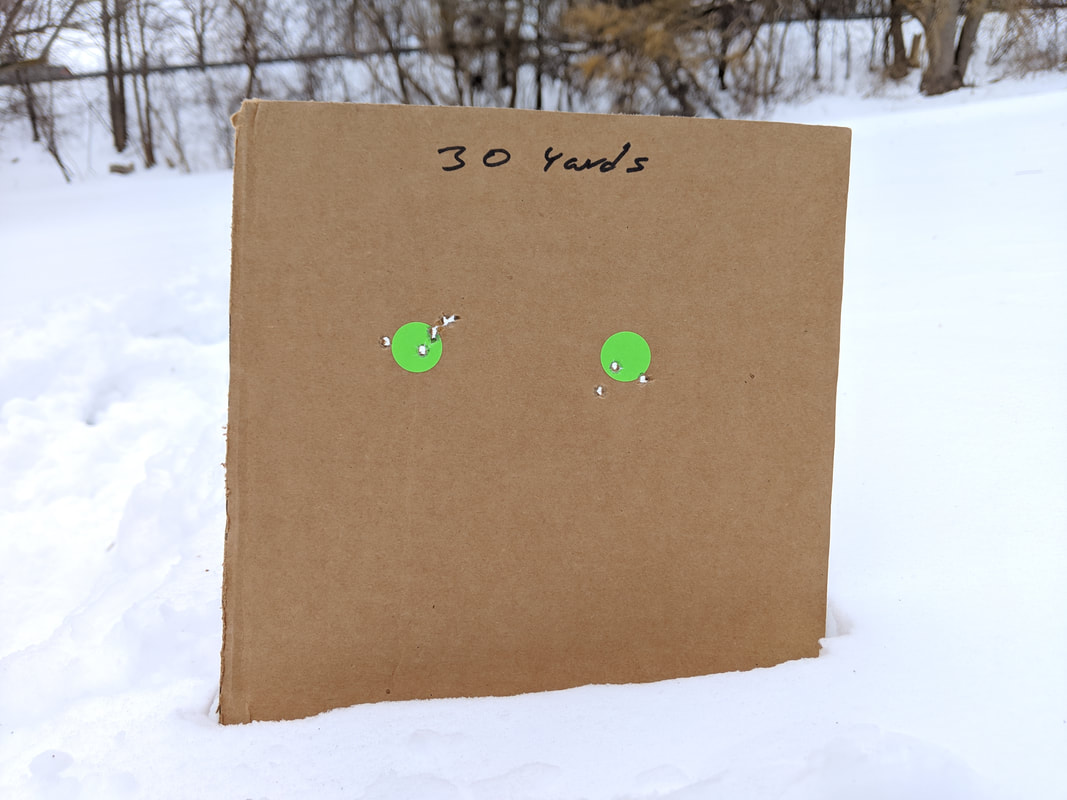
The most fun (and probably meaningful) test of the day was placing cardboard targets in the snow at distances of 10, 20, 30, 40, 50, and 60 yards. Each target had two aim points. At each distance, I would first aim directly at the left target to see where the pellet was impacting, then I would use the right target to determine elevation correction using the subtensions in the reticle.
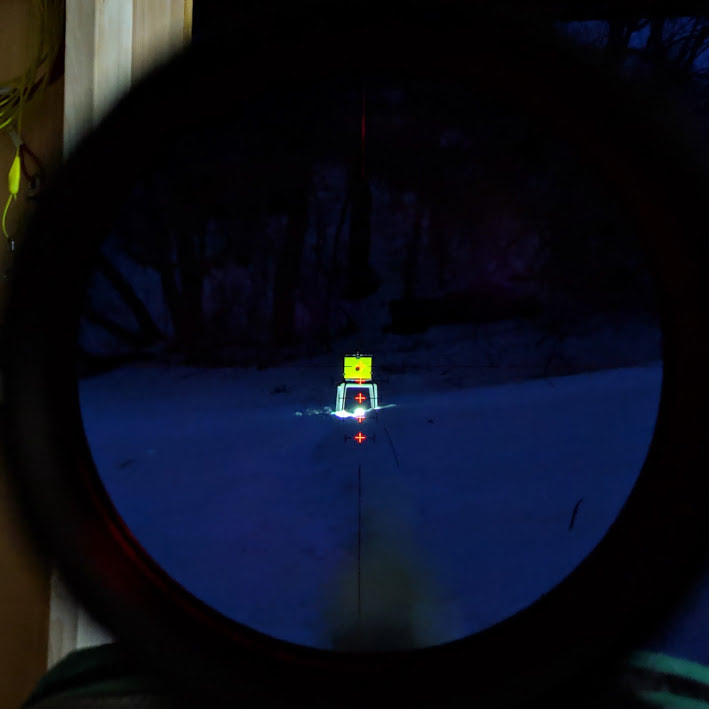
It is worth noting that the reticle’s illumination did start acting up after 200 or so shots. The scope just decided to turn its illumination on all by itself! I actually had to rotate the illumination brightness adjustment “on” to actually turn it “off”. That being said, I did sneak outside in the evening - actually just after dusk - to see how effective the illumination was in dim lighting conditions. In short besides the on/off issue, the actual quality of illumination was was both effective and pleasing to use.
Summary (so far…)
In short, this scope has been a pleasure to use. There is a lot to be said for its relative light weight and size. It truly matches-up well to the Diana/RWS 48 air rifle with its shorter length-of-pull. The scope’s clarity is great and this certainly contributes to it's ability to be VERY accurate out to 40 yards on targets that are ¾ of an inch in size. At 50 to 60 yard distances a ¾ inch dot is too difficult to resolve (to this shooter’s eyes at least) to accurately place the point-of-aim.
I will also be performing some comparisons to shooting unscoped with the rifle’s open-sights at varying distances. Stay tuned!
And 4 months later . . .
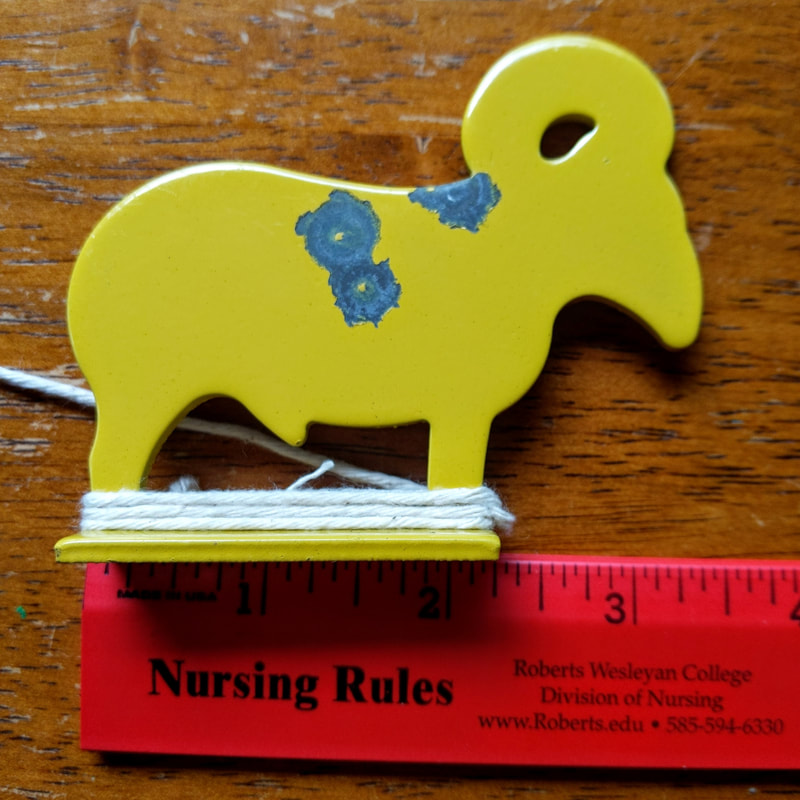
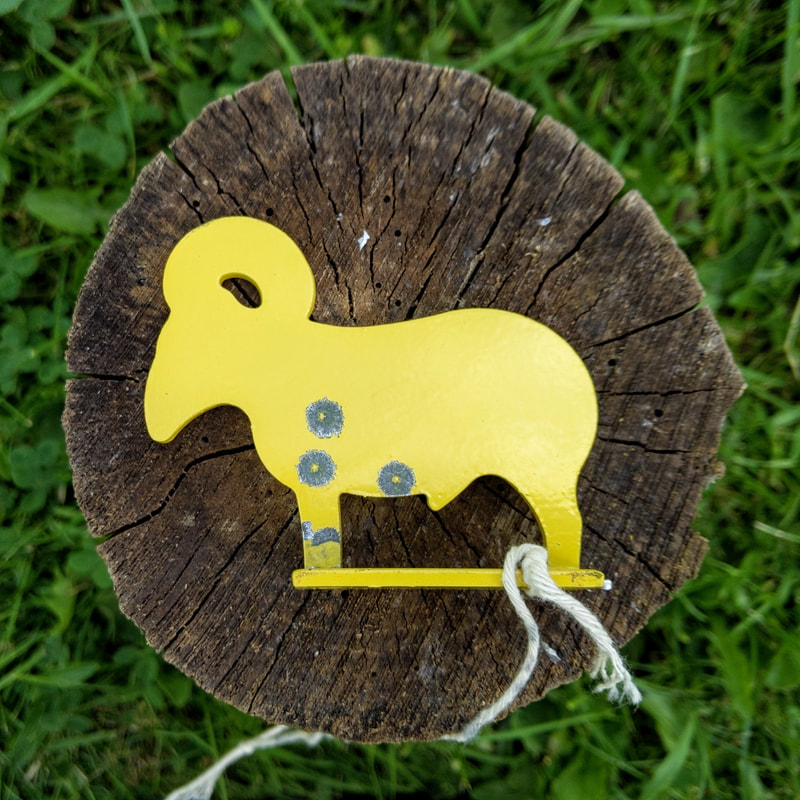
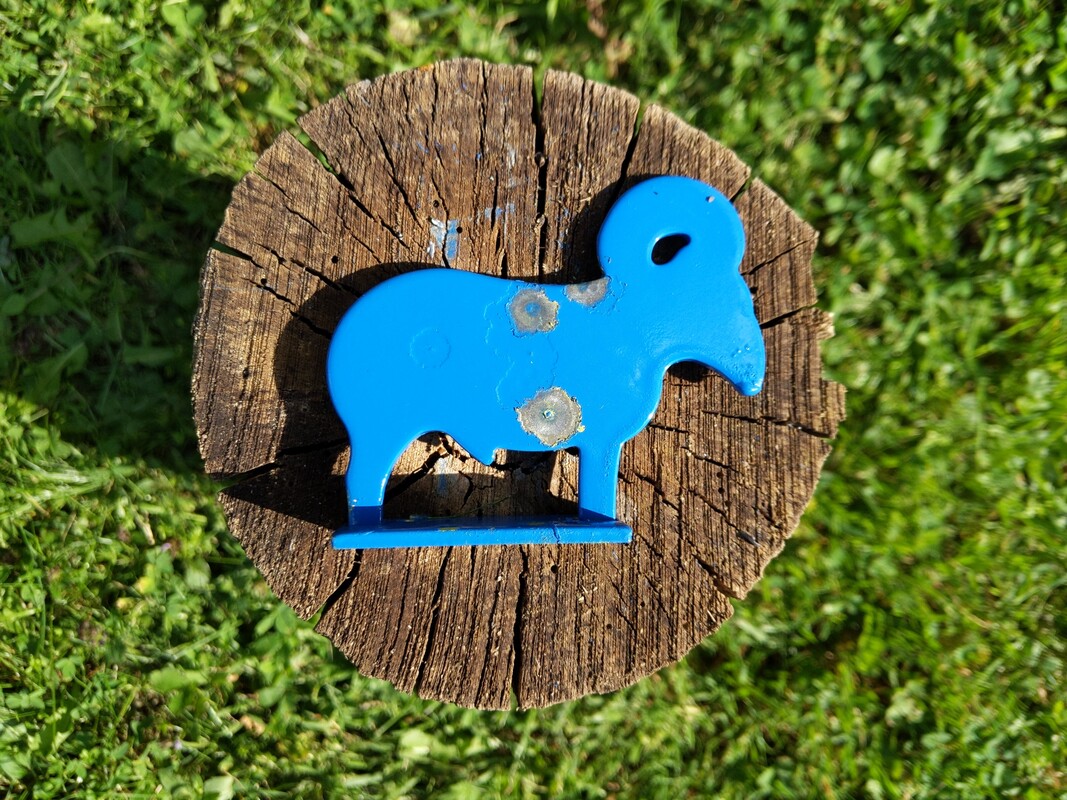
After sending many pellets downrange using the Sightmark Core SX 3x32 VXR-L Crossbow scope on my .22 caliber RWS / Diana 48, I wanted to see how I may be able to simplify using this scope in a hunting scenario. Since real quarry typically refuse to hang out at the distances I specify, I decided to use the goat from the Air Venturi Airgun Metal Silhouette target pack!
After sending many pellets downrange using the Sightmark Core SX 3x32 VXR-L Crossbow scope on my .22 caliber RWS / Diana 48, I wanted to see how I may be able to simplify using this scope in a hunting scenario. Since real quarry typically refuse to hang out at the distances I specify, I decided to use the goat from the Air Venturi Airgun Metal Silhouette target pack!
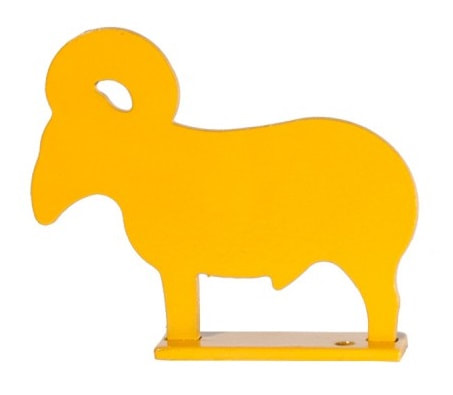
Though it looks big, it is not that big:
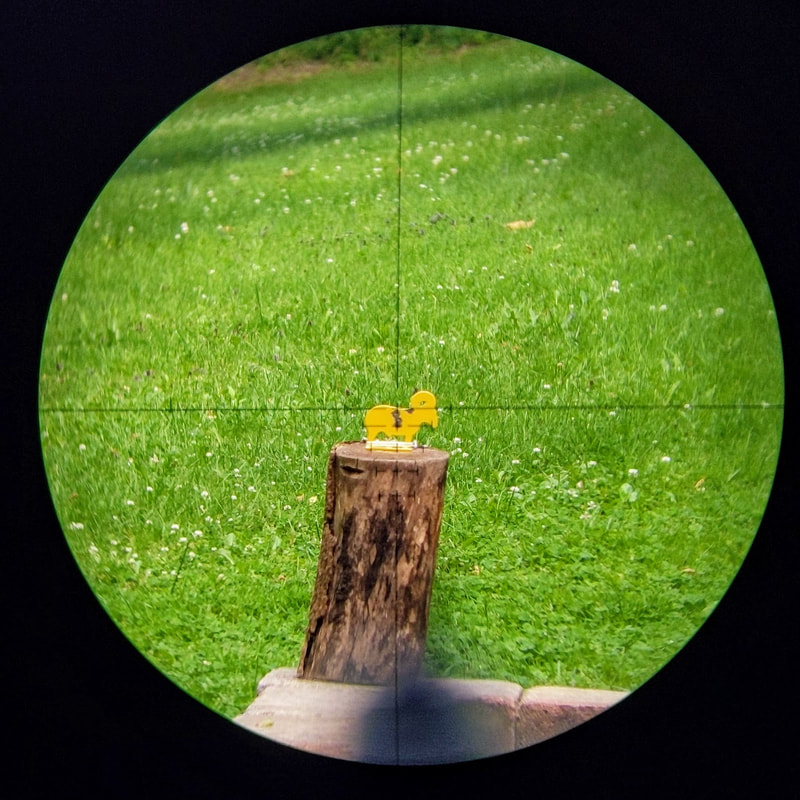
I have found this little 3X scope to be a great tool out to 35-yards (and in right conditions 40-yards). Compared to most of my other scopes, this one adds little weight, it has a VERY clear image, and as can be used accurately at distances from 8-yards to 35-yards. While the distances and sight pictures I mention here are unique to my rifle, its ballistics, and my zeroing distances, they should be fairly representative of other users’ experiences.
In my case, I found two aiming-points covered the 15 to 35 yard distances which I suspect are some of the most common distances for backyard hunters. I have also included a closer distance (8-yards) and the longest distance I felt comfortable shooting my silhouette (40-yards)
o 8-yards = use second set of crosshairs (set one down from main crosshairs)
o 15-yards = use main crosshairs
o 20-yards = use main crosshairs
o 25-yards = use main crosshairs
o 30-yards = use top segment of main crosshairs
o 35-yards = use top segment of main crosshairs
o 40-yards = ??? was not able to hit consistently
It was not that I couldn’t hit the target at 40-yards, but I could not hit it consistently given the lighting I was shooting in. Additionally, my ability to see the yellow silhouette target during my testing made me expect that might be the upper range for effective hunting. In the shots I took in this testing, I missed once at 30 yards, and a few times at 40 yards.
In graphical terms:
In graphical terms:
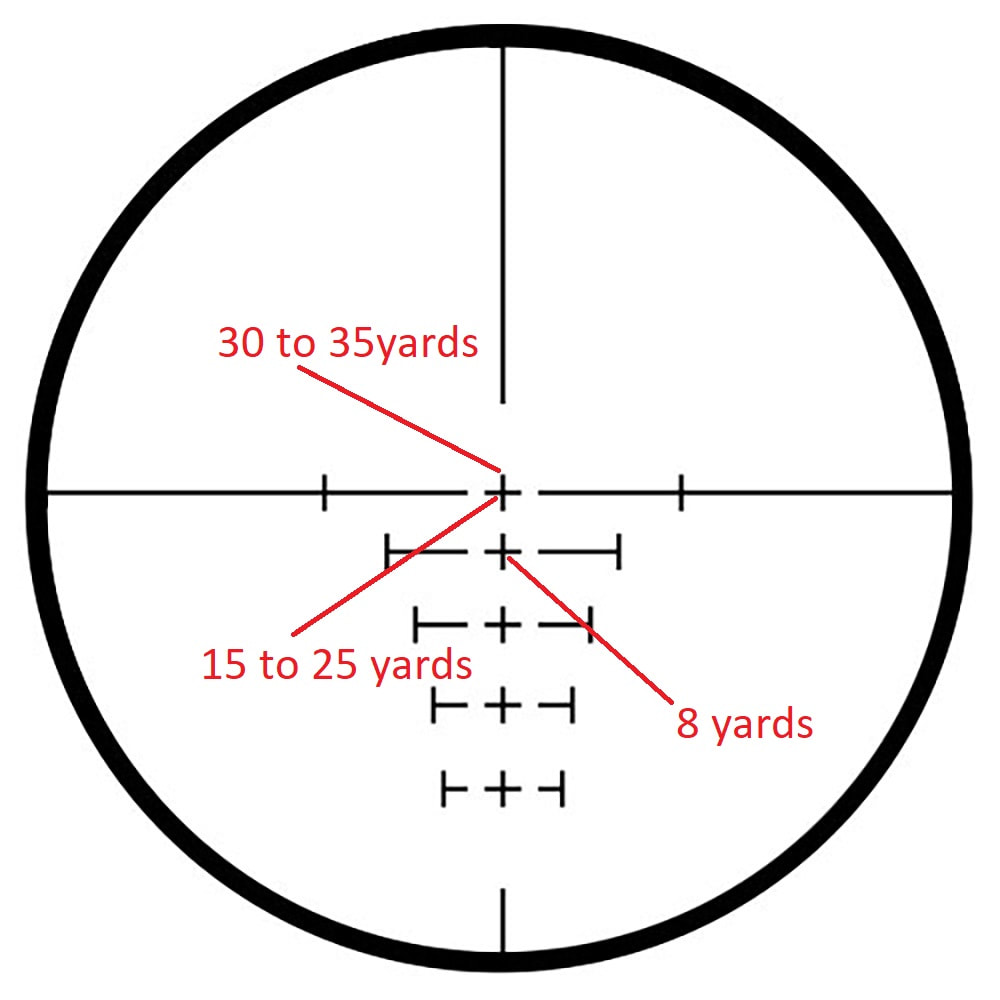
Which is a pretty simple scheme to remember.
The added "advantage" of a low magnification scope is that it is not easy to forget where the limit of an ethical shot lies.
High magnification scopes makes targets look so big that we may take a shot we really should not have.
The added "advantage" of a low magnification scope is that it is not easy to forget where the limit of an ethical shot lies.
High magnification scopes makes targets look so big that we may take a shot we really should not have.
Part 2.- Using Open Sights
After several months of using the Sightmark Core SX 3x32 VXR-L Crossbow scope on my Diana/RWS 48 in .22 caliber I wanted to see how shooting with a relatively low-powered scope was compared with shooting open sights. I began this round of testing shooting paper targets with the simple goal of sighting the rifle in. For consistency, I am using the same .22 caliber JSB 15.9 grain pellets that I used with the scope testing. I’ll state up front that the vast majority of shooting I do is with scopes. None of my PCP rifles even have open sites! Because of this, I decided to use 20-yards as a my zero distance for the open sight testing.
Up to this point my “go-to” target was a 3/4 inch colored dot sticker that is found in most any Walmart or office supply store. These brightly colored dots just plain work for me. I can slap as many (or as few) of these on normal paper and just shoot. However, this time shooting 3/4 inch dots at 20-yards without magnification simply wasn’t possible for my eyes. It took me less than 5-shots to figure this one out! I next tried drawing similarly sized black dots with a Sharpie marker. Nope, not going to work either…
Up to this point my “go-to” target was a 3/4 inch colored dot sticker that is found in most any Walmart or office supply store. These brightly colored dots just plain work for me. I can slap as many (or as few) of these on normal paper and just shoot. However, this time shooting 3/4 inch dots at 20-yards without magnification simply wasn’t possible for my eyes. It took me less than 5-shots to figure this one out! I next tried drawing similarly sized black dots with a Sharpie marker. Nope, not going to work either…
Fortunately, I had a pack of 2-inch Birchwood Casey SHOOT-N-C style Bull's-Eye targets handy and these were just the ticket for zeroing in my 48!
So lesson number one is that my visual acuity is so incredibly used to the magnification that even a 3-power scope provides. I simply could not make out a brightly-colored 3/4 inch target at 20-yards. The 2-inch Shoot-N-C target was large enough for me to feel that I could place shots using the open-sights that I hoped to test.
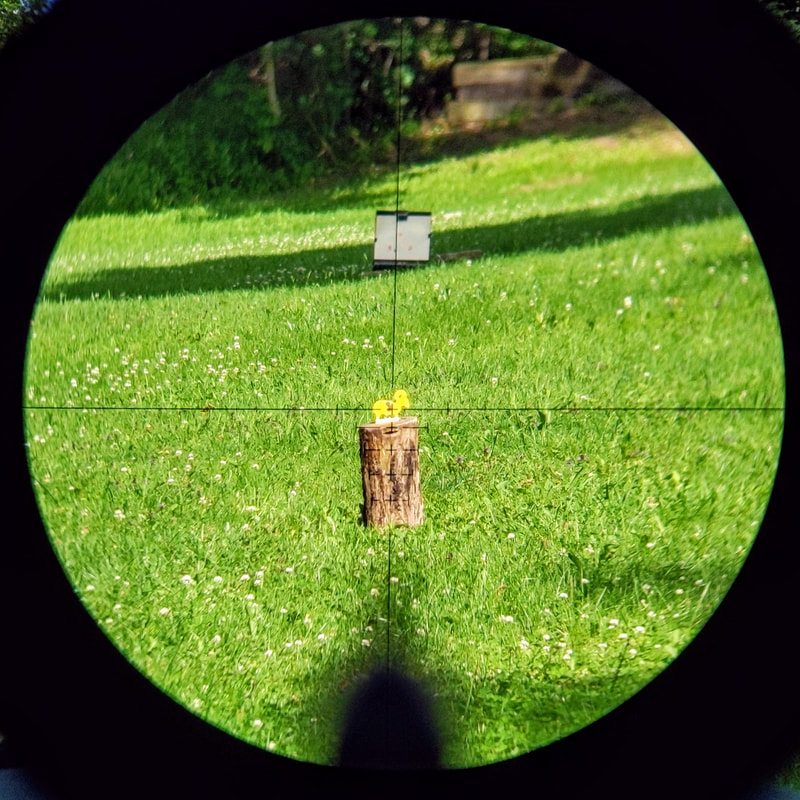
After going through a zeroing and then shooting targets at 10, 15, 20, 25, 30, and 35 yards, I learned a few more lessons!
One: the amount of adjustment / compensation needed in my sight picture is absolutely minimal. Where I could use distinct parts of the crosshairs in the scope for repeatable aiming, I found myself measuring changes in “smidgens”… as in “place the post a smidgen higher”.
And two: even a 2-inch target is small at 30-yards!
Three: The harder you look at your target, the more “evasive” it becomes. I think the best way to describe this is to analogize to stargazing. Have you ever tried to look at a faint star only to have it hide from you when you try to focus on it? To see it you almost have to look just to the side of it. While the effect was not quite as dramatic as stargazing, the target does seem to get more evasive the longer you try to look at it!
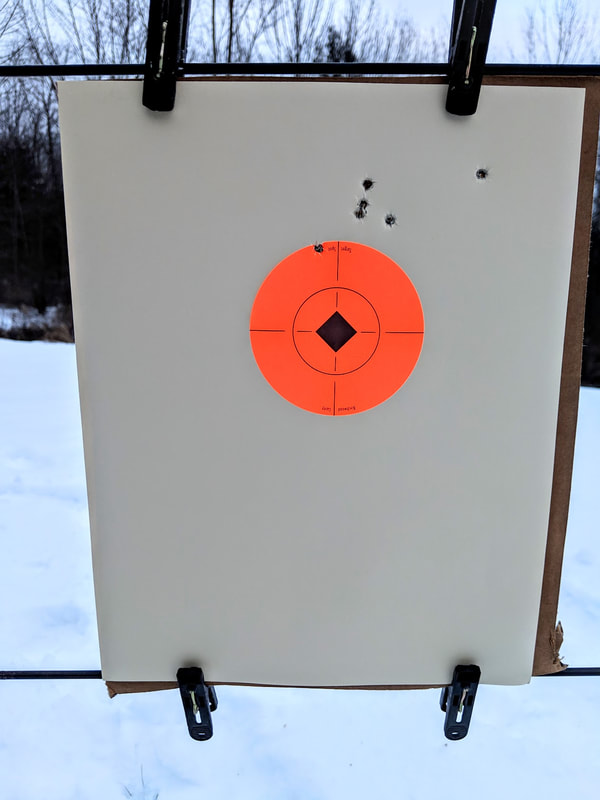
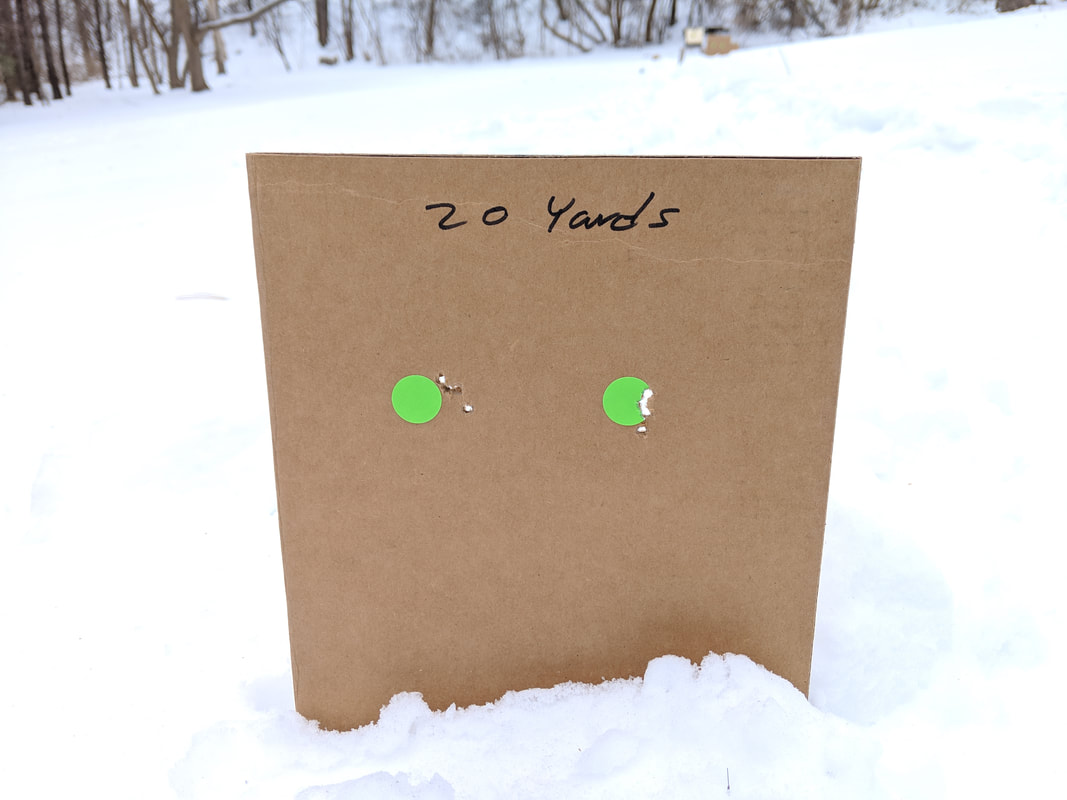
Here are my sample targets where I was compensating for the trajectory. There are three shots on each target. As you can see my “smidgen” adjustment for closer distances (10 and 15-yards) still placed the shots a bit high. The 20-yard target was my zero and 25-yards was just as good. But you can see my “groups” falling apart at 30 and 35 yards. Based on this I would limit myself to 25-yards when hunting with open-sights.
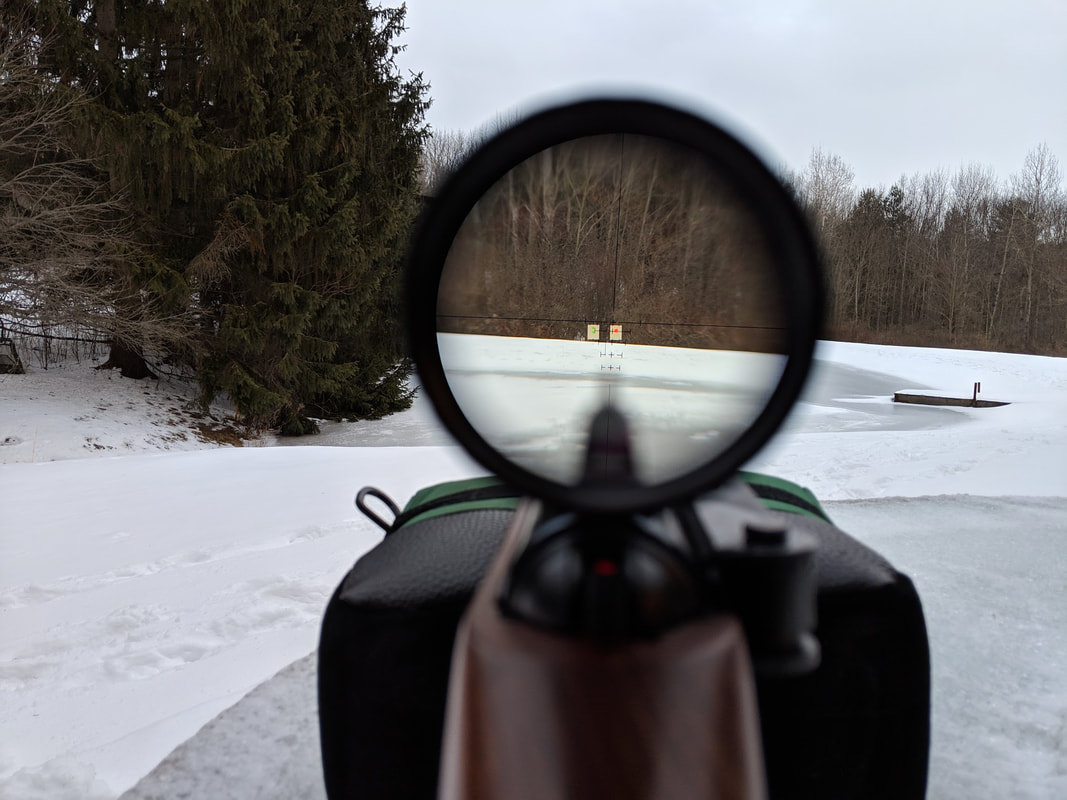
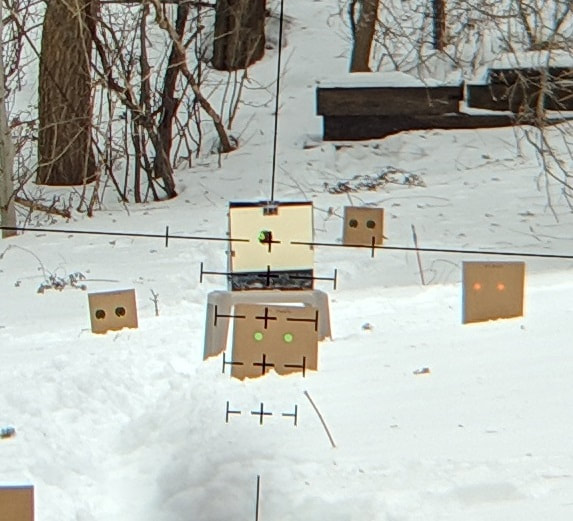
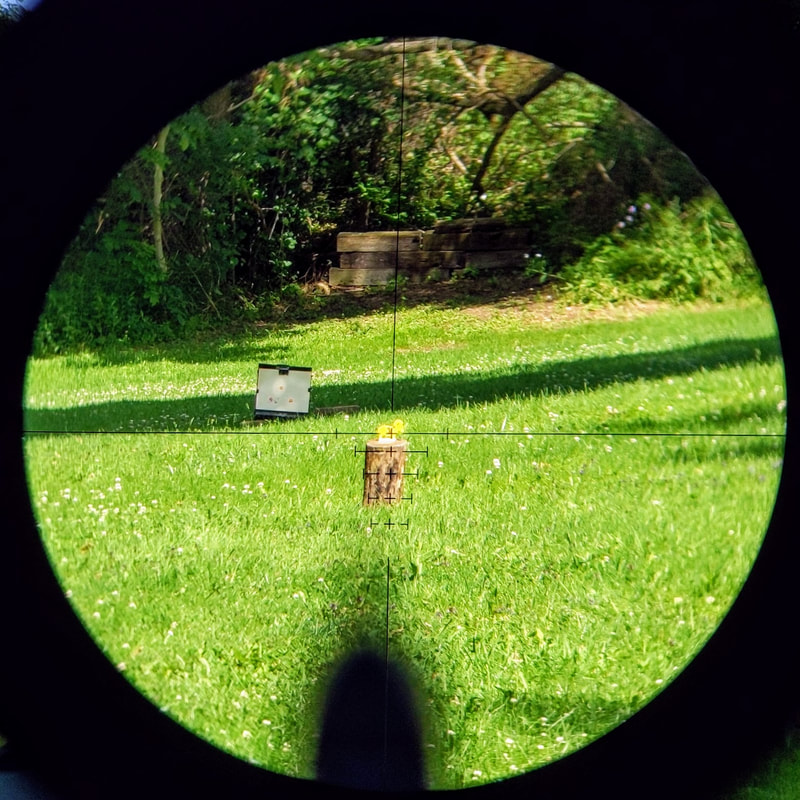
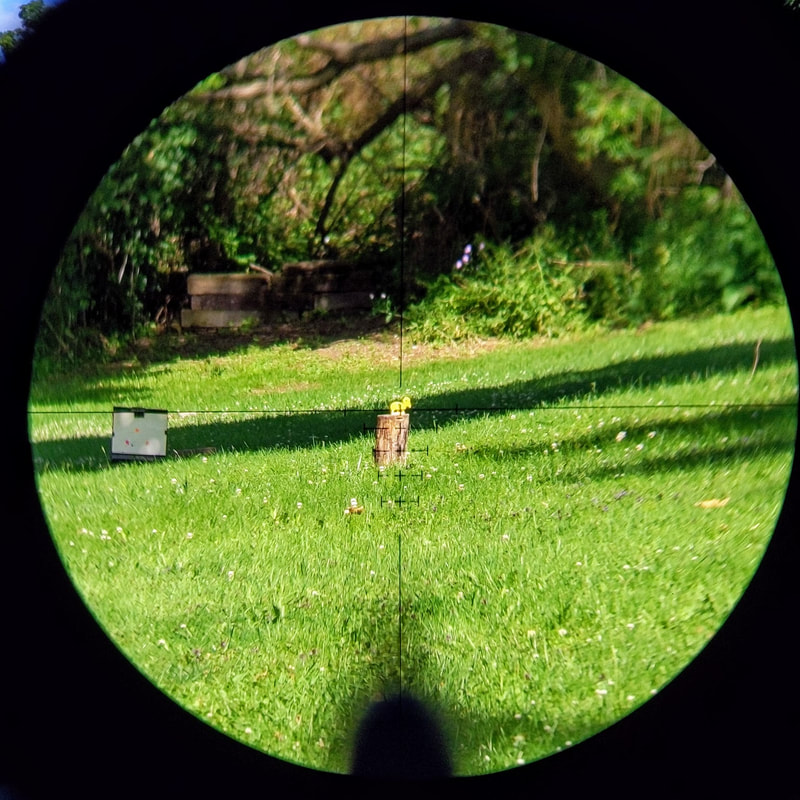
This is the normal view of a 30 yards target:
After going through a zeroing and then shooting targets at 10, 15, 20, 25, 30, and 35 yards, I learned a few more lessons!
One: the amount of adjustment / compensation needed in my sight picture is absolutely minimal. Where I could use distinct parts of the crosshairs in the scope for repeatable aiming, I found myself measuring changes in “smidgens”… as in “place the post a smidgen higher”.
And two: even a 2-inch target is small at 30-yards!
Three: The harder you look at your target, the more “evasive” it becomes. I think the best way to describe this is to analogize to stargazing. Have you ever tried to look at a faint star only to have it hide from you when you try to focus on it? To see it you almost have to look just to the side of it. While the effect was not quite as dramatic as stargazing, the target does seem to get more evasive the longer you try to look at it!
Here are my sample targets where I was compensating for the trajectory. There are three shots on each target. As you can see my “smidgen” adjustment for closer distances (10 and 15-yards) still placed the shots a bit high. The 20-yard target was my zero and 25-yards was just as good. But you can see my “groups” falling apart at 30 and 35 yards. Based on this I would limit myself to 25-yards when hunting with open-sights.
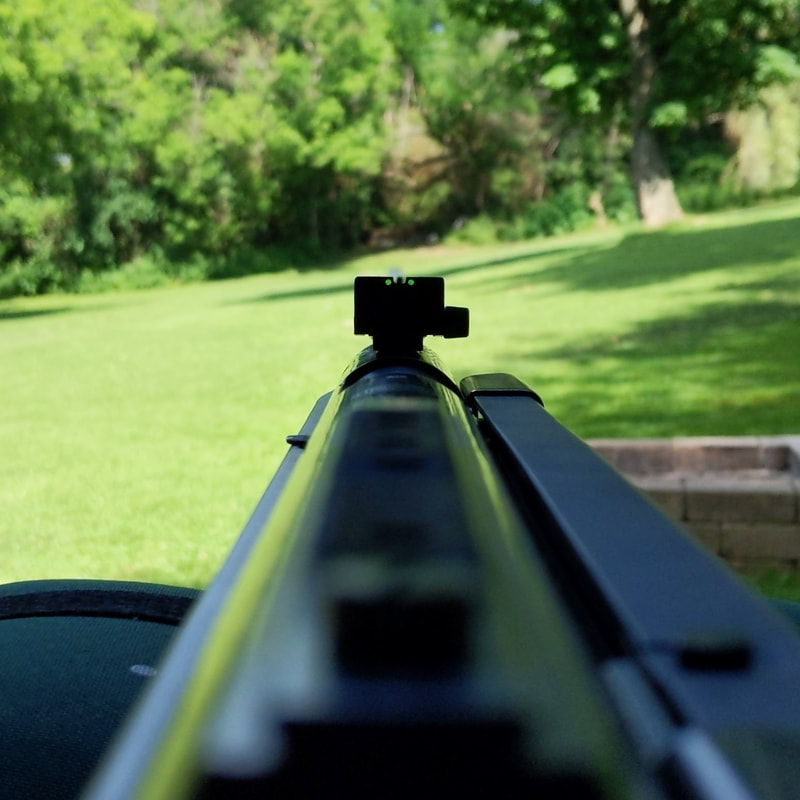
This is the normal view of a 30 yards target:
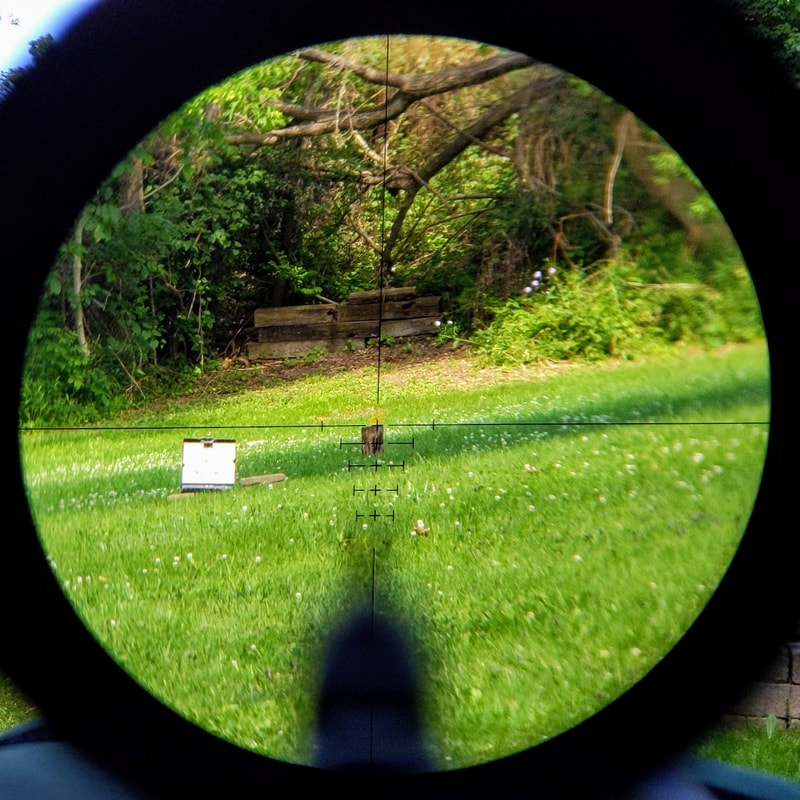
Now, some detail focusing on the target:
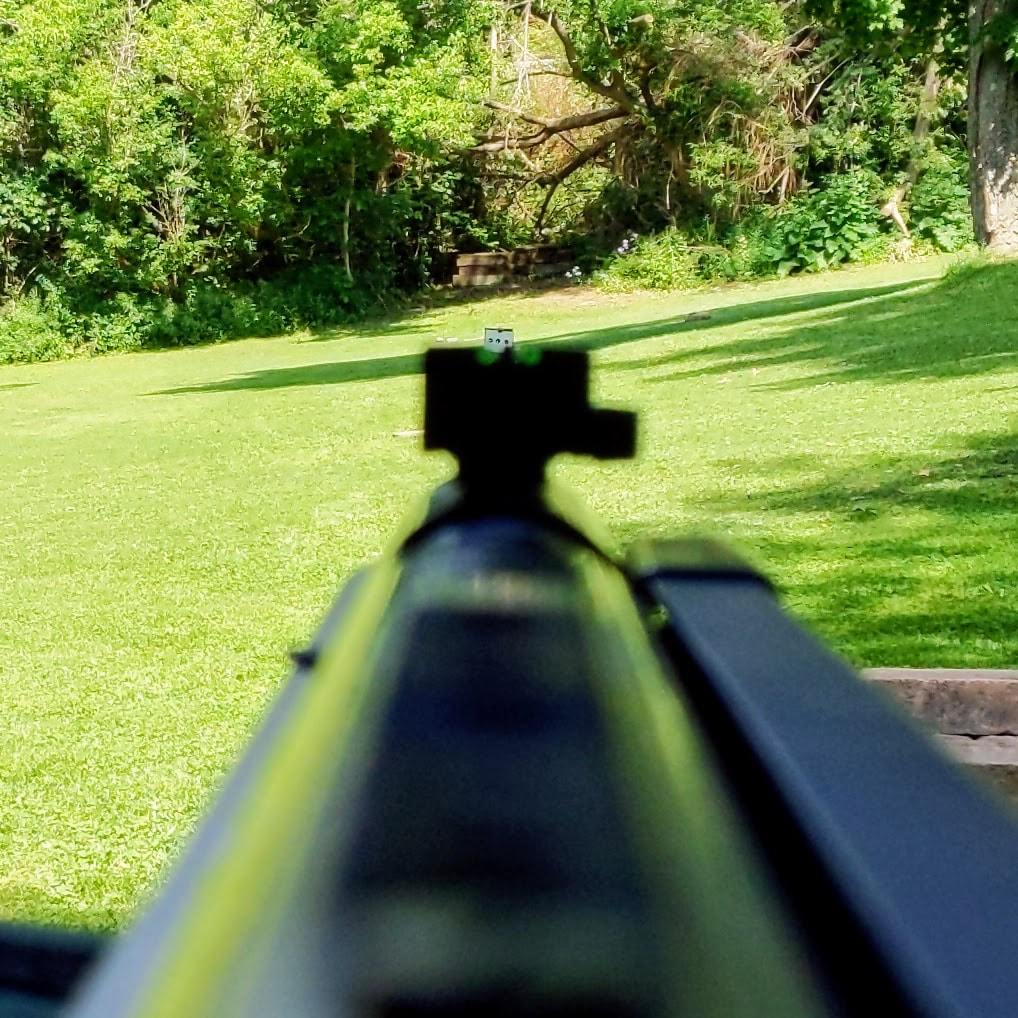
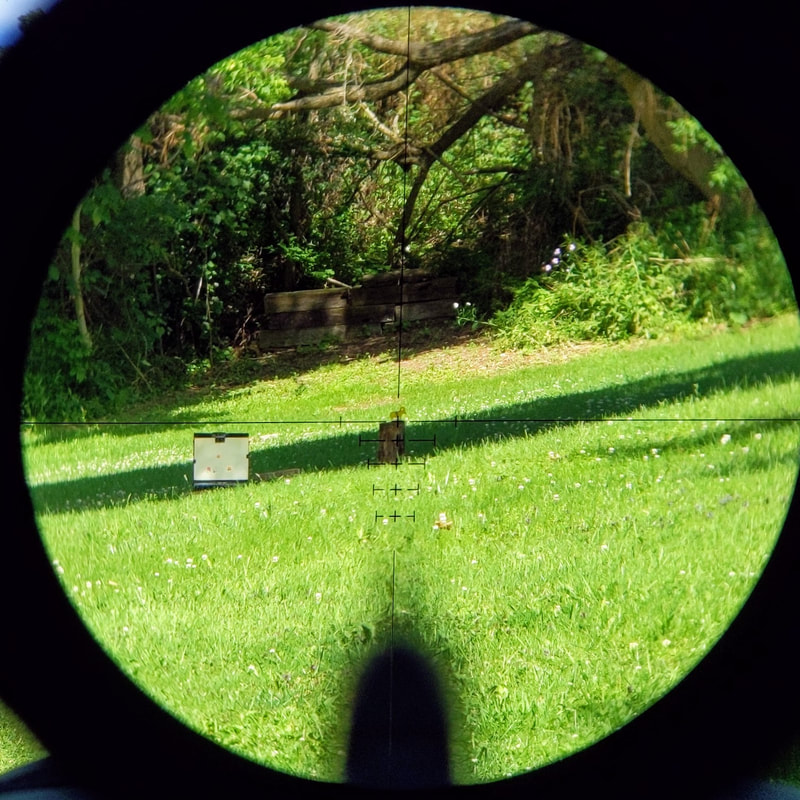
And what it looks like when focusing on the front sight (as all handbooks say):
Please note that I found it extremely hard to get representative photos of the relationship between the sights and target. These were the best that I could do! And aiming is not that different.
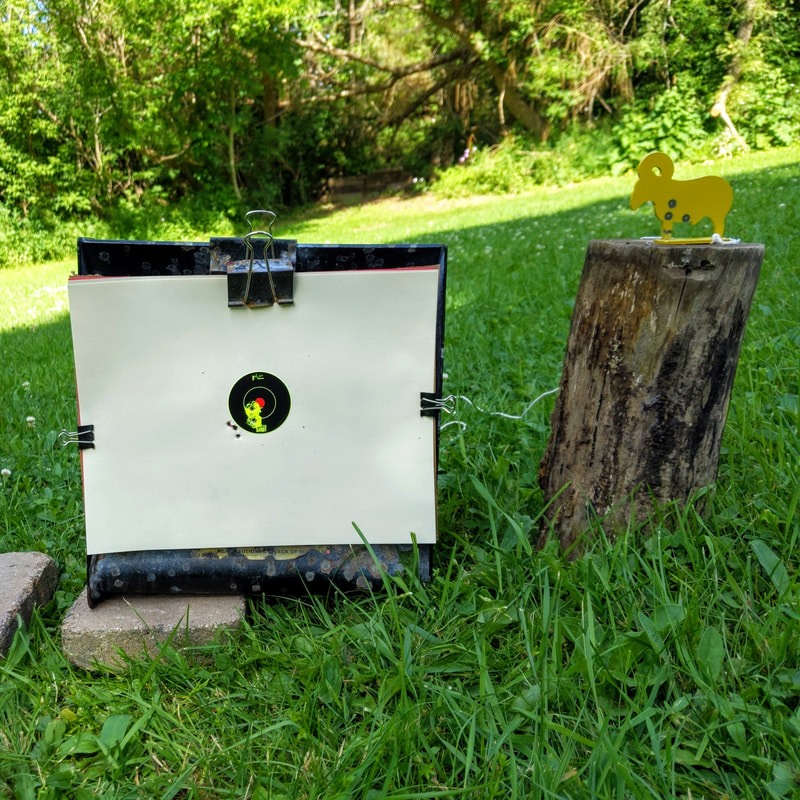
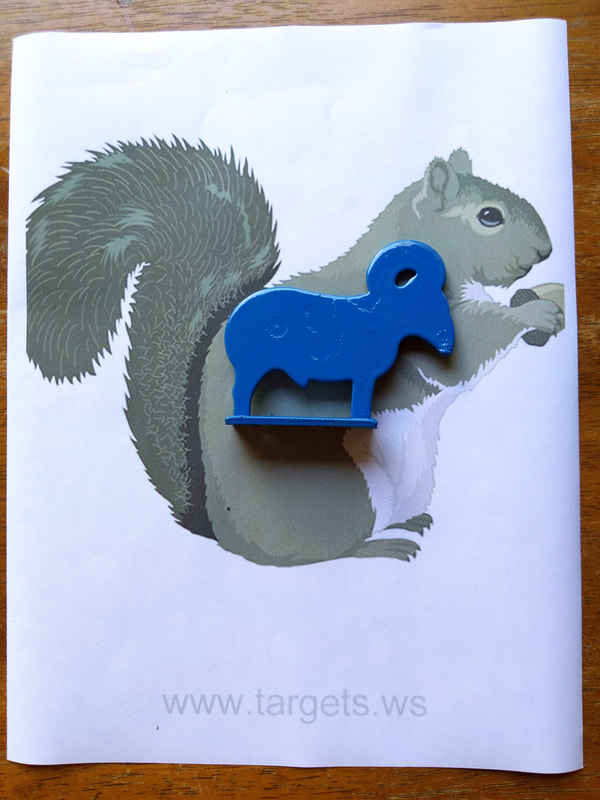
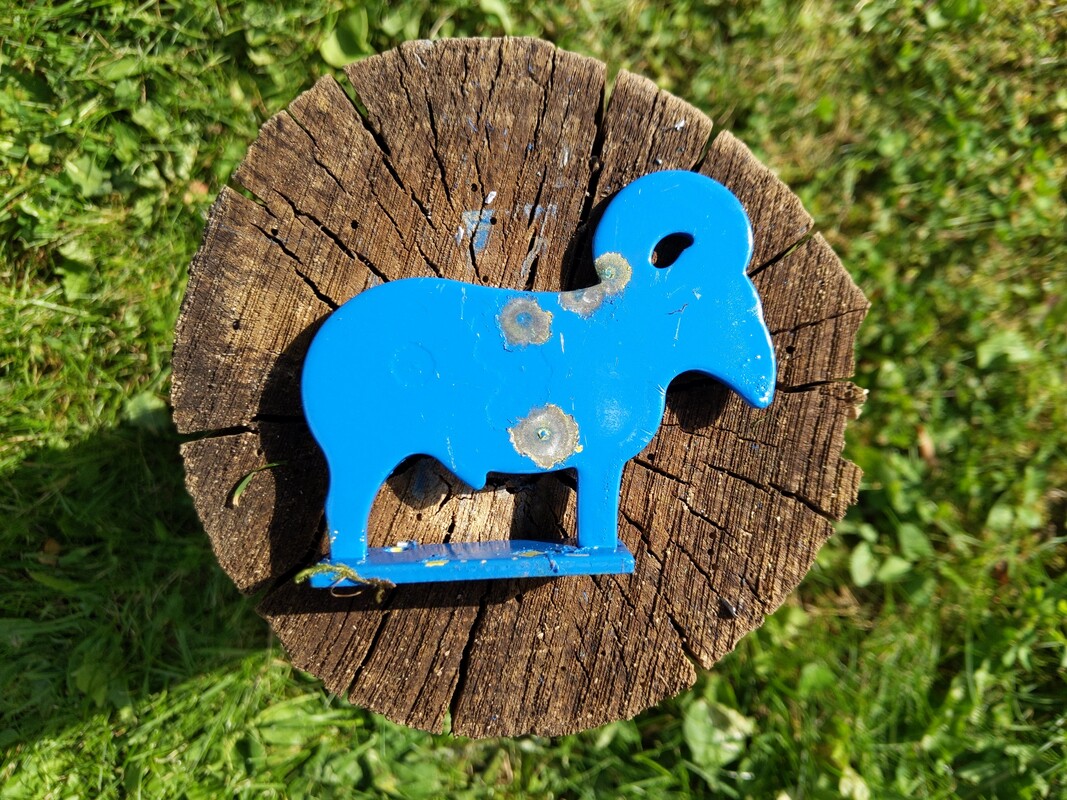
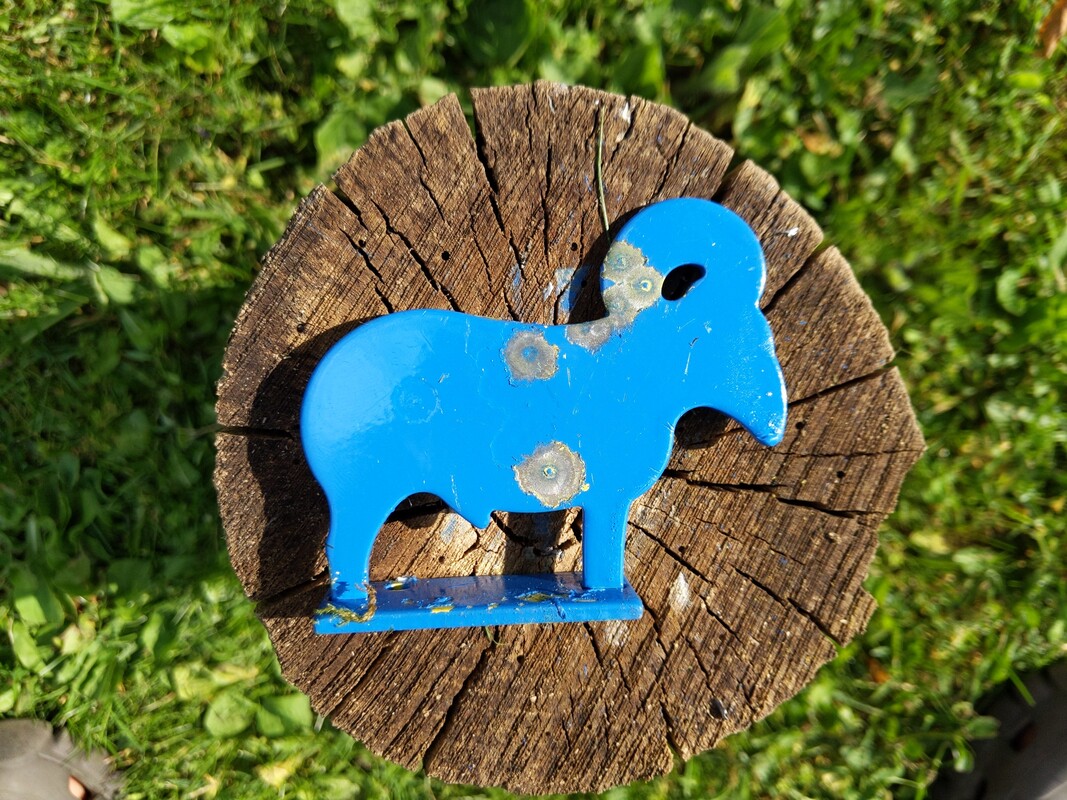
So bringing the discussion back to hunting, I wanted to compare my performance shooting the goat from the Air Venturi Airgun Metal Silhouette target pack just as I did with the Sightmark scope. But before jumping to those results, let’s compare this 3-inch silhouette to a typical squirrel. As you can see the metal goat is pretty compact.
So bringing the discussion back to hunting, I wanted to compare my performance shooting the goat from the Air Venturi Airgun Metal Silhouette target pack just as I did with the Sightmark scope. But before jumping to those results, let’s compare this 3-inch silhouette to a typical squirrel. As you can see the metal goat is pretty compact.
So how did I do shooting the silhouette with open sights? Actually pretty well! (Better than I was expecting!)
· 10 yards = hit
· 10 yards = hit

· 15 yards = two misses (high) before hitting it

· 20 yards = hit
· 25 yards = hit
· 30-35 yards = hit
To be blunt, I found the holdover at closer distances was tricky! And I was shocked that I was able to hit the goat at the longer distances. There is ZERO chance of me actually placing a shot much past 20 or maybe 25 yards without magnification. And it’s really quite amazing what a lowly 3x magnification actually does for you! See pics of each shot at these distances.
In conclusion,
This has been an awesome project to work through! More than anything else, doing this has reinforced the benefits that even a low-magnification scope brings. Namely, repeatable aim-points and added “resolution” of your target. I would encourage every reader who has a pellet gun with open sights to spend a few days shooting without your scope. It will give you both a new appreciation of those who have gone before us who did amazing things never having a scope, you get a feel for what your rifle may feel like when it sheds the weight of your scope, and it’s fun!
The flip-side of this is a bit more practical. In my opinion, this modest crossbow scope is an AWESOME tool. It really does have a great image and adds little weight to you gun. Most importantly, it WILL allow more accurate shot placement with a minimum of fuss.
Matt Coulter
 RSS Feed