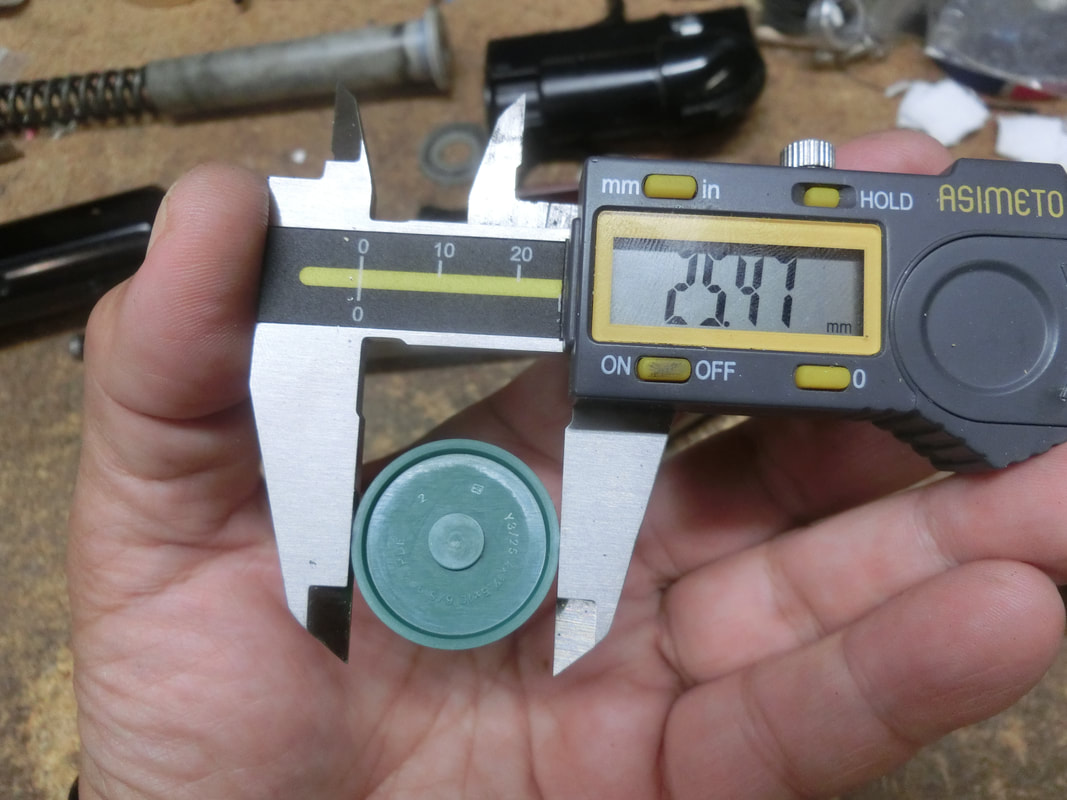
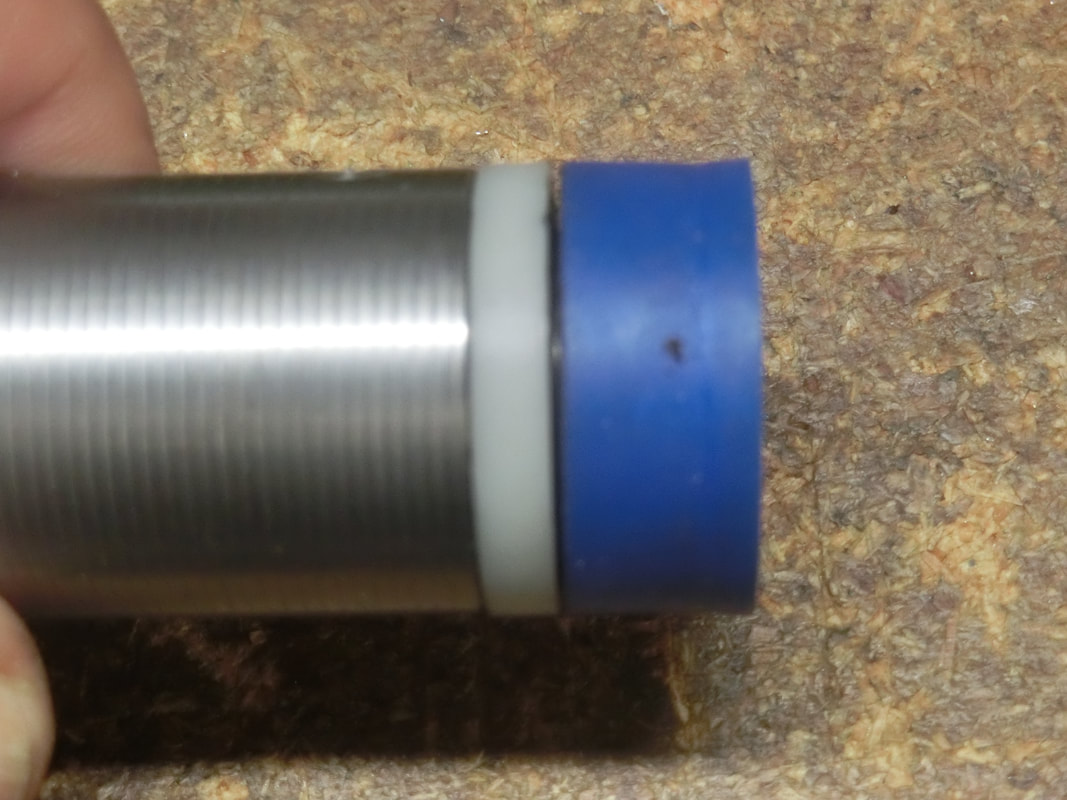
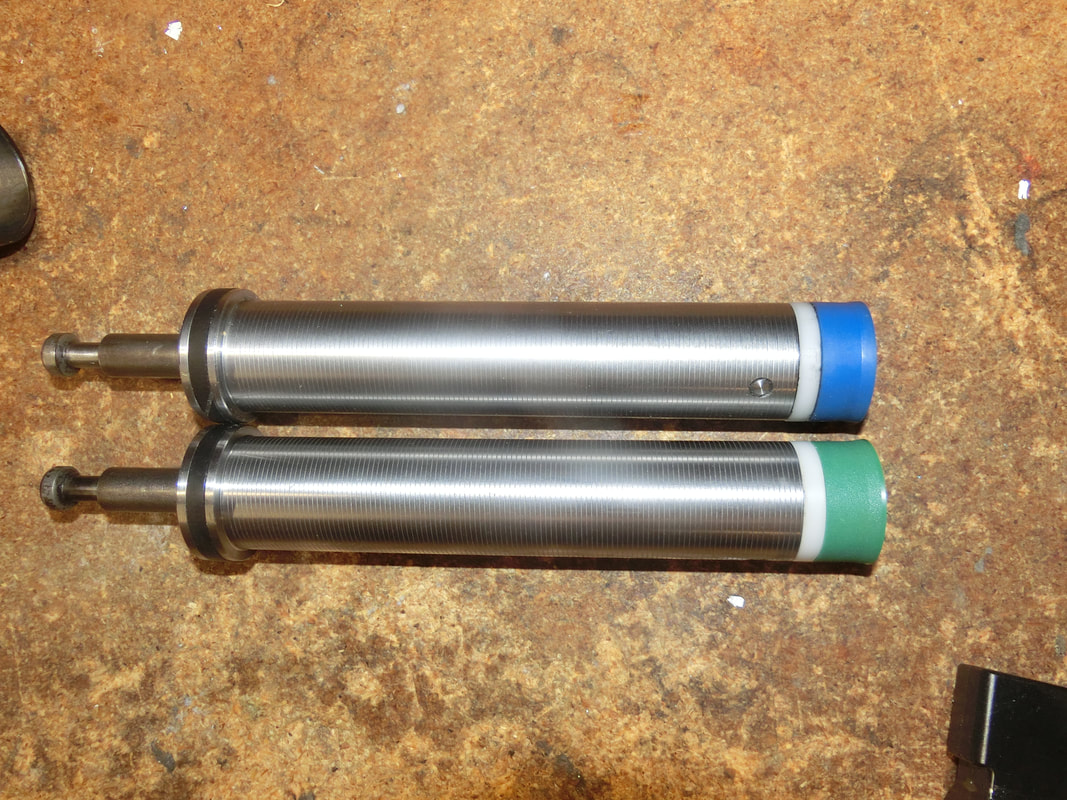
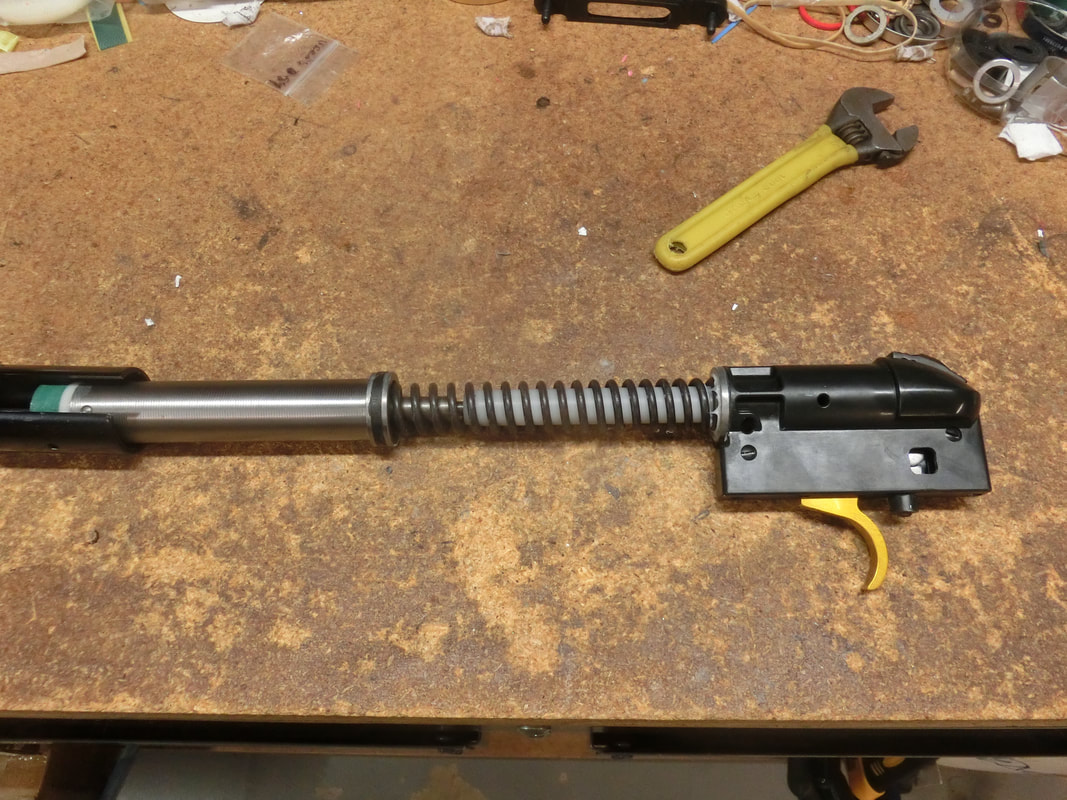
Connecticut Custom Airguns
  • Welcome!
  • Hector's Airgun Blog
  • Products and Products Blog
    • One-Off's
    • The "Héctors Special'" scope by Sightron
    • K1050i FT
    • The Hex Louver or "Secret Sunshade"
    • Pellet Path Calculator >
      • Questions, Answers and Comments on P-P Calc
      • Privacy Policy for PP-Calc
    • The Nautilus SideWheel
    • The X-10 TiltMeter
  • Zimmer-Silhouetten
    • Results 2017-2018
    • Results 2016-2017
    • Results 2015-2016
    • Results 2014-2015
    • Results 2013-2014
  • References and Links
  • Contact us
  • Store

Hector's Airgun Blog

Where we discuss, CIVIILY,  anything airgun.

Return Home

"Mr. Hyde", or Full Power version of the Mauser K-98 S

3/26/2025

0 Comments

 
Disclaimer:
Modifications made to this rifle were performed by an experienced professional airgunsmith. And, proved safe in THIS gun.
No warranties are implied nor extended.
We have no control of what you do on your own.
If you do decide to make ANY modification to an airgun, be conscious of which elements are under force or pressure and realize that, even a "little pre-compression" or as little as 10 BAR's CAN cause SERIOUS bodily harm.
These modifications have not been reviewed, nor approved by DIANA / M&G
Again: Be careful! You are the only guardian of your health and safety.

Two "personalities" in one model

When the Scotsman, Robert Louis Stevenson, wrote the famous novel: "The Strange Case of Dr. Jekyll and Mr. Hyde", he was writing about a commonplace phenomenon of the Victorian Era.
Persons that were the very image of Gentleness and Propriety in Public, had an underlying strain of lust and bottled up violence that came out under the right circumstances.
In true Victorian fashion, at the time of writing, the novel was purported to portray the inner fight of the "good and evil" personae inside each one of us.
After reading other works by RLS, I have come to the conclusion that it was not that "inner fight" the one that the author was trying to portray, but the desire of the Victorians for more "raw" experiences. Raw in the sense of physical power, of getting things done.
Of course, this was also the time of the magazine/pamphlet/periodical "The Pearl" (you will have to look this one up yourself because it is not for polite company). Which would do the same for the love life of the Victorians.

AND; BTW, it didn't help that it was also the time of the "Jack the Ripper" crimes that never "got solved",  probably because they were perpetrated by an "extremely high up personality".
Again the dual sides of getting rid of a problem (real or perceived) in the "proper" way, as opposed to the raw, direct and immediate "final solution".


Just "Food for thought" in our current times.

Now. Back to airguns:

Is power in a spring-piston airgun "evil" in itself?

Hmmmm  . . . . Nope!

It all depends on the platform and the purpose.

In previous occasions I have mentioned that the laws and rules that came into effect in the UK of GB and NI in 1968-1969 were drafted by persons that actually knew something about pellets, airguns, and ballistics.
If you factor in the average pellet weight of the era and the MV's most conducive to proper stability, precision, and accuracy you will find that 12 ft-lbs is a REALLY good number.
Perhaps we should say "WAS".
Why? because in the last 57 years, the art and science of making pellets has taken large strides, and nowadays, the medium weight pellets (between 8 and 9½ grs in 0.177" / 4.5 mm's), can now travel excellently well at 875-900 fps, and that is about 14½ ft-lbs. Which, perhaps not unexpectedly, is the point where most AAFTA Open Piston and Hunter Piston shooters tune to.
Still, the International Version of FT clings to the 12 ft-lbs and that makes it an interesting game where marksmanship skills play an all important role. Yes, guns, and especially scopes, play an extremely important role, but at sub-12 ft-lbs, it is the marksmanship skills of each shooter what takes the day.

ALSO, nowadays we have "bigger" pellets. I remember when the JSB Exact "Heavies" came onto the market. They had a long "waist" to achieve the 10.3  grs. weight, The Crosman Premiers of the day, had an almost solid skirt, sealing at the head and just taking the skirt for the ride. These Premier (Heavies) scaled in at 10.5 and the Barakuda Match came in at 10.6 grs.
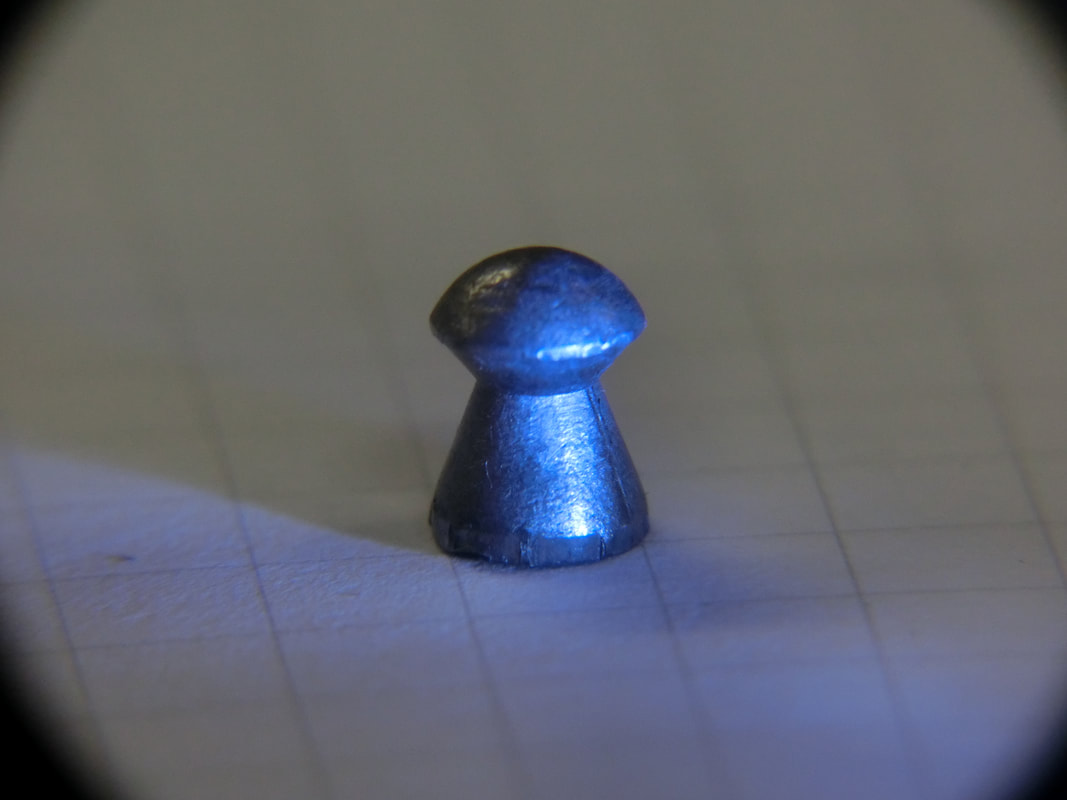
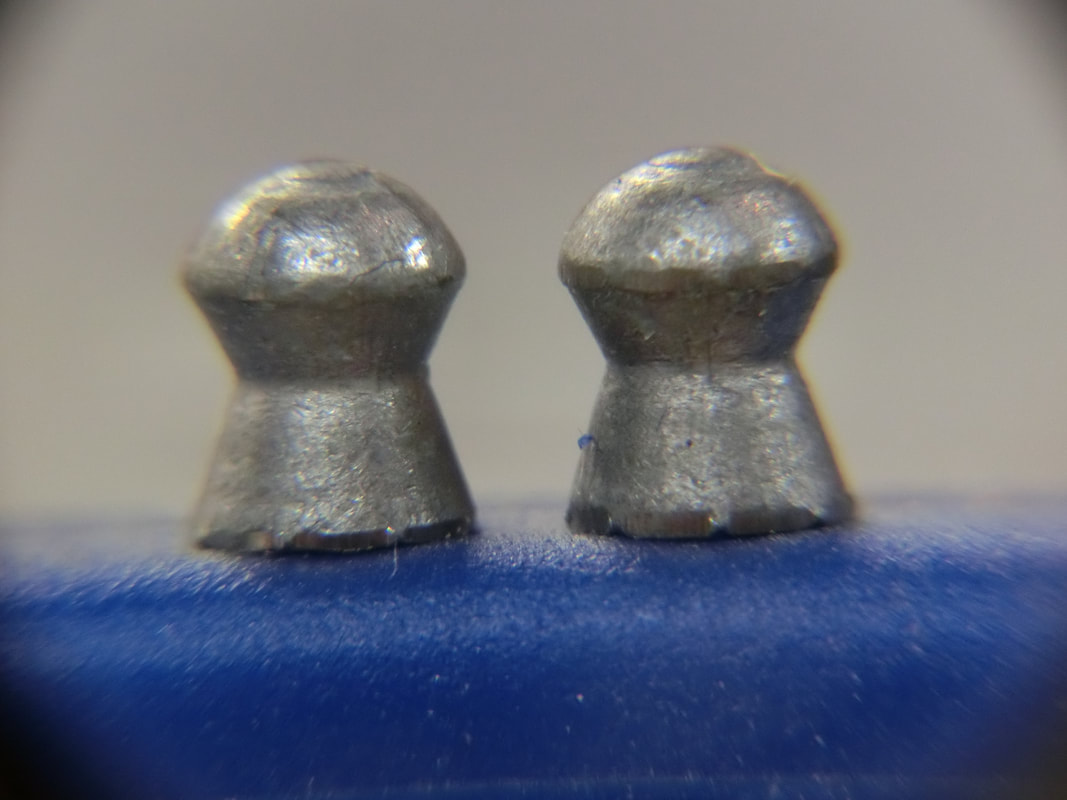
Later, the JSB H's went through a re-design that made them approach a slug because it has no real "waist". Rather the head and the mini-skirt are linked by a "column". Of course, the pellets themselves being a "flange (not flare) stabilized" projectile do not actually NEED the skirt (as a shuttlecock would).
The end result is a pellet that has VERY good ballistic characteristics when compared to other, more "traditionally made" pellets.
So, when I had the opportunity to make the companion K-98 S to the one described a few months ago, I opted for the "Mr Hyde" version of that Dr. Jekyll.
This one was NOT going to be demure, proper, "educated", or "gentlemanly" in any way. This was going to be a true "Valkyrie" in the sense that it would thrive in power.
And, in order to do THAT, and retain the precision and accuracy needed for our airgun games, we would have to come up with a slightly different architecture.
Last, but not least, we did not want to loose the personality of the K-98 as a "war implement".
If the first one had been the "low" power (still illegally powerful by UK stds.) was the "Auskundschafter" (Scout), this one was going to be the true "ScharfSchützen Gewehr".
​

After a few weeks of work, this is what we ended with, the left side:
Picture
As far as length, weight, balance, and overall "feel" this one feels just like the "real thing".
The grip, the shouldering, the LOS, the weight. With your eyes closed you would swear you are holding a vintage K-98 made in the late 1910's
On the right side the mystery is revealed:
Picture
​There is no bolt. So, you're safe shooting this in your backyard. It MAY raise a few eyebrows, but . . . just be safe and courteous when the SWAT team arrives.

;-)
​

The Full Power Tune

For the ~12 ft-lbs version, we made an Ultra-Light Piston and calibrated the weight of the TopHat to JUST yield the 13 ft-lbs the owner desired.
​For this one, a Mid-weight piston yielded initially well over 900 fps. And so, the Titan #1 had to be strain set and then, still doing about 900 fps, reduced by ¾ of a coil to manage a more stable and accurate velocity for the JSB H's:
Strings of 30 shots gave us these results:
Picture
If you do the calculations, these MV's put the K-98 S in the 18.5 ft-lbs. with the full length spring, 17.6 ft-lbs. with ¾'s coil lopped off, which is pretty much what I wanted.
Add a low sample Standard deviation and you can be confident that, as long as the barrel likes the pellets, it will be an accurate and precise combination. In graphic terms:
Picture
This type of power and stability is PCP territory.
With the exception that the shot string can be as long as the shooter's biceps and elbows hold, LOL!

In the previous version we did not need to get rid of any "lost volume", the weight of the TopHat was tailored to the power output, so there were no high pressure gases still behind the pellet when the pellet exited the muzzle.
In this case, we knew we had to solve an excess of air being pushed about because accelerating a 10.5 grs. pellet at 8,500 g's for the full 430 mm's of barrel travel would need a vortex diverter. AND, yes, this is a real number, if humans pass out at 7-8 g's, just imagine what 8,500 g's mean.
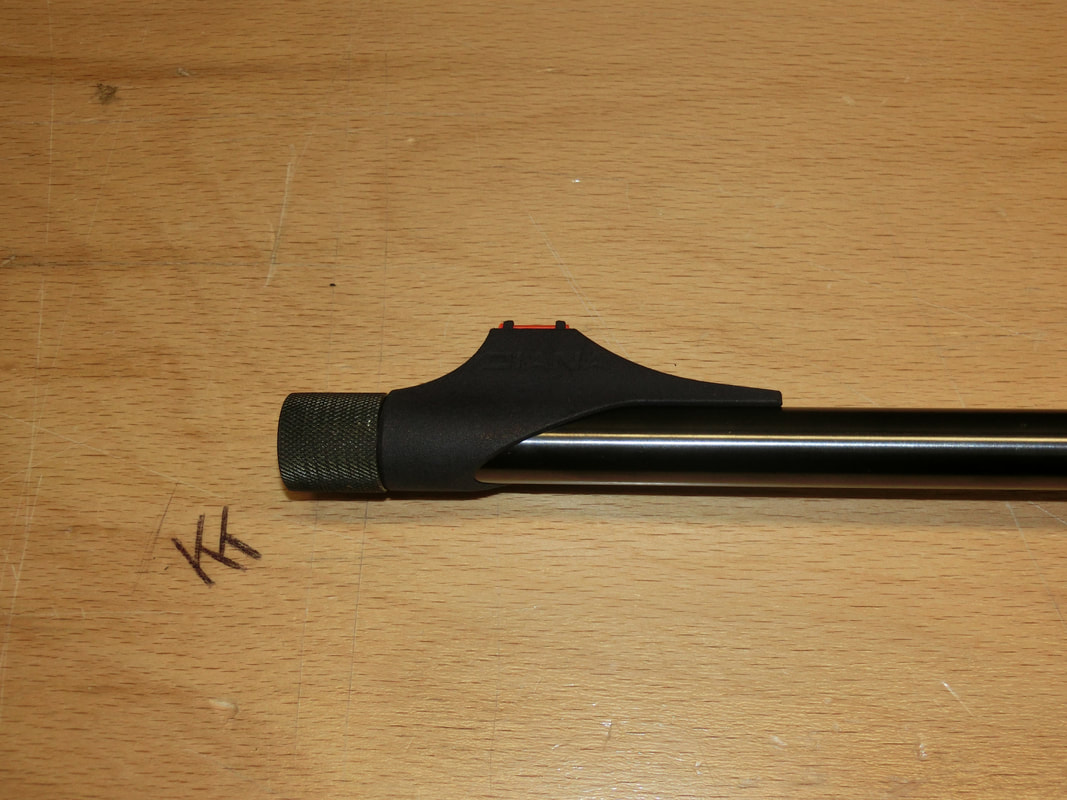
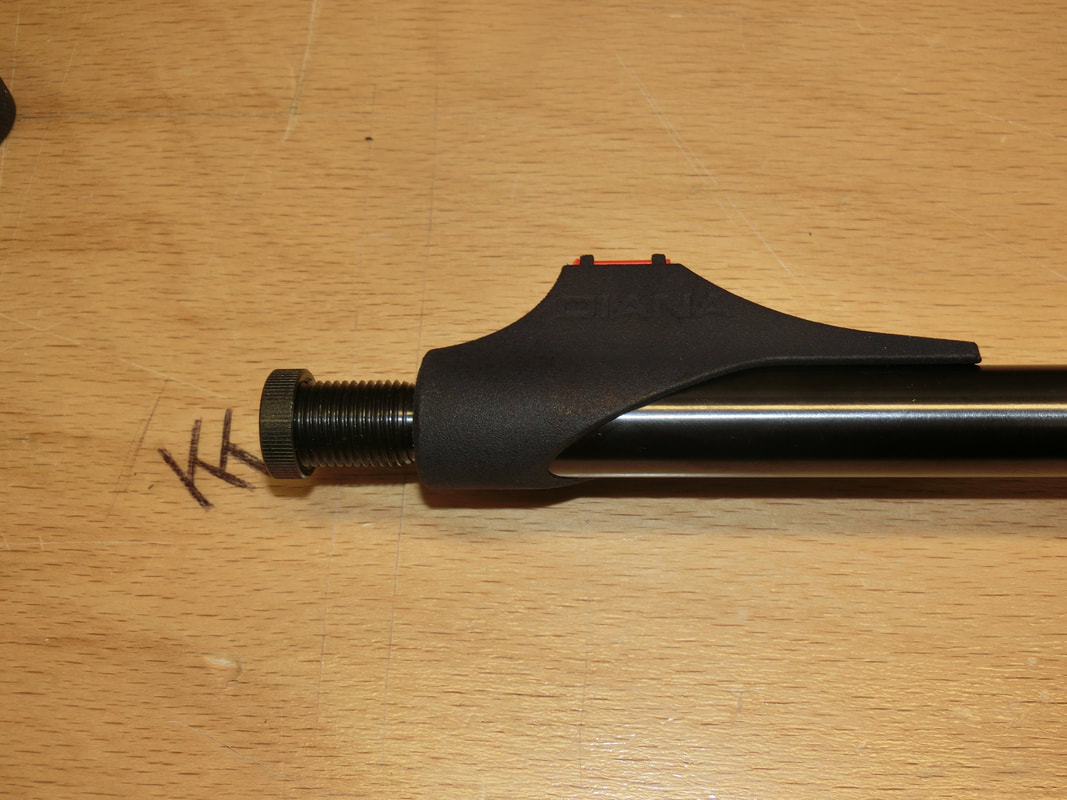
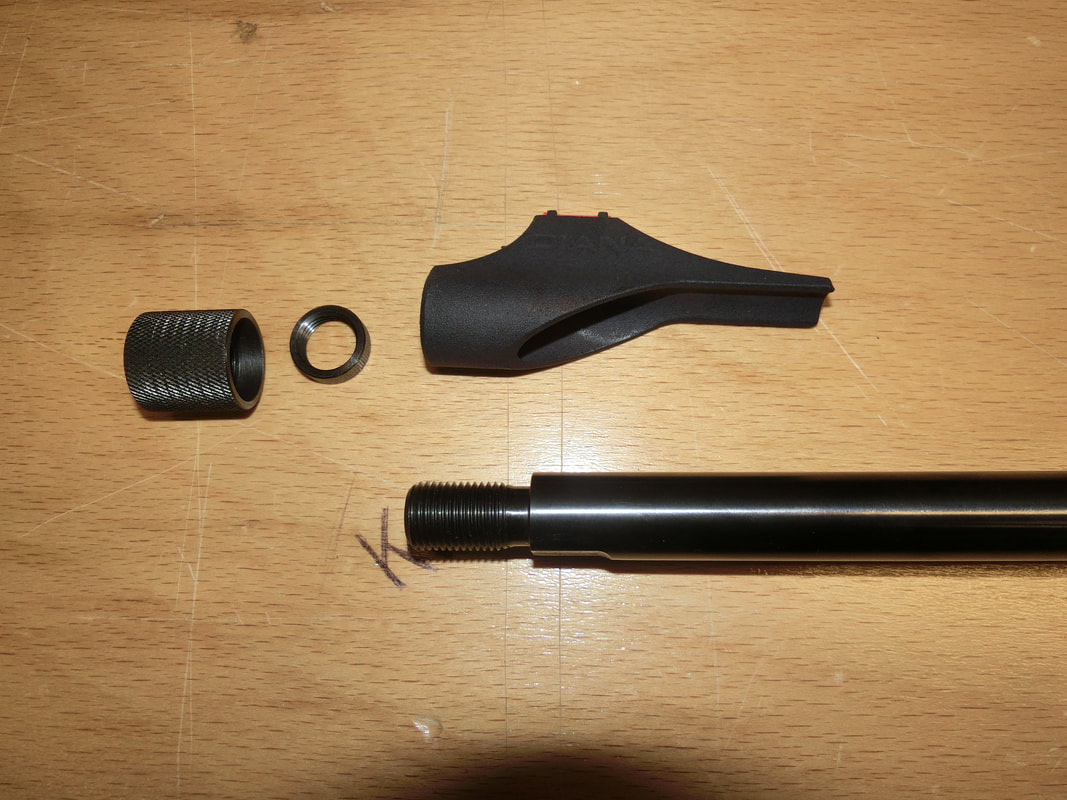
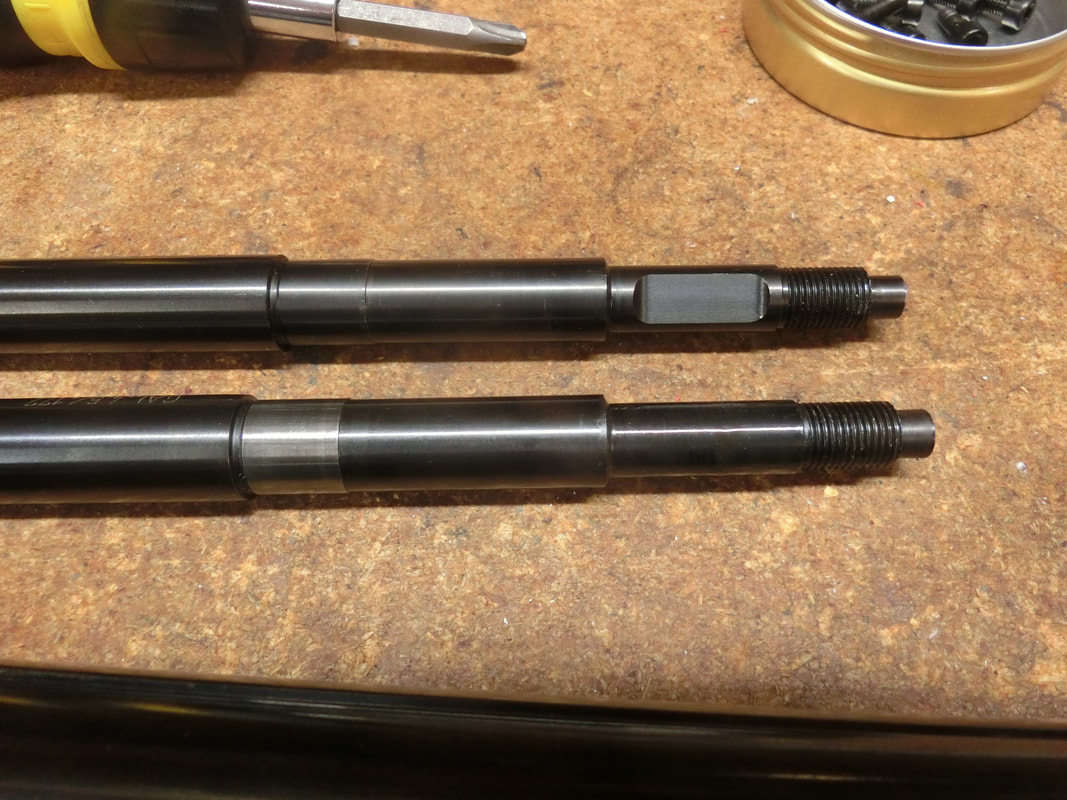
So taking advantage of the threaded muzzle of the K-98 S, we installed this:
Picture
Anyway, our pellets are so good that they do take that outlandish acceleration and fly to the target with some degree of controllability.
But the controllability increases if you make sure that the pellet flies through "calm air" as soon as it goes out of the muzzle. There are some "pundits" that maintain that the spin of the pellet is mostly needed to get across the "mushroom" of turbulence created when the pressurized gases exit and overtake the pellet in its path. While that is a partial truth, it is not the whole, sole, and unadulterated, truth. Recent productions of custom barrels with slow twists have shown that SOME spin is still beneficial.
On the side, I also use the location of the moveable brass weight to tune to some extent the harmonics of the barrel.
For reasons that should be obvious when you analyze the way the gun disassembles and (if you have not read the previous note, do so now, to understand how this barrel becomes an exercise in rigidity once the whole thing) is put together again, these are much lower than in other versions of the D 460 (of which the K-98 S is one variant), but it is still nice to have some degree of controllability in that.
Finally, as part of keeping in the character of the K-98, we needed some "battle sights". Which we found with the Tech sights for grooved receivers:
Picture
A detailed image:
Picture
Because we were planning to use this rifle with iron sights for some precision shooting, it was essential to have some sort of "peep" sight that would give us a long and low sight radius, which these sights achieved with great success.
​The sight picture is quite clear:
Picture

The shooting

Now, why we were thinking about using iron sights?

Well, DIANA has made a commitment to support the Boerne Schützenfest. Last year I was unable to attend because it coincided with the FT Nationals; having been to a few over the years and over the world, I can tell you that they are a lot of fun.
Mostly because they are usually held as some part of an "Oktoberfest" (the agricultural harvest starts in September and ends in October), which of course, involves some good food, some good beer, and some good company.
Target is challenging, though it is not difficult to get a high score because the center is worth 25 points, and the black goes down to the 18. Missing the last "white" ring of 17 gives you zero points, but as long as you keep them all in the "black", you are doing good.
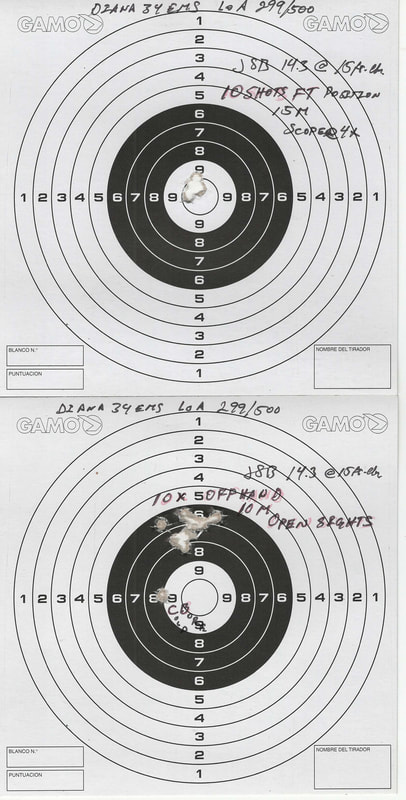
When the gun was tested with a reduced version of the target (for 10 meters), this was the result:
Picture
After the first "Cold Bore" shot, the remaining 10 shots went into a group smaller than a dime.
The K-98 amazes me in how "shootable" it is.
Further testing in true "match" fashion yielded good results.
This is with the iron sights:
Picture
It was the best card of the night's six, but it still shows that disciplined shooters can shoot well with "battle" irons.
Another session, this time testing with the 2-7 X 42 scope set at 3½X yielded TWO good cards (again, out of 6):
Picture
Picture
Why are the targets "pink"? because if they are black you cannot discern your hits . When they are printed in "pink" you can clearly see your impacts, even with iron sights.
Perhaps not quite as good as the first one (one point lower), but there were TWO in this session and that tells you that it is easier to be consistent with even a small scope, than it is to be consistent with "battle" irons.
Next test with the Schützen target will be with irons, but with an aperture up front (Korntunnel). And then we will see what happens. But that will be later and we'll use my Tyrolean D54 (of course, what else would be appropriate? ;-)  )
Before I forget:
A note on the scope used:

​It is made by Viiko
Picture
And it has a peculiar reticule:
Picture
A close-up of the reticle shows that, apart from the "rangefinding stadia wires", it also has POI drop marks:
Picture
It is a SFP variable, which will lend itself well to stadia-ranging. And we altered the parallax to 25 yards. Not complicated in simple scopes.
As the parallax was shortened so did the Eye Relief and, so, from an almost "pistol scope" eye relief it is now in the "High recoil" scope region. It can be mounted forward to have "situational awareness" at low mags, and also dialed up to provide precision and accuracy when the shot allows the time to do so. It would make quite an interesting hunting scope.
It is an inexpensive scope (which encourage customization) and the optics are good enough for some airgun uses.
The reticle gives me some ideas that I need to test, if those pan out, it may be a VERY interesting experience, LOL!
The Mount had to be "sculpted" to fit the rather large saddle and erector spring assemblies, but it is working well.

Now, would this be a good rifle for longer ranges?

Definitely YES!

This is how the rifle prints at 25 meters:
Picture
5 shots well under a dime and 10 shot groups under or at the dime o-o.

And beyond?

This is a 10 shot group at 55 yards / 50 meters:

​
Picture
Yes, there are 10 shots there. The stray shots on the left, outside the "Sighting" square, belong to other groups.
With a 7X scope and hold-off's, this is mighty rewarding in a windy day at DIFTA.

Would I use this setup for AAFTA Hunter?

I am seriously considering it.

MAYBE I would have to install a better scope, maybe a Veyron, or something like that. But the capabilities of the rifle are amply demonstrated.

AFAIK, there are no more K-98 S's on the retailers shelves, but the 460 is still in the lineup and perhaps there are some here and there in the warehouses.

While this one may be the Mr. Hyde impersonation of a raw and unpolished element. it is also true that the gun is a "wahre Walküre
" ready to take to the action fields.

Keep well and shoot straight!


HM
0 Comments

Exploring the Steel-Spring'ed EMS powerplant

2/26/2025

0 Comments


Using a 34k in 0.20" cal

The EMS powerplant is a peculiar beast.

The result of extensive tests (thousands and thousands of shots taken), and the desire to make a dual power-plant rifle, it is a 7 part system  (L to R in the picture below):

Piston
Forward guide
Spring
Shim
Rear guide
Piston skirt centering bell
Filler Screw
Picture
Now, being a 7 part system means TWO things:
1.- More manufacturing cost
2.- The need for more precision in the execution

For three years now, the "Motto" of the DIANA brand has been:
"Our Mission is Precision"

AND, as it is basically unavoidable, like all changes, it needs to start from within (remember the song "The Man in Mirror"?)

So, this exploration goes into what can be GAINED by using a steel spring in the D-34 sized break-barrels with the EMS architecture, and what needs to be changed.

Let's start with the diagram:
Picture
Numbers 1, 2, 3, and 4 are the basic mechanisms tube with the trigger block included.
Number 5 is the rear spring guide
Number 6 is a steel centering "bell" designed to hold the piston in the center when cocked, and allow the interference sear to do its job consistently.
Number 7 is a washer to protect the plastic rear guide from the steel spring
Number 8 is the screw that affixes the centering bell (# 6) to the trigger block (#2).
Number 9 is the spring itself
Number 10 is the front guide that telescopes into the rear guide
and Number 11 is the piston

Now, let us think about DIANA's "motto":
We have 7 pieces that need to align along an axis that is about a foot long (12"~~ 300 mm) and upon whose precision depends the consistency and efficiency of the powerplant.

¿Why?

Well, in a spring-piston powerplant there are several energy "sinkholes". The most important is friction, we take care of that mostly through lubrication. The next one in importance is "chatter", and that means all the small lateral movements that happen when a long thing vibrates along an expansion stroke.

How important is chatter?

Well, let's just say that IN THE SAME rifle-pellet-lubricant combination, a traditional D34 powerplant was able to yield about 13½ ft-lbs
Then, with the NTec unit (that prevented a lot of the chatter), yield went up to 16 ft-lbs.
With a "precisioneered" (precision engineered) EMS architecture it is now yielding 17 to 17½ ft-lbs
AND with a reduced cocking effort because Gas Springs will ALWAYS start from a very high force and go higher from there.

So, by reducing the tolerances and ensuring that everything is operating along the same axis, we gained a bit more than 25% yield with a reduction of about 20% in the cocking effort (and therefore the energy input into the system).

Yup! That is what true precision gains for us.

If you put it in numbers:

Efficiency of a traditional 34 PP.-
13.6 kg (30 #F, or 133.4 N) PCF over 135° of arc (2.36 Rads) on a 0.34 m radius.- Since the Compression starts from a value (preload), we will take that into account by an arbitrary/empirical factor of 0.6 (the average is a little more than ½ the peak) That means 64.22 Joules of energy input, vs. 17.6 J output, means an efficiency of about 27%

Efficiency of an Ntec equipped version:
20 kg (44 #F, or 196.2 N) PCF over the same arc and radius, means a peak input of 157 J, since the NTec starts from a substantially higher force, the factor now for the average force is about 0.7, instead of 0.6, so the input is 110.2 J, for an output of 21.7 J, that means an efficiency of 20%

Efficiency of the steel spring'ed EMS PP.- you need to input 18.2 kg (40 #F or 178.2 N)since this PP starts from a low value, we use again the 0.6 factor for the average vs the peak, and that means an input of 85.8 J, for an output of 24 J means an efficiency of 28%

Is this performance max'ed out for the 34 size? Yes. To get more/more efficiency, we would need to go the route of the fixed barrels.

Now, is there a way to achieve these gains without increasing the cost?

Well, yes, but it needs a change of thinking.

On one hand, parts  #'s 5, 6, 7 and 8 can be "unitized" in a single piece made up with two different materials in three parts.
Could it be made as a single extrusion/molding? Perhaps. Modern moulding techniques do allow for "overmoulding", meaning that you mould a part, then insert that into another mould and the final injection takes place.

But what is a dramatic departure from the traditional method of manufacturing is that this "unitized" part would have to be made OVERSIZE, and then CNC machined to precise dimensions with small tolerances.

The frontal guide (#10) also needs a serious tightening of tolerances, especially at the front where it meets the piston. AND the fit between the OD of the "stem" of part #10 and the ID of the "Unitized" guide also needs serious tightening, as well as the fit between spring and guide.

I am now hearing all of you saying:"Precision in manufacturing is not the same as precision at the target

LOL!

Yes, that is true, and not only precision, but accuracy is also important. Theoreticians think that if you achieve precision, then accuracy is the "simple matter of adjusting the sights".
Alas, those shooters with experience know that this is an oversimplification.

What happens if the sights don't adjust consistently?
What happens if the sights are vulnerable to thermal differences?
What happens if the sights are simply not adequate to the target at hand?

Many of the problems are "solved" using a scope, but scopes have their own issues, especially in the field.

Still, the best procedure to test a rifle is by shooting it.

And, yes we did a ton of that, mainly because our scope suddenly started playing scope "games" on us. We would shoot a great group at some point in the target, then the next group would be elsewhere. The we shot a shotgun pattern that was not even a group!
Since that particular scope has been with me for a LONG time and never failed, AND that scope has been mounted in "accurized" ZR Mounts, that is the last point we suspected.
So, we tuned the bedding (after all, even the most "sophisticated 34 is still a 34.We tuned the Muzzle piece (an HPM Unit), and we tested different pellets.

The pellets were not the issue, the JSB's 13.7's were shooting as they should.
The bedding took a bit of experimenting, at this power level, minute differences have substantial effects.
After three days of testing (and two full pages like this), we decided something was wrong, this is what we were getting:
Picture
Yes there were some great groups, but... no consistency.
This is a good example:
Picture
Five shots vertically scattered, then a tight group, then another five horizontally scattered.

​Now look at this:
Picture
Top row left to right:
A so-so group, then a better group, then a hideous group, then another good group with a lonely "flyer".

​AND, we knew that it was not a question of oscillating MV's:
Picture
So, we decided to swap scopes.​
Wonder of wonders, miracle of miracles! LOL!
This is what we got, straight off the bat:
Picture
This is the process of sighting in.

And when you click an inexpensive scope, you EXPECT to have to take one or two shots to settle it down.
Even some not so inexpensive scopes do this. Especially in a springer that is yielding almost twice its own weight in output energy.

At 25 yards, these are dime-sized groups from the knee and a scope @ 9X, let's validate that assertion:
Picture
Yes, I know there is one Canadian dime there, What do you want? I like the guys!

​Want to see how the groups are totally covered?
Picture
Picture
Picture
Picture
I need to finish the sighting in, but that will come at a later date when there is less wind.

Is it easy to shoot a light and powerful break barrel? Nope!

It would make a heck of a hunting rifle, or perhaps Silhouette?. Short, light (9# WITH scope), and with a lot of KO power as far as pigeons, squirrels, grackles , rats, etc. are concerned.

So, there you have it. Power, precision and accuracy in one small, light package.

AH! before I forget, dry lubed. Absolutely no oils or greases in the compression section.

In short, precision at the target comes from "internal harmony", and "internal harmony" comes from the precision fit between the parts that make up the heart and soul of the airgun.

Same could be said of humans ¿no?

Keep well and shoot straight!

​

​HM
0 Comments

Playing a little with a DIANA 58

2/6/2025

9 Comments


Re-sighting it really, LOL!

One of the pleasures of the professional airgunsmith is that, at times, someone, somewhere, finds something completely unusual and "out of this world", LOL!
This is one of those occasions.
A friend told me he had just acquired "an old DIANA", and that he wanted me to have a "looksie".
Well, we met at our Monday Night shoots and I was taken aback when the old dame came out of the case.
A REALLY OLD DIANA!
I thought to myself: "this is probably the first model to come out with a forearm in the stock"
Well, it seems I was not too off the mark.
After all the admiration, my friend told me that the gun was shooting to the right and up, he had to aim at the lower left corner of the target to hit the bullseye.
Hmmmm, that's not good.
Further, he told me that the sights had no way of adjusting the windage. Hmmmmmm
So, after looking in detail at the rifle, it was clear that the design intention had been to drift the sights to set the windage. The blade had a way to elevate, though a bit primitive, it was used all the way into the year 2k in the DIANA 30 (the shooting gallery/Kermesse gun).
So, that's where that peculiar sight came from!
After a few more words were exchanged, we concentrated on the task at hand (shoot 60 "for score" shots) and once that was done, we all had a long session of shooting the breeze.

When I got home, I put away the gun and during the week, in one of those instants where it seems time has stopped because you are waiting for materials, parts, tools, or "all of the above" to arrive I decided to tackle the "simple" job of re-sighting in the old lady.

In the light of the workshop, daytime, and more awake, I came to realize that for a gun that old it was in amazing state of preservation. Bluing, wood finish, everything was almost pristine.

BUT! Enough words, let's take a look at some pictures:
Picture
The DIANA 58 in all its splendor
Which is vastly superior to what they offered in the catalog:
Picture
There are some small differences, like the ring front sight that is not in the actual sample, and the "handle" of the cocking lever that disappeared, but apart from that it is a proper incarnation of the line drawing.
The "branding" in those days was a bit "Spartan" (or should we say "Laconic"?):
Picture
No model, no manufacturer, no origin.
Still, simple, elegant, and very clearly legible.
BTW, the rifle has NO OTHER markings.

This is the rear sight:
Picture
As you can clearly see the dovetail allows for some drifting and the elevation blade runs on the head of the screw. Not a "micrometer visier" but quite serviceable.
There are range markings on the side of this sight (10 to 50, I assume, meters), though not particularly exact/correct, it is a tribute to how something simple can still be effective.
And this is the front sight:
Picture
Again "driftable" in the dovetail.

After a few test targets and some measurements, the results were quite satisfactoyry and I had time to admire the craftsmanship that went into this rifle. Let's look into it in some detail:
Picture
This is where the cocking lever connects to the linkage.
The main screw has a "fixation" screw that can lock the position of the screw every ½ turn. And we need to assume that the axle screw is a "Shoulder screw". Nowadays, the same job is performed by a pin, with or without a head, and one or two E-Clips.
Now, let's move forward a little. This is the lever:
Picture
And, if we look at it in detail, we see that it was milled, and even checkered, from solid:
Picture
Now let's move back and see how the lever/linkage arrangement gets connected to the mechanisms tube AND at the same time serves as a mounting platform for the tap to load the pellets:
Picture
Also note above the distance markings of the rear sight.

In the purest sense of the word in gunsmithing, THIS would be the "receiver ring" because at the front, it receives the barrel and the rear, receives the power source.

Now, we go all the way to the back of the mechanics and we find this:
Picture
A cocking knob!

That cocked looks like this:
Picture
​Because, after you have cocked the spring, and inserted the pellet into the tap, you still have to cock the hammer that strikes the sear that releases the spring.
Safety? Or a simple solution to holding about 200 # of force and releasing them with a gentle trigger squeeze?
¿Both?
We'll never know. It makes the loading cycle complicated, but safe and the trigger pull more than manageable for some precision shooting.

​If we go to the stock now and look at the forend:
Picture
We find finely grained walnut, well sculpted for the purpose (this is one of those guns where the artillery hold is absolutely indispensable!
And screw cups! If anyone thought it was a modern invention, here is the proof that in the world of guns, there is VERY LITTLE that is truly original and new.

AND, what can we say about the pistol grip?
Extremely "English" in its conception and execution:
Picture
Rounded heel, flattened diamonds, double borderline. This pistol grip would be perfectly at home in any high end English Side X Side of the times.

The one "problematic" are this rifle has is where someone (surely an American), decided to use a "tang sight" to shoot longer ranges with more precision than the OEM sights allowed:
Picture
According to my measurements, these holes can receive exactly the base of a Sharps/Borchardt long range rifle.
Still available, it is not out of the question to get the bases and then add a mid-range sight that would allow the shooter to shoot out to 65-75 yards.
Since the rifle is a 5.5 mm's ("number 2 bore" per the English nomenclature of the time) / 0.22"  it is capable of reaching the 55 yards with enough authority to drop the Rams.

​Going all the way to the back, the buttplate is a steel plate:
Picture
And again the complete gun:
Picture
Shooting a round of 10M MMS (Mexican Metallic Silhouettes), I achieved a 32/40, not a stellar score, and just slightly under the score I would have shot with the K98 S but then the K98 S easily has one of the best sets of  notch and bead iron sights in modern airguns ever, and that includes the FWB Sport of modern times.

Point is that the gun is now shooting to POA without any need to do anything to the barrel and using fairly inexpensive Crosman Copperhead Pointed pellets and more reliable/consistent JSB's Express.

All in all a VERY enjoyable excursion through a time machine.

Would it be possible to make an airgun like this today?

Yes, issue here is :
Would anyone buy it at the cost it would imply?

Just taking a SWAG of what a gun like this would cost today: It would run north of $2,500 MSRP. Even using modern CNC machinery and current metals.

Hope you have enjoyed the pictures as much as I enjoyed having that old lady for a short while.

Keep well and shoot straight!


HM
9 Comments

The Hämmerli Pneuma

1/14/2025

2 Comments

 
Disclaimer:
Modifications made to this rifle were performed by an experienced professional airgunsmith. And, proved safe in THIS gun.
No warranties are implied nor extended.
We have no control of what you do on your own.
If you do decide to make ANY modification to a PCP, be conscious of which elements are under pressure and realize that, even 10 BAR's CAN cause SERIOUS bodily harm.
These modifications have not been reviewed, nor approved by Hatsan or Walther/Hämmerli
Again: Be careful! You are the only guardian of your health and safety.

Phewwwwww!

OK, now with the "small print" done, let's get down to our matter.

What is, exactly a "Hämmerli Pneuma"?

The short answer is that a Hämmerli Pneuma is just a re-branded Hatsan AT44

The long answer is that, for ME, there is NOTHING of "Hämmerli" in this rifle, and to get what I mean by this, we have to go back more than just a few decades.
Many years ago (58, to be precise),  I had the luck to see my first Match rifle.
Walking to my nearest "Sears Roebuck de México SA de RL y CV" (the Mexican Version of the company), I was regaled with the sight of the most beautiful rifle I had ever seen.
It was a Hämmerli Mod 45 Free Rifle.
Priced at the, then, EXORBITANT cost of Mx$3,595 (1966's US$ 287 ) it was way beyond the wildest dreams of a 10 years old.
Something like this:
Picture
Years later, I would come to own an Anschütz Match 64, and a Tanner Free 300 M, plus a Steyr SSG '69. But I can certainly say that my love affair with precision target rifles was born at the old "Sears" in Mexico City.

Therefore I always had a soft spot for the brand.

When UMAREX purchased Walther and Hämmerli I was dismayed.

What was going to happen?

Well, now, even that is history.

Luckily for Walther, the "Match" branch was spun off as an independent unit and they still produce top notch airguns, The Firearms branch is also independent, having been set apart from the UMAREX deal.
The Walther "Sport" branch of the airgun business produced two of the most advanced spring-piston airguns in history, only to die a quick death with the sale of all the parts and stock of what remained of the Walther Century Varmint parts to UMAREX for the creation of their 3400 model.

On its side, the Hämmerli brand has graced products made in China, Turkey and Mexico. Products that whether spring-piston or PCP power plant, have little to do with the Precision Match rifles of yesteryear.

Nowadays, through the German connection (Hämmerli was a SWISS company), they are re-branding the ISSC SPA "toggle bolt" RF as the Hämmerli Sport, and that is a gun that MAY be worthy of the brand, if the quality of the barrels honor the precision they promise. It should be noted that it is the THIRD "re-birth" of this particular RF.
BUT, we're getting away from the "Pneuma"

And here we arrive at the short answer: when UMAREX wanted a Hämmerli branded PCP that would get some traction in the "Sport" section of PCP airguns (they had already developed the Match version of their bottom of the line Walther into a passable beginner Match gun) they picked Hatsan, and the Pneuma is the result of re-branding a Hatsan AT-44.

The AT-44 has in itself, gone through at least two versions, the original one that we will call the "old model", and the new one that is sold under the "H" spec.
When Hämmerli discontinued the Pneuma, Hatsan advanced with the "H" version and the way the tanks hold the valve changed a little. This will be important later on.

​Soooooooo....

When a very good friend of mine asked me if I would take a look at his son's airgun, I replied that it all depended on the gun, I asked what needed to be looked into, and he commented that they could not get more than 20 shots out of a full tank fill and that they wanted to have the gun regulated, so that they could plink in a more comfy environment where the gun didn't need constant re-airing.

I answered that, subject to the availability of spare parts and accessories, I would be glad.

The Project

Everything started then at one of our Monday night shoots where, and when, I received a huge case with a smallish PCP.
I checked it over and wondered exactly what had I gotten myself into. LOL!

Some online research clarified to me that it was a Hatsan. Checked with my friends at Altaros (best regulators out there), and they DID have a regulator for the Hatsan. The only issue was winter holiday season in Europe was starting and all means of transportation were getting overloaded.
I still decided to order one because that would be the "gold standard" by which to judge other options.

Almost at the same time, I found the Hatsan made regulators and some looking into the old Youtube videos provided some interesting information:
a) there were two types of valves at the tanks. One that uses a simple plastic plug to hold the valve return spring (what we call the old model), and another (H type) that actually has a plastic screw in perforated plate that holds a much stronger return spring.
b) the inside finish of the tanks had gone down over the years. The older tanks were much more even and smoother
c) the regulator for the older model had a relatively small "plenum", which would limit the tuning options
So, I ordered a new tank under the new "H" spec and ordered two "H" regulators.
d) what I liked a LOT, was that the valve was IN THE TANK.

When the regulators arrived, to my dislike, it turned out that the newer "H" regulators were non-vented.

I generally like vented regulators for all guns, the non-vented regulators have a tendency to "creep" and even if it is well made enough that they do not "creep", the first shot is always low.
In a hunting scenario this will surely cause a problem, either a miss or, worse, a bad hit that will not cause immediate death. That is, ethically, unacceptable and should be avoided.
So, some non-vented regulators do require one to three "evening out" shots prior to actually starting the hunt, and then, the hunter should know how long the reg can stay under working conditions.
Not hard to determine, but something that needs to be determined BEFORE.

In view of that condition, and after studying what we had at hand, I decided to modify one of the "H" regulators to be a vented one.
Picture
They may look the same (well, almost), but the working is a bit different.
Let's see them from the front:
Picture
On the left is the vented one, on the right the OEM one.
observe where the "dimple" has been lathe turned in the center.
And now, let's look at the OEM one's attachment method:
Picture
As you can see, the valve return spring is held in place and pre-compressed by the regulator's front end.
Picture
It is not a bad system "per se", but it goes contrary to my philosophy as far as poppet valve tuning is concerned because I believe that MOST of the closing force for the valve has to be provided by (ideally) the flow speed, and if that is not possible, then the pressure remaining in the plenum or tank.
This is a "passive" way to ensure that the valve will self adjust to the natural lowering of the pressure as shots are taken.
But, that is JMHO. YMMV.

The other difference is the location of the additional ORing.

If you look at the vented version, you will see that it has an additional ORing at the rear, where the regulator's body meets the plenum chamber.

Well, that ORing makes it possible to remove the tank's closure ORing and create a vented reg. BUT, this works MUCH better in the older tanks that had a great finish and therefore needed little inteference for the ORing to seal at the rear. In the newer tanks, a bigger ORing is needed and this creates an unsafe situtation where you MAY think the tank is empty, but there is still pressure in the plenum. SO, BE CAREFUL!
​
ALTAROS regulators have a great site and their installation has been well documented, so we will not go there.
Suffice to say that ALTAROS regulators are graduated and offer a much better option when you want to tune an airgun to some specific specs and not just "dialing it to 11".

Now that the machining part was done, the "fun" could begin. And I am putting " " on fun because it is a necessary evil to test long strings when tuning a PCP. Otherwise, you are just making assumptions about how the regulated gun is going to behave. Professionals do not do that. Simple.

With the two tanks in hand, a probe and a compressor, we started the tuning process itself, which will not be without its thrills and surprises, LOL!

The tuning process

Regulators were (at least that is what the purchase specs said)  set at the factory to 120 BAR's
Now, that is, in truth, a VERY HIGH setting. If the gun needs 120 BAR's to yield decent MV's with a mid-heavy 0.22" pellet, then there is something wrong with the system's design.
It is not a bad setting if you are planning on slugs (which we tested), or pellets in the heavy for caliber region, but for mid-weight pellets it is a wasteful setting.

Anyway, that is what the factory sets them at, and there is no scale in the OEM regulators. On top: there is only ONE manometer in the gun, so that you cannot "monitor" the regulated cavity's pressure.
Your only method of determining what is the Reg'ed pressure is to shoot a whole string and note where the MV drops like a rock.
Following that method will also yield good information about the internals of the system and whether they are "balanced" or not.

Seven years ago, when we were studying the upgrade packages of the Stormrider, this was one of my main priorities; now it is almost a given in MANY PCP's, back then it was revolutionary.
So, with assembled and aired up tanks, we started the testing.
We had PREVIOUSLY, performed a few "benchmark" tests, which yielded VERY poor performances.
This is the OEM non-regulated setting:
Picture
The first indication that something is not right comes from the fact that the MV drops DOWN continuously from the first shot.
Yes, there is a lot of power in those 18 shots that are "really good" , but then, most pellets will not stabilize well from most barrels at this MV, so ¿Why use it? ¿Marketing, probably?
Whatever the reason, this was the source of dis-satisfaction about the rifle that my friend and his son had.
Quite understandable.
So, I thought, maybe they drew the spec for heavy pellets and slugs?
Well, here is the result of testing:
Picture
Not exactly stellar performance, and those two consecutive low shots with the JSB H's (10.3 grs) showed that there was something fishy going on in there.
The K-O slugs (same weight) performed well and more consistently, so there COULD be an argument made that the idea was to use slugs, but then, something does not "jive" in the balance of the system because the system is rated at 200 BAR's and, theoretically, at least, there are shots that could be taken at higher pressure and use the valve-lock to control the energy output.
So, what went funky in the design and prototyping? the spec of the tank's max pressure?, or the springs in the valving?
Because in principle I wasn't going to spend too much time in this project, I thought, well, we reduce the reg pressure and we'll be fine.
Customer had expressed the desire of 60 shots at 600 fps to make this a "plinker", so there were no real high stakes and just a lower reg pressure should do it ¿right?
Hmmmm, not so. This is the string of a regulated string with the vented modified reg:
Picture
Still too high an MV, way beyond useful, though consistency was good.
So we reduced the pressure in the reg to ABOUT 90 BAR's:
Picture
At first I tought I had done something wrong, probably "broken" the reg by setting it too low, nowhere could I find any spec telling me what was the min pressure of the reg.
So I tested with the Altaros at 100 BAR
Picture
WHAAAT????
We're getting less shots from a lower pressure regulated cavity?
As Hamlet would say: "Something is rotten in Denmark".
But this told us that the problem lied in the action itself. 
The action was being wasteful, and there was no further adjustment possible to the valving.
Picture
But before that, we need to discuss the hammer adjustment procedure.
And, on purpose, I am not going to show any pictures.
All the videos and literature out there said that, to adjust the hammer strike you needed to put a long 4 mm's hex wrench through the rear hole and screw IN for less energy, OUT for more.
SOME videos told the user to cock the hammer, or to at least bring it back to where the screw was accessible to the wrench.
Well, at least in THIS version, that is total hogwash.
Even under hammer spring pressure the very long grub screw at the bottom of the hammer will make the hammer spin and not "take" any adjustment.
HOWEVER, looking at the bottom of the action, there is a nice little hole a little bit to the rear of the middle stock screw, and through that hole, when the hammer is partially retracted, you can LOCK the hammer rotation by inserting a punch through a corresponding hole in the hammer itself and effect some real adjustments to the power screw.
And so, we tried to reduce the energy of the hammer strike, only to find that it was at its LOWEST.

The grub screw at the bottom of the spring cavity in the hammer dictates the preload of the hammer spring, if it is out, there will be more pre-load, if it is in, there will be less pre-load.
At its lowest setting, the grub screw still protrudes almost 10 mm's into the hammer spring cavity, so this was dictating a LOT of pre-load.

​As hard as it seemed, we had to get INTO the action.
The action seems to have been designed by a shotgun gunsmith.
The components are not actually "unitized" and springs are held by the pins that keep the trigger in the action.
Take out the pins to remove the trigger and there are springs that are now axle-less and can be displaced to places where they do not do their job anymore.
AND there is no documentation of how the trigger works.
So let's look at it briefly.
The trigger parts are not that different from all the airgun trigger parts we've seen that seem to stem from the Chinese Crossbow triggers of the 3rd Century BCE.
Picture
When the trigger adjustment screws push the lower lever, the front of this moves up and the rear drops down, thereby enabling the rear lever to rotate to the left, allowing the sear's rear to move up and the front down, thereby releasing the hammer from its cocked position.
It IS a good trigger, crisp and clean.
It is also an interference trigger, as opposed to hook triggers, interference triggers are faster.
Why give the trigger blade a counterweight? I assume it is mostly a place to put the first stage spring, though the weight does give the blade a little return force, it is not the determinant force.
Now, springs coming out of their place when disassembling something is not an unknown aspect of airgunsmithing, and the same solution that applies to spring-piston airguns applies here:
Dumb pins.
A dumb pin is a shortened pin that holds the parts of subassemblies in place while the assembly of the whole gun is being completed.
Once all the sub-assemblies are in place, the final pins drive the dumb pins out, the gun is secured and can be mounted in the stock and shipped.

So we turned two dumb pins, 3 mm's OD, 10 mm's long and they worked well.
Picture
One dumb pin is installed, the other is out for illustration purposes. With this sub-assembly in place, the action can be dis-assembled and re-assembled again as needed.

For our purposes then the action had to be dis-assembled, the grub screw adjusted to it MINIMUM, and then the whole thing had to go into testing again.

And this is exactly what happened, the grub screw was cut IN HALF, and the gun re-assembled for testing.
Once the power adjustment screw was cut in half these are the results using the Altaros regulator at 100 BAR's in the old tank: 
Picture
NOW, we're cooking!
57 shots at top speed for mid-weight pellets is a good performance, sample standard deviation of 3.2 fps tells us that 95% of the shots will be between 911.8 and 902.2 which is perfectly acceptable.
If the user can find a pellet that is really accurate out of this barrel, he could shoot most FT matches without worried of refilling during the match. Make sure you start with a full tank, take two shots just before startin the match, and just keep on shooting!
For a light gun, this is perfectly acceptable performance, and, at more than DOUBLE the OEM performance, it was a good point to stop this avenue of development.

Now, the user wanted a "plinker", something in the 600 fps region.
There are MANY reasons why users may want lower power.
Noise
Neighbors
Backstops
Targets
etc.
So we decided to dedicate the Hatsan H tank and the non-vented regulator to reach that goal.
We tried setting the reg at "about" 70 BAR, and upon testing a whole string we observed something VERY interesting:
When the tank's pressure was at about 60 BAR's the valve self regulated!
This was a Eureka moment and we proceeded to adjust even further the OEM H regulator and perform a test.
Because we did know what happened at higher pressures, we started at 150 BAR's:
Picture
So, 78 really good shots using 2/3'rds of the tanks capacity, with an ES of about 19, and a sample standard deviation of 6½ fps.
NOT BAD.
DO note that even starting at a lower than Max rated pressure, the first two shots are "penalized" by the non-venting regulator.
Since the express purpose of this tank is to be a plinker, I considered the project had achieved its goals.
As a plinker and using the full capacity of the tank, this combination will yield about 150 perfectly usable shots.
Which means 1 shot per BAR.

Epilogue

As I said to my friend: Now you have TWO rifles.

It's a question of finding a pellet that works for each power level and having two scopes.

If you want to plink, you use the plinking tank and the corresponding scope and get a ton of shots without refilling. IF you want to pump by hand, then do not worry about going much higher than 170 BAR's and you will still get more than 100 shots.

If you want to get more serious, get the appropriate pellets and scope and you still get almost 60 shots per fill at 15 ft-lbs. Plenty of power for the caliber.

Overall, I would say it was successful project.

Hope you have enjoyed the read, keep well and shoot straight!


HM
2 Comments

The Mauser K98 S (Spring) by M&G

12/18/2024

4 Comments


A true Mauser

The Mauser K98 is an iconic weapon, a lot has been written about it and we'll not go there here.
What is important is that Mayer & Grammelspacher (makers of DIANA airguns) now belongs to the same industrial group that owns Mauser (among other prestigious brands), so M&G/DIANA can, in all honesty, make and market an airgun under the Mauser
 brand.​

The first time this happened was with the launch of the AM-03, an airgun version of a current Mauser sporting rifle.
We have already reviewed and commented on that one, so we will also skip that.

The second time it happened was when M&G decided to make a "facsimile" of the venerable K98 using the D460 Magnum as a platform/chassis.
The 460, being a svelte and powerful lady made a lot of sense as a spring-piston version of the war horse that
 is the K98.
There is another version still, as a PCP, but we will tackle that at a later date, as it has much in common with the Stormrider and we have explored that one fairly in depth.

So, what we are looking at in detail today is this:
Picture
Nice! ¿No?

Well, a few "pundits" have complained that  (insert Gilbert Godffrey's voice here:) "it lacks a bolt".

Ok, so, this is the difference between a replica and a facsimile.

Replicas are supposed to be identical to the object they replicate (am I making sense here?) .

The word "facsimile" comes from the Latin "facia" and "similes", which means "similar face".
In a DOCUMENT, a facsimile is an identical copy because a document is nothing but a "face", in more bodily goods, a facsimile is understood as being "similar enough" , but not necessarily identical all around.

So, having clarified that, perhaps we also need to say that the idea had been brewing for a number of years.
​Back in 2018, at the IWA, DIANA showed this:
Picture
That year, we had good, long, conversations with my friends Michael Swoboda and Florian Hassler, CEO's of M&G who are great fans of history and finely made guns so, this model holds a special place.
In here, I have to say that Florian will be retiring from DIANA/M&G at this year's end and that, personally, I will miss him much. We may have not always agreed on technical stuff, but the respect and gentlemanly conduct of the person made him very dear to me.
Back to the k98: the model was produced for a few years and, due to economic conditions, is now out of the catalog; at least for the foreseeable future, but there are enough around that they merit a study in depth.

A project is born

Back in November of 2020 (yes, that is a long time ago), a friend asked me a BUNCH of questions about the K98 S (for spring), and they were dutifully answered. Little did I know that it would "unchain" a series of events that would take years to consolidate into a solid idea.
First of all, my knowledge about the different models and issues of the k98 was somewhat sparse.
AaMoF, even the "experts" could not agree on certain aspects, like which scope, how it was mounted, how did the stripper clips fit into the picture, was the "grunt issue" buttplate always in place, what other modifications were done, etc, etc, etc....

As my enquiries progressed, two notable companies with whom I do some small, but interesting business, started asking ME questions!?!?!?
Wait, what? I am the one that asks the questions here,  LOL!

It ended up that they came up with VERY interesting replicas (now these are TRUE replicas) for parts that are extremely scarce, and yet highly sought after. Now the powderburners have access to replicas of parts that might enable them to build a SS K98 using old actions/basic guns available in the surplus market, into something historically accurate and functional.
BTW, there are matches that are limited to originals or true replicas, and very few will enlist a $24k gun into a match, LOL!

We'll come to that in a moment.

The other thing that happened, was CoViD. Yes, the world stopped for almost two years. And it took one more year to get all the delayed stuff over!

Once everything was sort of back on track, we could take up the project again.

In here, I have to extend to my friend/customer my heartfelt gratitude for his patience and understanding.

​So, where does one start?

"In the beginning"

Famous words from one of the most read books. But, back to airguns:
​
In the beginning there was an idea:
To turn the k98 S into a shootable/enjoyable/accurate/easy to shoot machine; while respecting the "spirit" of the beast and its specific incarnation as a Sniper's Tool (ScharfSchutzen Gewehr-SSG)

Most of us are fairly conversant with the two main "embodiments" of these:
​
The small, forward mounted scope:
Picture
And the quick detachable "high mount" that offered the opportunity to use the iron sights on the fly:
Picture
Picture
Picture
When developing these ideas, there is no alternative but to get, physically, the parts you need, or believe you will need and "try them on for size".

So, in this way I came about getting this:
Picture
Yup! My good friends at Vector Optics made a run of replica mounts for the 98k. And I mean replica.
They allow the use of the iron sights:
Picture
The mounts are "claw" style in the sense that there are "tabs"  that secure the front mount:
Picture
Then the whole assembly gets inserted:
Picture
And rotated:
Picture
So that the "claw" at the rear slides in and catches
Picture
And the mount gets locked by turning the rear lever to the back:
Picture
There is absolutely no doubt about the strength of this arrangement, and it incorporates windage adjustments:
Picture
The scopes themselves had the elevation turrets.
​
As much as I like this system, we could not use it and still keep the "scope forward" mounting version.
MOSTLY because the D460 is loaded exactly at the point where the original forward mounted scope would be.
There is nothing as displeasing as an airgun that is hard to load.

The last thing to mention that is interesting for us, airgunners, is that the mounts allow for "droop mount" compensation:
Picture
If you are wondering why mount the parts into wooden "dummies", it is because these parts are made to VERY TIGHT tolerances, and so, you need to "work them well" BEFORE installing.
You do NOT want your scope to be the lever that "loosens up" the mounts.
The curvature of the mounts follows VERY closely the curvature of the mechanisms tube in the D460, so soldering the mounts would have presented no serious trouble.

I MAY use these mounts in another specimen that will be upcoming. But, for THIS specific version, where the user wanted a "forward mounted" scope, we ended up having to use a "reversed" version of the Hawke adjustable dovetail to weaver rail with extension.

​The OEM part starts like this:
Picture
But it is designed so that the extension protrudes to the REAR, if you see in the picture above the "hinge" is located on the opposite side to the extended part of the rail.
So, the reversal starts with changing the arrangement, and because we wanted no "slop" we started by turning a brass pin to replace the loose hinge pin in the OEM piece:
Picture
We had to relocate the droop adjustment screw and the locking screw:
Picture
And then the rail could work as we wanted:
Picture
Picture
Picture
Do note that the k-98 S's loading port is "clear" of the scope's bell and loading is not a problem.

Not bad, ¿huh?

The other part that came from a totally unexpected source was the "Geriffelt Schaftkappe". One of my main peeves about the K98 S's (and I've sold a few) is that, for precision shooting, the smooth buttplate simply does not "cut it". It slips at the worst possible moment. 
I always wondered how the snipers of the time adjusted to that, and I found pictures of a number of rifles wrapped in rags, others with filed marks, and still others that had actually received a "grooved" (geriffelt) buttplate (Schaftkappe).
​
​So, when I received this from my friends at ADE:
Picture
I was very pleasantly surprised.

​The difference is day/night:
Picture
Now, you MAY think that the replacement isn't a direct one because the stock screws do not align, but the reality is that the stock-maker actually replicated the stock's rear, and the stock DOES have a screw hole in the right place.
​These butt-plates are VERY strong pieces (after all, the butt was part of a war implement) that are like a "cuff", meaning that they go OVER a "reduced" section of the stock. I was somewhat fearful that the reduction would be different in the Mauser by DIANA stock vs. the original Mauser version, but lo and behold! Perfect fit!
Picture
Picture
With the addition of a leather cheekpiece, combined with the very low rings and small scope, the rifle can be used with both, iron and scope sights.
The leather cheekpiece can be available in RH or LH version and you can cut slots in the "off side" to allow the two part Mauser K98 sling to be used.

Picture
The rail and the scope rings do not allow the simultaneous use of the iron sights and the scope, but by removing the scope WITH the rings, the iron sights are clearly usable:
Picture
A quick walk-through of the ergonomics showed that we had achieved the objectives:
Picture
Picture
Looking through the scope was an interesting experience, at 2X it offers a wide field of view:
Picture
At 7X it affords quite a lot of detail:
Picture
So, now that we had the "dress" it was important to get a performance that honored the likeness.

The Powerplant

The idea was to have a 13 ft-lbs springer that could be shot all day without too much fatigue.
So, initially, I had thought about using a short stroke piston:
Picture
AND the output was there. BUT the cocking stroke could not be altered in such a way as to reduce the PCF (Peak Cocking Force).
Exerting 45 # F, even for a short arc still requires the human to exert the force, and humans fatigue on the force exerted, not the total energy input.
So, building on the work previously done in the LGU Ultra Light (UL) Piston, we devised one for the D460.

We used a Titan #1 spring, with one coil lopped off.
In here an important note:
The "NEW" Titan #1 is not the one we had come to love. And I cannot but blame our European "cousins" that complained endlessly about the #1 not being a "standard power" spring and being "too powerful and not a drop-in for 12 ft-lbs". The "NEW" #1 is a good 0.010" larger in OD, and  0.002" smaller in Wire Diameter.
And those differences are important, just plug the numbers in a spring rate calculator.
The other aspect is that the ends of the spring are not forged parallel.
The ends are somewhat "conical". The last coil or coil and a half are substantially smaller than the ID of the rest of the spring (0.583" vs. 0.624"), so that created a huge headache. We ended up "opening up" the ends.

And had to turn two different guides.

Anyway, by using an UL piston, we could "tune" the shot cycle to the power we wanted and the pellet the barrel preferred by modifying the weight of the top-hat alone, while keeping the PCF to 31 # F.

Extensive tests in a D52 platform yielded interesting results and by the time we settled on an arrangement, the whole was transplanted into the k98 S.
Results were a bit on the low side to start with:
JSB Xact .- 11.6 ft-lbs
H&N B-8.- 12 ft-lbs
QYS SL.- 12.1 ft-lbs

So we changed the top hat to a heavier one:
JSB Xact.- 12.9 ft-lbs
QYS SL.- 13.2 ft-lbs
H&N B-8.- 13.2 ft-lbs

BINGO!

The lowest spread was obtained with QYS SL's, but those pellets are not easy to obtain, so we did the rest of the tuning with the H&N B-8's

In the end, after about 500 shots the gun was yielding 838 ± 4 fps with the H&N B-8 that are 8.44 grs. (nominal)
.

The process

We'll be tacking here the K98 S serial # 25030667, which should be fairly typical of all others.
To disassemble a Mauser K98 S you will need some special tools.
DIANA includes them in the box, so if you got your gun second hand, you may not get them.
One tool is for adjusting the front sight's elevation; the other, the most important one is a 3 mm's thick 16 mm's wrench.
​You can make one from a bicycle wrench in 5/8" if it does not happen that the tolerances in these cheap tools allow dual usage.
Picture
The notches are to allow the use of this tool also for tightening/loosening the scope rings.
​
You need to remove the muzzle piece:
Picture
There is a tiny retaining screw at the top, behind the sight blade that needs loosening. Do NOT forget this!
Picture
Picture
Picture
The tiny screw at the FRONT of the front sight base is to set the blade. The blade gives you a wide range of vertical positions by screwing in and out the whole blade.
Picture
Do note there is a flat at the bottom and the piece will always align properly. Just do not force it.
Picture
Once that is done, then the "train" can start coming out. Open the lever:
Picture
And using a shaped block, tap to remove the front metal guard:
Picture
This will allow you to slide out the first "wagon":
Picture
Now, keep that part as an assembly:
Picture
And note that there are small pins and big pins. You CANNOT assemble the part in the wrong orientation if you follow those. Now remove the second metal part and put it in the train:
Picture
You will now need to disassemble the stock from the action because there is one piece that is "keyed".
​
Loosen the fore end screws and the rear stock screw (front trigger guard screw):
Picture
Check the screw wells for damage by the star washers:
Picture
Clean it up
Picture
You will need to reinforce that with some steel flat washers. That will be done later.
Remove the rear stock screw and now take the action out of the stock:
Picture
Now you can slide the top wooden piece out of the barrel:
Picture
If you look at that part from the front, you will see how it is "keyed":
Picture
And now you can put together the whole "train".
Keep it all together in a box, old scope boxes work very well for this:
Picture
Picture
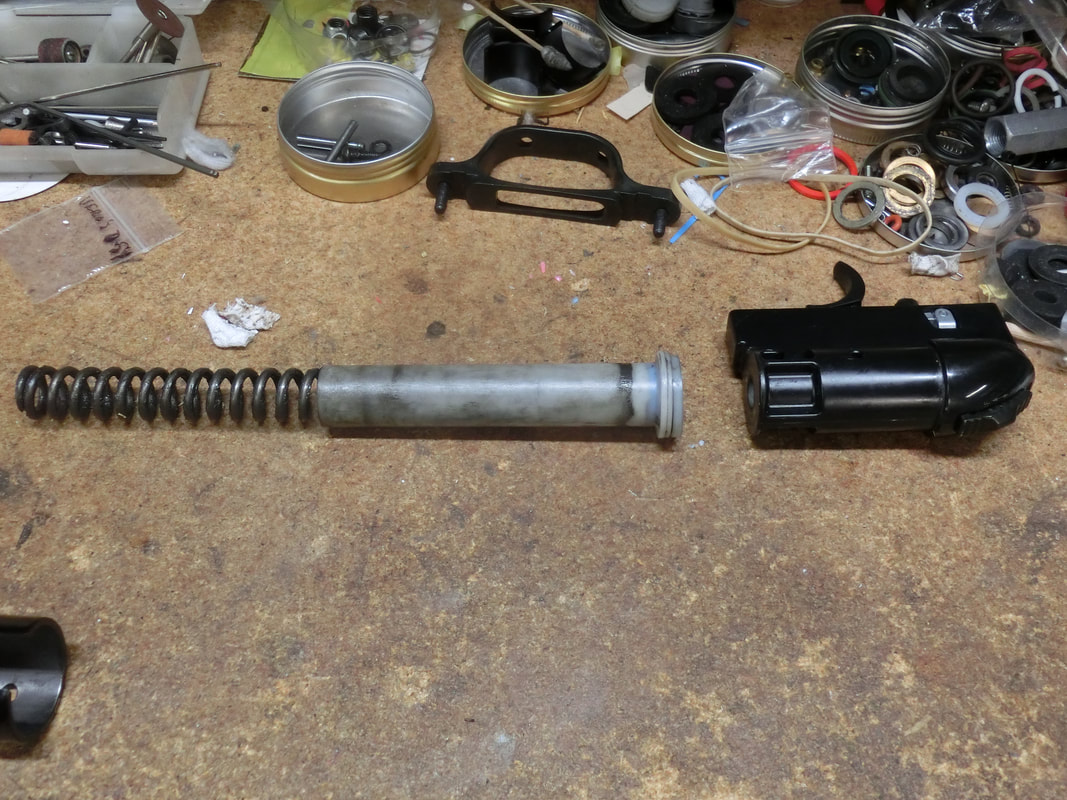
Now you have a D460 action you can work on:
Picture
On of my favourite parts:
​
​"Look Ma!, it's a genuine Mauser"!
Picture
Put the action in the compressor, replace the action pins with the dumb pins, open the action and remove the power plant:
Picture
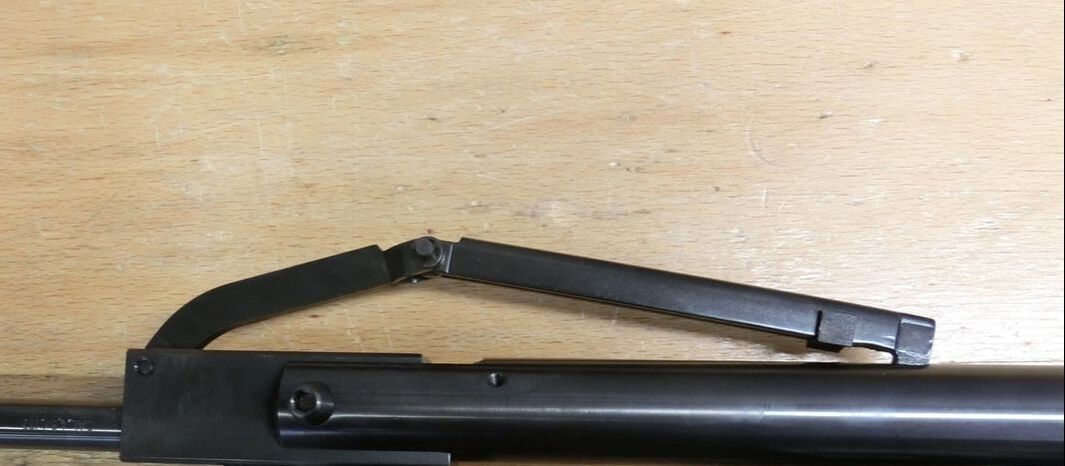
The cocking lever arrangement is disconnected:
Picture
And the lever linkage is disconnected from the compression chamber:
Picture
Picture
Once the compression chamber is extracted, the breech seal can come out:
Picture
To my surprise, a spacing washer came out.
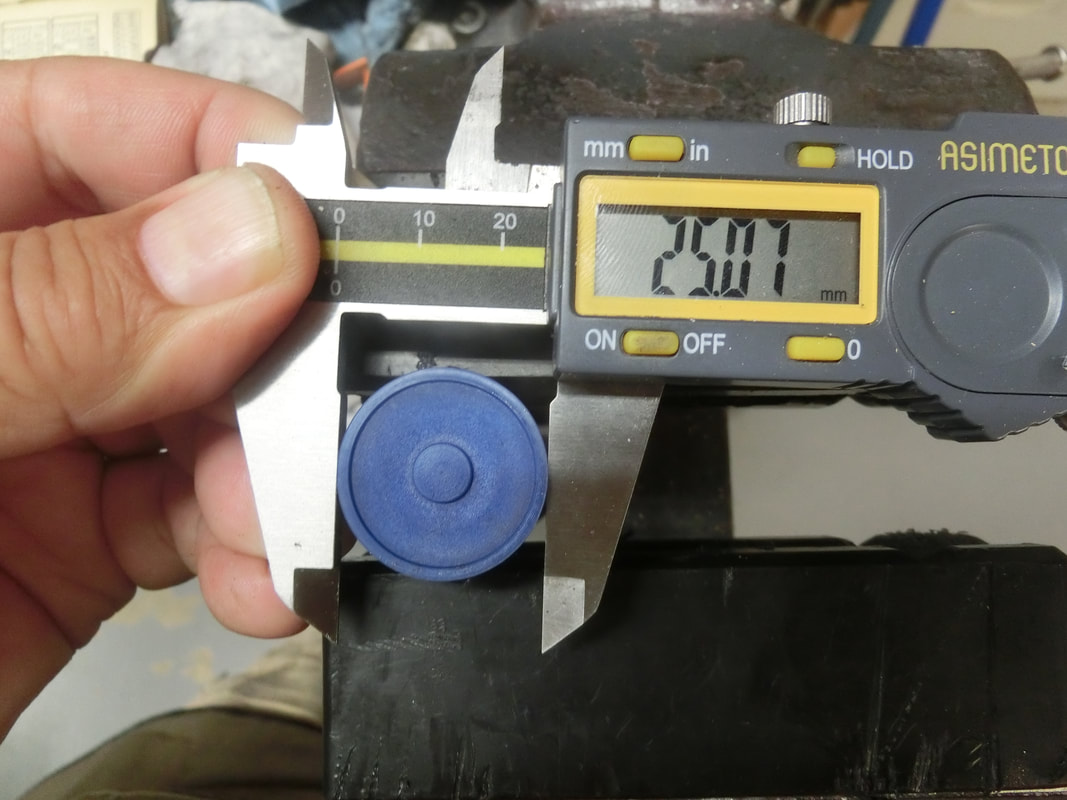
We had to turn a special 
reinforcing insert and replace the seal with a new one:
Picture
The barrel was cleaned:
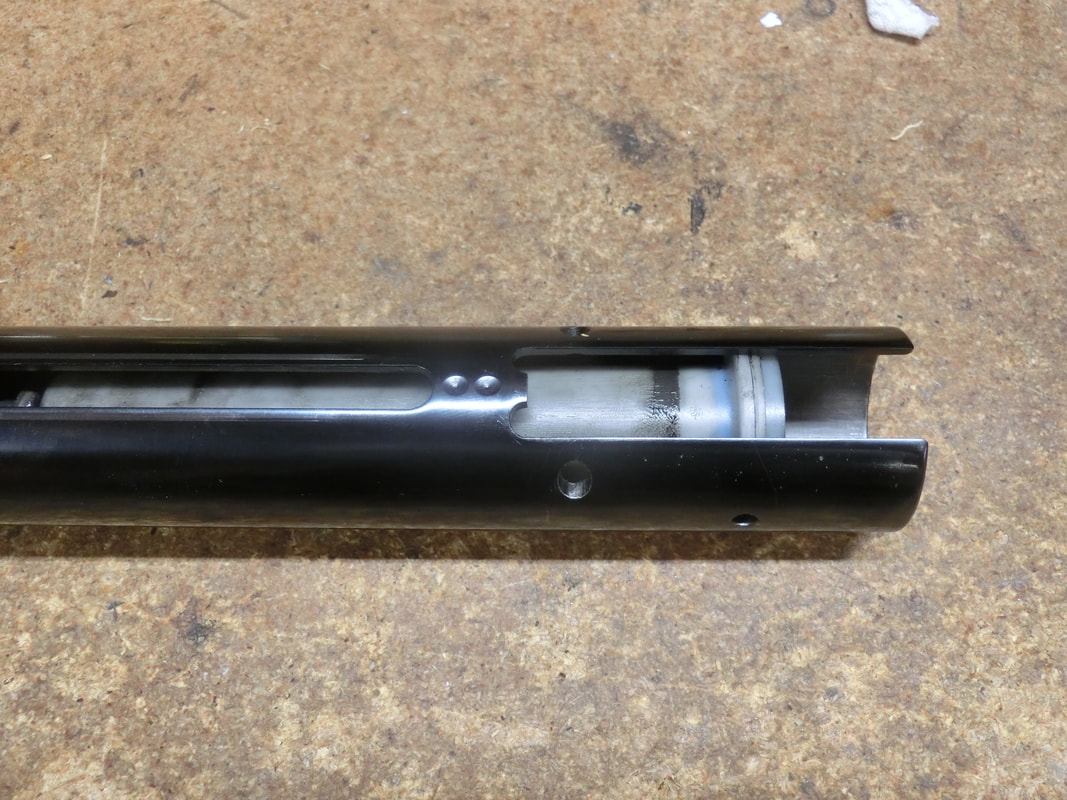
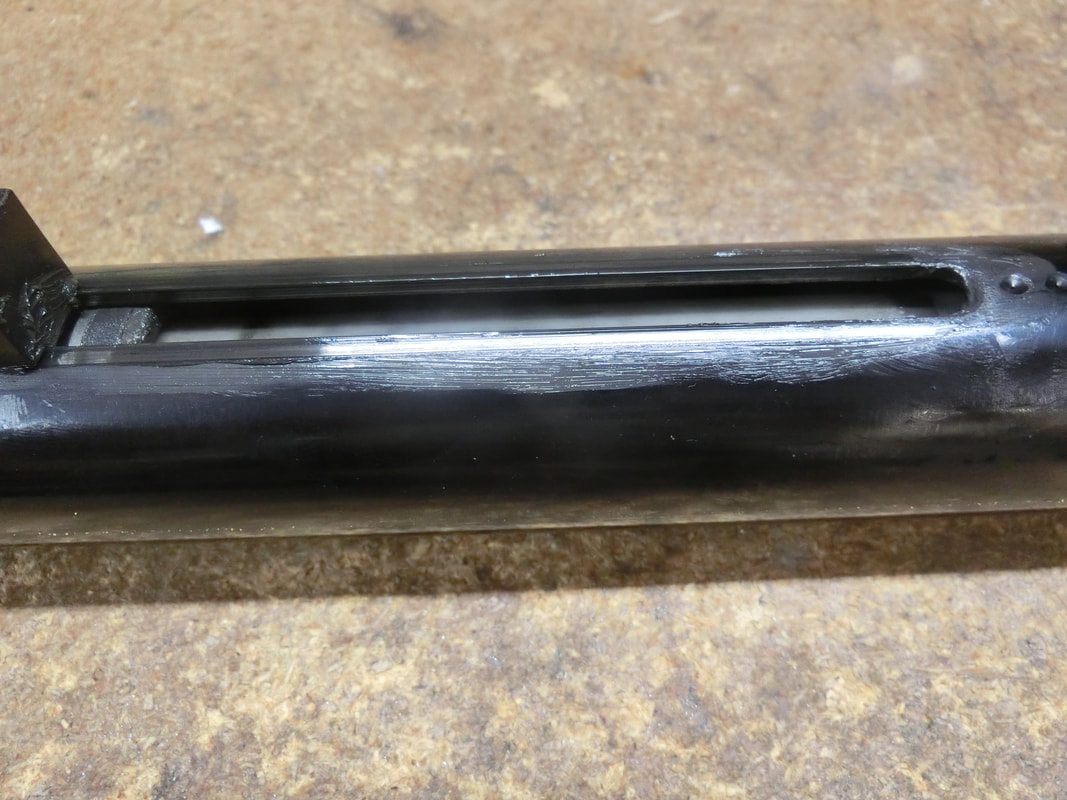
Picture
And the inside of the mechanisms tube was de-burred / polished:
Picture
Picture
Picture
Picture
Now the barrel work can start.
As it has become somewhat "normal" for DIANA airguns in 0.177" cal., the barrel's leade was too lose for the precision pellets we normally shoot (JSB, H&N, QYS), so that leade needs to be shortened.
Because the 460 has an offset barrel in relation to the compression chamber, we needed to make a special tool
:
Picture
The brass pilot was turned to the diameter of the chamber (that differs from the diameter of the barrel at the choke). The tool also needed to connect to a manual drill and extensions:
Picture
To reach deep into the D460 action:
Picture
We made sure everything was square:
Picture
And removed about 0.5 mm's:
Picture
Once that was done, we performed the trigger work and affixed the external retaining rings we use in all our builds:
Picture
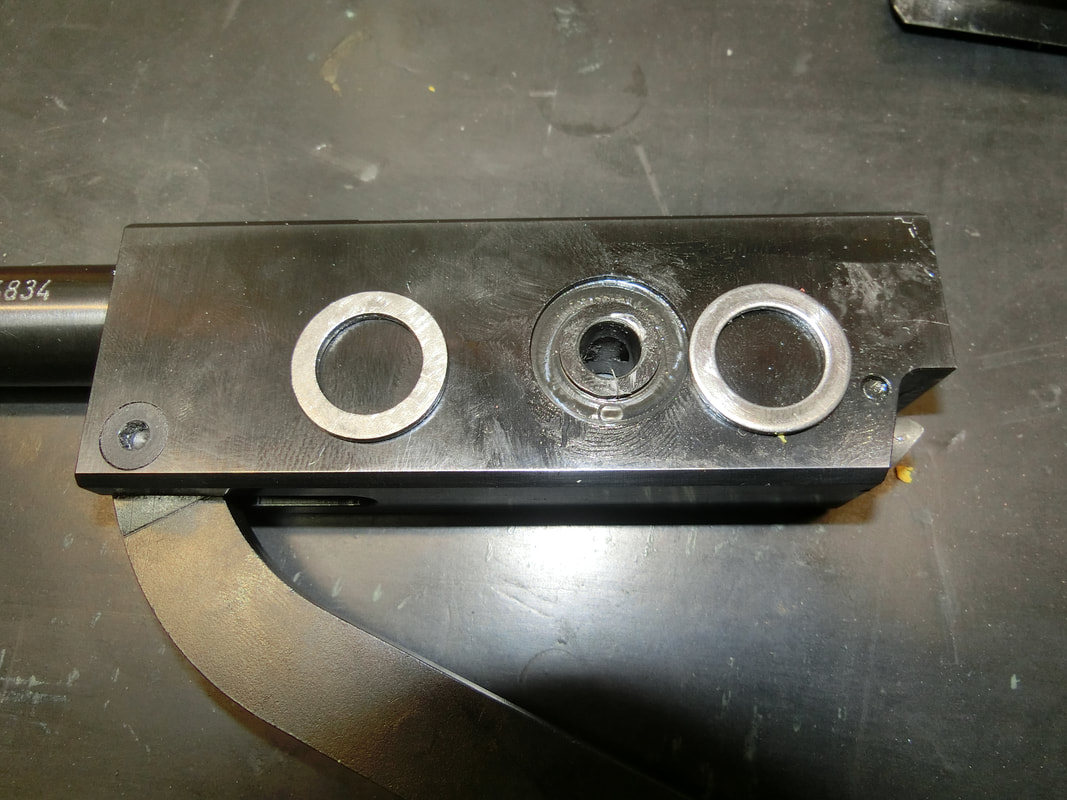
The powerplant was changed and upon assembly, we took care of the screw wells by gluing flat washers at the bottom:
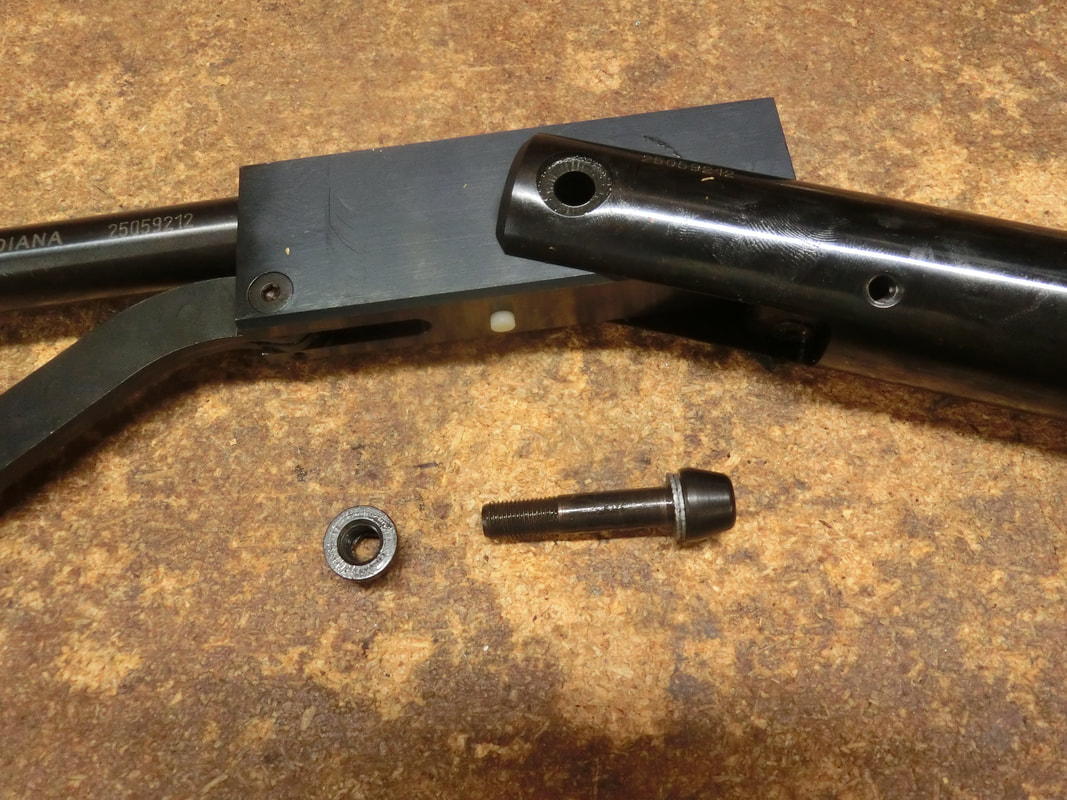
Picture
And replacing the star washers with Nord-Loc washers:
Picture
The assembly went in reverse order EXCEPT for the addition of barrel shims between the barrel and the barrel sleeves.
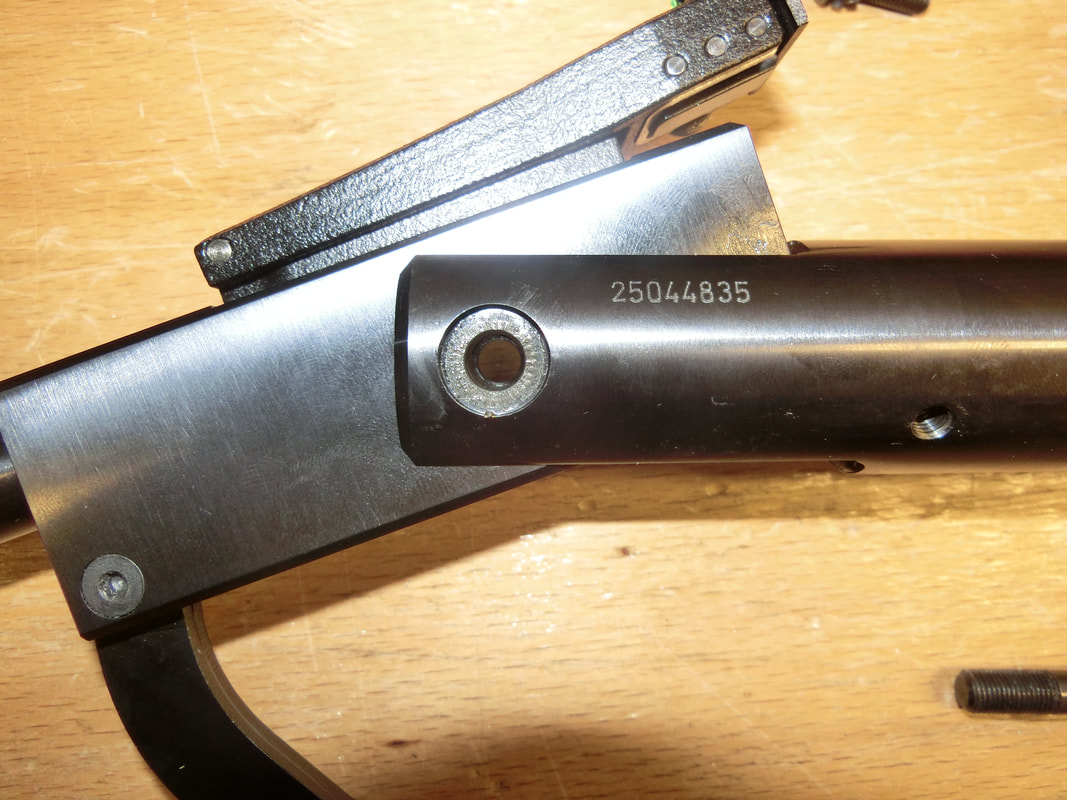
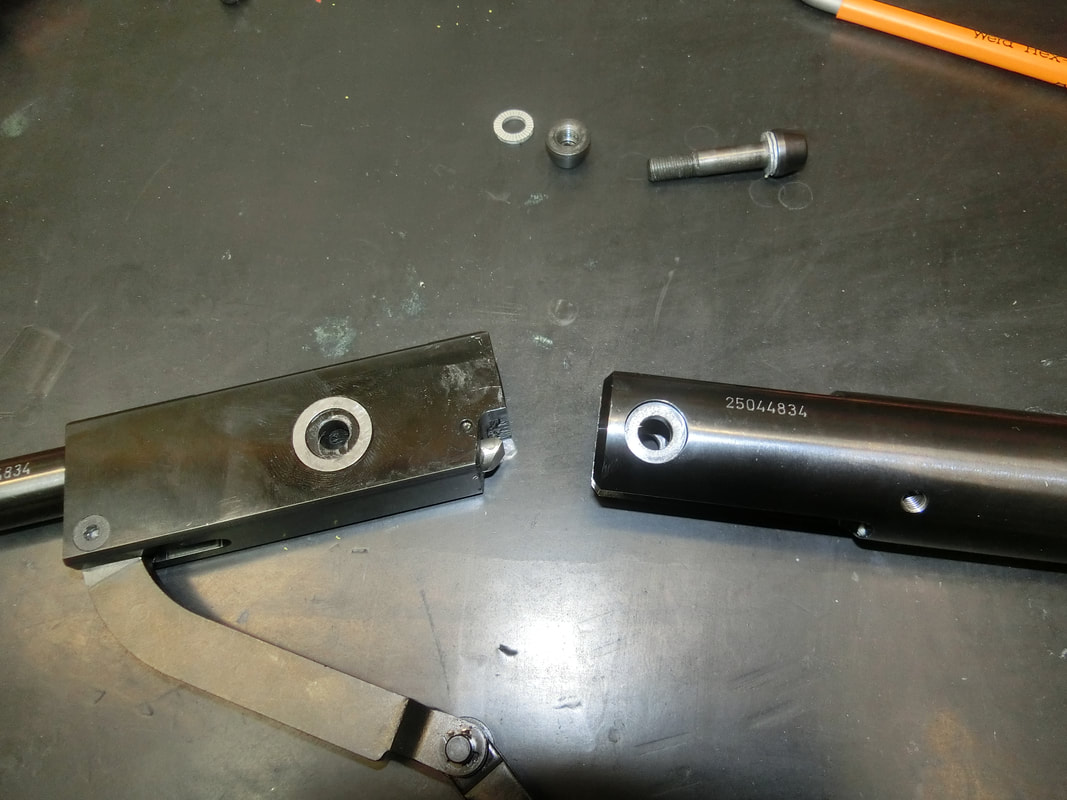
This is a part hat DIANA uses in ALL the rifles under the 48 -> 56 model numbers, so I do not know why they excluded it in this model that, because it has so many "thingies" hanging out there, needs it the most.
Shims were cut from larger stock and sized precisely to the lengths needed:
Picture
Picture
To cut thin materials, you need to use a mandrel:
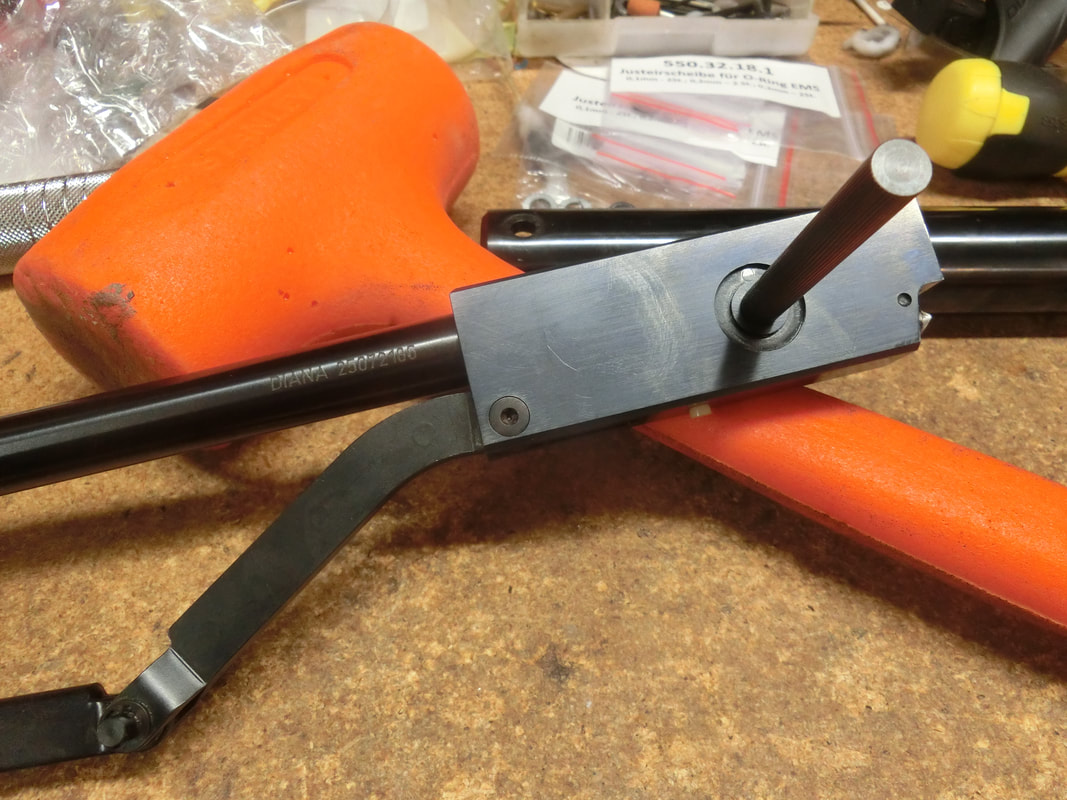
Picture
Now we have a superb fit:
Picture
ORings added:
Picture
Picture
Picture
And a magnet glued to the spot where the lever needs to be held.
If the gun is disassembled, then upon assembly, care needs to be taken to align this magnet with the cocking lever to make this secure.
Picture

The results

Now, was all this work worth it?

I would answer with a resounding yes.

I took advantage of an outing to the WAC-DIFTA airgun range to test it at distance.
And, on, purpose, did not take any other rifle apart from this one.
Picture
Picture
For starters, it is truly a beautiful lady, and once I became somewhat familiar with the 7x scope and the duplex reticle (a FAR cry from the 30X Xmas tree style I normally use), this Valkyrie (war lady) allowed for a more than reasonable performance.
Targets were set at 10, 25, 40 and 55 yards; on one hand to reflect the distances that the Pyramyd Air Cup "Gunslynger" silhouette style shoot is shot at, and on another, the max distances allowed in WFTF for targets of 15, 25 and 40 mm's diameter.
Picture
The FT targets were for my friend Toby, that is starting his FT career
Picture
I am still hopeful I can convert him into a Spring-piston shooter, LOL!
The silhouettes were mainly for the K98.
The first round of 20 shots, was taken to decide HOW to sight in the rifle:
​The chicken:
Picture
The Javelina (wind started picking up):
Picture
The Turkey (I started paying attention to the wind):
Picture
And the Ram.
​I had no idea where the shots were going to land, but the fact that all the shots are in a horizontal line told me the pellets were being stable at this distance, and that was a huge success:
Picture
After retrieving the targets and taking some measurements, I decided to sight-in the rifle with the crosshairs, dead on at 25 yards and holding off for range and wind.
These are the results, do note it is a 7x scope, LOL!

​The chicken:
Picture
5 hits, now the javelina:
Picture
Another 5 hits and still refining the POA's, now the turkey:
Picture
At this distance, the hits are no longer visible through the scope still, not bad, 3 hits on the hardest target in the silhouette game from a 7X scope. Not too shabby, at all.
Now the ram:
Picture
Aaaarrghhh! The wind got me.
The ram was located above all the other targets, so more open to the wind.
Still, not bad.

Would I be competitive in a current Gusnlynger?
Nope! LOL!

It is a young man's game now. I shot 20 "for score" shots in 2:45 with 3 misses

The current youngsters shoot all 20 targets down in 1:30

:-(  LOL!

Still, it was a wonderful experience shooting the K98 S SSG at extended distances.

It COULD be a good gun for Hunter-Piston under AAFTA rules, perhaps shooting a bit "hotter", something that this platform is perfectly capable of doing. The 55 yards "group" printed on the Ram measures 30 mm's c-c, or 35 mm's O-O, so they would all have gone into the 40 mm's kill zone, given correct wind reading, a better scope (up to 16X allowed under the rules) and, most importantly, a better shooter, ROFL!

There are several factors for the accuracy and precision of the K98 S SSG in this tune:
1.- It is a heavy rifle; 10 # with a small scope
2.- Barrel is tensioned
3.- The shot cycle is extremely fast, it is not even a "thump", it is more like a dry "TK"
4.- The rifle proved to be hold insensitive.

There are still some of these rifles around that are available, if you are in the market for an interesting piece of history that is, at the same time enjoyable and useful (could be a great hunter in 0.22"), then look into it.

Thanks for reading!

Keep well and shoot straight!


HM​
4 Comments
<<Previous
Forward>>

    Hector Medina

    2012 US National WFTF Spring Piston Champion
    2012 WFTF Spring Piston Grand Prix Winner
    2013 World's WFTF Spring Piston 7th place
    2014 Texas State WFTF Piston Champion
    2014 World's WFTF Spring Piston 5th place.
    2015 Maine State Champion WFTF Piston
    2015 Massachusetts State Champion WFTF Piston
    2015 New York State Champion WFTF Piston
    2015 US National WFTF Piston 2nd Place
    2016 Canadian WFTF Piston Champion
    2016 Pyramyd Air Cup WFTF Piston 1st Place
    2017 US Nationals Open Piston 3rd Place
    2018 WFTC's Member of Team USA Champion Springers
    2018 WFTC's 4th place Veteran Springer
    2020 Puerto Rico GP Piston First Place
    2020 NC State Championships 1st Place Piston
    2022 Maryland State Champion WFTF 
    2022 WFTC's Italy Member of TEAM USA 2nd place Springers
    2022 WFTC's Italy
    2nd Place Veteran Springers
    2023 WFTC's South Africa Member TEAM USA 1st place Springers
    2023 WFTC's South Africa
    2nd Place Veteran Springers

    Archives

    February 2026
    November 2025
    June 2025
    May 2025
    March 2025
    February 2025
    January 2025
    December 2024
    October 2024
    September 2024
    June 2024
    May 2024
    February 2024
    October 2023
    September 2023
    August 2023
    May 2023
    March 2023
    December 2022
    August 2022
    May 2022
    April 2022
    February 2022
    August 2021
    July 2021
    June 2021
    May 2021
    April 2021
    March 2021
    February 2021
    October 2020
    September 2020
    August 2020
    July 2020
    June 2020
    May 2020
    April 2020
    March 2020
    February 2020
    January 2020
    December 2019
    November 2019
    September 2019
    August 2019
    July 2019
    May 2019
    April 2019
    January 2019
    December 2018
    November 2018
    October 2018
    September 2018
    August 2018
    June 2018
    May 2018
    April 2018
    March 2018
    February 2018
    January 2018
    December 2017
    November 2017
    October 2017
    September 2017
    March 2017
    December 2016
    October 2016
    September 2016
    July 2016
    June 2016
    March 2016
    January 2016
    December 2015
    November 2015
    October 2015
    September 2015
    August 2015
    June 2015
    May 2015
    April 2015
    March 2015
    February 2015
    January 2015
    December 2014
    November 2014
    October 2014
    August 2014
    July 2014
    June 2014
    May 2014
    March 2014
    February 2014
    December 2013
    November 2013
    October 2013
    September 2013

    Categories

    All
    Events
    Gear
    Hunting
    Tests

    RSS Feed

Proudly powered by Weebly