BEFORE ANYTHING ELSE, I am required to post this, the legal disclaimers:
1.- Swapping the trigger blades WILL invalidate the warranty of your rifle.
2.- ANY user intervention in the triggers MAY result in an UNSAFE condition. Once you get into the trigger you are on your own.
3.- I have no control of YOUR actions, so I can take NO responsibility for the results YOU get. This process proved safe and sound in MY gun. I cannot guarantee that it will be the same in YOURS.
Having said that to the satisfaction of the company's counsel, lets start:
Following our initial experiments with the Walter LGU and its excellent performance, but horrible trigger; we decided to distribute the "Match Abzug" (or "Tuning Trigger") to all those that got their guns from Ct Custom Airguns free of charge. We saw no reason to have an excellent gun saddled by a hideous trigger . . . or so we thought! LOL! but more on that later.
The "Tuning Triggers" were obtained and mailed to all, but time precluded the real effort of creating a detailed swap-guide for people that are not experienced tuners till yesterday, when we could afford the time and tranquility needed to tackle the operation with the mind set of a beginner. Those of you that are experienced airgun tinkerers will have to bear with me and if I go too fast, then those that have questions, do feel free to post them as comments to this entry.
SO, here we go.
Take all accessories off the gun: scope, slings, sights, anything that is extraneous must come off.
Undo FIRST the two FRONT screws and then undo the rear TWO screws. NOTE well how tight each screw is. NOTE that the front screws have TWO washers each: a star washer near to the screw's head and a FLAT washer next to the stock. Reversing this order will destroy the stock's fine screw hole finish, expose your stock to humidity entry and create a mess. Do NOT reverse the order of the washers! Since the action cannot be completely bedded to the stock in an airgun, the tightness of the screws plays an important role in the accuracy of the rifle.
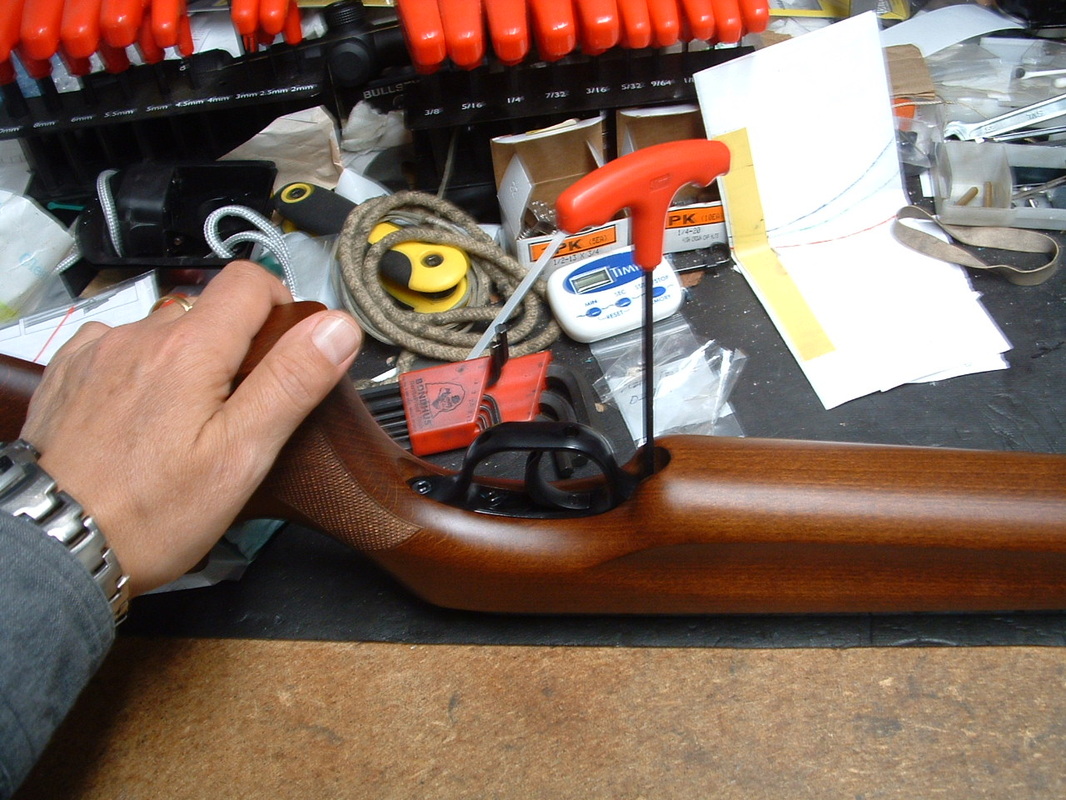
If you cannot remove the trigger guard, don't worry, remove the stock with the trigger guard and then remove the guard from the stock. Do NOT loose any of the screws! Though they are common screws, they are metric and not easily replaced in the typical US general store.
Note how the action is held closed by two pins. Note their relative size and position. Since the two pins are different, there is no chance of putting the wrong pìn in a hole, but DO pay attention to the SENSE the pins go into the action. In European habits and customs, pins usually go INTO the action from right to left (the right and left sides are ALWAYS referred to with the gun pointing AWAY from the gunsmith). Because most pins in well made guns will have a slightly better chamfer on their LEFT (so that they can go into gun from the right), take the pins out by using a punch ALSO from the RIGHT. These are cylindrical pins, so they should be taken out in the same sense they went in.
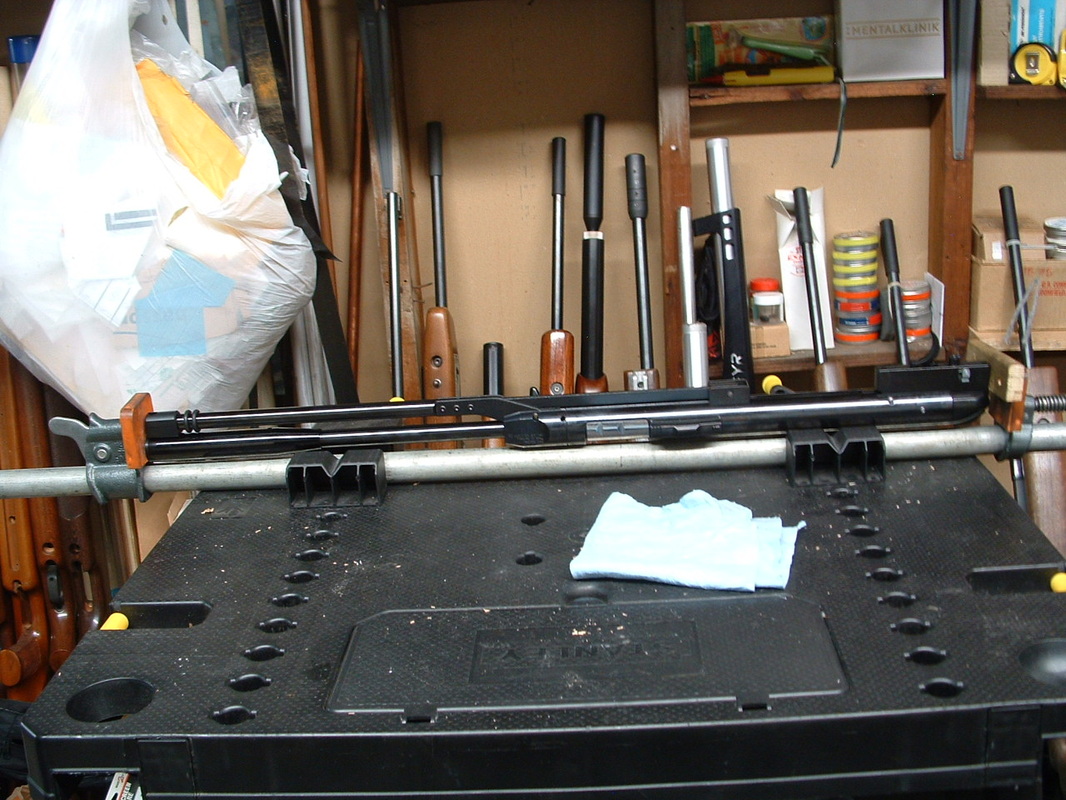
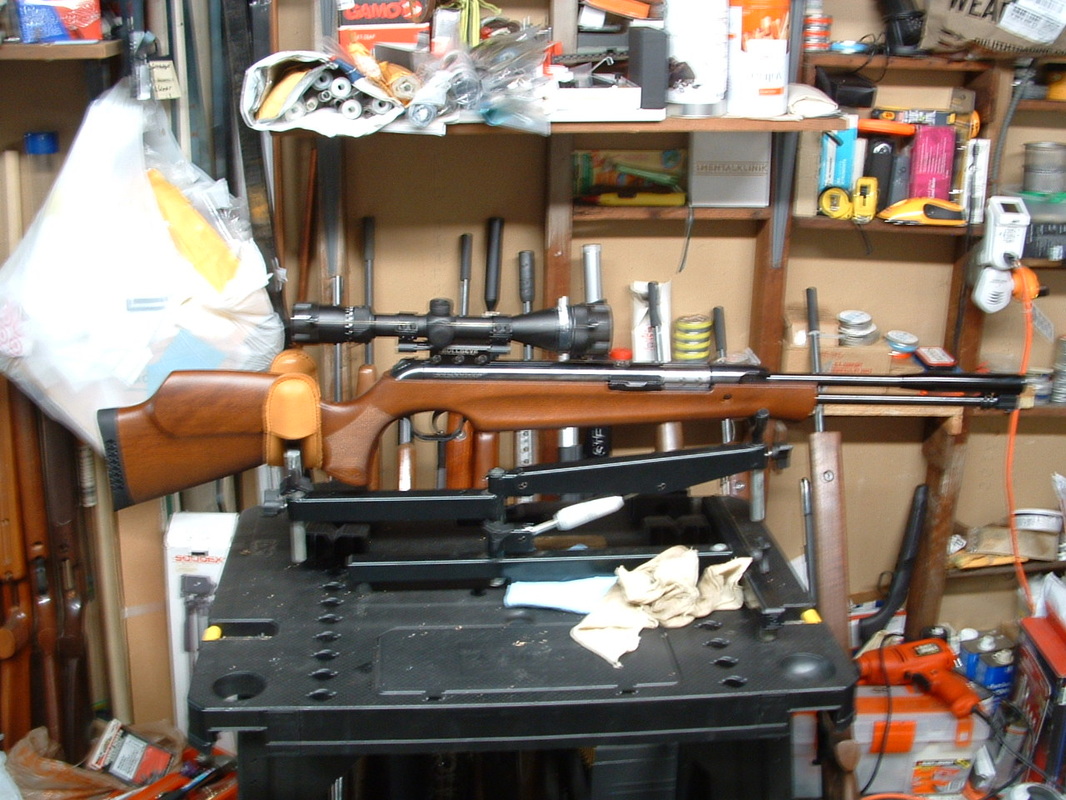
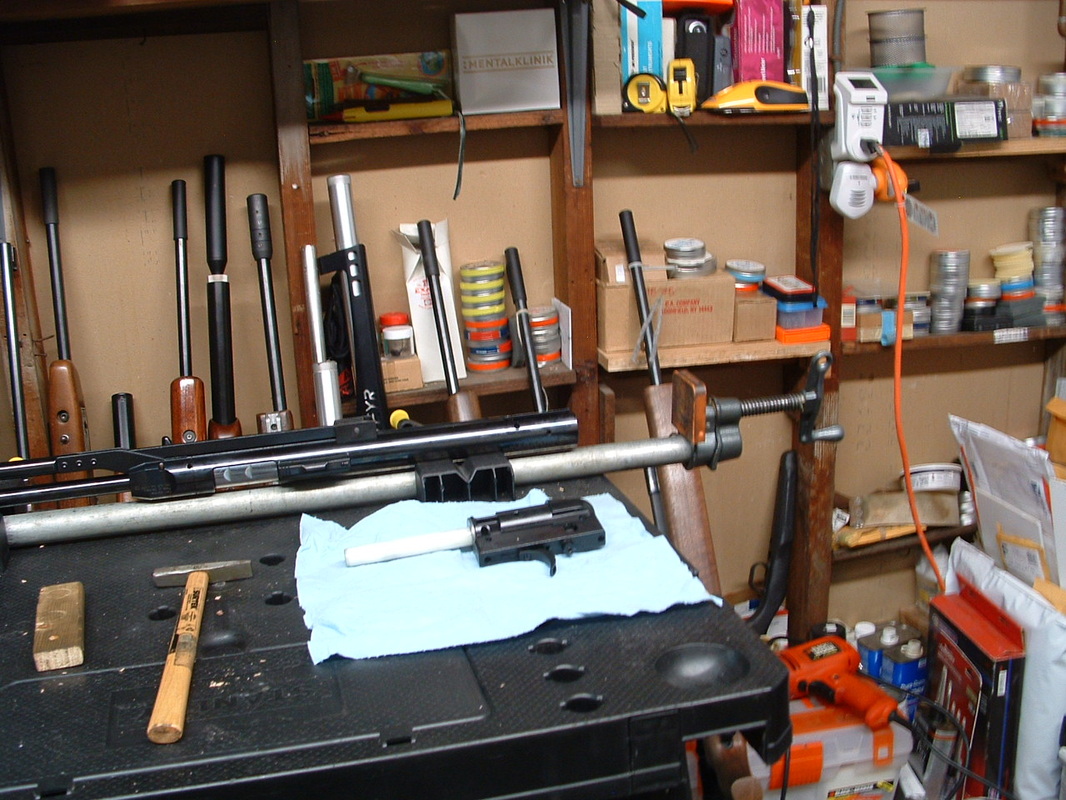
Now, to set the gun into a spring compressor, make sure you protect the trigger block casting and the muzzle by using pads and wooden blocks to apply the pressure.
I would be standing to the right of this picture, BEHIND the action and spring compressor, holding the light hammer on my right hand and driving the pins from RIGHT TO LEFT. Don't loose the pins.
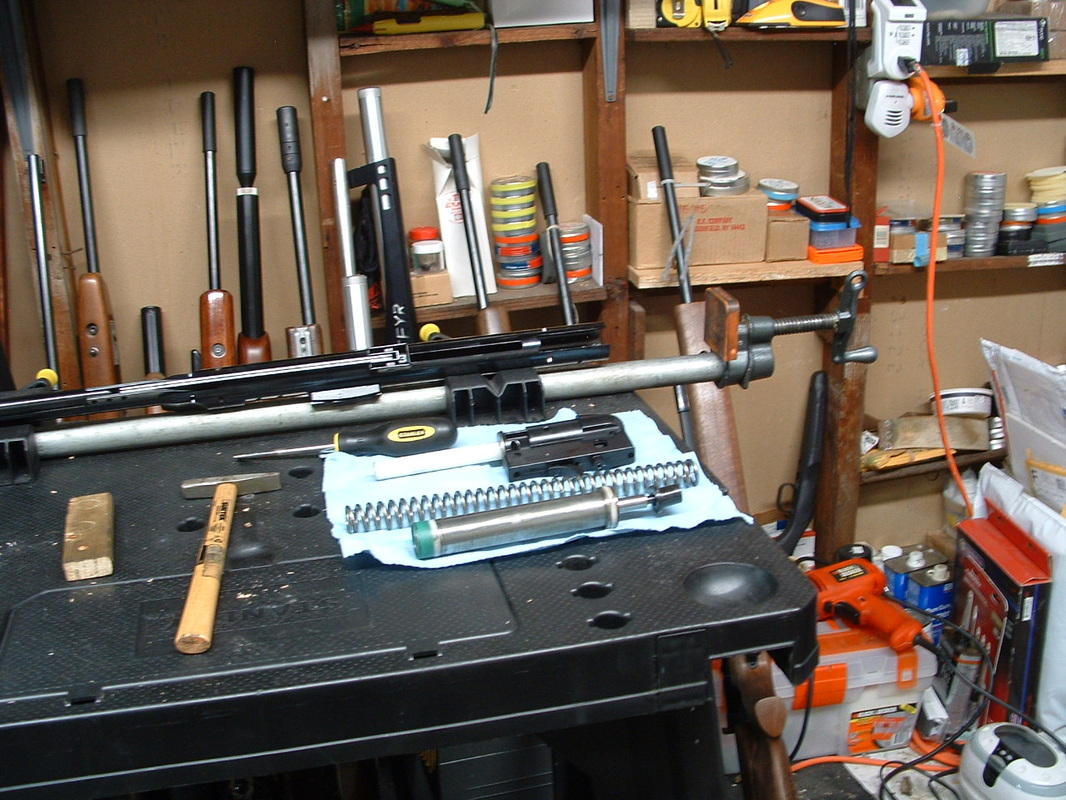
Once the pins are out, holding the action down with your left hand use your right hand to unscrew the spring compressor. Easy does it, no one is in a hurry.
When the spring has decompressed all its pre-compression, you can recuperate the wooden block and allow the action to be pulled apart.
In the Walther, the guide (the white plastic tube that holds the spring and the piston's stem in place) is attached to the trigger block. This is one of the reasons why there is little spring bounce in this gun. Also note the steel "thrust washer" at the base of the guide abutting with the trigger block. This washer allows the rotation of the spring. All springs rotate when compressing and decompressing.
For the trigger swap operation you do not HAVE to take out the piston and the spring, but most probably you will want to take them out, just because curiosity is what it is. Here you can see the trigger block (top to bottom), then the spring, and then the piston. The black thingy at the rear of the piston's stem is the "Top Hat" a device that acts like a spacer and also centers the spring in the piston's body. IF you had purchased a replacement spring (springs are "consumables" in most spring-piston airguns), or an aftermarket spring (like Maccari's) you would swap the springs at this point.
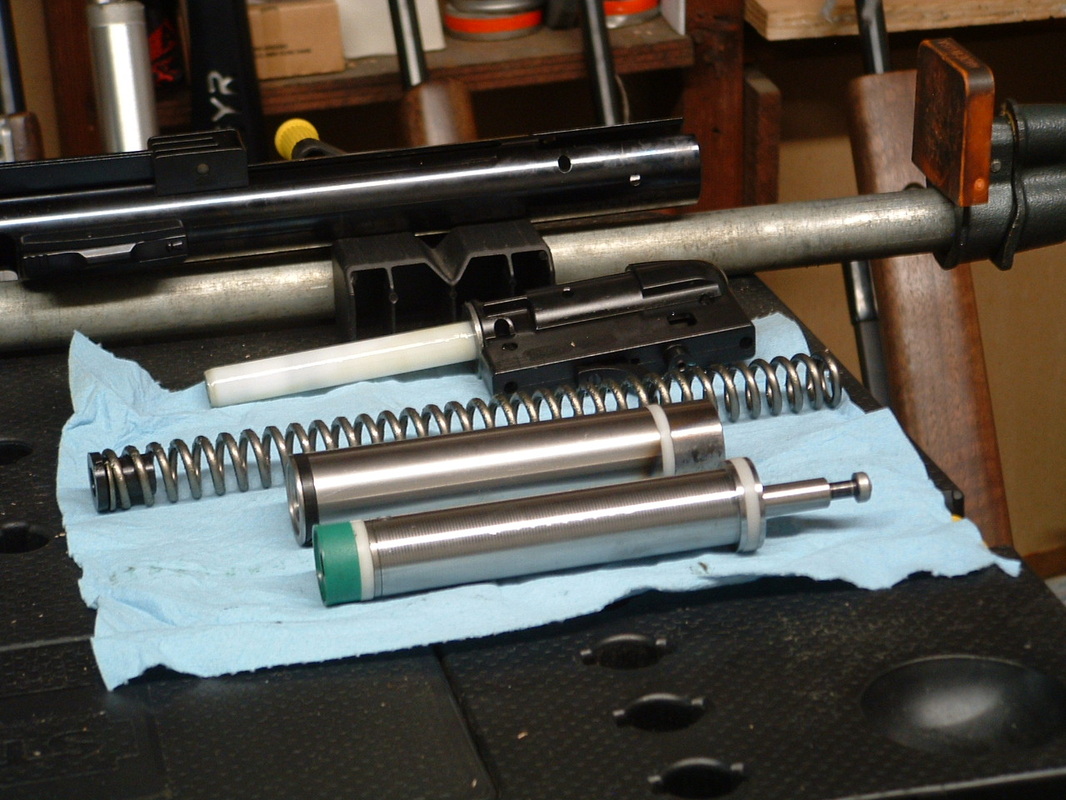
If you wanted to clean the compression cylinder, or replace the breech seal (also a consumable item in most airguns), you would have to extract the compression cylinder (here flanked by the spring and the piston). The rings in the compression cylinder are NOT seals. They are bearing rings and they are split diagonally. In this photo, you can see the front bearing ring in the piston (the white one) as well as the rear bearing ring in the piston's skirt (also white). The green front end of the piston is the piston seal and although not strictly a parachute seal, it does have a buffer ring. This is another reason for the perceived smoothness of the gun. The piston seal is made of a relatively hard elastomer, but it definitely does NOT act as a bearing. NOTE: some people call the linear bearings shown here: "buttons", out of the old habit of placing round buttons at the piston's skirts. But these are NOT buttons, nor should the piston be termed a "buttoned" piston. It is a piston with linear bearings.
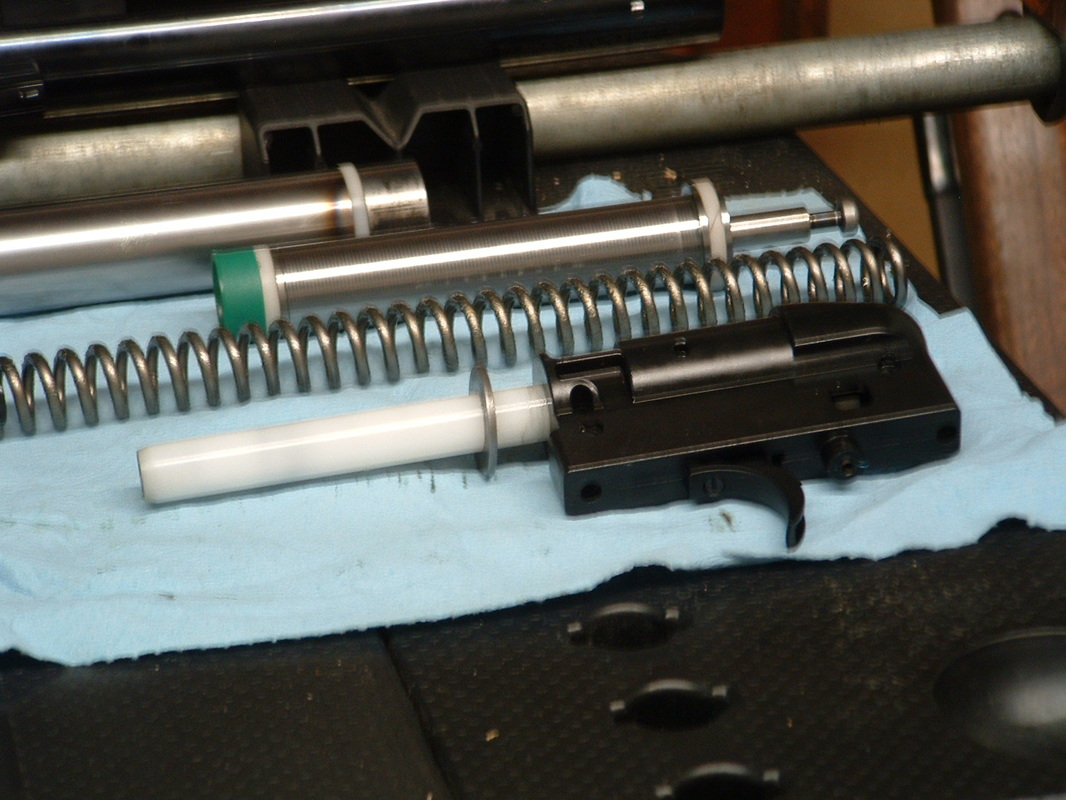
Now remove and store the thrust washer.
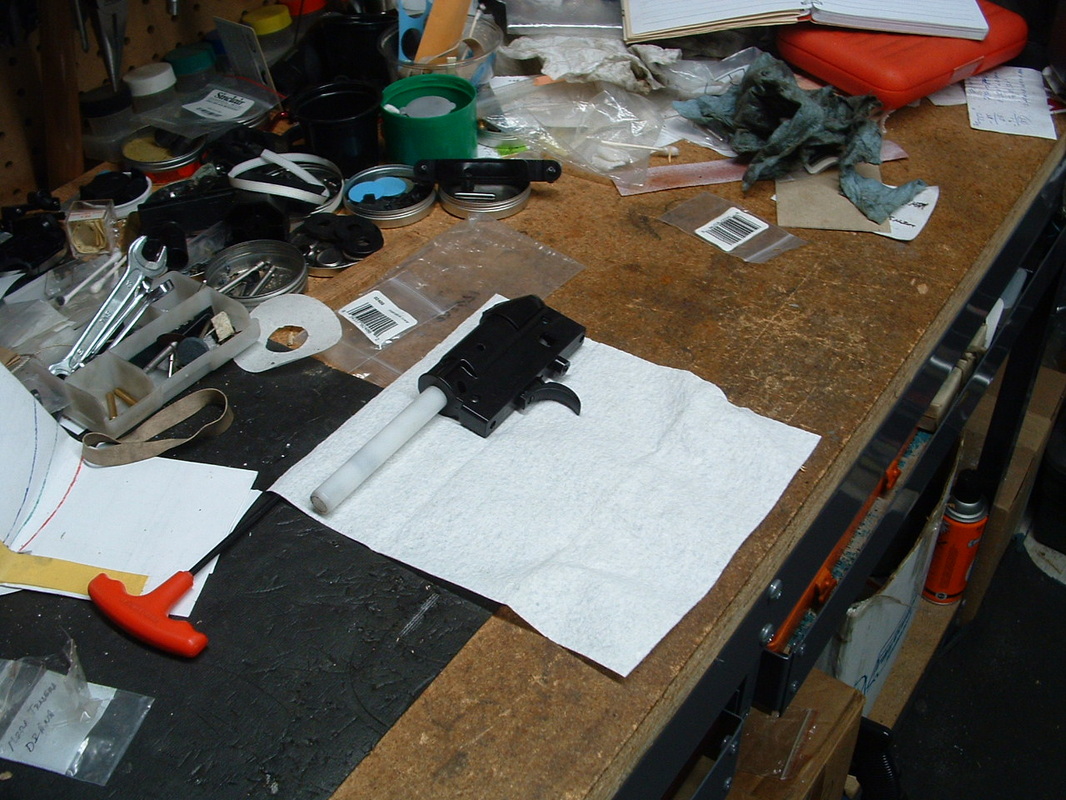
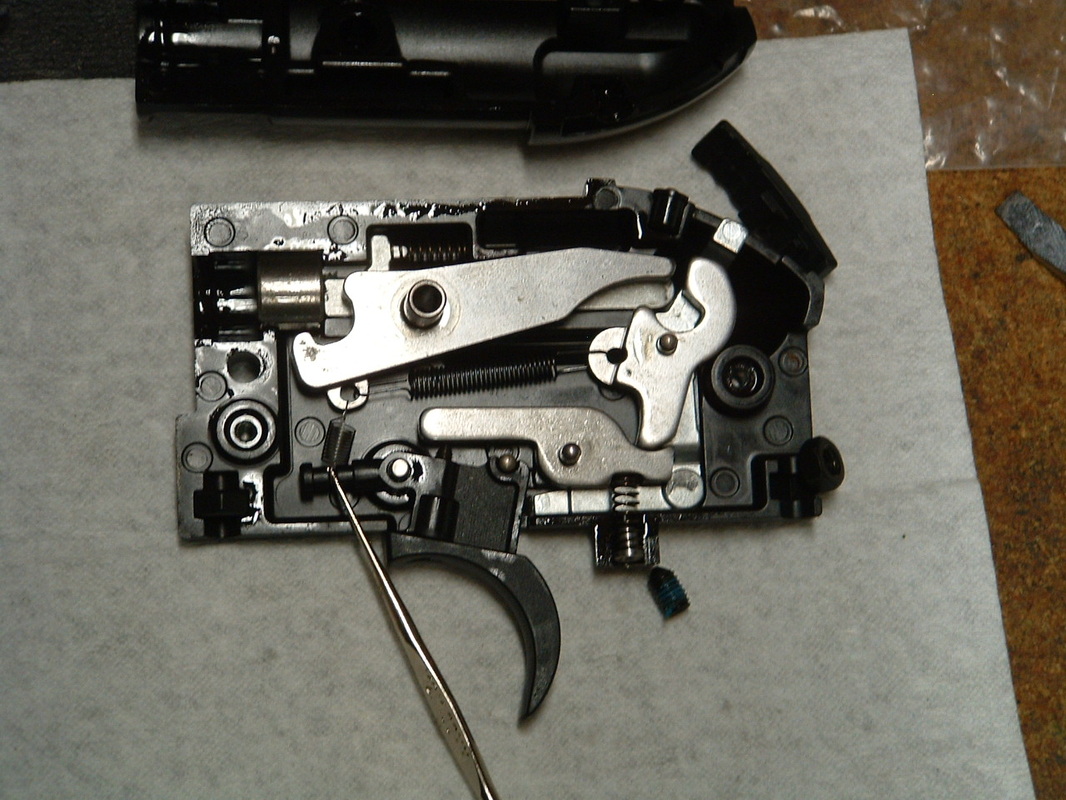
And now let's get to the trigger itself.
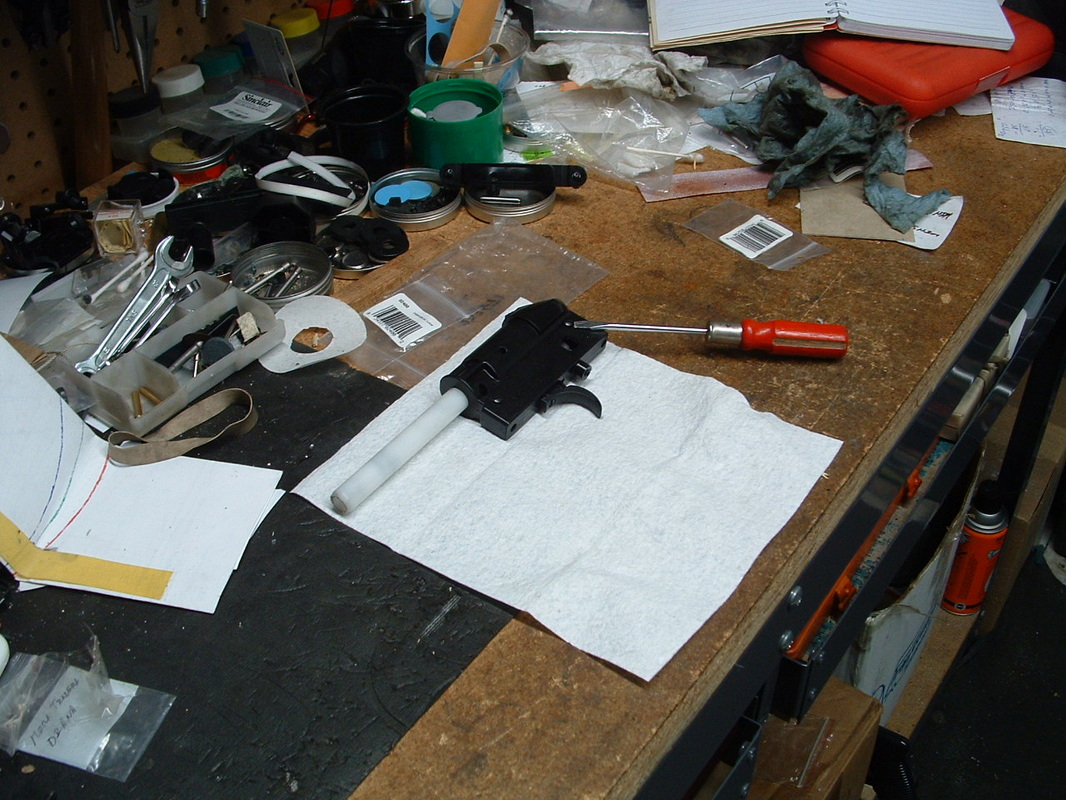
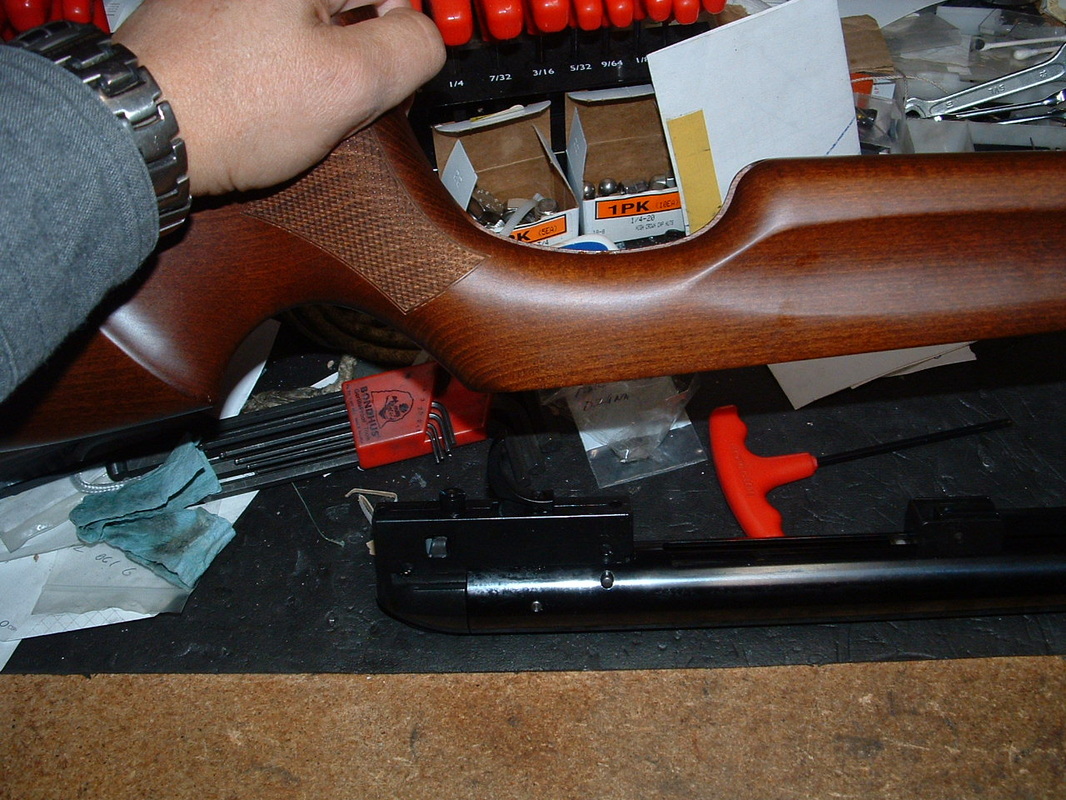
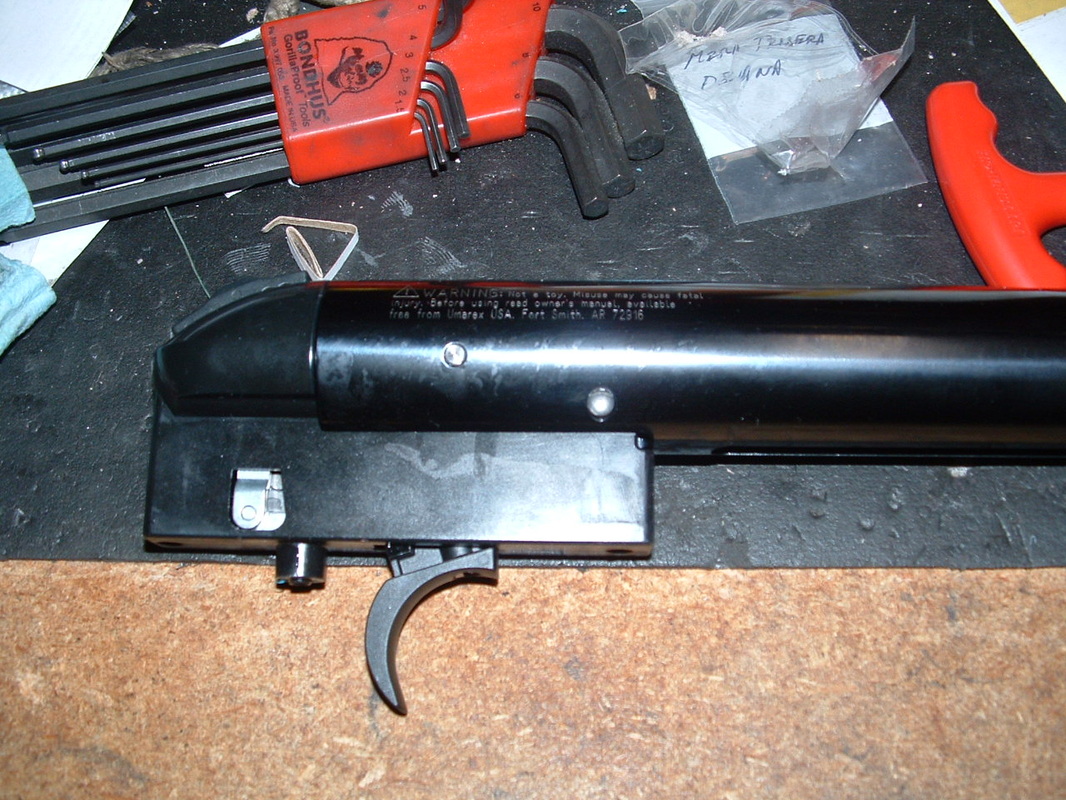
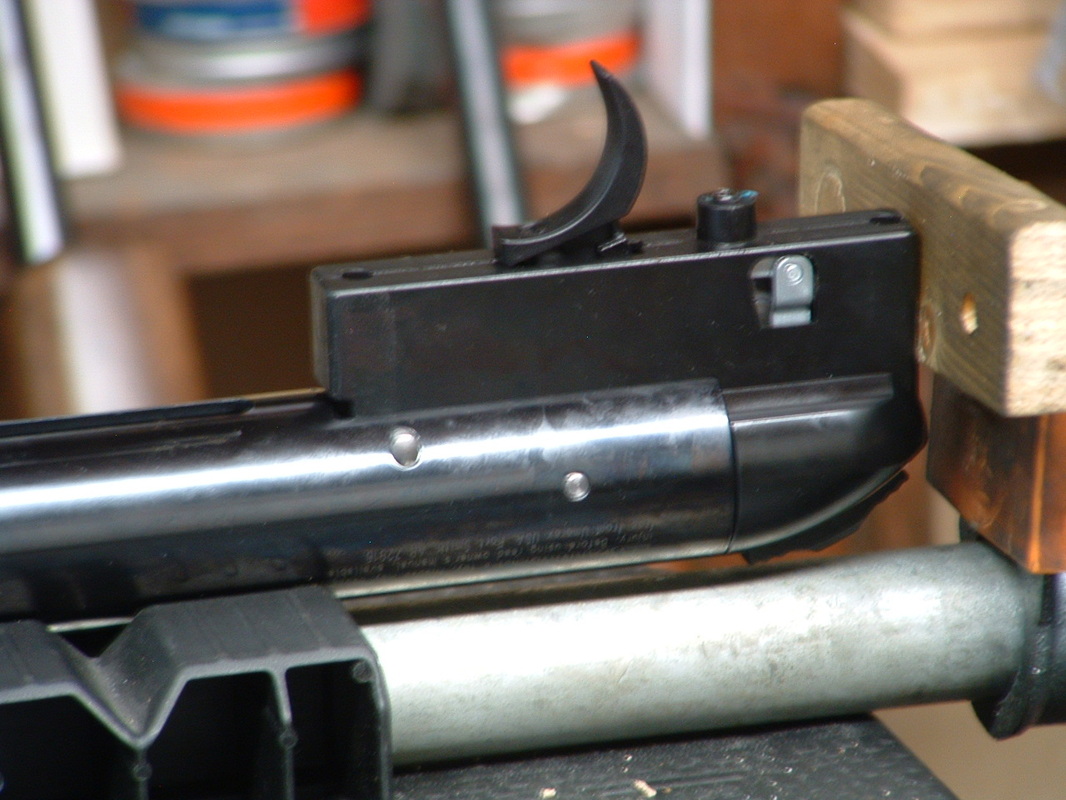
The trigger block is a cast housing that is held together with two screws. Screws will need a flat head screwdriver. Make sure that the blade FITS PERFECTLY the screw. If you have to polish or change the blade, then do so. NOTHING detracts more from the value of a gun than having burred screw slots. It tells anyone looking at the gun that an amateur got in there and raises the doubt about what else could have been changed (if not spoiled) by the person in question.
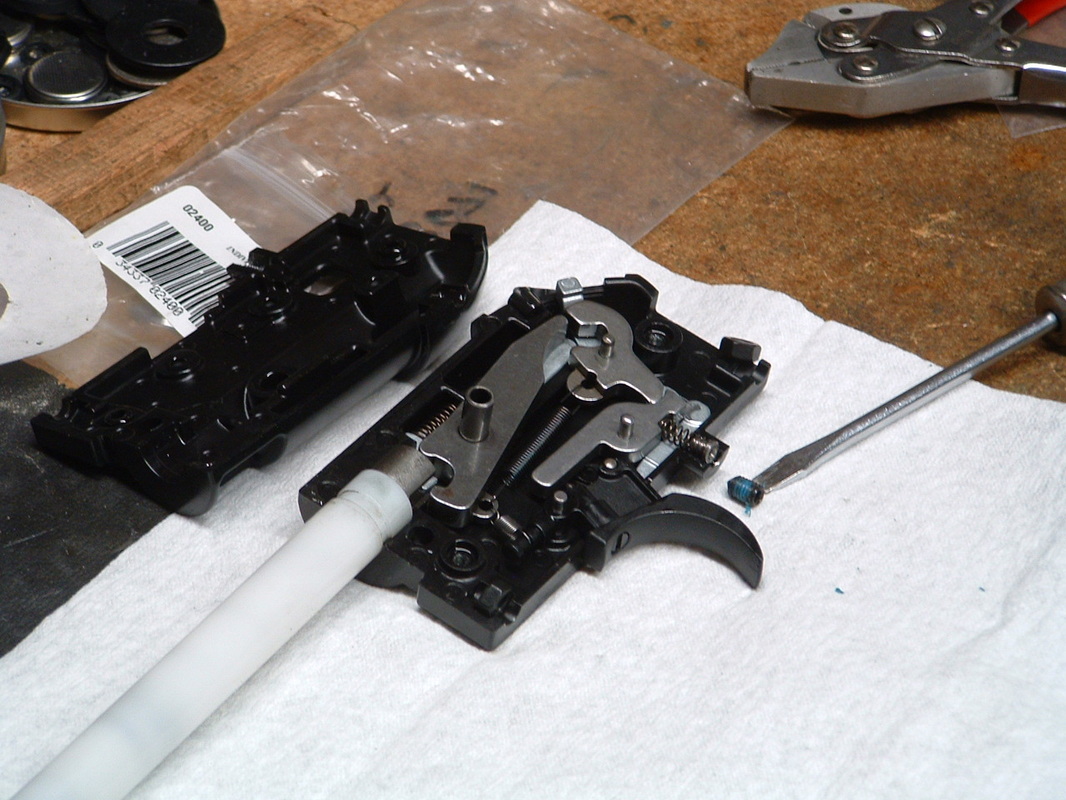
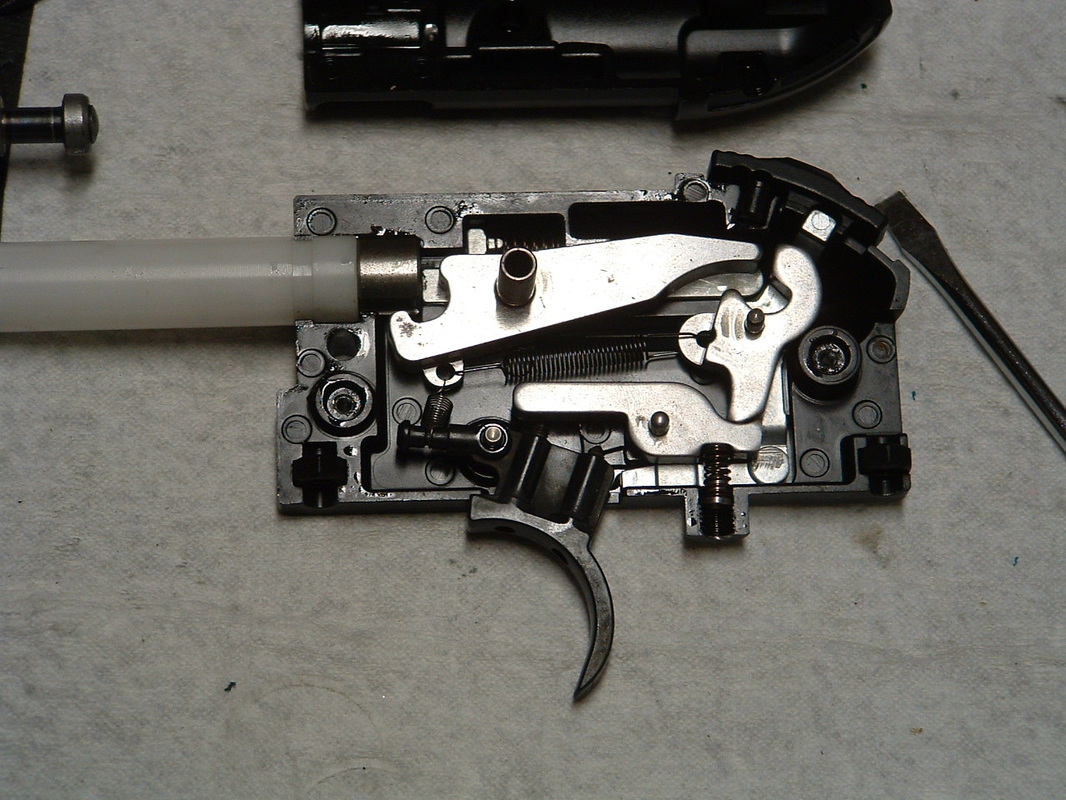
The casting is well made and even with loose screws it will not come apart easily. It has to be pried open VERY carefully, the screw the driver's blade is pointing to will always fall, so be careful. This is the screw that regulates the trigger OVERALL RELEASE WEIGHT. Note how the plastic guide also holds a steel bushing in place that will hold the piston's stem when the stem is engaged by the trigger hook.
This is the trigger in the fired position and with the guide removed.

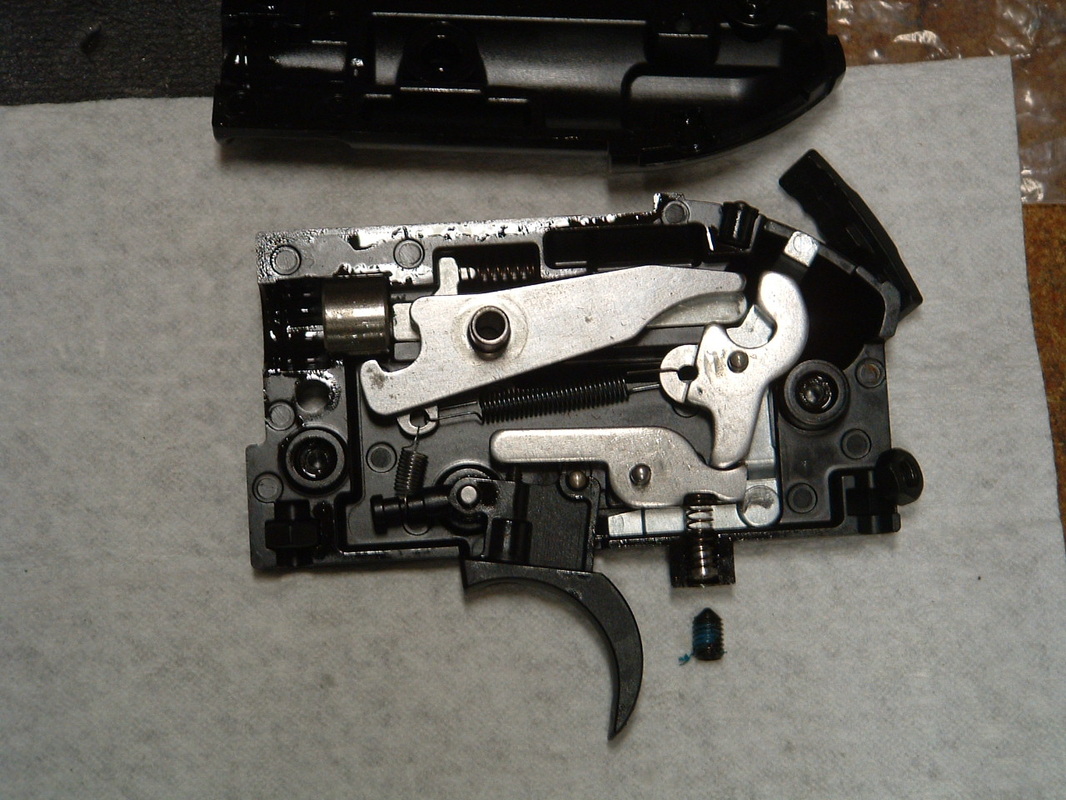
This would be the trigger in the cocked position with the guide removed.
Now, borrow a crochet hook from your wife's and very carefully remove the return spring from the trigger blade's front stub.
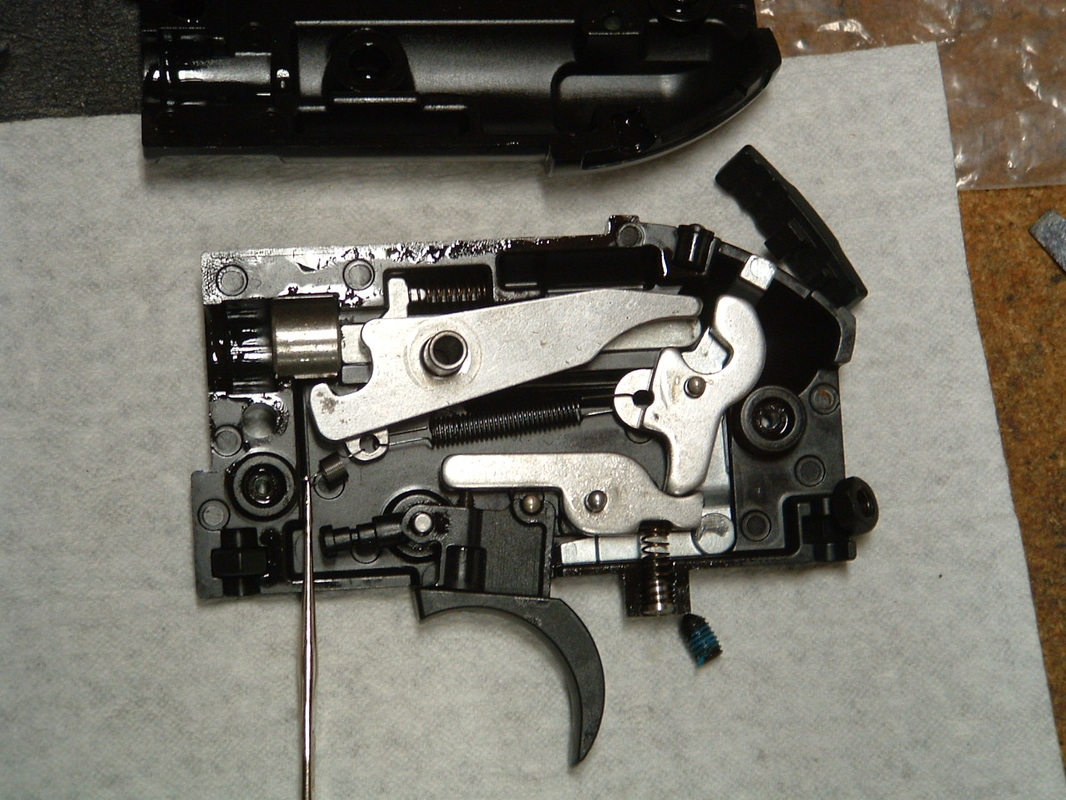
With the return spring's tension removed, the trigger blade is free to come out.
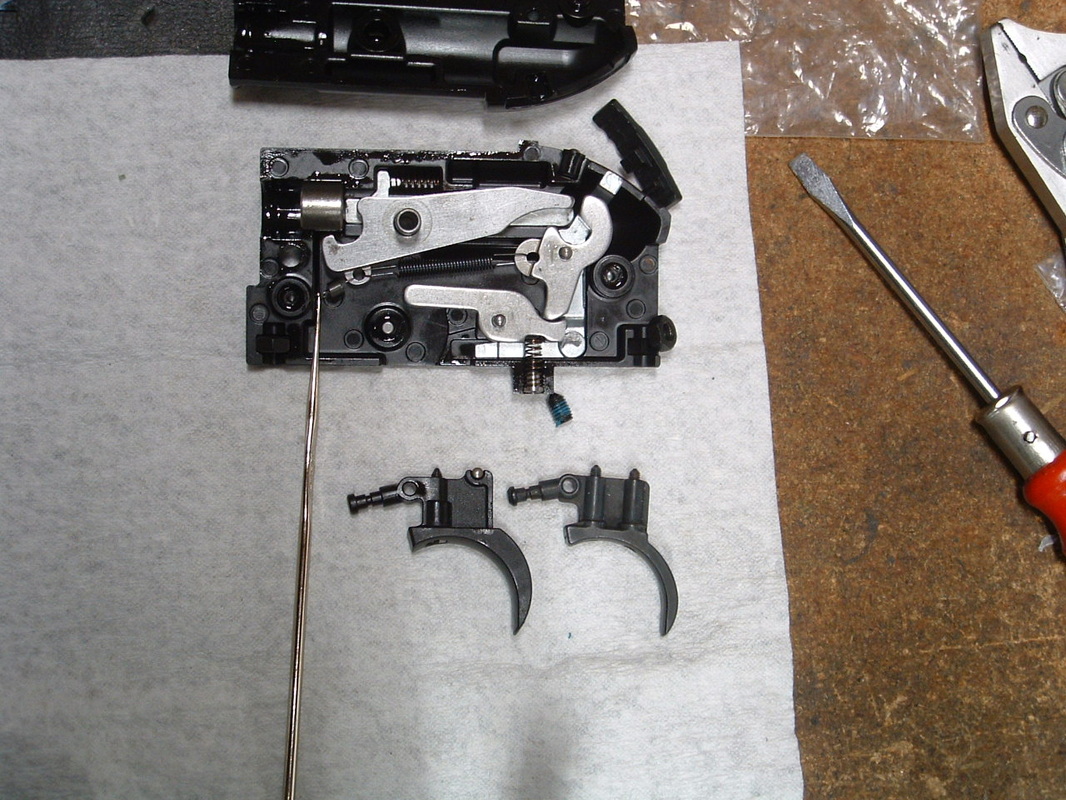
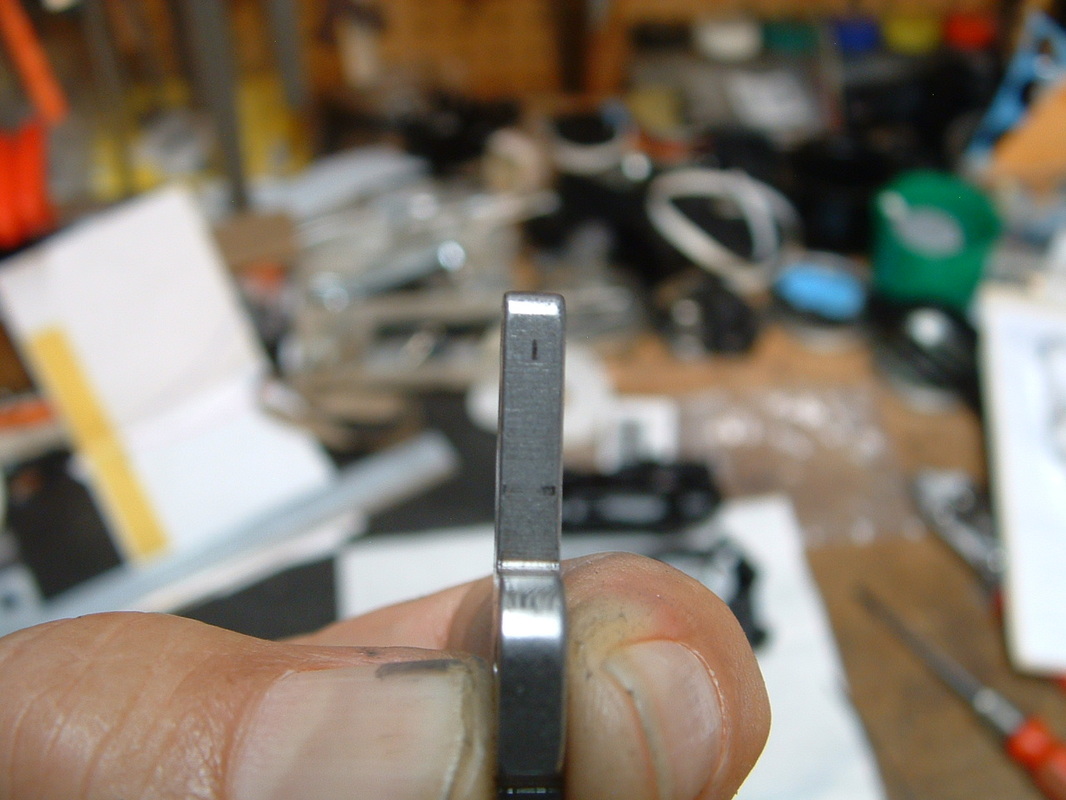
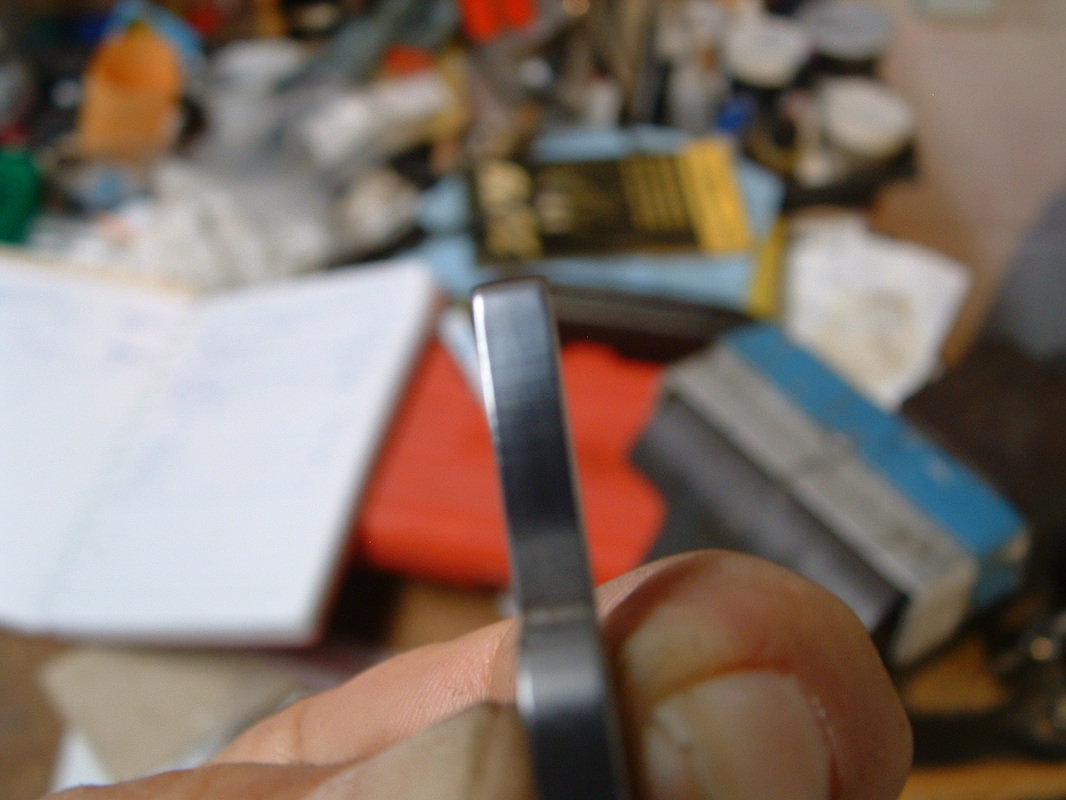
Side by side comparison of the trigger blades: On the left, the OEM "non-adjustable" plastic trigger blade. On the right, the "Match Abzug". You can clearly see that the plastic blade has one screw, the Match blade has two.
Even with the bad, out of focus picture you can see that the plastic blade is wider than the metal one. In normal, European usage, the finer the trigger can be adjusted the thinner it will be. Wide trigger shoes and very light trigger weights make UNSAFE guns. Specially in cold weather. So, BE CAREFUL!
Some writers have claimed that the engaging surfaces of this trigger unit have been polished, this is NOT so. They have a good finish, but they have not been polished. In this picture you can see the point of contact of the FRONT screw of the plastic trigger blade.
A little bit of jeweler's rouge in a felt drum and the surface becomes so polished that the autofocus of the camera has difficulty focusing into it.
If you are going to polish the lever surface shown above, then also take the time to polish the screw's tips.
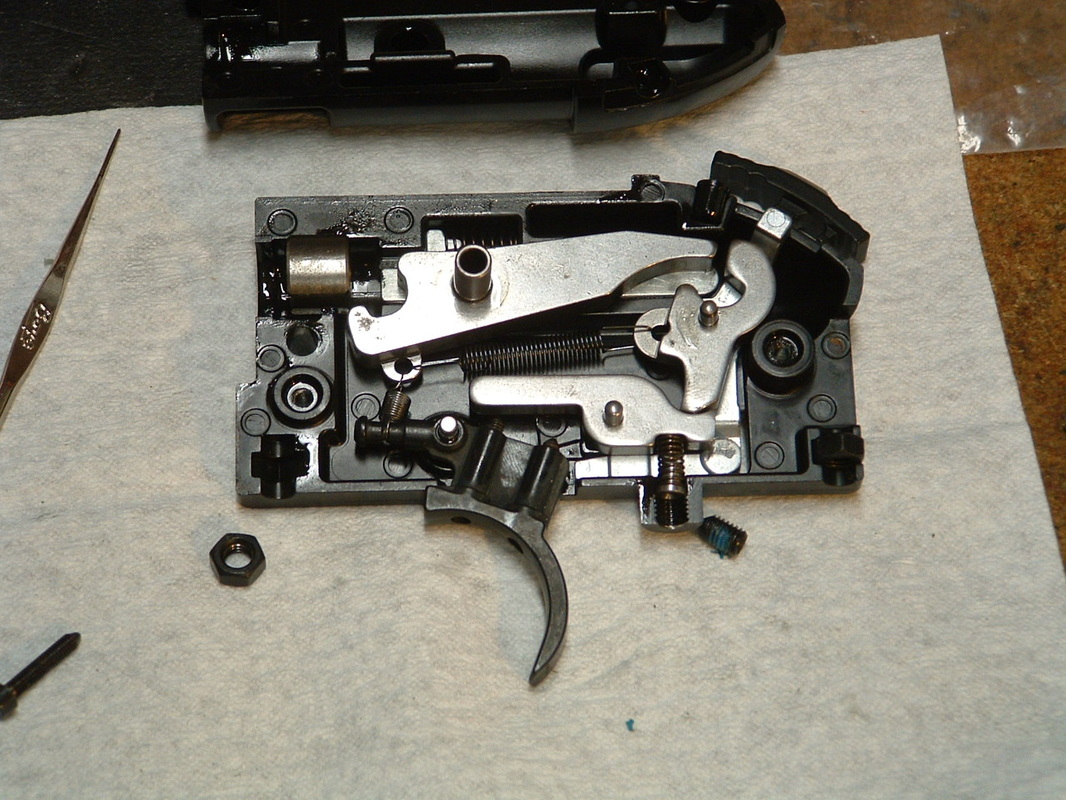
Now, insert the Match blade into its place and restore the return spring. NOTE that the nuts that are tightened by the stock screws are loosely held in a cavity in the casting. While this is good because non-ferrous casting should never be allowed to be threaded (unless they are high strength aluminum), it also poses the problem that the nuts may turn out of position and then the casting may not close as well as it should. Make sure that all parts are in their proper place: Nuts, safety's detente, safety, trigger wieight spring, guide and bushing. When EVERYTHING is in its rightful place the casting can be closed by hand and the edges will align perfectly. If ANY edge does not close completely, you have something out of place.
Everything in place and ready to close. You CAN test the trigger once it is closed by pushing the piston into the closed trigger block and allowing it to be taken out of safety and the trigger blade pulled to release the piston. The piston should release completely. Making sure everything works without the mainspring tension is a good idea! Do NOT overlook this test!
Do NOT overtighten the two screws that hold the cast housing together. It would be easy to strip those threads and then you are in big trouble.
Tighten to something between snug and slightly tight and use thread locker, the blue one that is "medium strength" to make sure that the whole housing will not vibrate loose, open, and dropping trigger parts all over the field.
From here, just follow the reverse procedure to put your gun together.
Make sure that you insert the piston into the compression chamber BEFORE you insert the compression chamber into the gun.
Make sure that the Top Hat and Thrust washer are inserted into the spring and guide respectively.
Make sure that you release the anti-beartrap safety when re-inserting the compression chamber.
Make sure you align the compression chamber to the slot in the action for the cocking lug. NOTE that the cocking lug is held onto the compression chamber by a claw that has no hook. It is held in place by the location of a plastic runner that rides on a slot in the stock. The stock is, therefore, a MECHANICAL component of this gun.
Once you have everything together, cock the gun and holding the cocking lever firmly, make sure the trigger fires. Re-cock and fire several times. Once you are satisfied that the trigger unit is working well, then de-cock the gun and head for a test range.
You will need to fire the gun at least 50 times before attempting to reach the final adjustment of the trigger screws. If you polished the lever surface and the trigger screws discussed above, then you can start adjusting, but if not, do not worry, surfaces will become "burnished" by each other and you probably need the trigger time anyway.
Once you have fired the gun at least 50 times, you will need to start screwing IN both screws: first the front and then the rear.
Screw them in by ¼ turns, you will see how the trigger release becomes lighter and crisper. Lighter and crisper.
Adjust till you have the letoff you want.
The adjusting was tougher than the swapping, but once done, you're good for a substantial number of shots. You will have to adjust the fine details after every 1,000 and then after every 5,000 shots, or thereabouts.
HTH
Un abrazo!
Héctor Medina
PS.- in the next blog entry we will tackle what can be done to the PLASTIC trigger blade to make it a good trigger blade.
 RSS Feed