DISCLAIMERS:
1.- ALWAYS FOLLOW THE LAW! Shooting at night-time produces very different perceptions in different parts of the country and the world, so, make sure you are well aware of your laws and that you are not infringing on anyone else's right to safety, security, and tranquility.
2.- Application of the ancillary equipment to airguns is NOT sanctioned by SIGHTMARK. It is safe and a good investment when used in complete accordance with the stated layout. NO warranties are made or implied.
3.- Shooting at night requires 10X more care and the need to ABSOLUTELY identify your target. Take your time, wait for the shot, and make sure to make it count.
4.- Also make sure you visit/scout the place during daytime and that you KNOW the spot like you know your "farcebook" welcome page, or the nicks and scratches in your favourite airgun stock.
5.- If you know the spot and you know the distances, and you know your target, practice under as similar as possible conditions. Do not wait for the hunt to actually practice your viewing, lighting of the "work area", keeping track of personal gadgets, simplifying of trajectory data and having the facility to consult it at all times, even in the dark.
Precedent:
This is not the first time we set-up guns specifically to address some pests that are mostly active at night (Raccoons, Skunks, O'Possa, Foxes, Rats, Pigeons) and other vermin.
If you are interested in the previous version, it is here.
As you can read there, the originals were made using the Photon XT scope, but sadly that was discontinued some time ago in favor of a more technologically capable unit, the Wraith.
But we will get into technical details later, so, having said that, let's get into business:
The rifle:
We chose the DIANA Mauser AM03 platform to develop this concept on several grounds:
For one it is a gas spring gun, therefore keeping it cocked for extended periods of time offers no worries. It also is relatively free of vibrations post shot cycle. Therefore protecting, to some extent, the opto--electronic equipment (the night-vision sight).
It is also an airgun that has been proven accurate in the past at extended ranges, and very capable of reaching useful hunting energies with the right pellets.
The synthetic stock offers an adjustable cheekpiece and that was essential because night sights, by definition need very high L'sOS.
It helps that it comes in black, AND that short barreled versions are available.
Having agreed to the main ideas with the end user, we proceeded to source all parts.
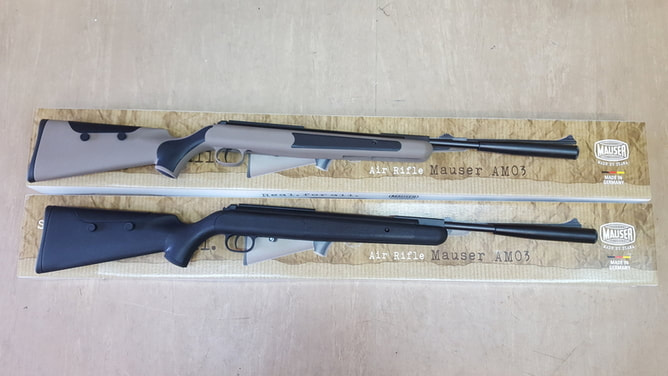
Gun came directly from Germany.
In the US the short barreled version is only available from AoA and has an extended moderator affixed (as required by law):
We chose the DIANA Mauser AM03 platform to develop this concept on several grounds:
For one it is a gas spring gun, therefore keeping it cocked for extended periods of time offers no worries. It also is relatively free of vibrations post shot cycle. Therefore protecting, to some extent, the opto--electronic equipment (the night-vision sight).
It is also an airgun that has been proven accurate in the past at extended ranges, and very capable of reaching useful hunting energies with the right pellets.
The synthetic stock offers an adjustable cheekpiece and that was essential because night sights, by definition need very high L'sOS.
It helps that it comes in black, AND that short barreled versions are available.
Having agreed to the main ideas with the end user, we proceeded to source all parts.
Gun came directly from Germany.
In the US the short barreled version is only available from AoA and has an extended moderator affixed (as required by law):
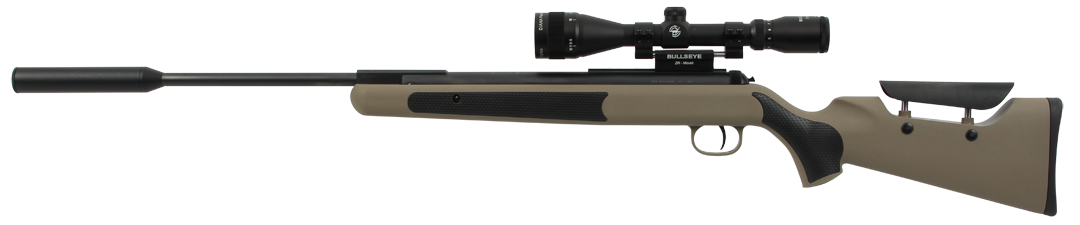
But the resultant long OAL sort of defeated the purpose of having maneuverability while in a blind or tight spot. So, we decided to use what in the UK entered the market as a "Pro-Compact" version:
With one difference:
Ours has a threaded barrel that allowed us to create a reflex LDC.
In this way, we have a rifle that is shorter than the standard AM03, but still has all the elements to ensure we protect the tranquility of the night..
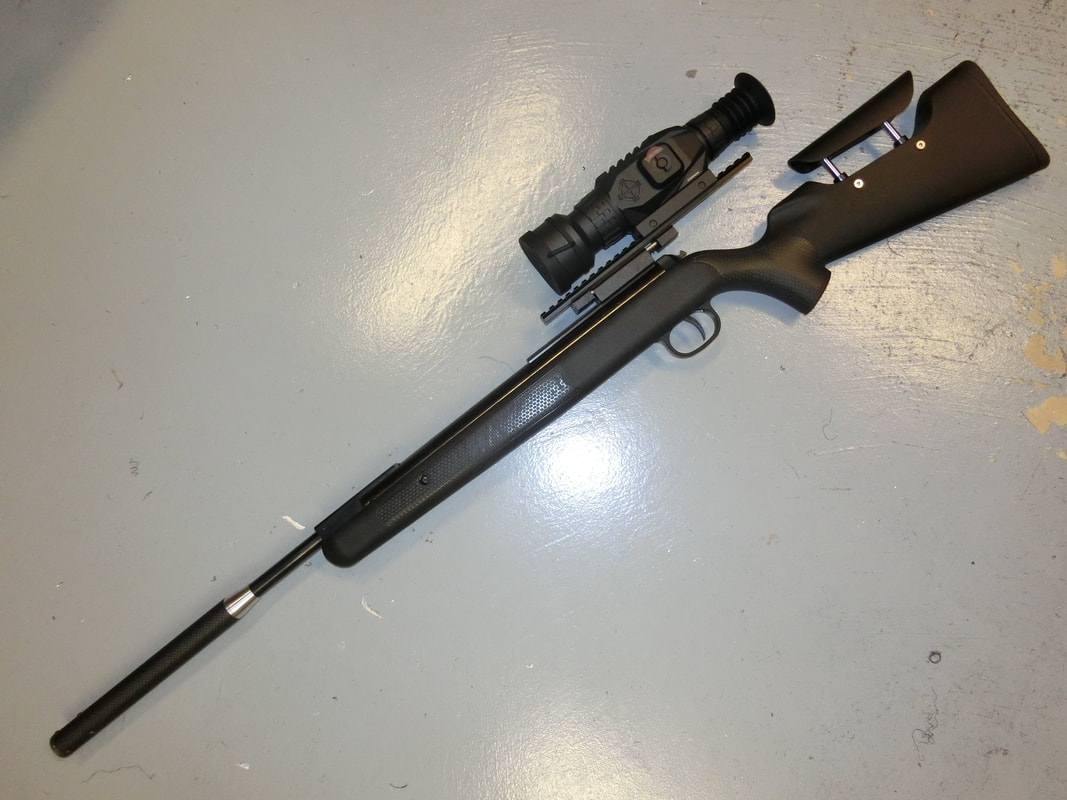
When compared side by side, it is quite interesting:
Ours has a threaded barrel that allowed us to create a reflex LDC.
In this way, we have a rifle that is shorter than the standard AM03, but still has all the elements to ensure we protect the tranquility of the night..
When compared side by side, it is quite interesting:
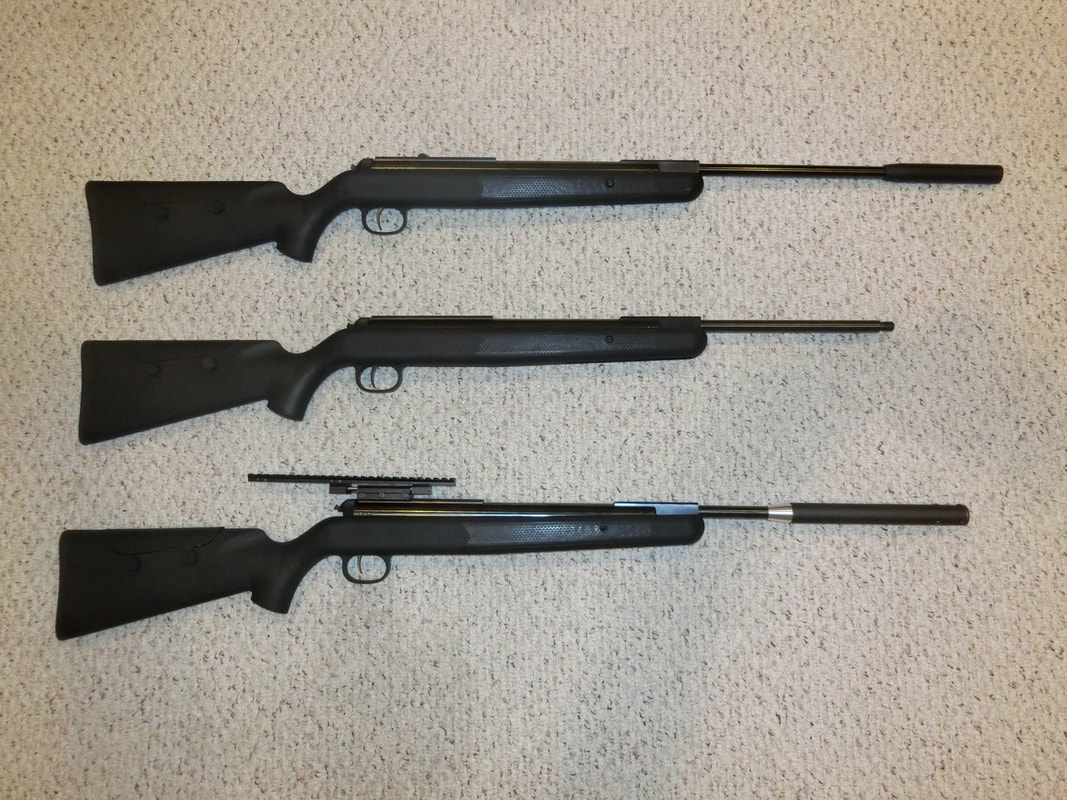
At top is the "Standard" AM03, the muzzle weight has been tuned to the energy level of this particular airgun, and uses the full length barrel, muzzle piece ends flush with muzzle.
In the middle is the "bare bones" short barreled version, without the DIANA heavy muzzle piece, with the threaded muzzle.
At the bottom is the N-J/N-H that adds a 4.5" to the OAL in comparison with the short barreled version, but incorporates a reflex device that also doubles as a harmonics tuner and so, is tune-able (within reason) to the pellet of choice. the Carbon Fiber sleeve also serves to distribute the cocking pressure over a larger area of the hand/fingers, and so makes for a pleasant handle
The Mount:
This is one of the most complicated mounts I have ever dealt with.
It started life as a "Scope Angel"; actually a quite good copy of the ZR Mount, made in Brazil by Senhor Boassi.
After all the Accurizing and customization process, it is quite repeatable and allows for a WIDE latitude for mounting different scopes and various optics.
It was necessary because night optics need the shooter to put the eye INTO the scope eyeshield as a means of getting as much contrast between light and dark as possible. BUT in a hard-kicking airgun, a solid mount was quite uncomfortable, as every time the gun came back at the start of the spring extension cycle, high pressure air was "pumped" into the shooting eye.
The fact that the ZR principle is to "float" the scope in its position (through inertia) makes it a very valuable addition in this case, not only because it protects the optoelectronics, but also because it gives good relief to the shooting eye from this "air burst" generated by the eye-shield acting as a bellows.
On top of this, because of the very high LOS, the mount needed a droop that would have been impossible to achieve in a proper ZR Mount (50 mrads). So I was glad to have the Scope Angel in hand.
As originally made, the mount tilted in the DIANA groove, and so it had to be corrected with a shim. Also the Weaver rail affixed on top was extremely thin and completely incompatible with the Picatinny standard spacing of cross bars.
Lastly, the drilling was made by hand, and so the rail had a side-bias of about 20 mrads, this also had to be corrected.
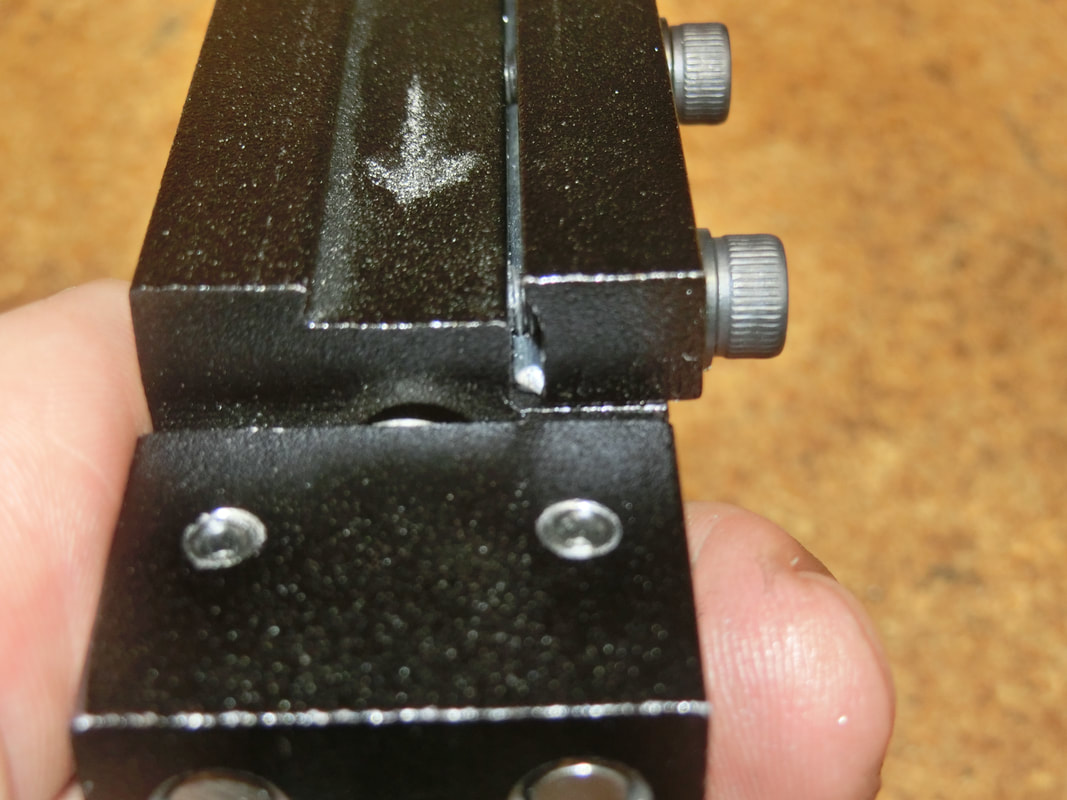
Look in detail at the dovetail and see that there is a "Wire Shim" that takes up some of the slack, but aligns better the groove with the dovetail.
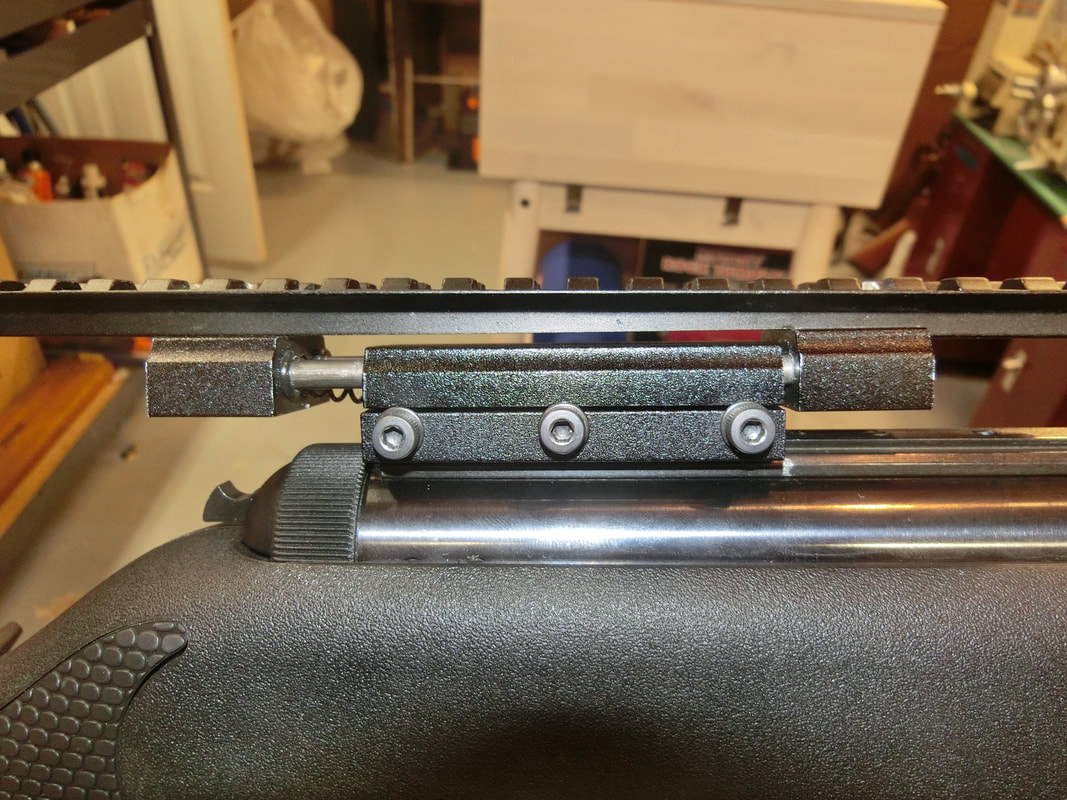
In this picture you can see that the Picatinny rail has been milled and has had a stop built into it. so that the upper Picatinny rail has a solid "stop" against the sliding blocks. In this picture the rear screw has been tightened, and the front one hasn't so you can see a little "light" in there. But it also shows how the milling has not distorted the Picatinny Rail.
This picture shows that the Picatinny Rail is still straight. There is no further "droop" induced by a heavy scope cantilevered on the rail.
After ensuring that the rail was perfectly straight and would not stress the opto-electronics, we mounted the whole thing:
The Stock:
The stock of the AM03 is quite good; from the design POV it incorporates elements that are very forward looking and will be retained in the future generations of airguns, but the current embodiment suffers from some shortcomings when considered for a "serious field application" like this one.
The pillars that allow the adjustability of the cheekpiece needed to be changed for longer ones. And the ambidextrous capability of the stock also implies that tightening the thumbscrews on one side, is simply not enough friction to keep the cheekpiece in place. So the plastic inserts on the "off side" were replaced by allen screws cut to dimension, and that allows the thumbscrews to put proper pressure into the cheekpiece.
The pistol grip cap has a tendency to fly off with repeated firings at full power, so we got rid of it.
The pillar bedding is good, but we add Nord-Loc washers on the gun side of each pillar and that has proven to be the solution to the loose screws normal to airguns. Between pillar and screw, the normal star washer was preserved as it does a good job once the pillar itself is prevented from turning with each shot's vibrations.
The rear stock screw was also changed to a suitably re-worked countersunk head allen bolt.
Finally, spacer plates need to be added in the trigger well because the cavity is way too large, and that allows the trigger pins to move more than they should.
The user also requested the use of a bi-pod. Being an experienced long range shooter, he feels comfortable using bi-pods and so, part of the challenge was to find a bi-pod that would work well with a break barrel airgun.
I had heard in the past that DIANA made some Bi--pods for the 48 and for the 34 (two different models), but I had never seen one. Finally located a reference, only to discover they were no longer available!
BUT, the principle had to be usable and so I started searching for side mounted bi-pods, and I found a company run by an airgunner and while I found the components in other websites for less money, I strongly believe in supporting companies run by fellow sportpersons so, I purchased this bi-pod for my customer and I am very pleased, as we'll see later.
Mounting did offer its challenges, but that is why someone goes to a custom gunsmith, ¿right? ;-)
Here are some pictures:
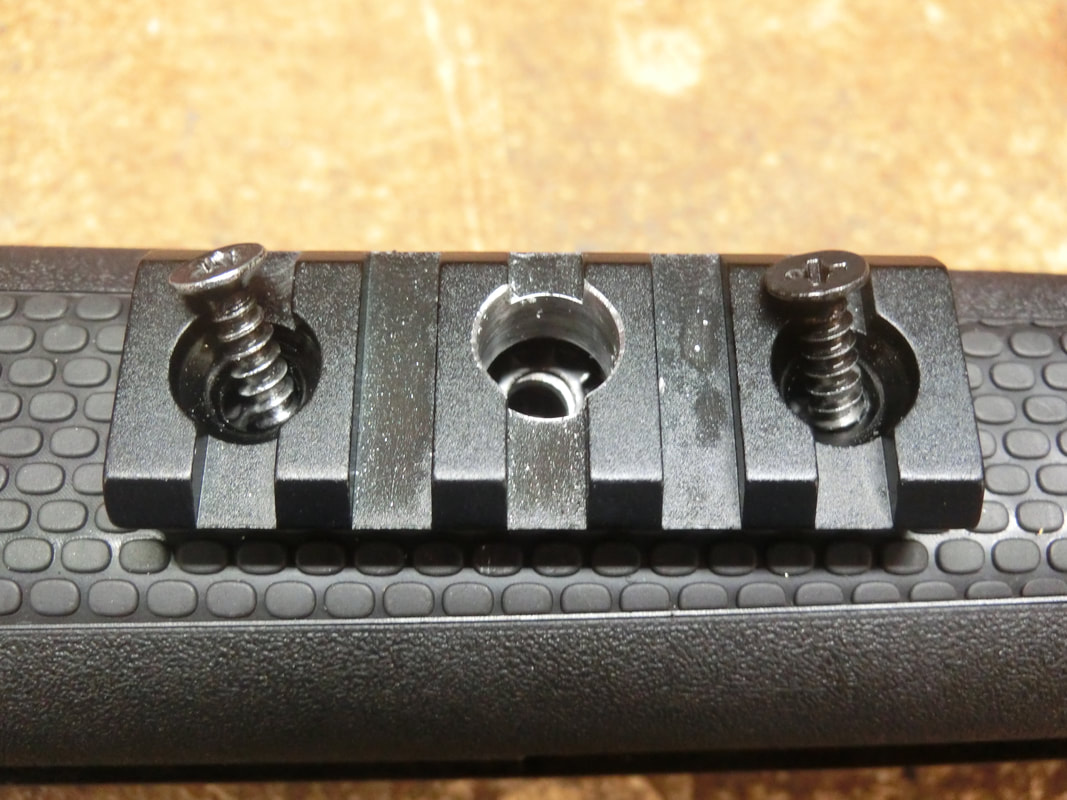
Customization of the Picatinny rails and marking of the stock
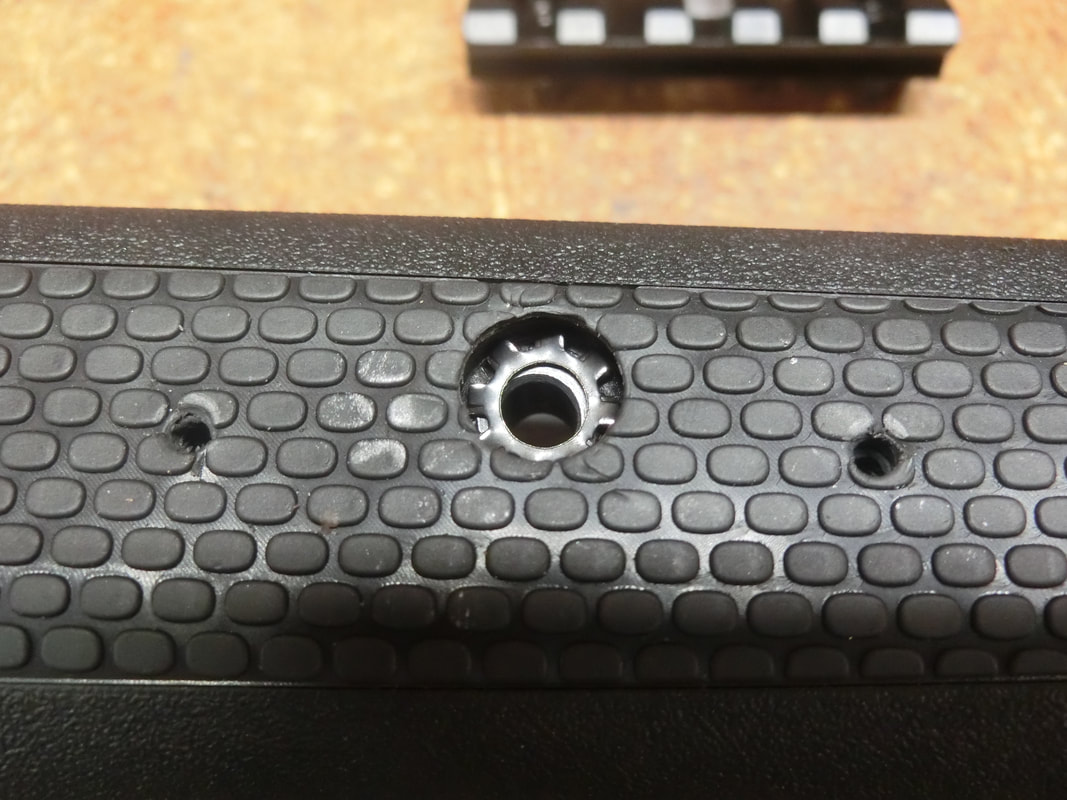
Holes drilled and pilot/threaded
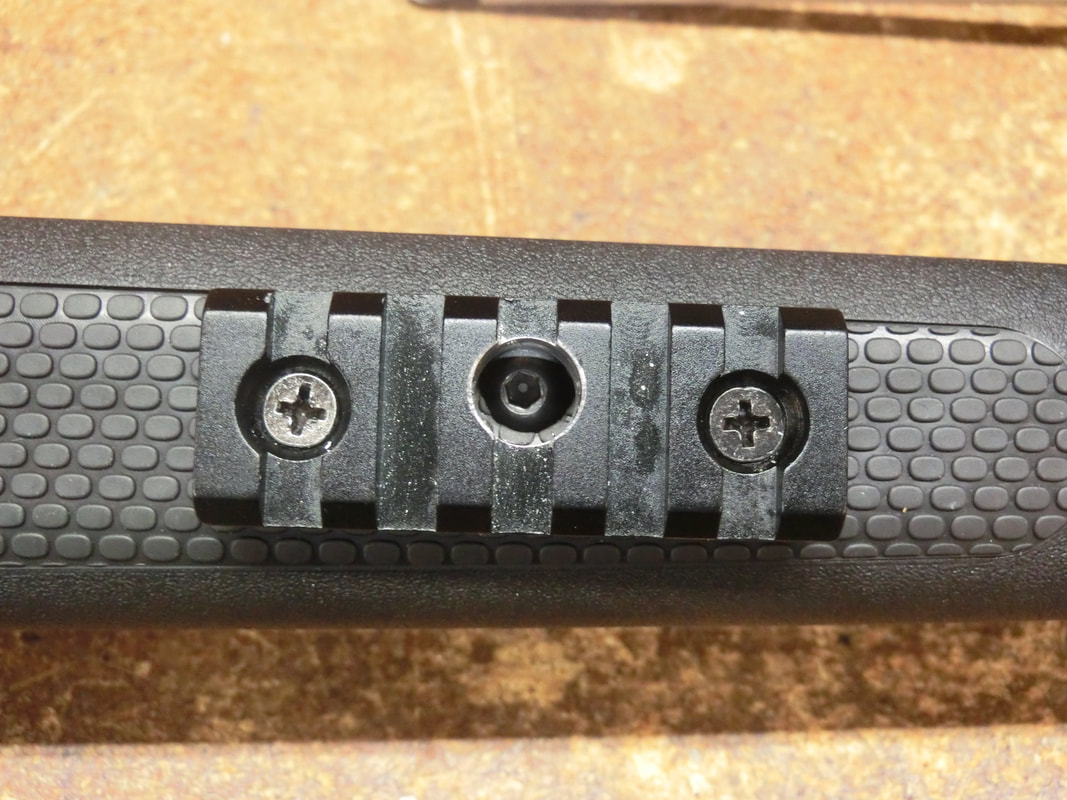
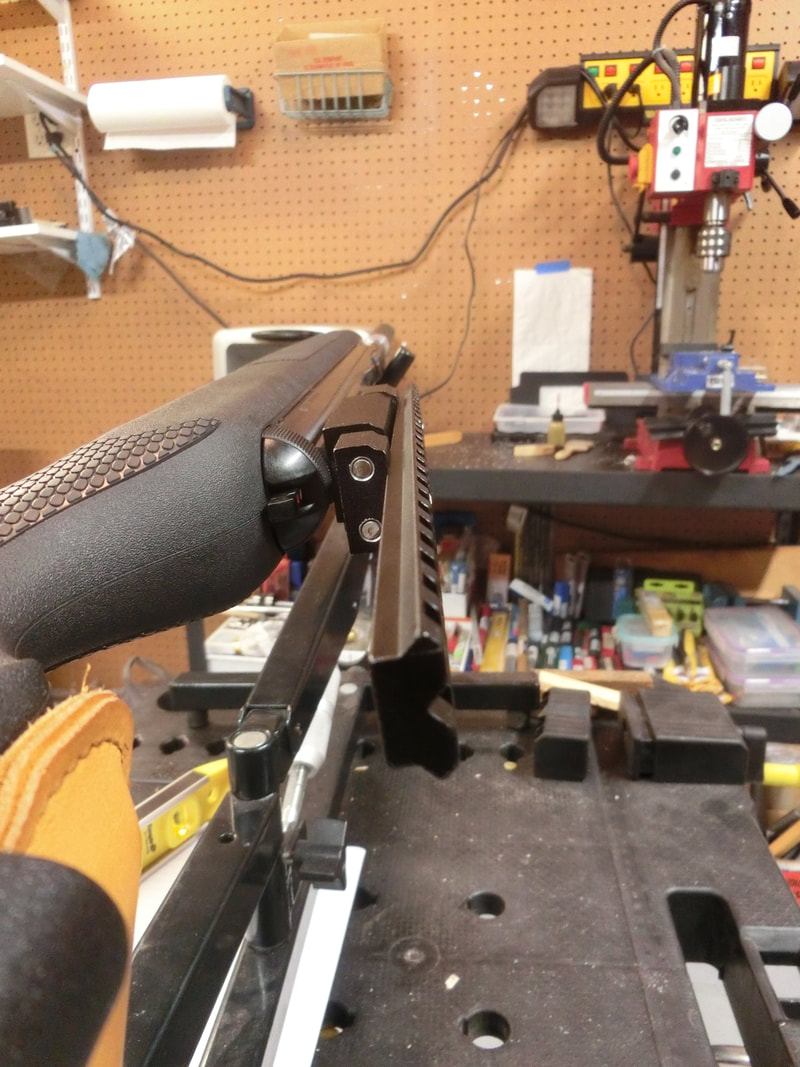
Side-rails mounted and alignment checked.
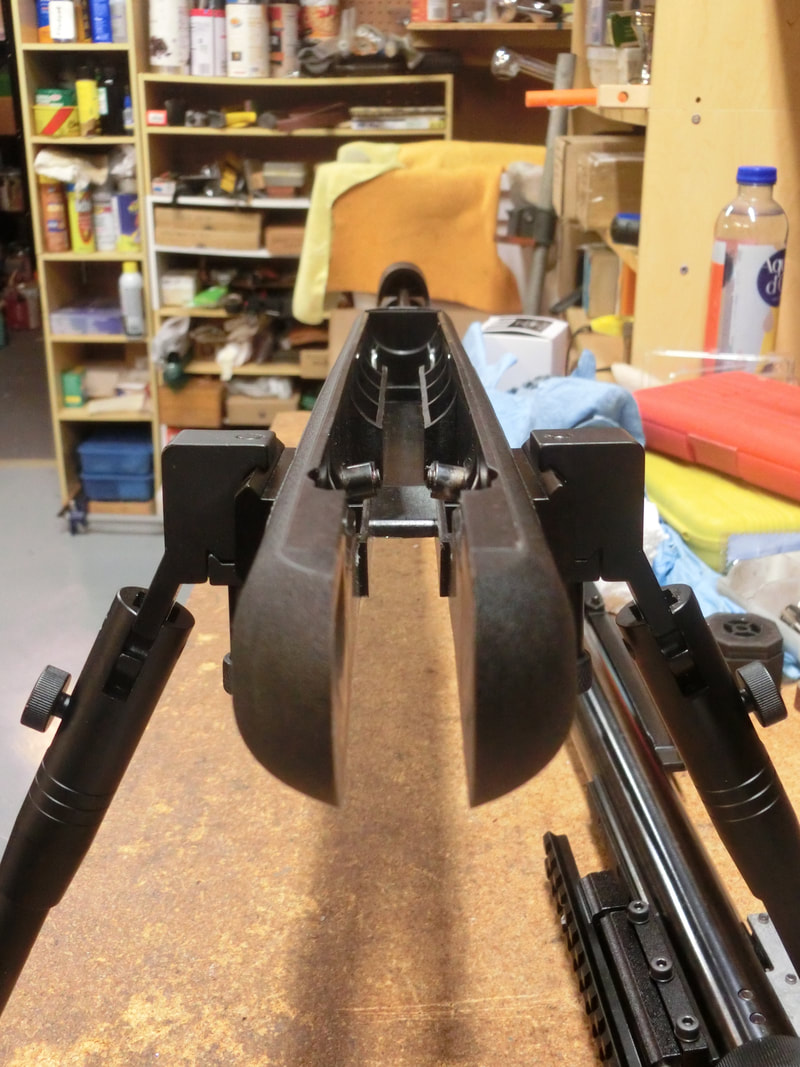
Here we check the alignment of the bedding pillars inside the accessory rails.
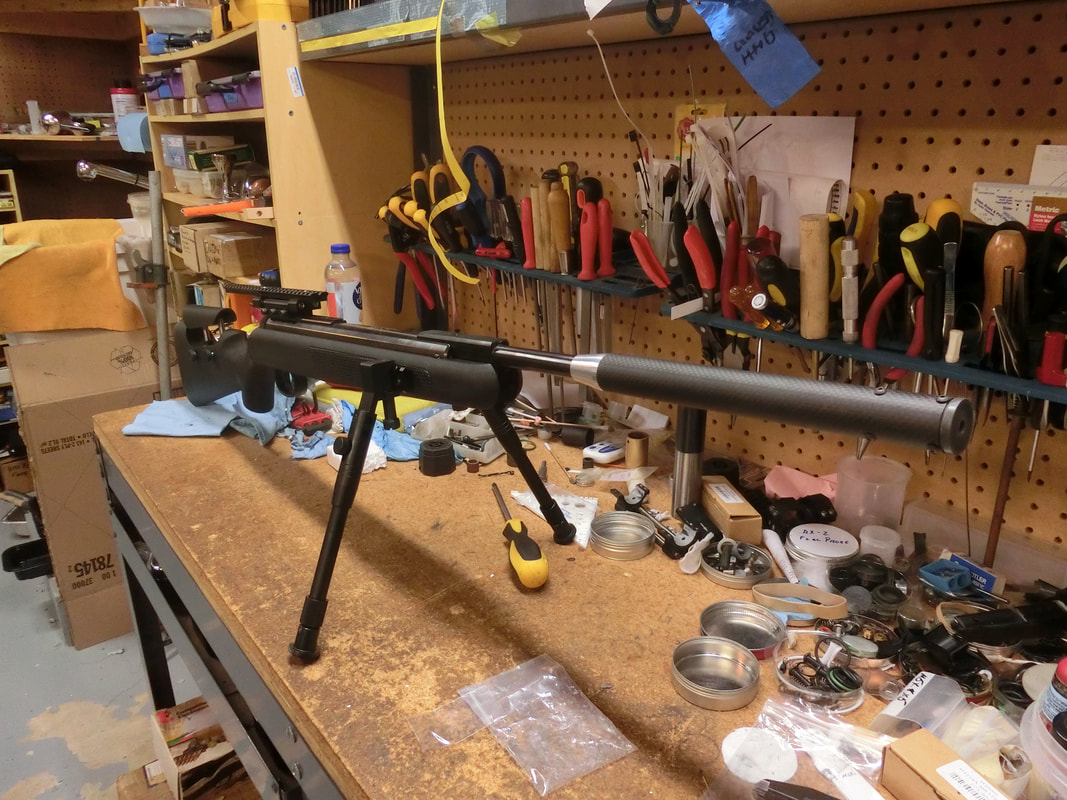
With the action mounted, the whole rig is stable.
A note here: Some shooters have complained that bi-pods are not "rigid" enough. And that was the reason why DIANA discontinued the product. The truth is that bi-pods SHOULD NOT be rigid. SOME degree of final fiddling with the position must be allowed to the shooter at the final trigger squeeze.
In our case (and this is something that DIANA could consider in the future), the accessory rails with 5 slots allows for an additional degree of tuning to which is the best position for the bi-pod, given the power level and the style of engine in the gun (steel spring or gas ram). IN GENERAL, gas rams feel better when supported exactly at the forearm screws, other springs usually feel better when supported as far forward as possible.
In our case (and this is something that DIANA could consider in the future), the accessory rails with 5 slots allows for an additional degree of tuning to which is the best position for the bi-pod, given the power level and the style of engine in the gun (steel spring or gas ram). IN GENERAL, gas rams feel better when supported exactly at the forearm screws, other springs usually feel better when supported as far forward as possible.
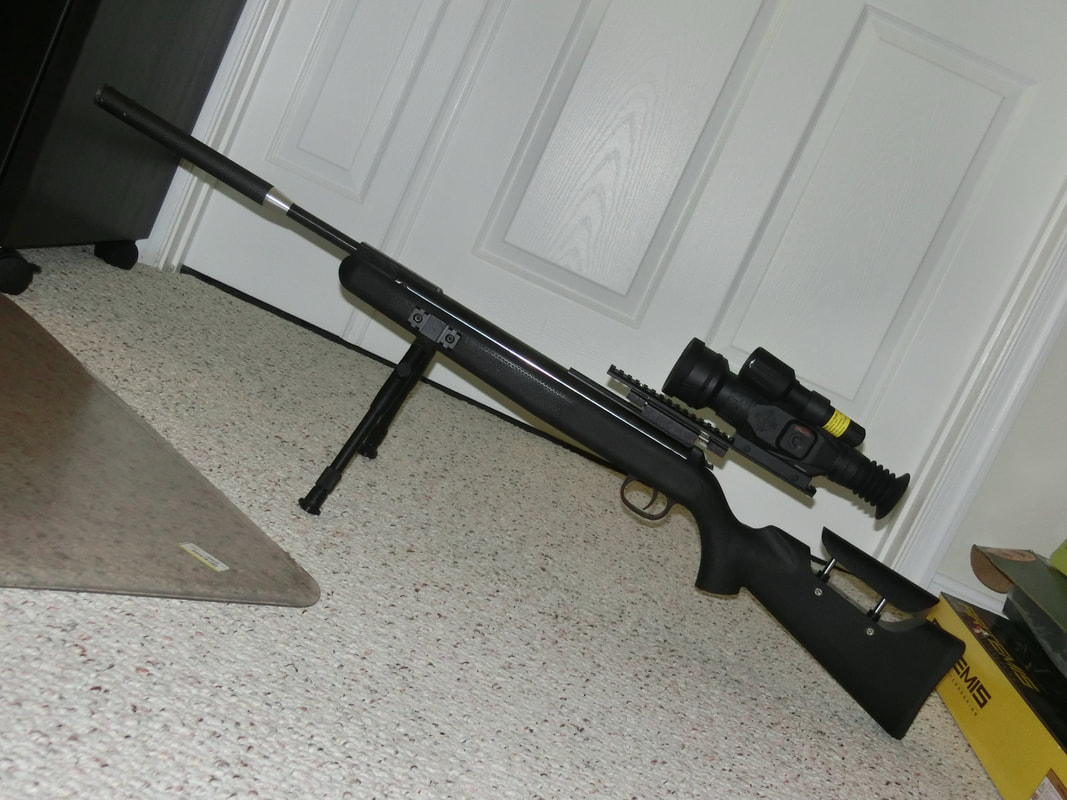
The opto-electronic sight:
The Wraith is one of the newer models to come into the SIGHTMARK line. It replaced the Photon with vastly improved resolution and more facilites (video recording, picture taking, more energy efficient, included illuminator, higher resolution, color rendering for day time use -instead of the black/white of the Photon-). Still, it is a heavy unit (well over 2# 4 Oz.) and the shooter needs to contemplate this.
It also, and we cannot stress this enough, is NOT rated for spring-piston airgun use.
SIGHTMARK will guarantee and replace units that fail, but do consult beforehand.
It has a very short eye relief, so the extreme rearwards mounting will pose a problem for most airguns.
The Wraith uses 4 AA batteries, but each set of 4 batteries will be drained in about 5 hours of continuous use. Having a background in electrical engineering, I procured some high capacity (2200 mAh) rechargeable batteries and got rid of the issue. Use for 5 hours, then recharge overnight/next day and you're ready to go next night.
The Wraith also accepts an external power source via a USB, so that's another possibility, but I prefer the rechargeable battery way, less clutter and noise.
There is an IR illuminator that has is own power source, and the diameter of the illuminator is common to many "tactical" flashlights, we'll include one in the final packaging.
The OptoElectronics side of the sight accept a mini SD card of quite large size, enough to hold a whole hunt, and to take MANY pictures. I'm sure we will start to see "documented hunts" with these sights.
At under $500, it competes successfully with other sights that almost double the price.
I am sure that the newer I-gadget generation will find the operation very easy and almost intuitive. I had to read the manual three times, because I have never had an I-Pod in my life.
Still, it is not complicated to handle, just read the manual.
Please consult the manufacturer's website for full specs.
The Muzzle Piece:
The Muzzle Piece is an interesting combination.
It uses the threaded muzzle to attach, and the interfases between barrel and muzzle piece have been ORing'ed. The Shroud can be "peeled back" to access the tuning element. This can be moved in a continuous form to achieve the tuning of the harmonics.
The space between shroud and barrel forms a rather large cavity, and there is a second cavity between this and the false muzzle.
This part has been affixed to the barrel to comply with the law, but accessibility to the adjustable element has been safeguarded.
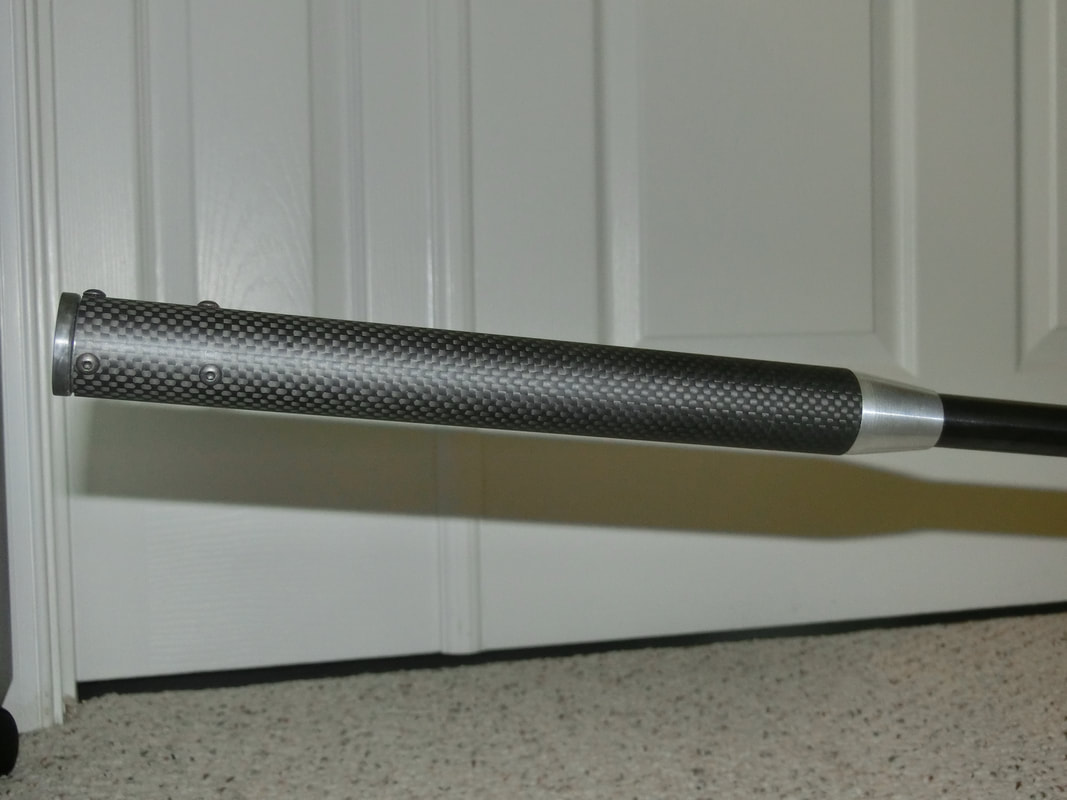
Still, the whole assembly just adds 4.5" to the OAL of the gun. So it is still a relatively compact gun.
So, how does it work?
As usual, I started with the "shooting in" routine of shooting and cleaning and shooting and cleaning . . .
Once that was done, we checked the possible accuracy of a number of 0.22" cal pellets at short range.
After all, I have never heard of converging pellets, so if they do not shoot pellet on pellet at short range they are not worth trying at long range, are they?

As you can see here, the JSB's yield fairly uniform energies, even for pellets with 2 grs of difference between them, so clearly the JSB Jumbo Exact was not THE pellet for this barrel. The RWS H points, while not bad gave some doubts, the Baracuda Greens performed well, but the JSB made GTO,'s were simply amazing. Do remember this barrel is barely 11" long, so slow pellets have an even worse chance of performing well.

Some further tests pointed to the Crow Magnum also, but we decided to leave that to the user. depending on how long his shots are, he might be better off with the Predators.

After tuning the variable element in the LDC WITH the Bi-Pod attached and operational, we re-tested the JSB's and the SuperH Points, but while some improvement was there, still not quite "up to snuff". "CB" means the first cold bore shot.
Good!, so now everything is mounted and functional, it's time we adjourned to the outdoor world and take care of long range tests and sound tests.
The Wraith comes with a bracket to hold the IR illuminator. The bracket has an espherical interfase, so that the illuninator can be focused and oriented towards the "work area".
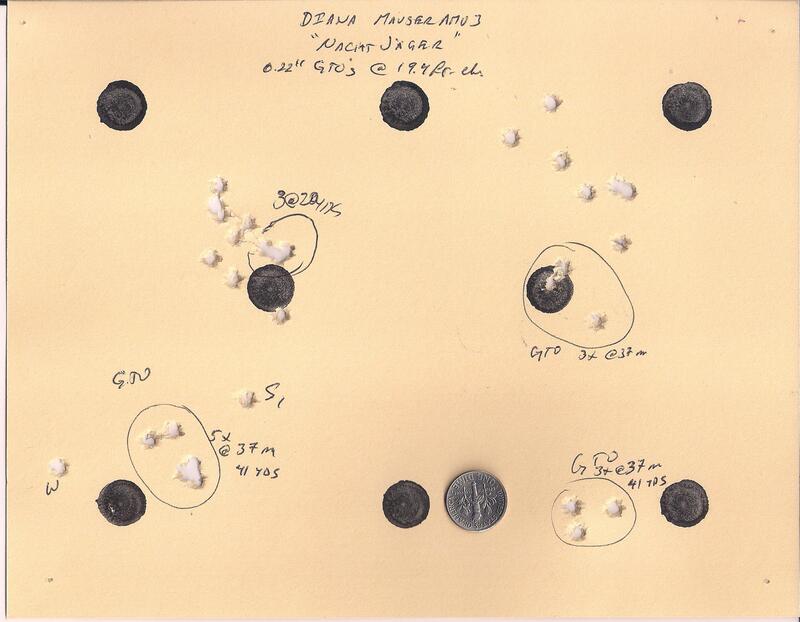
Tests at 20 yards revealed that the GTO's were still shooting well, so we adjourned to the 37 meter/41 yards line and we proceeded to shoot some groups.
A 5 shot group taught us that for a heavy optic and a long, cantilevered mount, any pressure from the eye into the scope via the eye-bellows would open the group, once that was identified, we rested about 10 minutes and shot a three shot group (more appropriate to a hunting gun). The black blobs in the target are a little under 1/2", but I am often asked to put an object so that the groups can be better appreciated. Since the "dime" seems to be an established measure of grouping in the US, I decided to include one.
And for those that REALLY need to see what "three shots into a dime means" here it is:

For me, it was a lesson in shooting and I will be the first to acknowledge that I am not the best shooter, either from a bi-pod or otherwise, but the bi-pod did present me with some challenges I am not used to, the process seemed to be:
Lay down
Shoot
Roll on your back and sit up
Rap the muzzle open
Cock the gun putting your left arm between the bi-pod legs
Insert the pellet
Close the barrel taking care to avoid hitting the bi-pod legs as well as not moving the scope-floating mount.
Return carefully the rifle to position
Aim
Fire.
Start again.
Still, the system demonstrated that it is capable of perfectly good hunting accuracy/precision.
Comparing that to my normal routine of shooting seated it is MUCH more complex.
So, yes I am sure I was not doing justice to the system.
With the usual 20/20 hindsight, a table would have been a great asset, and possibly one of those shooting chairs that swivel. That would be a more versatile setup, though I would still prefer a blind with some table like support so that shooting could take place from the sitting position and the cocking of the rifle would not be so noticeable.
That would belong to a "fieldcraft" post, LOL!
As for the sound tests, I used the setup I have always used:
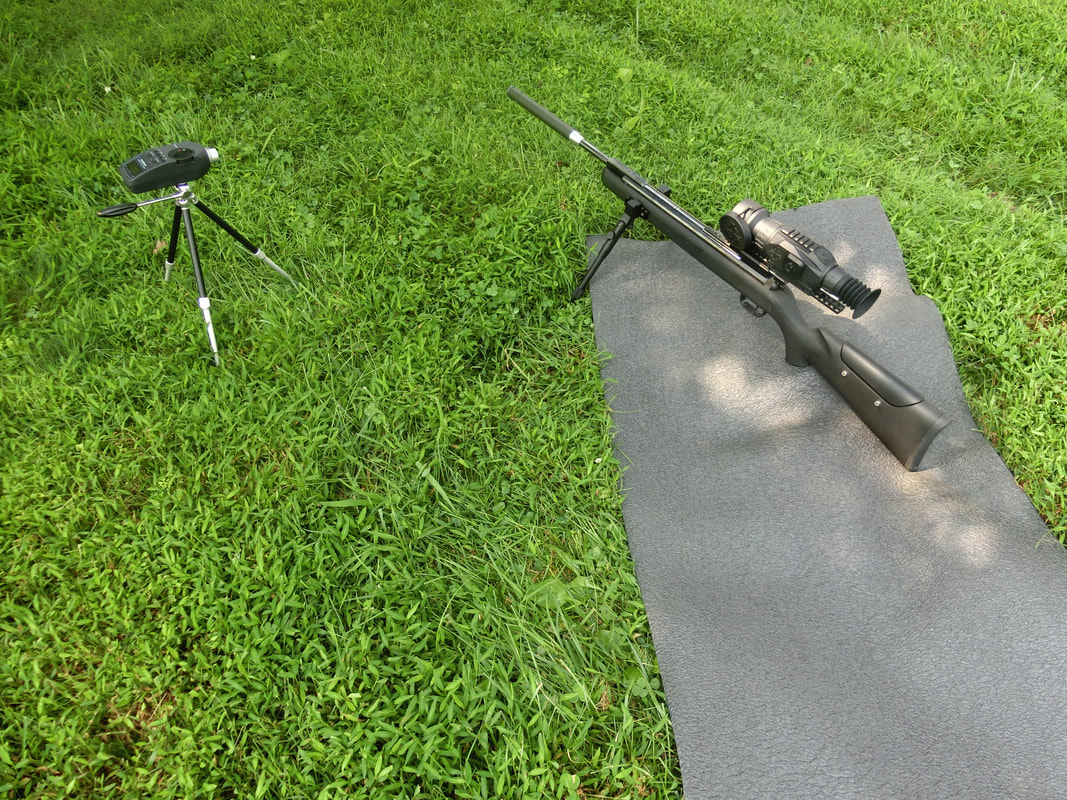
As you can see, the grass is quite grown and therefore it provides some sound absorption. Shooting at ground level on a hard surface would have added some reverberations to the sound signature.
The sound meter is located 1 m away,measured at right angle to the muzzle.
The sound meter is located 1 m away,measured at right angle to the muzzle.
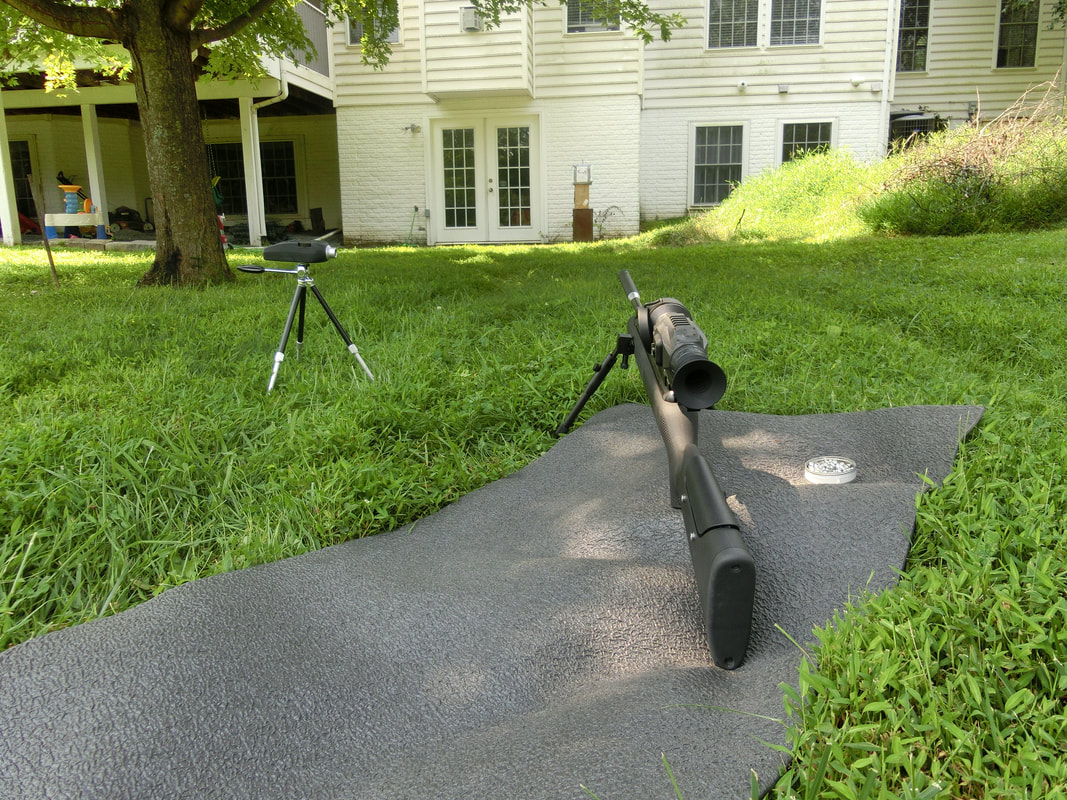
This picture shows more clearly the orientation and location of the sound meter relative to the muzzle.
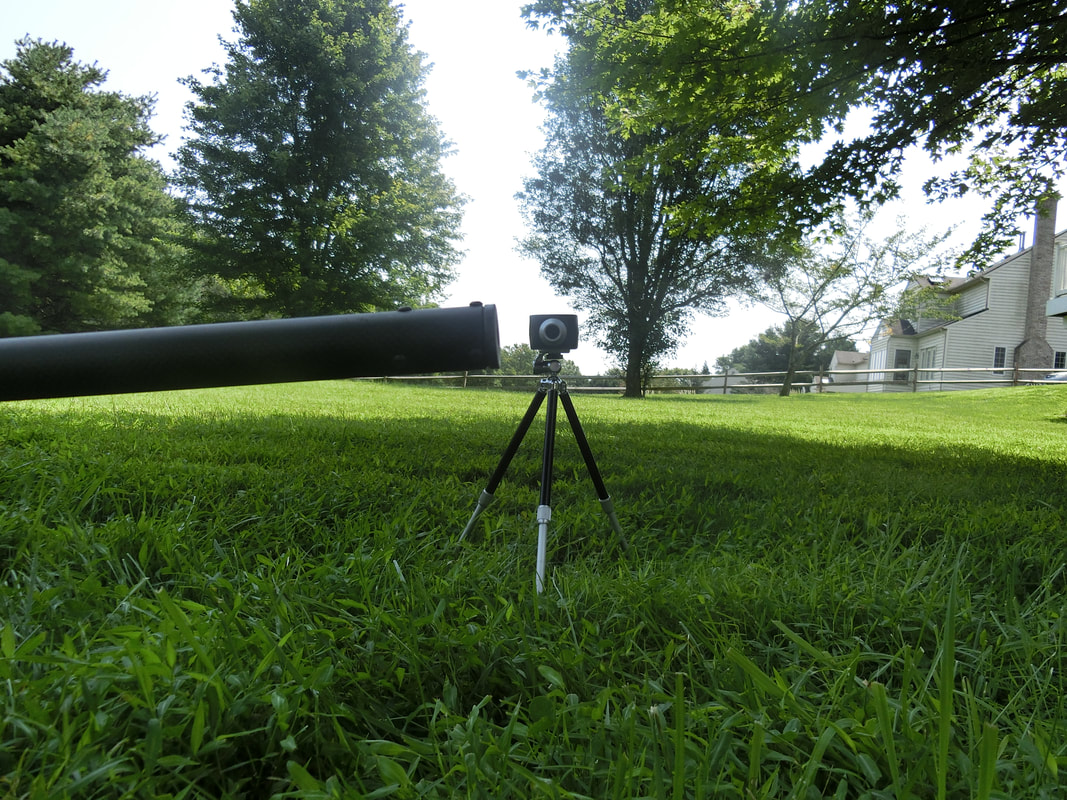
And a look from the other side of the muzzle shows how the sound meter addresses the exact line of exit.
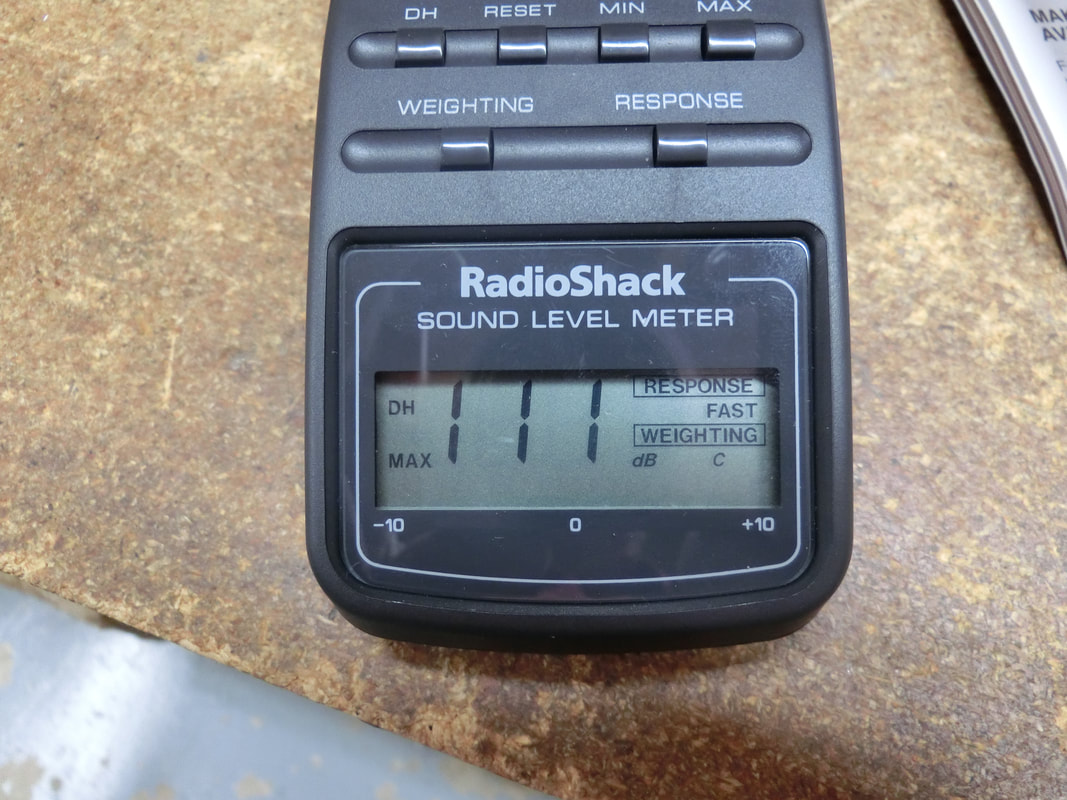
We tested the sound levels before affixing the Muzzle piece and found that, without it, it is a rather noisy airgun:
We tested the sound levels before affixing the Muzzle piece and found that, without it, it is a rather noisy airgun:
After affixing the muzzle piece, the sound averaged 9 dB less:
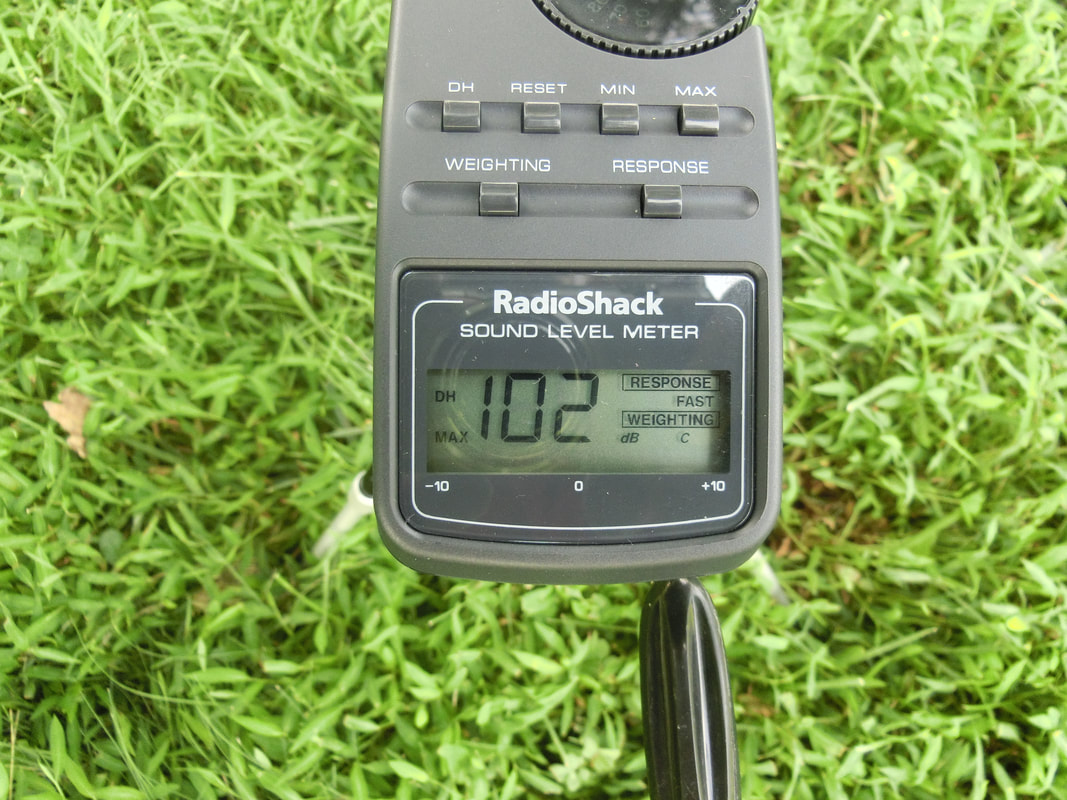
Now, this may not seem much, but since the dB is an exponential function that doubles or halves every 3 dB, these 9 dB's mean that the gun less than 1/8th as noisy with the device than without the device.
For those interested, you can note that the "Response" is set to "FAST", the "Weighing" is set to "C".
At this sound level, the gun is not more noisy than a toilet flushing (~70 dB) from 30-35 yards away.
All in all, it has been an interesting experience.
I still lament the discontinuation of the PhotonX, as I think that for serious airgunners, it was all that was absolutely needed, but I guess that modern times enforce the necessities of the luxuries, like video recording, color picture, and the like.
The more I deal with modern Consumer Electronics, the more I feel like a dinosaur, ROFL!
Hope this has been an interesting read, keep well and shoot straight!
HM
 RSS Feed