We all know that "life happens".
I had hoped to use a little quiet time to do the writeups for the Pyarmyd Air Cup and the Pennsylvania State Championship, but suddenly I had to devote time to fix a situation that should have never happened.
I had been watching a thread in the Gateway to Airguns Forum, but everything pointed out to a relatively simple problem.
Now I LIKE to leave the forum alone because in that way, people that have learned over the years how to do things and fix problems share their knowledge. If I were to jump into ALL threads, the forum would become a boring place and there is no "community building" in that.
By leaving the users help the other users, a "Community" is built where trust and friendship are clear and evident. And THAT is worthwhile.
At first I thought that the problem was a broken mainspring guide.
Why?
Because the OP said: "I began to cock it but stopped at the first ratchet of the bear trap so I could reposition my hand. I then grasped the lever and it would not move. Tried it again and this time put a little more force to the cocking action and it still did not move."
So, that meant, in my mind, that the sliding compression chamber had moved freely to the first ratchet position.
Lots of good advice was given, but still the 54 refused to cock.
By then I got in contact with the OP and suggested he returned the gun to the seller. But I also said that, given that he had demonstrated being a careful individual, I would not consider his warranty to have lapsed or gone up in smoke if he tried to do the repair himself.
Still, I insisted that he return the rifle to the seller, as sellers have a contractual obligation to let DIANA know what is failing in the case of returns.
He then offered to drive 5½ hrs to Ohio, to witness the repair process.
So, you can see he had an attachment to the gun, LOL! And so, after the seller refused to do anything else but replace the gun, I made an offer to repair the gun and learn from the experience, as well as share it with all of you.
Learn was the operative word here, LOL!
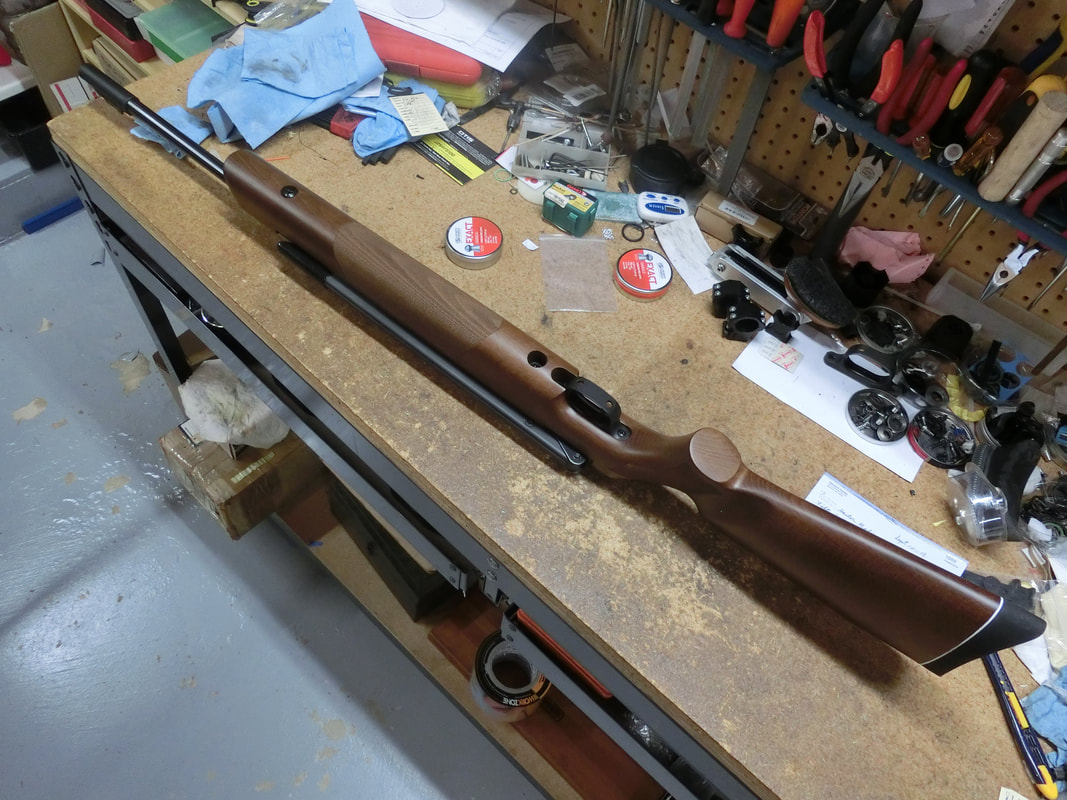
The gun arrived to Maryland well packed and boxed.
After unboxing, I tried to cock the gun and was completely taken aback, there was a strong resistance from the first movement of the sliding compression chamber.
Hmmmmmm, this was no broken guide.
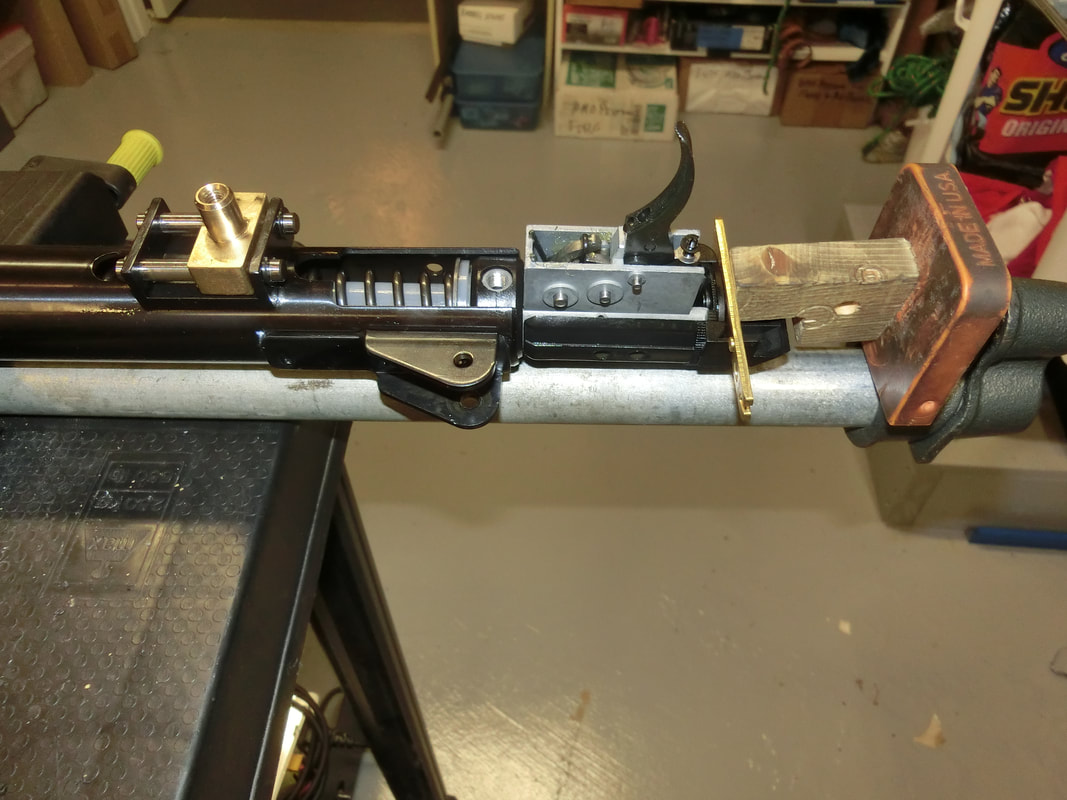
Off to the table:
I had hoped to use a little quiet time to do the writeups for the Pyarmyd Air Cup and the Pennsylvania State Championship, but suddenly I had to devote time to fix a situation that should have never happened.
I had been watching a thread in the Gateway to Airguns Forum, but everything pointed out to a relatively simple problem.
Now I LIKE to leave the forum alone because in that way, people that have learned over the years how to do things and fix problems share their knowledge. If I were to jump into ALL threads, the forum would become a boring place and there is no "community building" in that.
By leaving the users help the other users, a "Community" is built where trust and friendship are clear and evident. And THAT is worthwhile.
At first I thought that the problem was a broken mainspring guide.
Why?
Because the OP said: "I began to cock it but stopped at the first ratchet of the bear trap so I could reposition my hand. I then grasped the lever and it would not move. Tried it again and this time put a little more force to the cocking action and it still did not move."
So, that meant, in my mind, that the sliding compression chamber had moved freely to the first ratchet position.
Lots of good advice was given, but still the 54 refused to cock.
By then I got in contact with the OP and suggested he returned the gun to the seller. But I also said that, given that he had demonstrated being a careful individual, I would not consider his warranty to have lapsed or gone up in smoke if he tried to do the repair himself.
Still, I insisted that he return the rifle to the seller, as sellers have a contractual obligation to let DIANA know what is failing in the case of returns.
He then offered to drive 5½ hrs to Ohio, to witness the repair process.
So, you can see he had an attachment to the gun, LOL! And so, after the seller refused to do anything else but replace the gun, I made an offer to repair the gun and learn from the experience, as well as share it with all of you.
Learn was the operative word here, LOL!
The gun arrived to Maryland well packed and boxed.
After unboxing, I tried to cock the gun and was completely taken aback, there was a strong resistance from the first movement of the sliding compression chamber.
Hmmmmmm, this was no broken guide.
Off to the table:
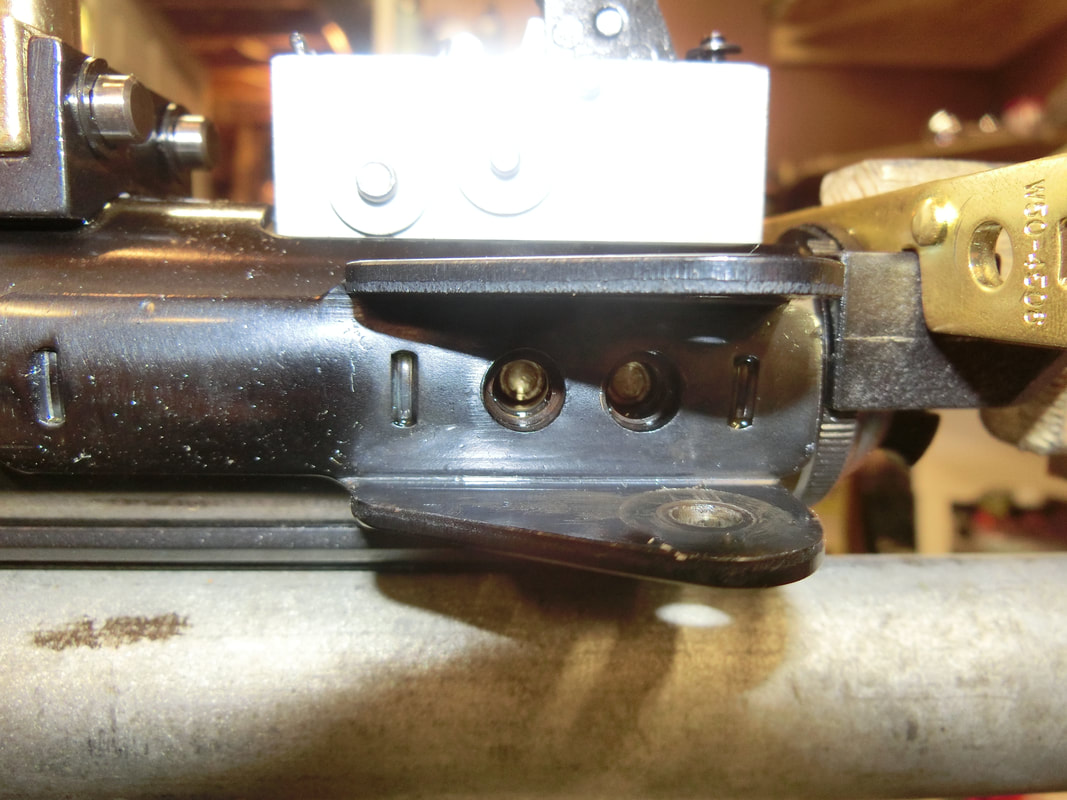
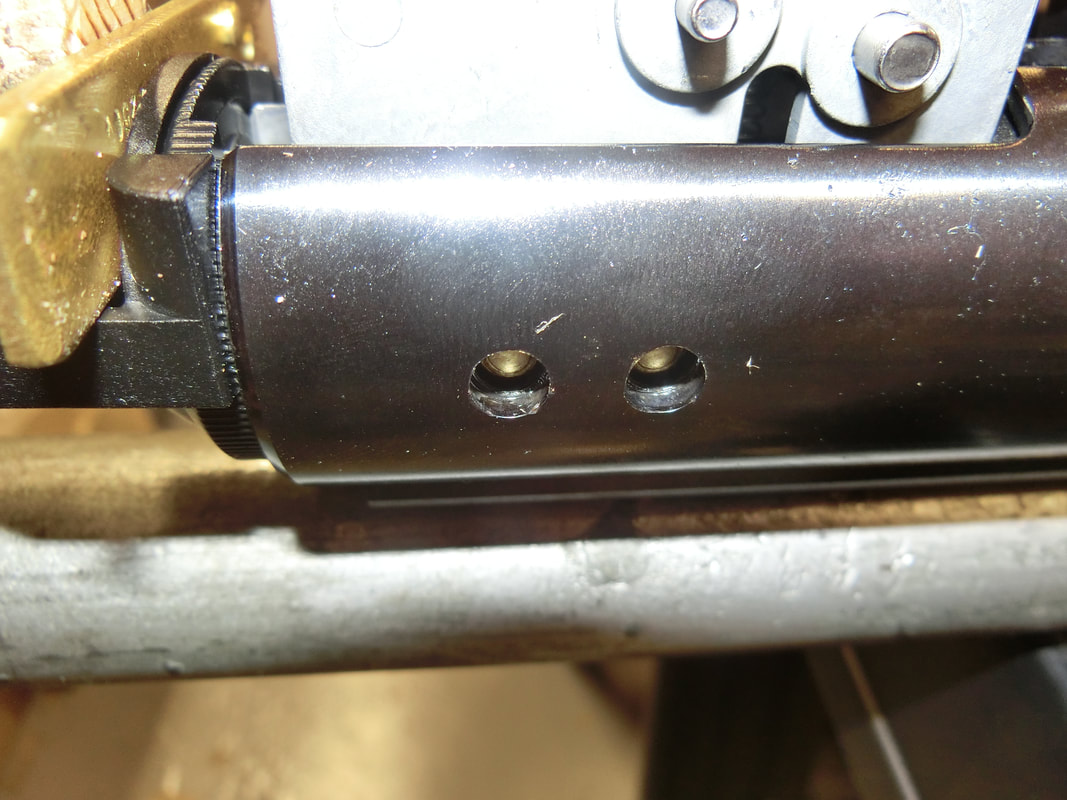
Sights and stock removed:
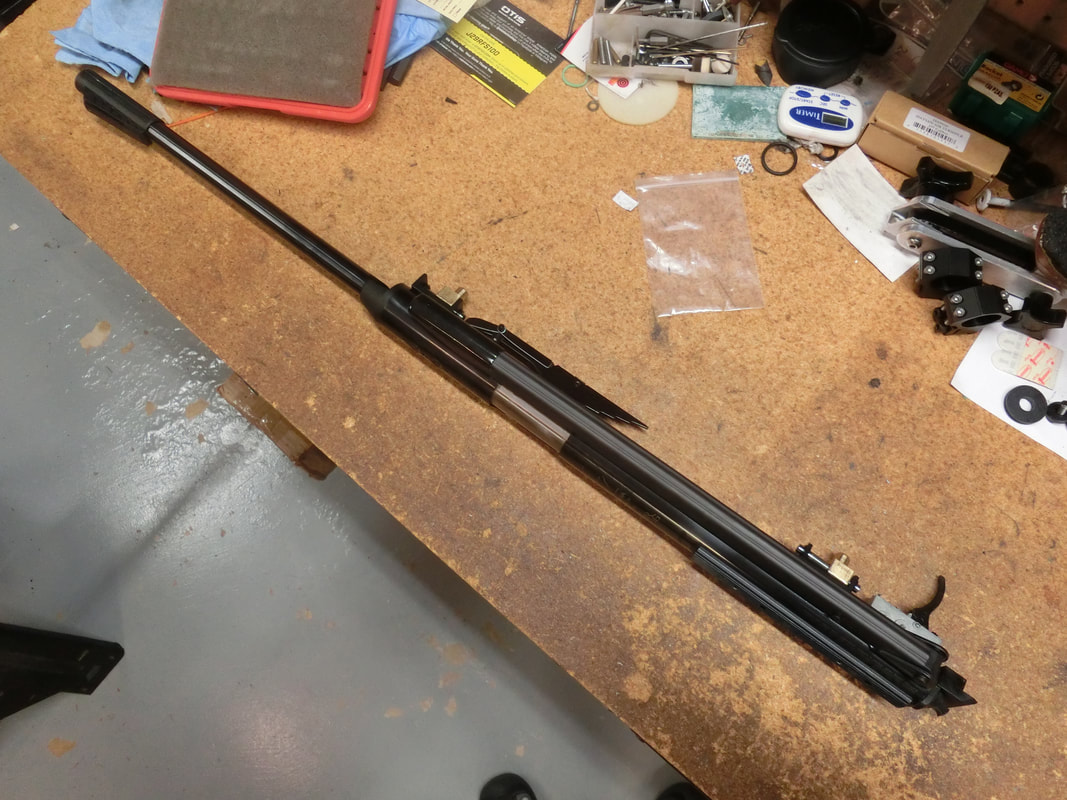
Everything seemed to be normal in the bedding:

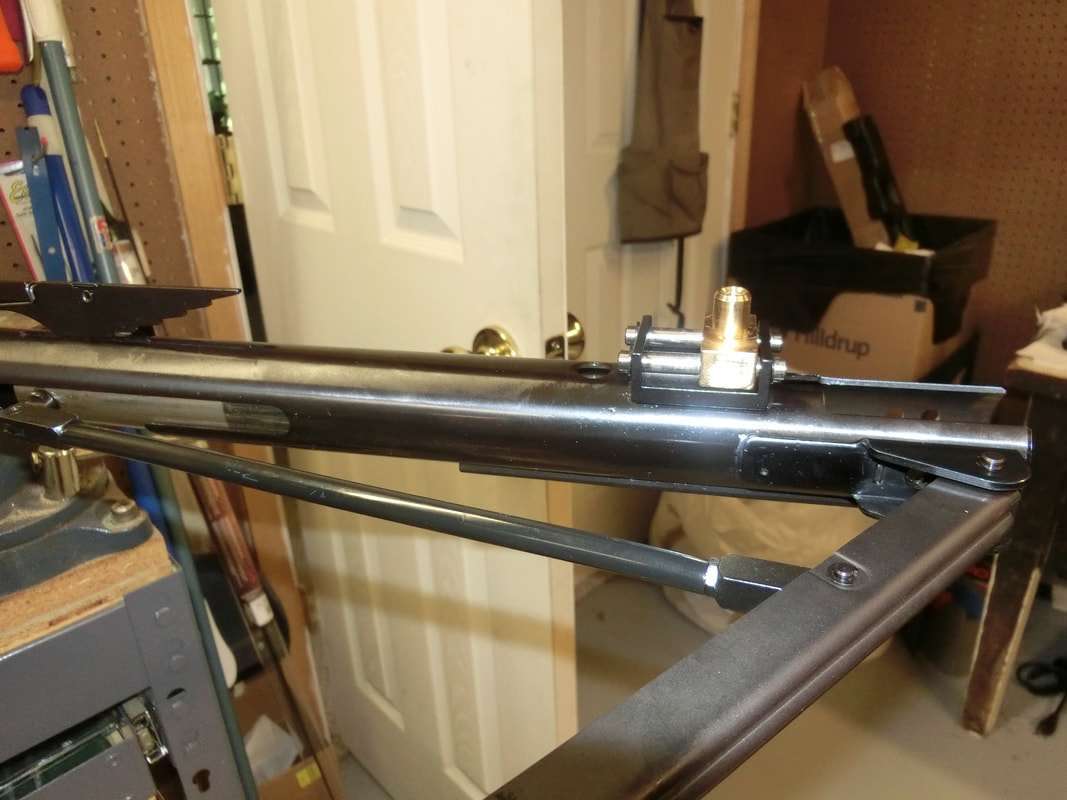
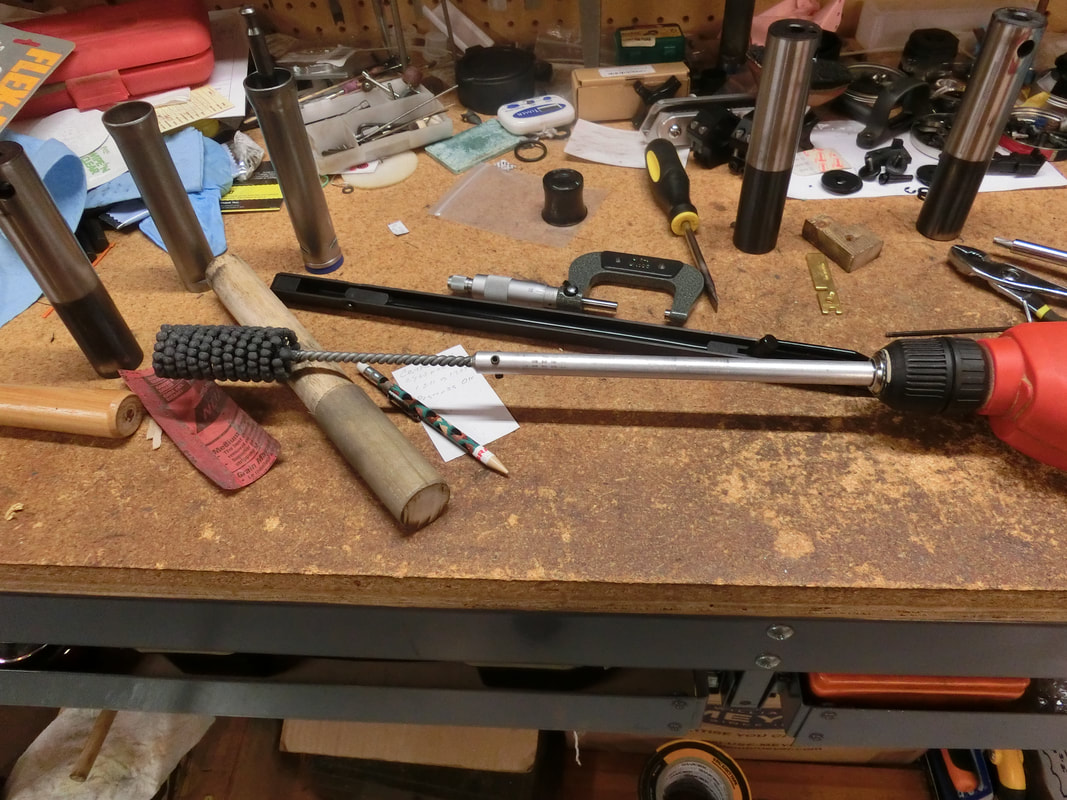
On to the spring compressor:
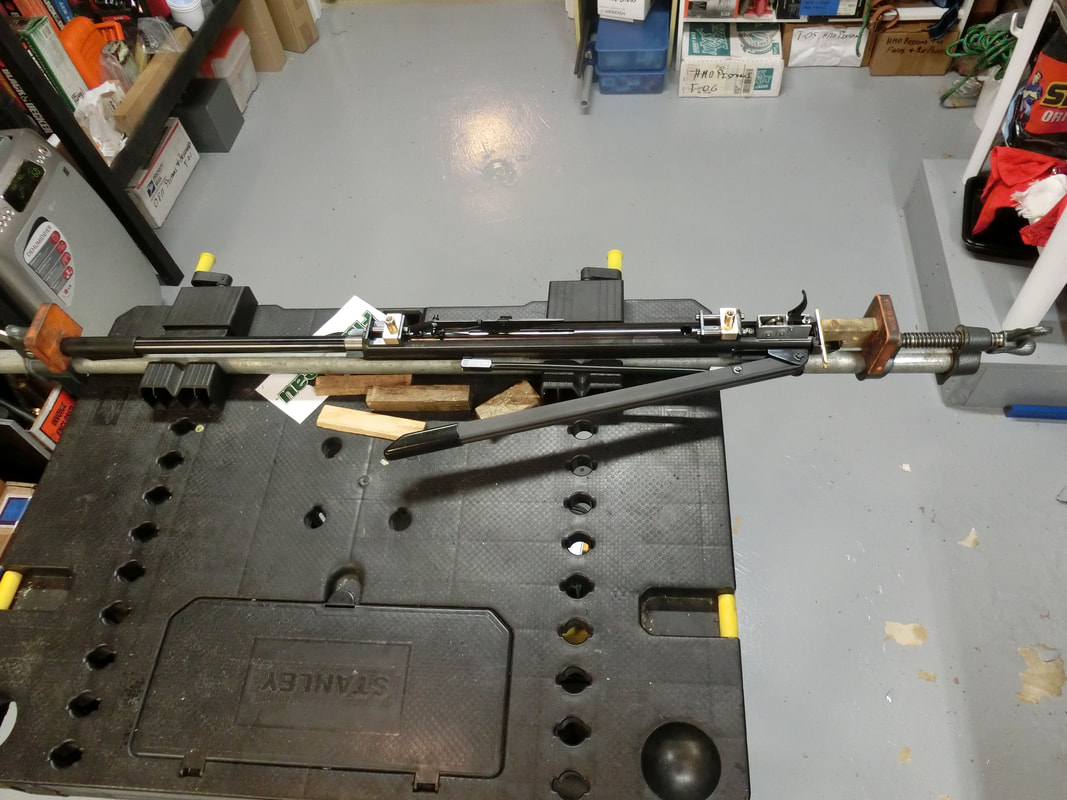
Cocking lever was removed:
Slave/Dumb pins inserted:
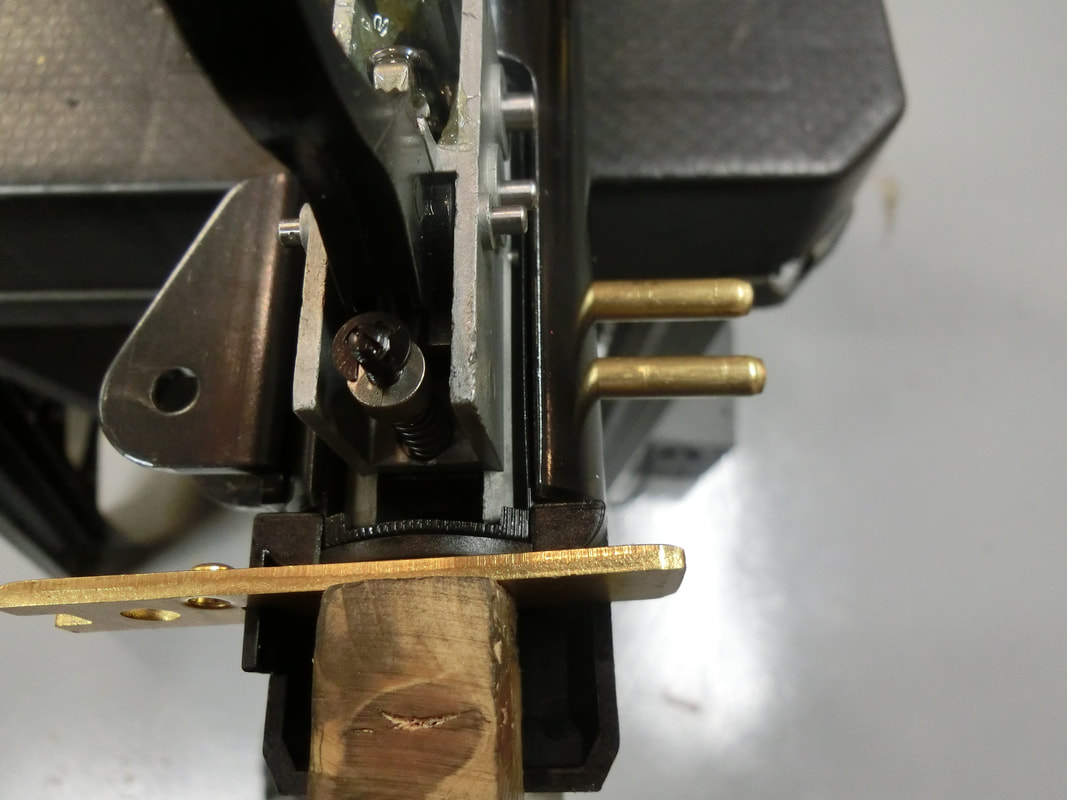
Out came the action pins and when the slave pins had been centered
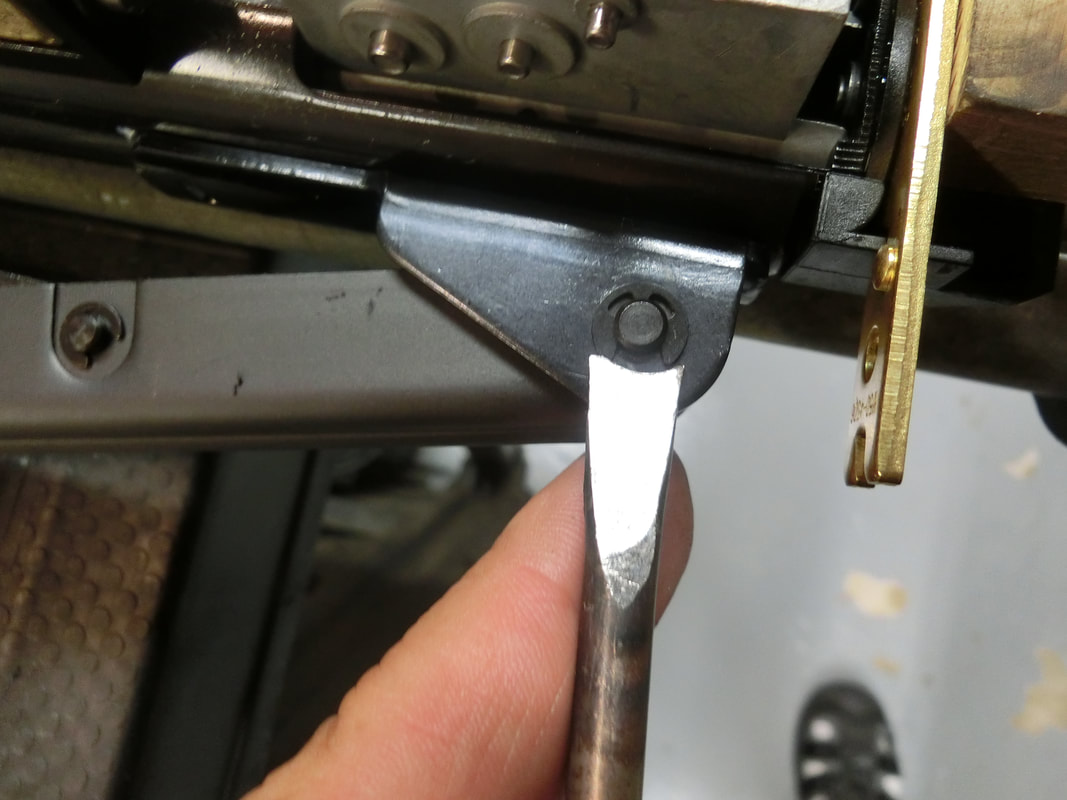
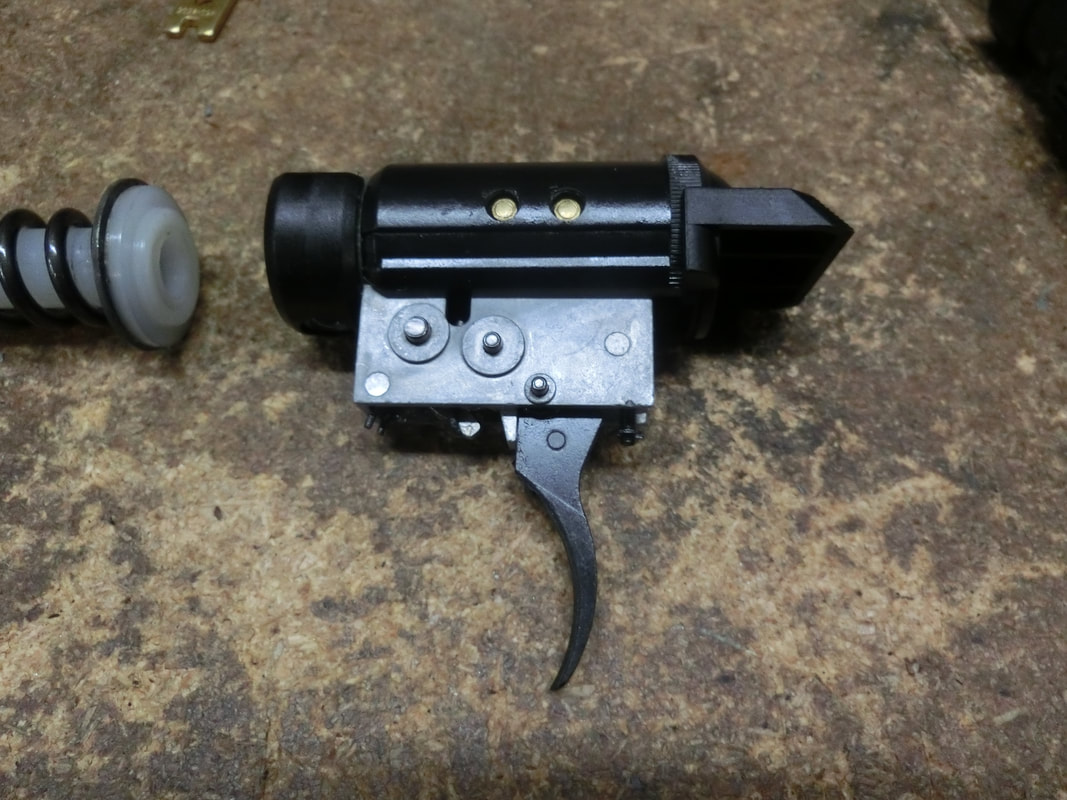
The trigger block came out:
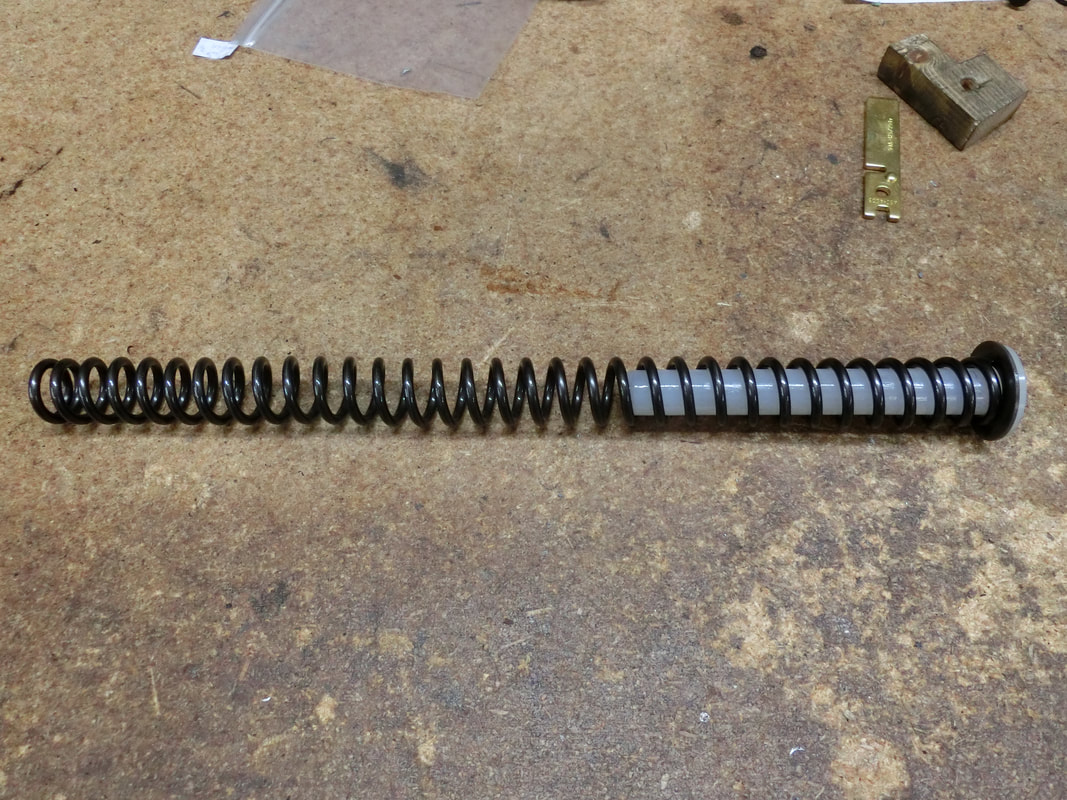
Spring and guide were good.
Trigger worked properly
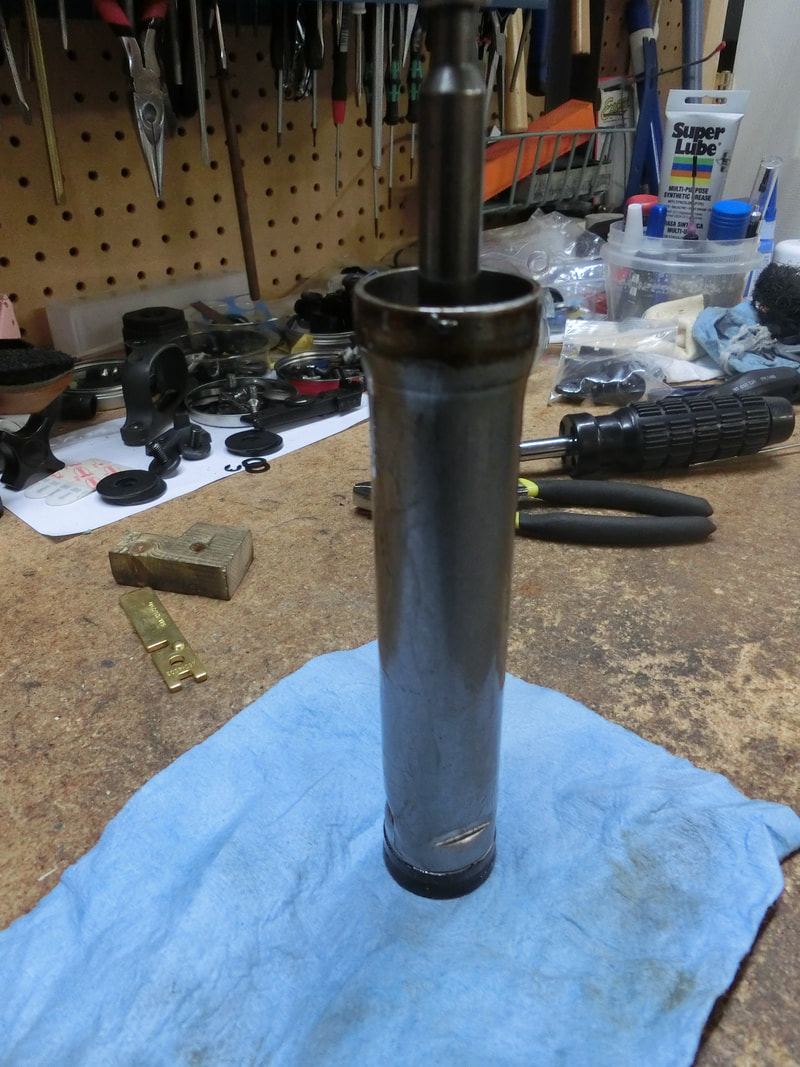
Without the spring, the cocking lever was used to bring back piston and compression chamber
But then, things really got stuck.
The piston did not come out, the compression cylinder refused to move
Ah, well, this is going to be one hairy ride!
Let me digress a little: I was once asked what I thought the difference was between a "Home tinkerer", a "Tuner" (whether professional or not), and a "Gunsmith".
And I still think that this appreciation is correct:
A "Home Tinkerer" will use general tools to the best of his knowledge and ability. He MAY even have some commercially made gunsmithing tools, but he will stop when major modifications are required for a gun to operate properly. He will use commercially made replacement parts, or "kits", whether OEM or not.
A "Tuner" has specialized in changing and upgrading parts, doing minor modifications, and possibly altering some parts (barrel, or piston) so that the best possible performance is attained from the engine. In general, Tuners will not deal with problem guns because that is not their job. If something is not working, it gets replaced. Simple and expedient.
Now, based on the principles of the old guilds' apprenticeships, I THINK, that a gunsmith makes himself many of the specialized tools he uses. They can be as simple as a properly ground screwdriver, to a jig to support a workpiece and move it within the desired path for a good result.
And in many occasions he will make a tool to solve ONE problem. That problem may present itself at a later date, but it may not.
The other aspect of the gunsmith is that he understands WHY things happen.
In the old days, apprentices passed their first year when they could take a lump of steel and with nothing more than a set of files, a ruler and a compass, come up with a perfect cube of steel.
Sounds Simple? Try it! Note that you need to start by creating a square.
Second year, apprentices learned how to forge, temper and draw springs (Flat), how to case-harden parts, and how to blue them.
By the third year they could forge a barrel, ream it, chamber it, backbore it, or choke it (most of the long guns back then were smoothbore)
By the fourth year they could rifle a barrel, time the locks and set up loads and sights.
Along this route, the lads built their tool chest. One by one, the tools they made were what they would be taking away to hang their own shingle. Apprenticeships of 5, 6, and even 7 years were not uncommon.
And once they were a practicing gunsmith, they would have to present, within a reasonable amount of time, a piece to the guild's council to be accepted as "Master" and THEN he could take in apprentices of his own.
That piece was the "Master-Piece" ("MeisterStuck").
To this date, there are museums where the tool chests of different craftsmen are exhibited and one wonders if the system really had to disappear.
Now, back to reality, and the reason why I made the long comment, is that to get the piston and the compression chamber out, I had to make two tools, one straight relatively slender dowel to push the assembly from the inside, and then one curved one more beefy, to give the pair the final "whacks" to get them out.
Once out, this is what I found:
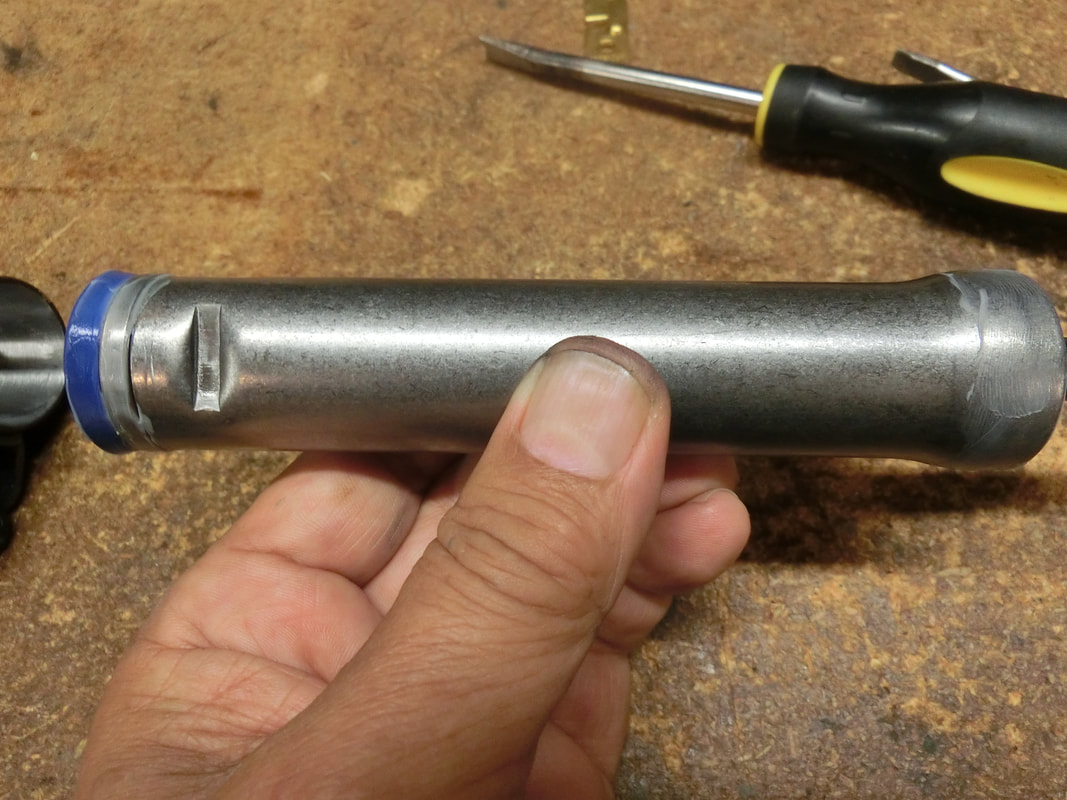
Now, this is a lubricated piston, but there was something more on the edge of the bell, that, when taken out resulted in this:
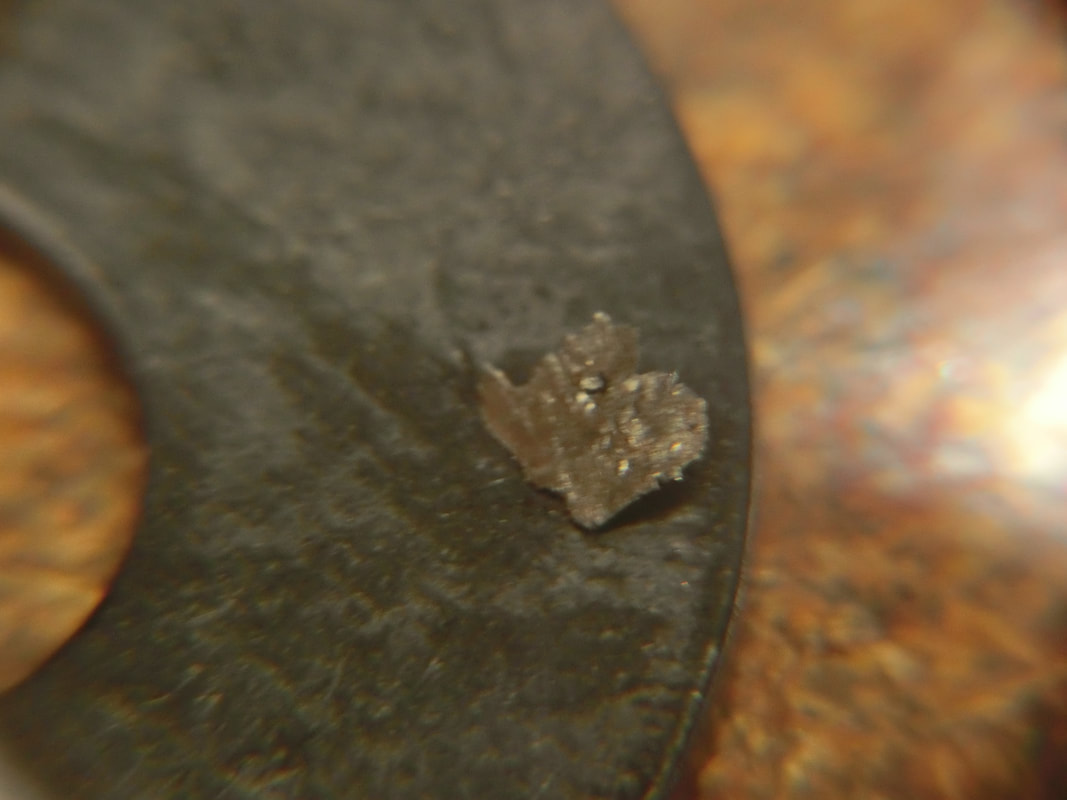
Yup, that is a small sliver of steel. It had gotten lodged between the bell and the tube and created a strong "interference".
But steel, specially heat treated steel, does not generally gall, so why did it occur in this instance?
And why did the compression chamber also needed to be extracted with a dead-blow hammer?
Upon cursory inspection, there was nothing wrong with it. On the left the "problem" compression chamber, on the right a "normal" one.
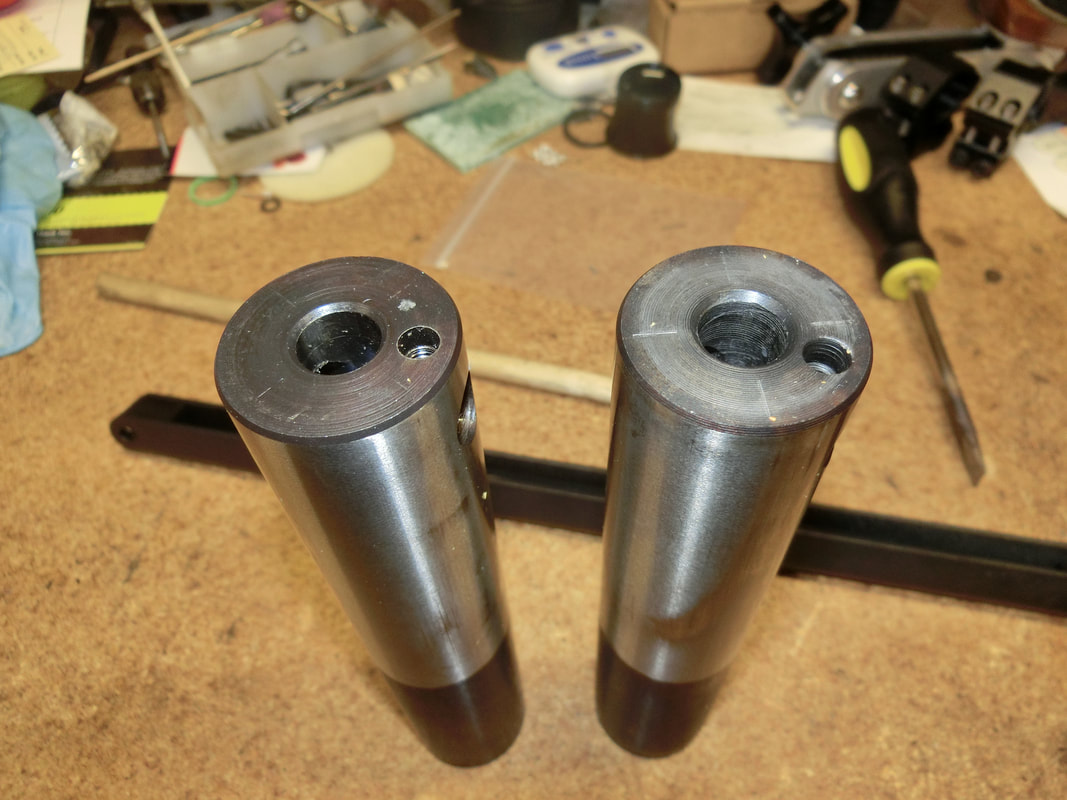
But, ¿Were they really the same?
Careful measurement showed that while in most places the compression chambers were identical, there was ONE place where the problem compression chamber had a difference: and that was on the OFF side of the cocking lever attachment point.
From a working diameter of 1.209" the non-working part went to 1.211"
Now, 0.002" may not seem much, but consider that when working with steel (not heat treated as this was), an interference fit of 0.002" on a 1.209" piece can hold around 36,000 newtons (about 7,900 #)
So, now we knew what had happened: this specific compression chamber had the "bad luck" of receiving the cocking lever attachment point perforation where it presented the "fattest" diameter.
With the cocking system in place, the compression chamber pushes more on one side than on the other, and the huge pressures created, caused the galling.
And not only that, but the whole assembly was getting stuck because while all the proper tolerances were kept, the accumulation of errors created an impossible condition to work in.
I think we need to revise our GD&T for reference points from where to define the tolerances. But that is "homework" for the technical guys. We're here to see how we fixed it and along the way, created a gun that will be unique.
One solution could have been to grind off a thousandth from the compression chamber, but in my experience, compression chambers usually last a LONG time, as long as the rifle itself, so, ¿Was there a better way?
And of course, the answer was ¡yes!. We had the opportunity to hand-fit the compression chamber to the mechanisms tube.
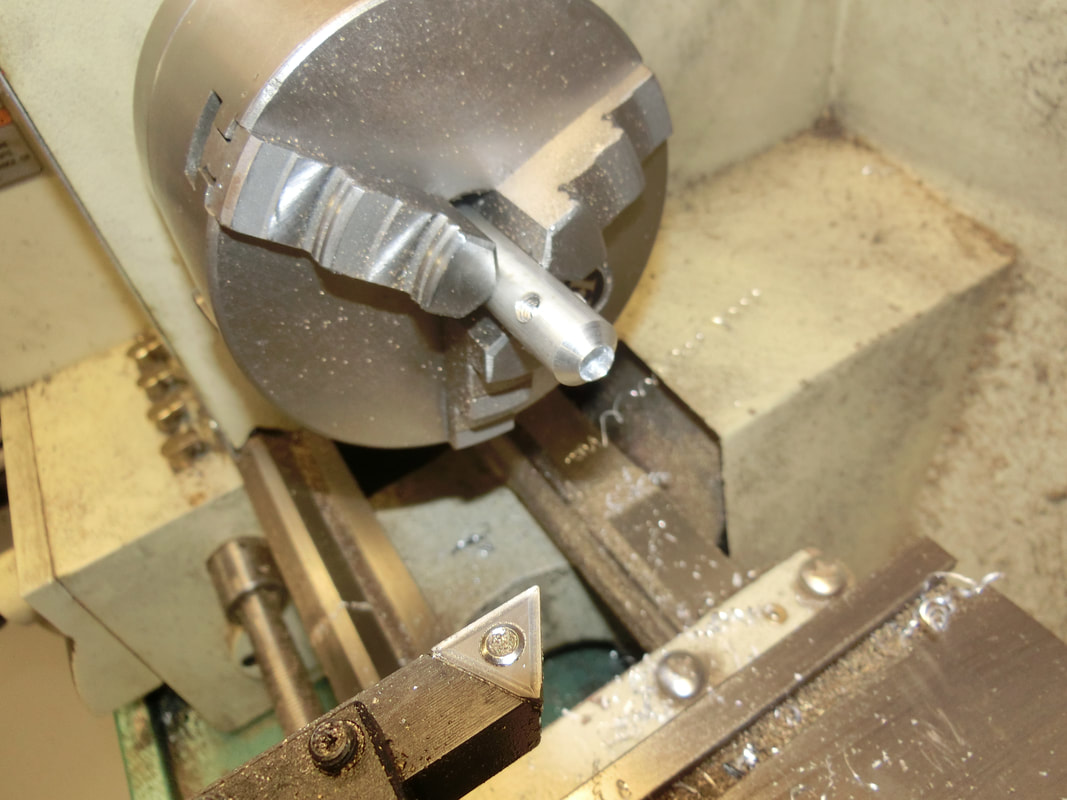
I started by making a tool to de-burr the cutouts of the action:
Careful measurement showed that while in most places the compression chambers were identical, there was ONE place where the problem compression chamber had a difference: and that was on the OFF side of the cocking lever attachment point.
From a working diameter of 1.209" the non-working part went to 1.211"
Now, 0.002" may not seem much, but consider that when working with steel (not heat treated as this was), an interference fit of 0.002" on a 1.209" piece can hold around 36,000 newtons (about 7,900 #)
So, now we knew what had happened: this specific compression chamber had the "bad luck" of receiving the cocking lever attachment point perforation where it presented the "fattest" diameter.
With the cocking system in place, the compression chamber pushes more on one side than on the other, and the huge pressures created, caused the galling.
And not only that, but the whole assembly was getting stuck because while all the proper tolerances were kept, the accumulation of errors created an impossible condition to work in.
I think we need to revise our GD&T for reference points from where to define the tolerances. But that is "homework" for the technical guys. We're here to see how we fixed it and along the way, created a gun that will be unique.
One solution could have been to grind off a thousandth from the compression chamber, but in my experience, compression chambers usually last a LONG time, as long as the rifle itself, so, ¿Was there a better way?
And of course, the answer was ¡yes!. We had the opportunity to hand-fit the compression chamber to the mechanisms tube.
I started by making a tool to de-burr the cutouts of the action:
Using water and a fine sanding paper, I managed to open up the inside of the tube to the point that the piston entered with SLIGHT effort, but not too much.
At first I thought that the cutouts and the pressure put in the welding of the sled-rails support bracket were the culprits, but then I remembered that the compression chamber had posed resistance from the first movement.
So the problem was all along the raceway of the compression chamber.
What to do?
Of course, make another tool!
The reason is simple:
Hones are made to work on cylinders and jackets, but not when they are located 8" into a mechanisms tube.
So, I made an extension:
Hones are made to work on cylinders and jackets, but not when they are located 8" into a mechanisms tube.
So, I made an extension:
There are two hones that a gunsmith can use: Either the little stones that are made for honing motorcycle and other small motors, or the "Flex Hone".
Fixed hones, when properly extended and weighted, can do a good job of polishing and truing the internals of a compression chamber, but for mechanisms tubes where the uniformity of the inside diameter is not as critical as in the compression chambers, a flex-hone will do nicely.
It is NOT recommended for the inside of compression chambers because it cannot reach to the bottom of it.
Unless you can disassemble the compression chamber, do NOT use a Flex-hone on the inside of a compression chamber.
I like to use diamond-loaded honing oil, so what you see on the flex-hone is the extremely black "dust" that is the industrial diamond honing additive.
After some work, taking it slowly, measuring often and being careful not to overdo it, it became possible to assemble the whole thing.
The rifle feels like a vault, even if I had WANTED to button the piston, there is no space to do so. Of course vaults do not operate at 100 m/s (328 fps)
Now, would it be possible to hold this level of precision fitting from the factory? no way! A hand fitted gun costs a lot more than the run of the mill DIANA.
For assembly, I chose to use Ultimox 226 paste, as it is the only lubricant that can guarantee a good performance under the pressures that such a tight-fitting action will give for the first year or two.
Small price to pay for a good gun.
They say the proof of the pudding is in the eating, and so I tested the gun with open sights at 15 yards. I am sure there are better shooters than me with open sights, but the results are not half bad:
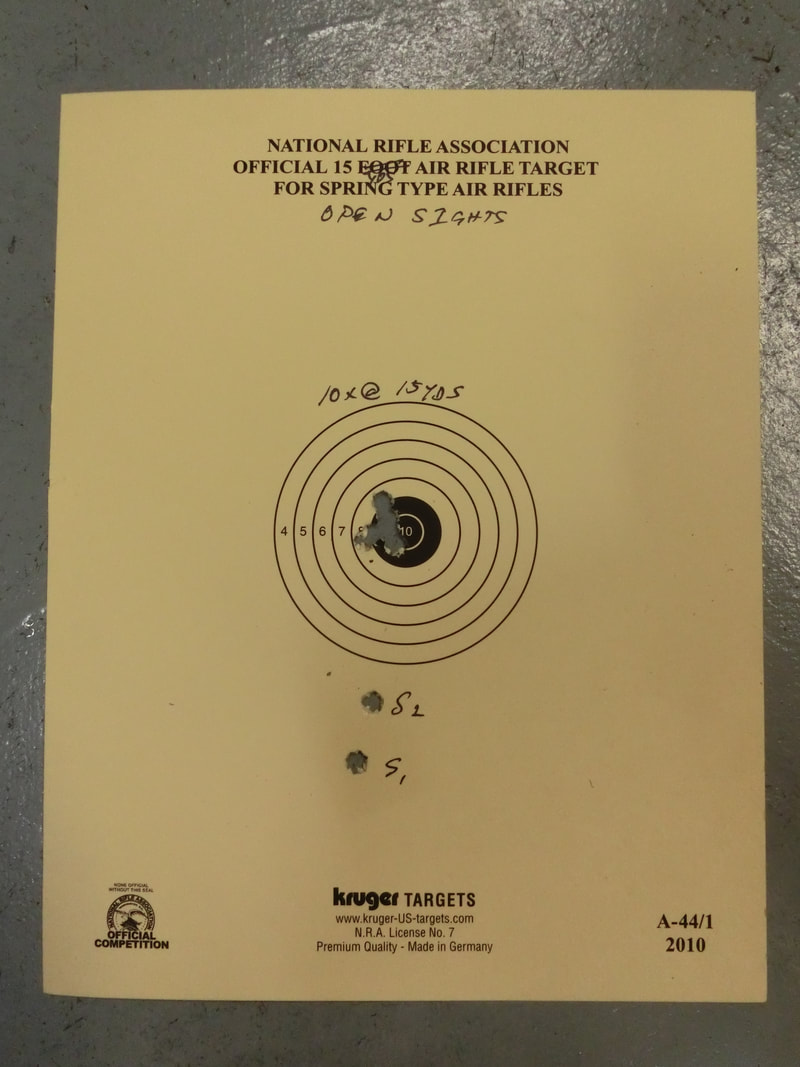
For effects of establishing "Provenance" I will say here that the above applies to the rifle serial number 25036871 and that I am sure that this provenance should be worth at least $1.98 above and beyond the BBA values (private joke).
;-)
Keep well and shoot straight!
HM
;-)
Keep well and shoot straight!
HM
 RSS Feed