A short review of the Rowan Engineering's trigger blade, with some comments about the BMS trigger
DISCLAIMER, I will post the same disclaimer as I used in the original post about swapping triggers in the LGU:
1.- Swapping the trigger blades WILL invalidate the warranty of your rifle.
2.- ANY user intervention in the trigger MAY result in an UNSAFE condition. Once you get into the trigger you are on your own.
3.- I have no control of YOUR actions, so I can take NO responsibility for the results YOU get. This process proved safe and sound in THIS gun. I cannot guarantee that it will be the same in YOURS.
Having said that, let's dive into it:
In the past years, I have had the opportunity to tune and shoot a number of LGV's and LGU's, and I still like the guns. They are not the ideal gun for me (though the LGV seems to be a better match), but as we have discussed in the past, we are all different and some guns will shoot very well in some people's hands while shooting horribly in someone else's hands.
Among the most important characteristic of a gun that is to shoot accurately many times in a day, is the trigger. For most shooters, the Walther "Match Abzug", or the "Yankee Tune" trigger solutions will be all they ever need, or want.
I have installed a few of the "super-custom" triggers (like the BMS's and the RE's), but there was always something that didn't really "jive" for me; perhaps I am spoiled by my DIANA T-06's. But, as we just said: we are all different. And so, when a friend asked me to add a Rowan Engineering trigger to his LGU and document the process, I decided to put this blog entry together.
Experiences with Rowan have been somewhat less than stellar.
As an example:
When I ordered this last trigger through the website, everything seemed to be straightforward, when I received an Email from them supposedly enclosing the tracking number, but without any number at all, I suspected that there would be other problems.
So, after writing to them and receiving the proper tracking number, I followed the shipment almost daily.
When suddenly the USPS sent me an alert (I have a USPS account and had registered to receive updates on the package), about the "item being returned to sender because it is undeliverable", I jumped into action and went looking for the package to my local Zip-Code head office, sure enough, after 90 minutes of waiting and repeating the same story several times, someone took pity on me (actually the Germantown, MD, USA, PostMaster), and personally went to look for the parcel.
When I received it, I understood the whole ("Undeliverable") thing:
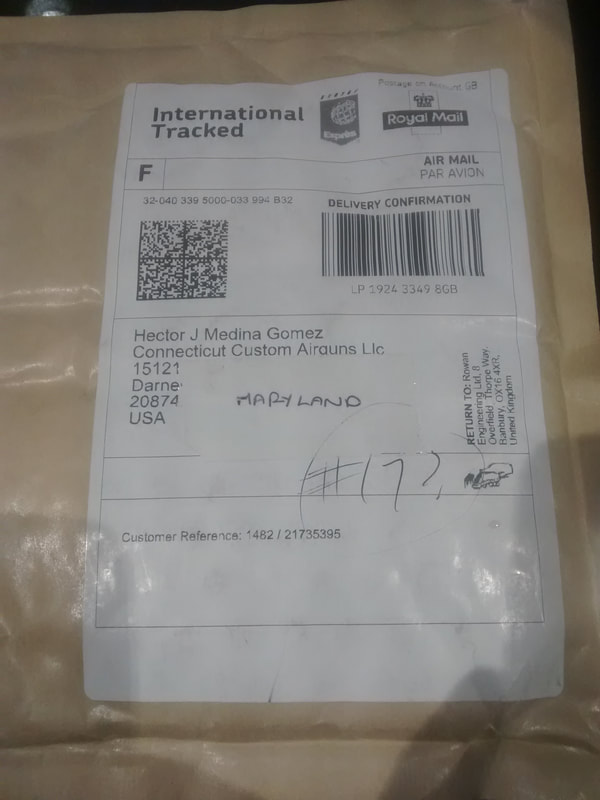
Tell me in all honesty ¿Would you have been able to deliver such a package? I wouldn't.
An Email to them relaying the same picture included above produced the following response:
"Hello Hector,
I have found out what happened with the address.
Occasionally the printed address is missing some detail that is hand written afterwards.
To stop this smudging , clear tape is added over which we have been doing for several years.
It appears now that the last batch of print consumables is different or the the clear tape has changed in someway and now over a day or so causes the printed ink underneath to erase !!!
Very strange.
Anyhow, we will not add the clear tape from now onwards.
Best regards,
Derek Rose."
By the end of the day, I only lost 3 hours hunting down the package but now I had it in hand.
Anyway, back to gunsmithing:
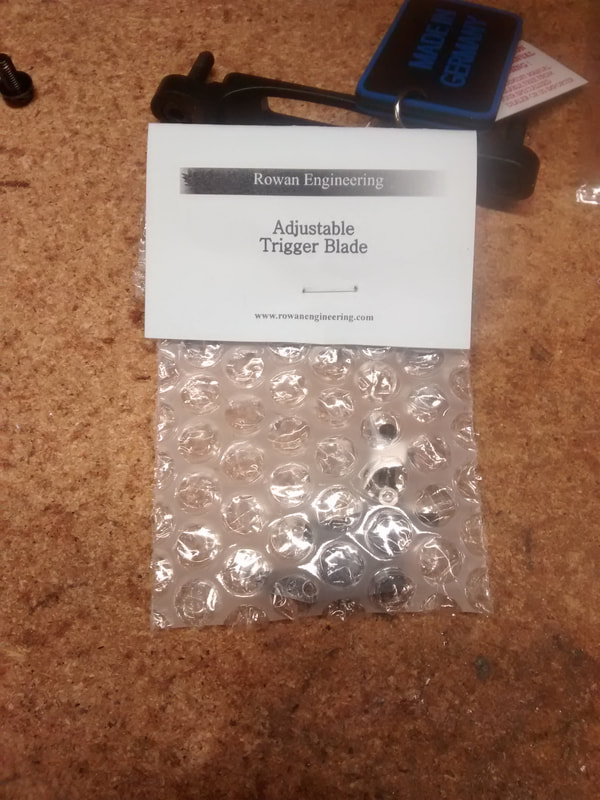
This is what you get in the envelope:
An Email to them relaying the same picture included above produced the following response:
"Hello Hector,
I have found out what happened with the address.
Occasionally the printed address is missing some detail that is hand written afterwards.
To stop this smudging , clear tape is added over which we have been doing for several years.
It appears now that the last batch of print consumables is different or the the clear tape has changed in someway and now over a day or so causes the printed ink underneath to erase !!!
Very strange.
Anyhow, we will not add the clear tape from now onwards.
Best regards,
Derek Rose."
By the end of the day, I only lost 3 hours hunting down the package but now I had it in hand.
Anyway, back to gunsmithing:
This is what you get in the envelope:
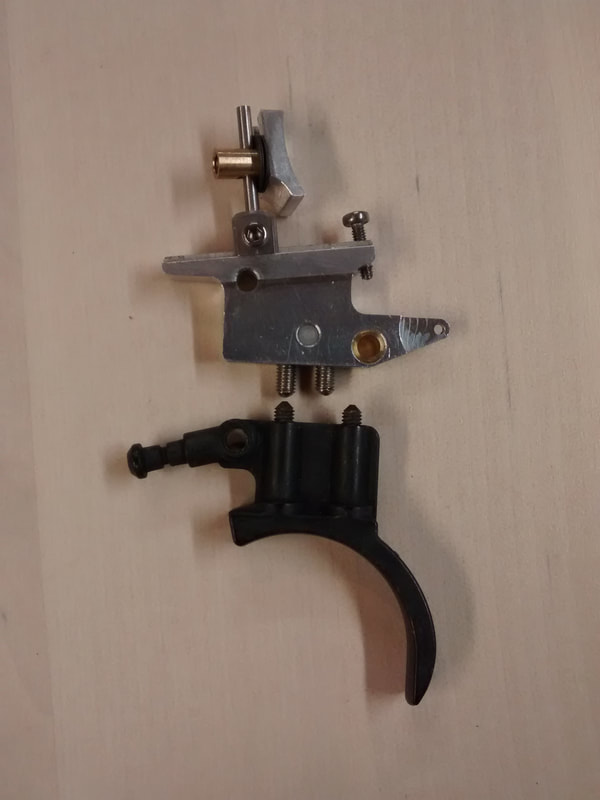
And when you unpack it, this is what is inside:
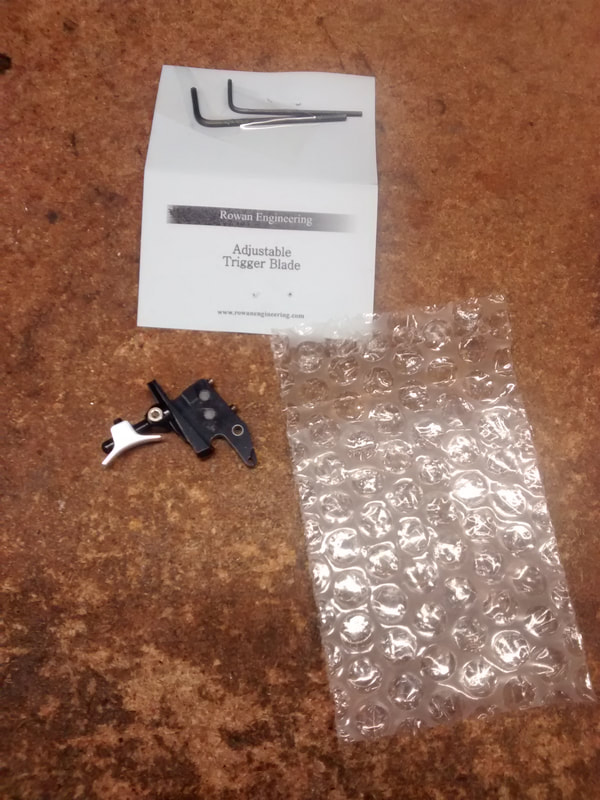
You will also get a black and white printed version of the instruction booklet:
http://rowanengineering.com/pdf/WalterLGVLGUAdjTriggerInstruct.pdf
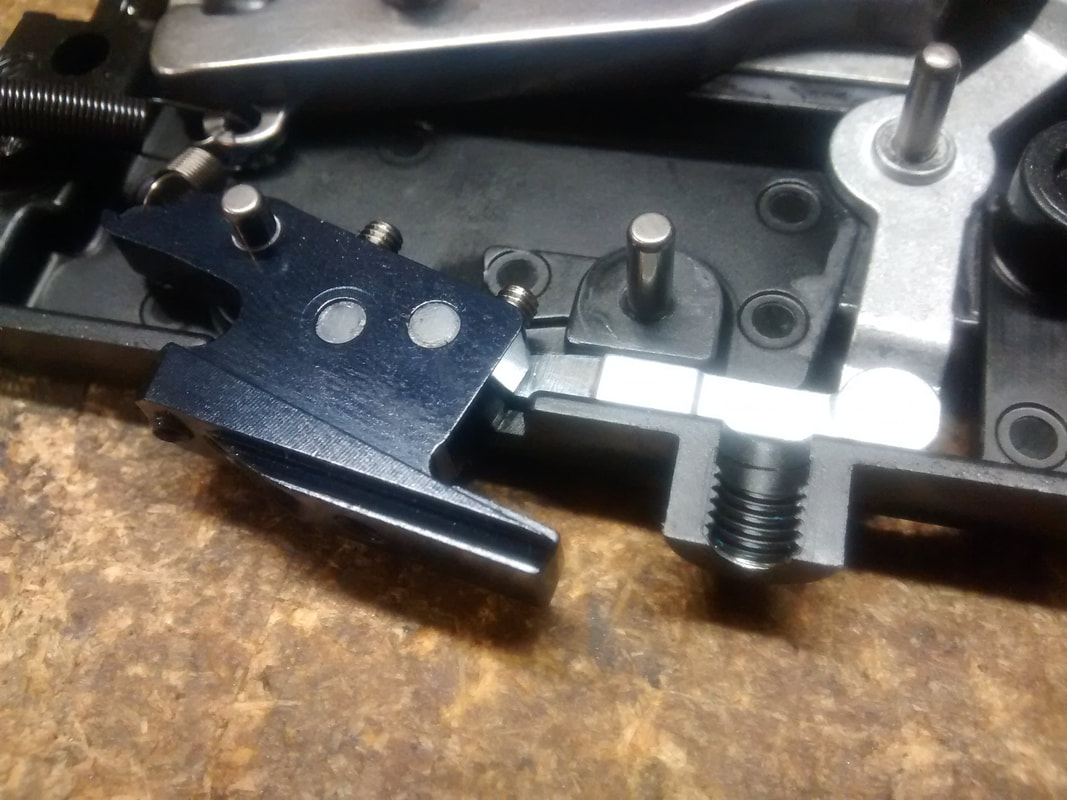
One of the things that strikes any observant gunsmith is that the adjustment screws (as the trigger is shipped) are even further apart than the ones in Walther's "Match Abzug"
http://rowanengineering.com/pdf/WalterLGVLGUAdjTriggerInstruct.pdf
One of the things that strikes any observant gunsmith is that the adjustment screws (as the trigger is shipped) are even further apart than the ones in Walther's "Match Abzug"
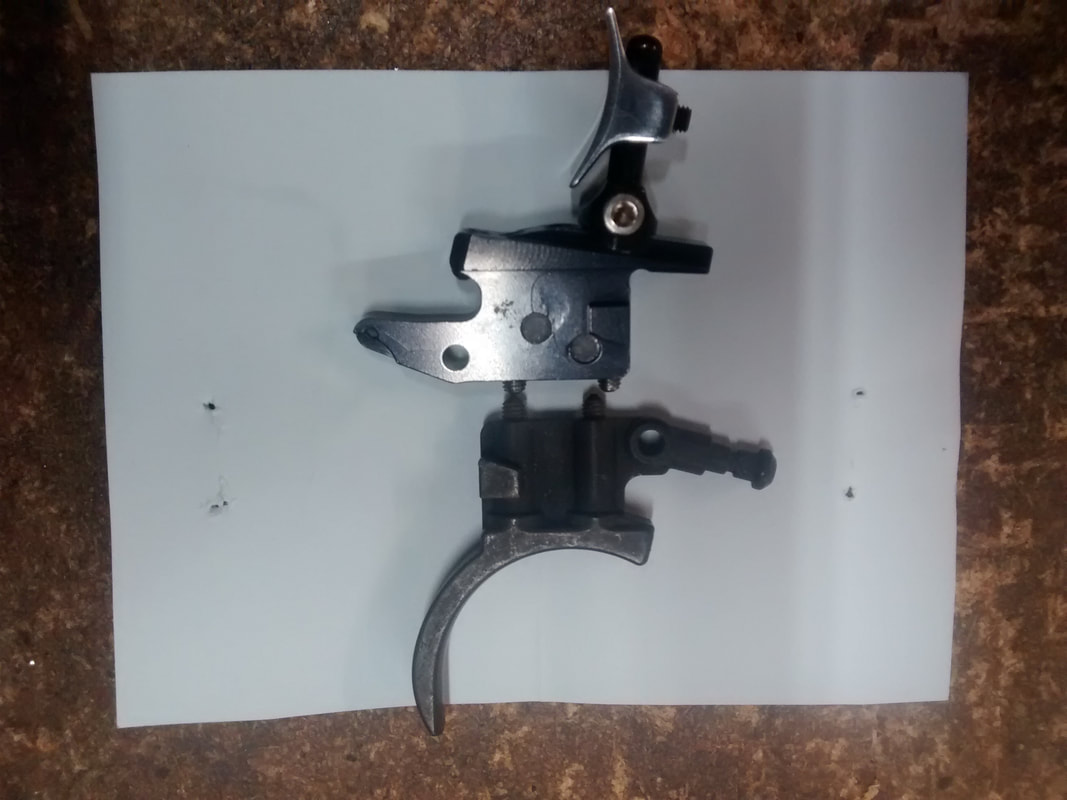
If we do the same comparison with the BMS trigger:
So, how can it accomplish a lower trigger pull with screws that are even farther apart than the OEM triggers?
Reality is, that as it is shipped, it can't FOR THE SAME SET OF CIRCUMSTANCES.
You can read carefully, again, and again, and AGAIN, the instruction sheet included, there is no mention of further adjustability.
Reality is, that as it is shipped, it can't FOR THE SAME SET OF CIRCUMSTANCES.
You can read carefully, again, and again, and AGAIN, the instruction sheet included, there is no mention of further adjustability.
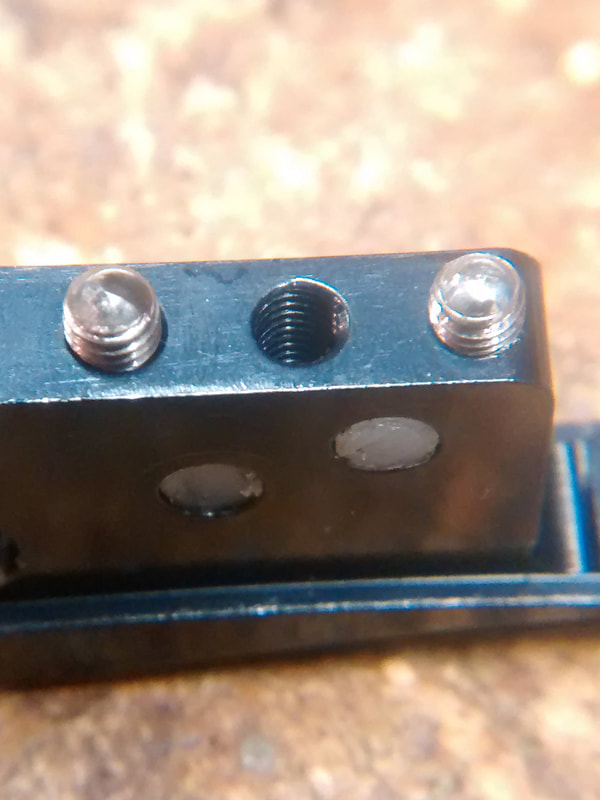
But if you look closely, you can see that there is a third hole in there. And it is tapped for the same screws. So, if what you REALLY want is the lightest trigger pull possible without any further work, then you need to change the rear screw's location from the outside to the center.
But, in a sense, we are getting ahead of ourselves because when I installed the RE's trigger in THIS Walther, then the piston would not make the trigger latch onto the stem.
I looked and looked and looked and could not find what the problem was, until I looked closely at the safety. It would not move to the safe position.
Upon close examination, it was determined that there was not enough space between the housing, the safety pawl and the new trigger blade for the pawl to enter into the cavity of the trigger.
My first reaction was to shim it a little, believing that the problem MUST be a minor one, a question of one or two thousandths of an inch.
I measured the thin washers in the trigger mechanism and made some of copper shim material of the same thickness:
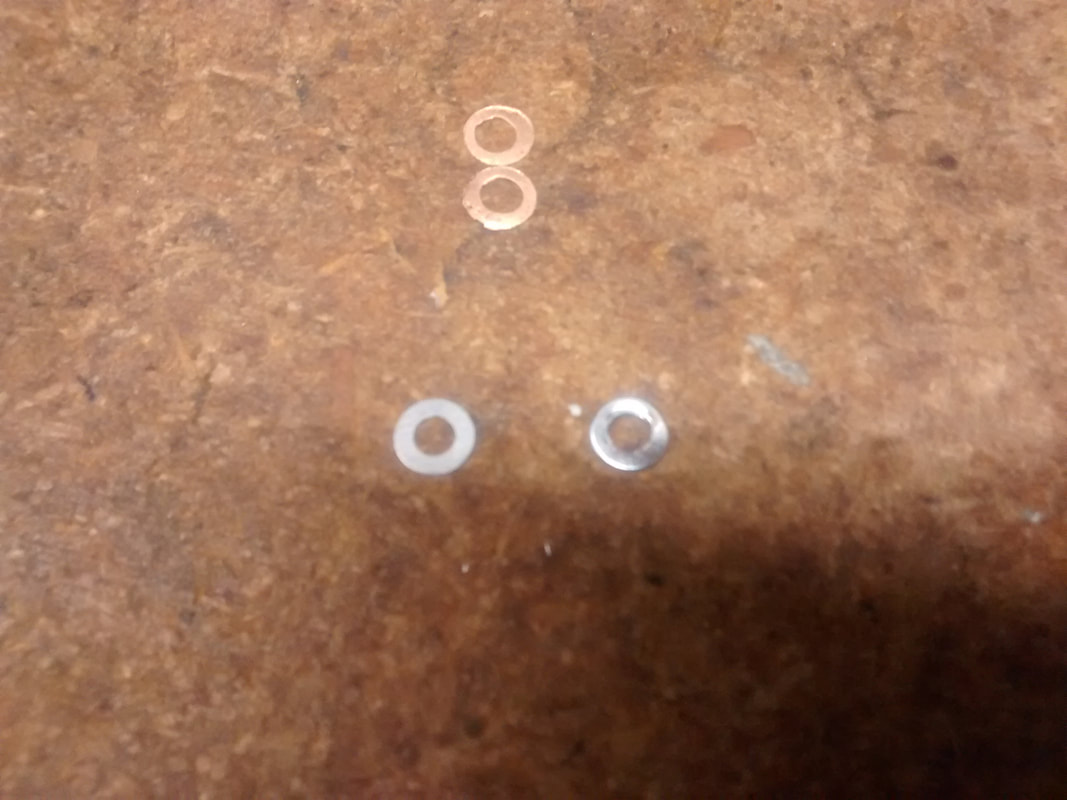
Yes, I know they are not as elegant, but they fit and didn't snag on anything, so I tried one on the offending side.
NO luck.
Tried two
NO luck
Tried three
Finally, the pawl could enter the trigger's cavity.
BUT, when I assembled the trigger, it was clearly wrong. Once assembled the housing put enough pressure onto the washers as to lock the parts (sear and blade).
So, what was there to do?
I remembered then that when discussing the trigger with the designer, we had talked about Zinc parts.
Few people really understand why, but those that have worked in precision moulding know that moulds that are made to mould zinc have a relatively short life. It's not that they get clogged, or they break, or they loose their definition, it's that they GROW on the inside. So, parts that are moulded become increasingly thick. A friend once told me that molten zinc dissolved iron/steel; and that is possible, as crucibles for melting zinc are usually ceramic, but I do not know this to be absolutely true, though I think it makes sense.
Not a problem when you know the tolerances and you can plan ahead and leave room for parts that may have up to 0.015" of extra room here and there, but when you design an aftermarket part you run the risk of not being able to use that part if the manufacturer has a little more tolerance built into its designs.
And so, the solution was to thin out the pawl a little, but it is a small part.
Well, part of the reason why early gunsmiths were also clock makers (Girandoni to name just one), was because we develop the tools and the eye to work to very small dimensions by hand.
The small vice was taken out of storage and put to good use:
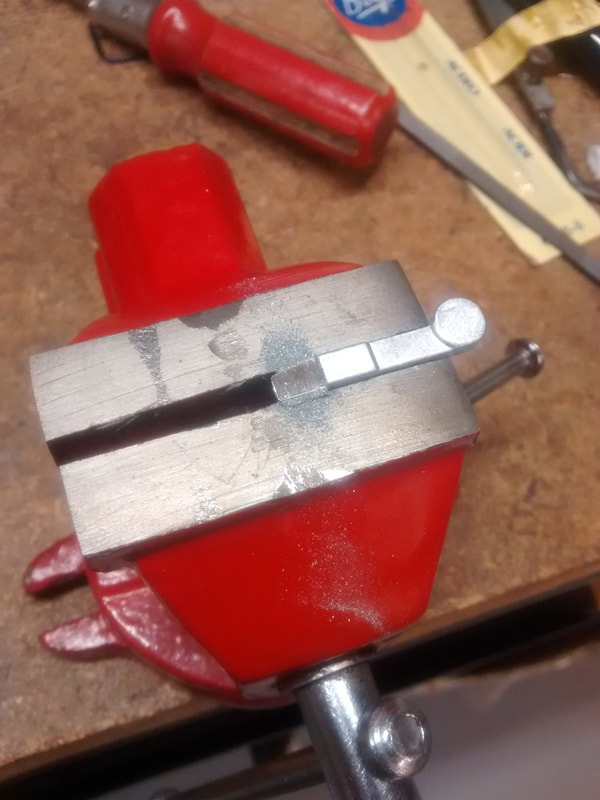
Once the offending 0.027" were taken off using needle files, the pawl entered smoothly into the trigger blade cavity when the piston's flat part of the latching button hit the safety extension lever:
Now, I assume that some of you are asking "why didn't you create some relief in the trigger blade itself?"
Well, the reason is that RE has a very specific position where the trigger can be at the same time light AND safe. And IMHO there is NOTHING as dangerous as a gun that HAS an INOPERATIVE safety lever; it will lead people to believe it is a safe gun when in reality it is not. So, it was paramount to safeguard the functioning of the safety lever.
You may or may not have the need to do this to your gun, this one in particular was from the latest batch; hopefully, this issue will be corrected and hopefully by now you are ready to start the process of getting the trigger in line with what you want/need.
The booklet tells you to start where the old trigger was adjusted to, but where do you start when you had the OEM 1 screw trigger blade?
Well the answer is in this photo (that you can find here):
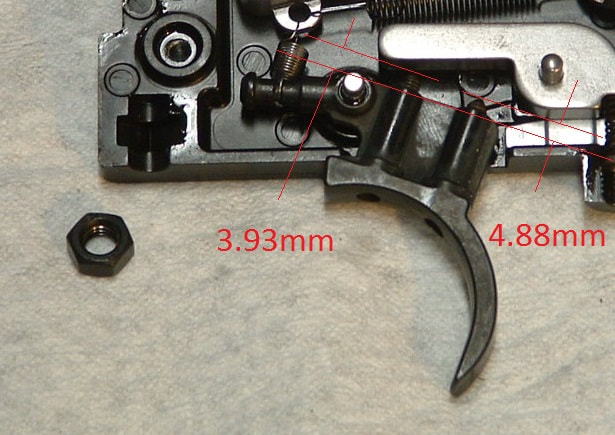
What is important here is the DIFFERENCE between the two screws HEIGHTS. Since the "watertables" of both trigger blades are not the same, we cannot ensure that the heights should be the same, but we CAN say that the difference in screw heights should be the same so, we took the height of the front trigger screw and added 0.95 mm's to the second height, and we used that as our starting point.
And, sure enough, the trigger pull changed little.
I then adjusted to the lowest possible weight and measured an average of 5 shots.
It was interesting to note that compared to the "Yankee Tune", the difference was almost non measureable.
To take the experiment further, I moved the screw to the closer position (more forward), and re-tuned the trigger to the lowest possible weight that I still felt was "safe". It was then that we could observe some appreciable differences.
Here we need to add that adjusting the RE's trigger is not as easy as it should be, every time the screws need to be adjusted, the blade itself needs to be moved/removed.
By the end of the day, the RE trigger was set to 17 oz. (close enough to 1# even) and the job was considered finished.
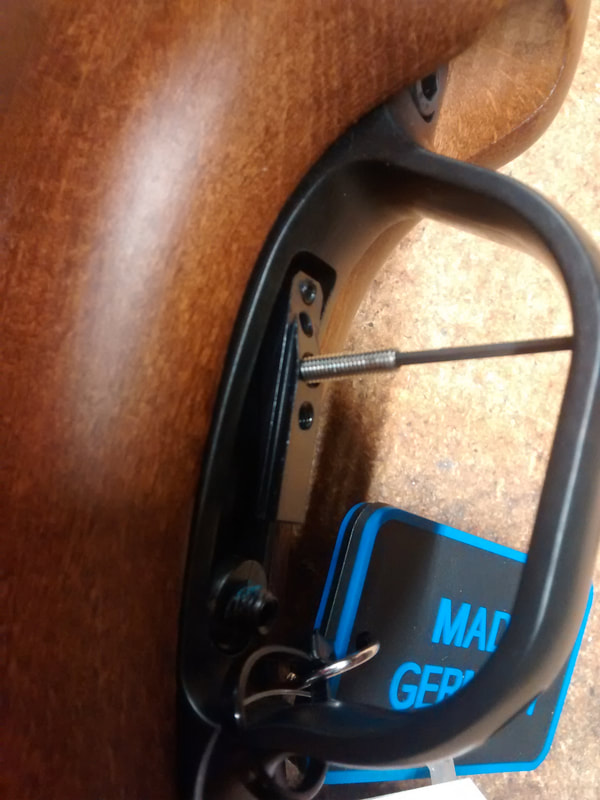
One important aspect is that if you need to work on your gun, remember to remove the trigger blade, as the trigger guard will not release the trigger with the blade on.
You can modify your trigger guard to create room, but in general I do not advocate modifying structural parts and the trigger guard is an important part in the bedding of the LGU and LGV. They are not as "tunable" as DIANA mod. 34's using the rear stock to action screws, but a properly set and consistent trigger guard torque is important to achieve utmost accuracy in any gun.
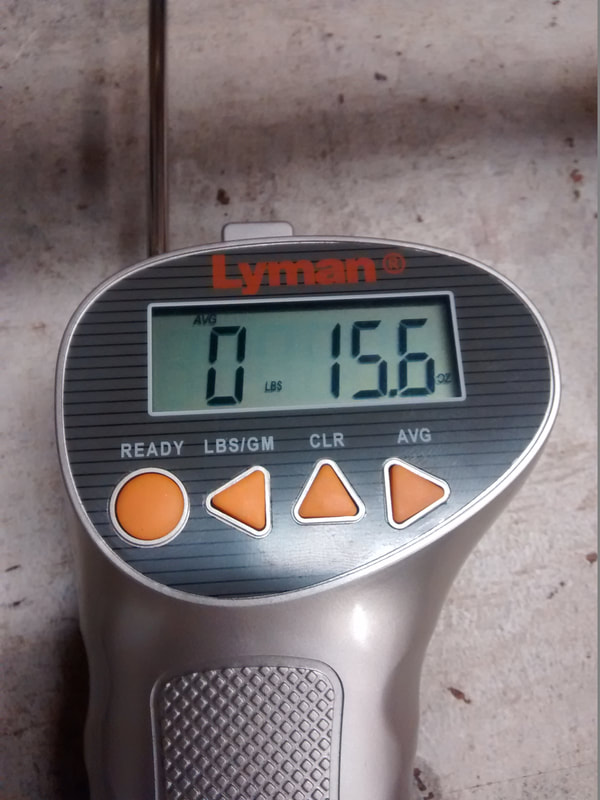
Since I already had the trigger pull scale out and I had the rifle vise pointed at the pellet trap and everything was set, I decided to measure the trigger pull in my personal LGV (shooting at 16 ft-lbs in 0.177"), the average of 5 trigger pulls was 15.6 oz.
Sure enough, my LGV has stoned trigger parts and uses the "Walther Match Abzug".
Further, the trigger on the LGV feels "crisper" because once the force of the opposing sear spring has been overcome, the trigger pull is finished in a VERY SHORT DISTANCE. Whereas the BMS and the RE triggers need a longer distance to actually release the shot.
Nothing new or out of the ordinary here, it's a simple result of levers and fulcrum points. Longer lever, more force, but shorter distance. Shorter lever, less force needed, but a longer travel is required.
In here I would like to insert RE's response to the question of when the third screw hole had been added:
Hello Hector,
The additional tapped hole was added in the last few months, we’ve been producing the trigger for several years.
We often make incremental changes to our products and this was a result of one or two comments I have read on various forums that people have done themselves.
Like almost all manufactures, we don’t offer “upgrades” to the latest version during the product life cycle.
I’m not entirely convinced that the extra hole it is necessary or even gives an overall improvement, but was added so that customers who wished could experiment.
I find that although the new grub screw position will reduce the pull weight, it also increases the trigger creep which is very undesirable.
Our recommendation is to position the grub screws in the original intended position.
Best regards,
Derek Rose.
Couldn't have said it better myself! LOL!
By the end of the day, the RE trigger was set to 17 oz. (close enough to 1# even) and the job was considered finished.
One important aspect is that if you need to work on your gun, remember to remove the trigger blade, as the trigger guard will not release the trigger with the blade on.
You can modify your trigger guard to create room, but in general I do not advocate modifying structural parts and the trigger guard is an important part in the bedding of the LGU and LGV. They are not as "tunable" as DIANA mod. 34's using the rear stock to action screws, but a properly set and consistent trigger guard torque is important to achieve utmost accuracy in any gun.
Since I already had the trigger pull scale out and I had the rifle vise pointed at the pellet trap and everything was set, I decided to measure the trigger pull in my personal LGV (shooting at 16 ft-lbs in 0.177"), the average of 5 trigger pulls was 15.6 oz.
Sure enough, my LGV has stoned trigger parts and uses the "Walther Match Abzug".
Further, the trigger on the LGV feels "crisper" because once the force of the opposing sear spring has been overcome, the trigger pull is finished in a VERY SHORT DISTANCE. Whereas the BMS and the RE triggers need a longer distance to actually release the shot.
Nothing new or out of the ordinary here, it's a simple result of levers and fulcrum points. Longer lever, more force, but shorter distance. Shorter lever, less force needed, but a longer travel is required.
In here I would like to insert RE's response to the question of when the third screw hole had been added:
Hello Hector,
The additional tapped hole was added in the last few months, we’ve been producing the trigger for several years.
We often make incremental changes to our products and this was a result of one or two comments I have read on various forums that people have done themselves.
Like almost all manufactures, we don’t offer “upgrades” to the latest version during the product life cycle.
I’m not entirely convinced that the extra hole it is necessary or even gives an overall improvement, but was added so that customers who wished could experiment.
I find that although the new grub screw position will reduce the pull weight, it also increases the trigger creep which is very undesirable.
Our recommendation is to position the grub screws in the original intended position.
Best regards,
Derek Rose.
Couldn't have said it better myself! LOL!
Which trigger is the best? All of them, or none, it all depends. Remember we are all different, and depending on your habits and customs as related to shooting, one trigger may be better for you than the others.
An undisputable advantage of these "supercustom" triggers is that you can move the blade itself back and forth, and twist it a little, if that works better for you, the Match Abzug, or the OEM triggers do not have this facility.
A good gunsmith can set the release point to a reasonably wide latitude of positions forward and back, but moving the trigger blade itself makes more sense for the home tinkerer.
The BMS trigger does have more adjustability in the LENGTH of the first stage because the safety pawl to trigger relation is less demanding than in the RE's trigger.
That is part of the beauty of gunsmithing, there is so much variety!
Anyway, hope this short note helps you identify which trigger is better for you and why, and also may or may not save you some money because at around US$80 for the RE and US$140 for the BMS, getting some polishing stones and a longer M3 screw; or asking a friend to do it may make more sense.
Keep well and shoot straight!
 RSS Feed